Important
aspects
of
cassette
tape
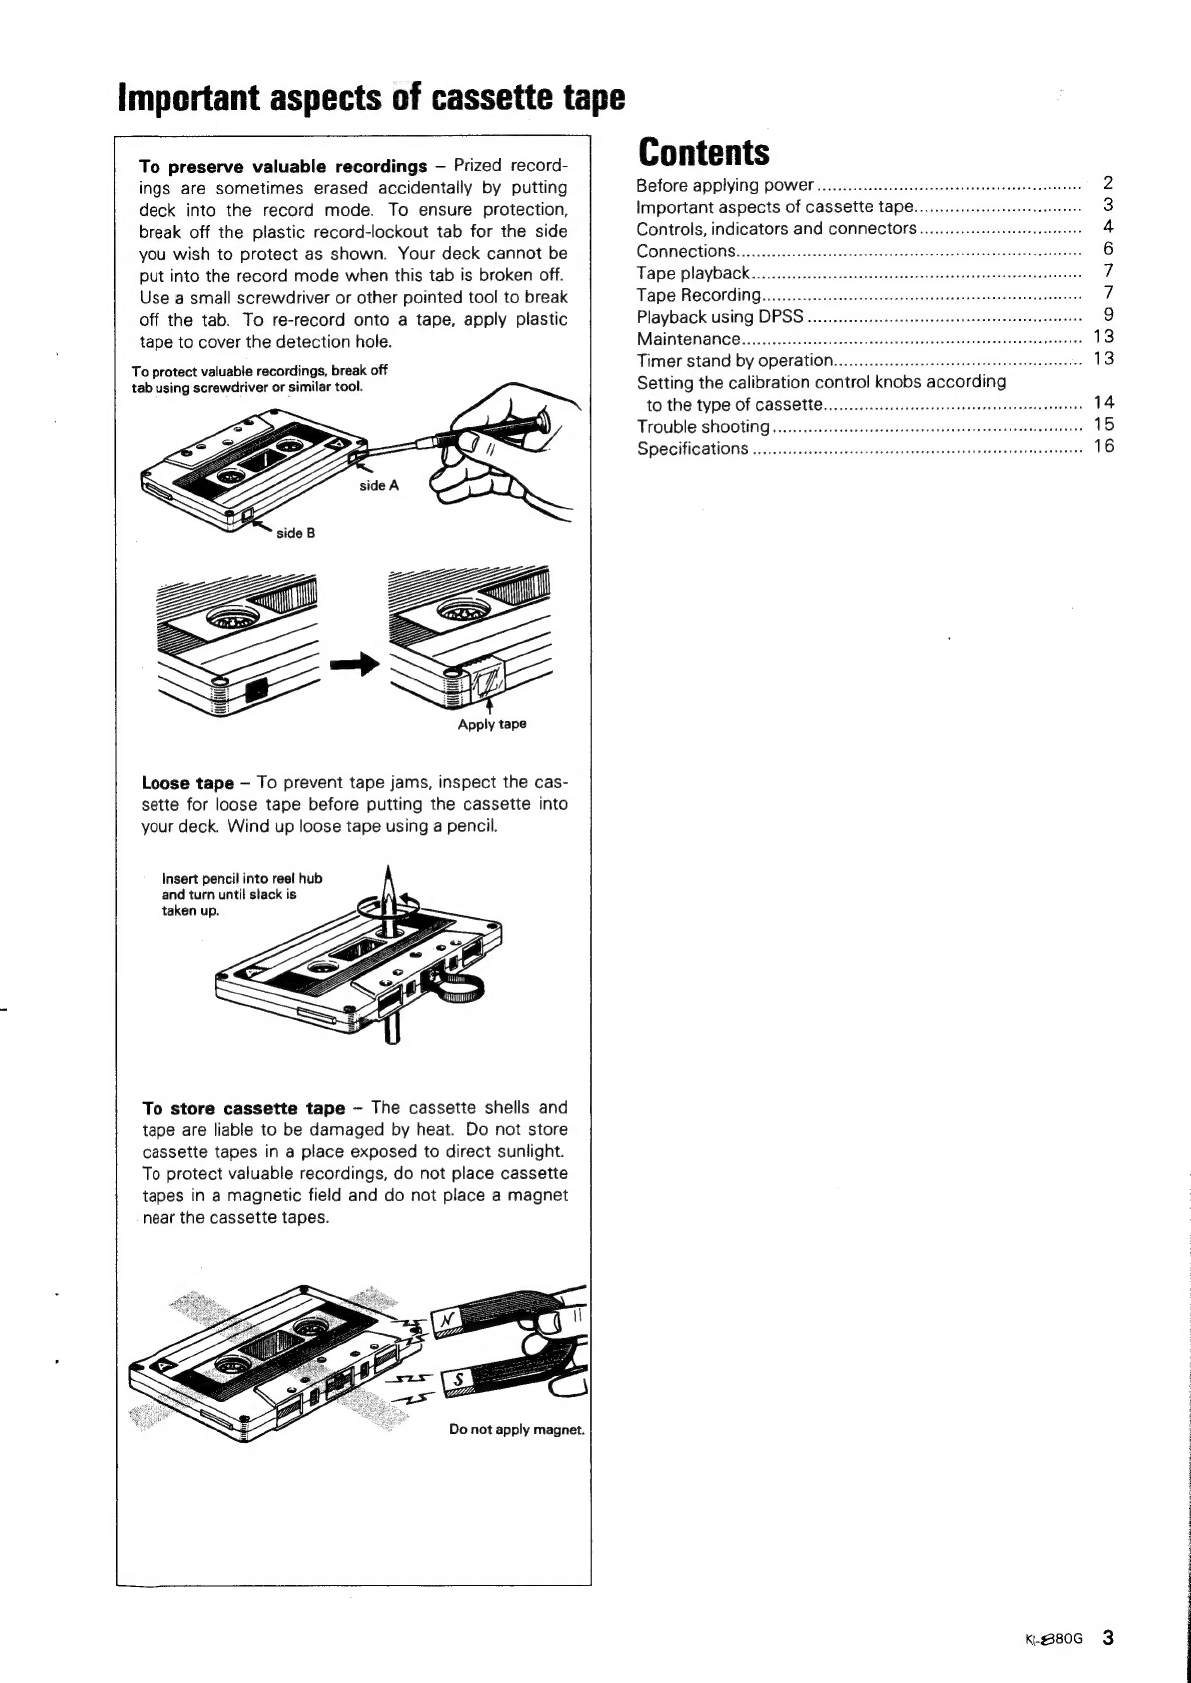
To
preserve
valuable
recordings
—
Prized
record-
ings
are
sometimes
erased
accidentally
by
putting
deck
into
the
record
mode.
To
ensure
protection,
break
off
the
plastic
record-lockout
tab
for
the
side
you
wish
to
protect
as
shown.
Your deck
cannot
be
put
into
the
record
mode
when
this
tab
is
broken
off.
Use
a
small
screwdriver
or
other
pointed
tool
to
break
off
the
tab.
To
re-record
onto
a
tape,
apply
plastic
tape
to
cover
the
detection
hole.
To
protect
valuable
recordings,
break
off
tab
using
screwdriver
or
similar
tool.
Apply
tape
Loose
tape
—
To
prevent
tape
jams,
inspect
the
cas-
sette
for
loose
tape
before
putting
the
cassette
into
your
deck.
Wind
up
loose
tape
using
a
pencil.
Insert
pencil
into
reel
hub
and
turn
until
slack
is
taken
up.
To
store
cassette
tape
—
The
cassette
shells
and
tape
are
liable
to
be
damaged
by
heat.
Do
not
store
cassette
tapes
in
a
place
exposed
to
direct
sunlight.
To
protect
valuable
recordings,
do
not
place
cassette
tapes
in
a
magnetic
field
and
do
not
place
a
magnet
near
the
cassette
tapes.
Do
not
apply
magnet.
Contents
Before
applying
POWER
2...
eee
cece
eee
eeereteetecetennees
2
Important
aspects
Of
CaSSette
taPe..........
eee
3
Controls,
indicators
and
connectors...
ae
4
Connections......
6
Tape
playback
7
Tape:
RECOrdings....5:s.cc.vuesteve
syed
eeiecdieeoues
scared
sctees
asetein
cae
7
Playback
using
DPSS
...0......
cc
cecceeeeneeeteeeeeeeeeeesneeneens
9
Maintenance
:cccccc.c.cs
faeseseee
divers
ctettanca
dosha
sdandseagtsdavdaneteene.
13
Timer
stand
by
Operation..........00.cccccceceee
cece
ceeeeeeeteneeenaeee
13
Setting
the
calibration
control
knobs
according
to
the
type
Of
CASSETIE.....
eee
ce
seen
teers
eeeeerennees
14
TrOUBIE
SHOOTING
sii.
SecA
eis
ele
tied
ahead
vedteceadheteseancetvests
15
Specifications
..:.isicesivecredeaassciavers
iledeonr
tania:
16
k.8806
3
;
;
3
ROR
el
eRe
ee
are
Ey
Ce
SL
eR
Ae
ae
ee
Se