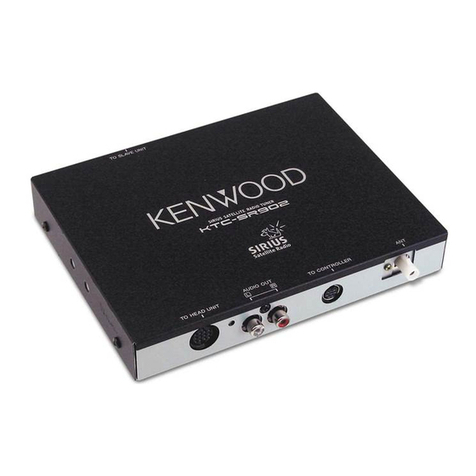
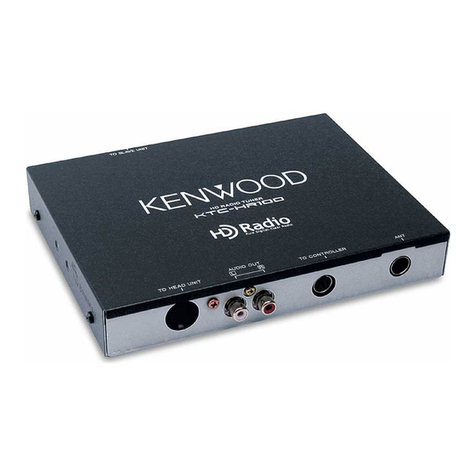
Kenwood KTC-959DAB User manual

KTC-959DAB
DAB HIDEAWAY TUNER
INSTRUCTION MANUAL
© PRINTED IN JAPAN B64-1175-00 (E) (DT)
SI DICHIARA CHE:
L'apparecchio Sintonizzatore DAB per auto Kenwood, modello KTC-
959DAB
risponde alle prescrizioni dell’art. 2 comma 1 del D.M. 28 agosto
1995, n. 548.
Fatto ad Uithoorn, 24 Marzo 1998
Kenwood Electronics Europe B.V.
Amsterdamseweg 37
1422 AC Uithoorn
The Netherlands

Safety precautions
3
Contents
2
Before use
Safety precautions ...............................................................................................3
Basic operations
Additional functions of Menu SystemVolume .....................................................5
DAB features
About DAB (Digital Audio Broadcasting) ..............................................................6
Alarm....................................................................................................................7
Selecting DAB Mode ...........................................................................................8
Selecting Seek Mode...........................................................................................8
DAB Reception ....................................................................................................8
Primary/Secondary Switching ..............................................................................9
Service Preset Memory .......................................................................................9
Dual Channel Audio Switching...........................................................................10
Dynamic Range Control (DRC)...........................................................................10
Display Switching/Dynamic Label ......................................................................10
Text Scroll ..........................................................................................................11
Traffic Information Function...............................................................................12
News Bulletin Function with PTY News Timeout Setting .................................12
Presetting Volume for Traffic Information/News ...............................................13
Restricting DAB Region (Region Restrict Function)...........................................13
Programme Type (PTY) Function .......................................................................15
Automatic Switching from DAB to RDS ............................................................16
Data Service mode / Radio Data Interface .........................................................16
DAB features with remote control ......................................................17
Installation
Accessories........................................................................................................18
Installation Procedure ........................................................................................18
Connecting Cables to Terminals ........................................................................19
Installation..........................................................................................................20
Troubleshooting guide ................................................................................21
Specifications ..................................................................................................22
To prevent injury and/or fire, take the
following precautions:
•When extending the battery or ground cables,
make sure to use automotive-grade cables or
other cables with an area of 0.75mm2(AWG18)
or more to prevent cable deterioration and
damage to the cable coating.
•To prevent short circuits, never put or leave any
metallic objects (e.g., coins or metal tools)
inside the unit.
•If the unit starts to emit smoke or strange
smells, turn off the power immediately and
consult your Kenwood dealer.
•Be careful not to drop the unit or subject it to
strong shock.
To prevent damage to the machine, take
the following precautions:
•Make sure to ground the unit to a negative 12V
DC power supply.
•Do not open the top or bottom covers of the
unit.
•Do not install the unit in a spot exposed to
direct sunlight or excessive heat or humidity.
Also avoid places with too much dust or the
possibility of water splashing.
•When replacing a fuse, only use a new one with
the prescribed rating. Using a fuse with the
wrong rating may cause your unit to
malfunction.
•To prevent short circuits when replacing a fuse,
first disconnect the wiring harness.
•During installation, do not use any screws
except for the ones provided. The use of
improper screws might result in damage to the
main unit.
•This unit has cooling fans to decrease the
internal temperature. Be careful not to block the
cooling fan openings when installing the unit.
Blocking these openings will inhibit the cooling
of the internal temperature and result in
malfunction.
IMPORTANT INFORMATION
The control units that can operate this unit are
listed below.
To enable the DAB operations, please bring the
control unit and the supplied version upgrade to
your Kenwood dealer.
Cassette Receivers
• MASK models
KRC-PS959R, KRC-859R, KRC-859C, KRC-
859W, and KRC-759R
• Flip-down TDF models
KRC-659R and KRC-559R
CD Receivers
• MASK models
KDC-PS9060R, KDC-8060R, and KDC-7060R
• Flip-down TDF models
KDC-6060R and KDC-5060R
MD Receiver
• Flip-down TDF model
KMD-860R
Reception of Data Service will be enabled by
installing an optional RDI (Radio Data Interface)
connector to this unit and connecting it to a
MASK model control unit.
Installation of the RDI connector requires
specialized knowledge and this unit should be
brought to your Kenwood dealer.
A separate, special RDI component is required
in order to use the data output from the RDI
connector.
NOTE
2CAUTION
2WARNING
❈Displays shown in this manual are for descriptive purposes only, and may differ from actual displays.
5
Safety precautions
4
IMPORTANT INFORMATION
You cannot connect the unit directly to the
following Disc automatic changers. For users
who want to use older changers with the unit,
follow the directions below according to the
type of changer you own:
• KDC-C200 / KDC-C300 / KDC-C400
Use the extension cable and the control box
attached to the CD changer, and the optional
CA-DS100 converter cable.
• KDC-C301 / KDC-C600 / KDC-C800 / KDC-C601 /
KDC-C401
Use the extension cable attached to the CD
changer, and the optional CA-DS100 converter
cable.
• KDC-C100 / KDC-C302 / C205 / C705 / non-Kenwood
Disc changers
Cannot be used with this model.
You can damage both your unit and the
Disc changer if you connect them
incorrectly.
•If you experience problems during installation,
consult your Kenwood dealer.
•If the unit does not seem to be working right,
try pressing the reset button first. If that does
not solve the problem, consult your Kenwood
dealer.
Cleaning the Unit
If the front panel gets dirty, turn off the power
and wipe the panel with a dry silicon cloth or
soft cloth.
Do not wipe the panel with a stiff cloth or a
cloth dampened by volatile solvents such as
paint thinner and alcohol. They can scratch the
surface of the panel and/or cause the indicator
letters to peel off.
2CAUTION
NOTE
2CAUTION
LA DICHIARAZIONE DI CONFORMITA’ “CE” DI QUESTO
PRODOTTO E’ DEPOSITATA PRESSO:
KENWOOD ELECTRONICS EUROPE B.V.
AMSTERDAMSEWEG 37
1422 AC UITHOORN
THE NETHERLANDS
Basic operations
This unit performs operations with a control unit such as a CD receiver or a cassette
receiver. The display will differ depending on the control unit. Differing display contents
are indicated by symbols such as "AAAAA"["BBB"] in this Instruction Manual.
Additional functions of Menu System
The following setting items are displayed by the menu system for the setting of DAB
functions.
AUD
DISC
DAB
MENU
LOUD
40W 4x
TI
DISP/
TEXT
VOL NAME. S
ADJ
EJECT PTY CLOSE
PWR OFF
TUNER
KRC-859R/859C/859W/759R
for KDC-8060R/7060R
for KRC-PS959R, KDC-PS9060R
AUDIO
TI
12345 6
40W 4x
MENU
NAME.S
PROG/PTY
VOL ADJ
LOUD
PWR
OFF
ATT
MW/LW
DISP/TEXT
DISC
FM
SRC
AM
for KRC-659R, KDC-6060R, KMD-860R
NEWS
TEXT
ST
TP
B NRDUAL
MTL REG
1 2
LOUD DAB
III
AUTO
ATT IN TA
TI
DISC
FM
AM
+
-
III
ST 1
2
CHANGER
LOUD AUTO
NEWS
TPB NR PTY
DUAL
MTL DAB
REG
ATT
IN
TA TI
for KRC-559R, KDC-5060R
SRCMENU MENU SRC
MASK models Flip-down TDF models
≠
"NEWS OFF" ↔NEWS ##M
±≠
"AUTO" ↔"MANUAL"
±≠
"DUAL M" ↔"DUAL S"
±≠
"RDS CHG OFF" ↔"RDS CHG ON"
±≠
"DRC OFF" ↔"DRC ON"
±≠
"REG INT OFF" ↔"REG INT ON"
±≠
"DATA-SRV"
±≠
±
Function Varieties of settings for each function (display)
News Bulletin Function*1
Selecting Seek Mode*2
Dual Channel Audio Switching
RDS Change
Dynamic Range Control
Region Restrict Function
Data service mode*3
*1This is a common setting for both DAB source and RDS source.
The "##" display indicates the setting value.
*2The same setting items are displayed in each of the DAB mode and the TUNER mode, but
settings for the DAB source are available from within the DAB mode and settings for the
TUNER source are available from within the TUNER mode.
*3Only when this unit is connected to a MASK models control unit. (See page 3)
NOTE
<In DAB mode>
<In DAB mode>
<In DAB mode>
<In DAB mode>
<In DAB mode>
<In DAB mode>
…
≠
"NEWS OFF" ↔NEWS ##M
±≠
"AUTO" ↔"MANUAL"
±≠
["MAIN"] ↔["SUB"]
±≠
["RDS OFF"] ↔["RDS ON"]
±≠
"DRC OFF" ↔"DRC ON"
±≠
["REG OFF"] ↔["REG ON"]
±≠
±
………
MASK models Flip-down TDF models

7
DAB features
6
About DAB (Digital Audio Broadcasting)
Thanks to the transmission of broadcast signals in digital format, the DAB system can
reproduce clearer audio than conventional analog broadcasting and stabilise reception
even in a mobile object such as a vehicle.
In existing analogue broadcasting (e.g., FM, MW and LW), for a broadcast station to broadcast
one programme the frequency must be changed and transmitted for each region and when
travelling over long distances it is necessary to change the frequency.
In DAB (Digital Audio Broadcasting), broadcasting to the area in a Single Frequency Network* is
permitted using one channel. In this system, a number of Services (Service components) are
broadcast as an Ensemble (one channel). Service components contain audio programmes and
data services.
Within a Service the main service component is broadcast as Primary and the other service
components are broadcast as Secondary, thereby providing diversity in one Service.
Also note that a Service transmits a wide variety of information such as Service Labels (names)
and network information. For example, transmitted information may include the same Service
that is broadcast by an RDS station. Based on this data, when it is no longer possible to receive
the DAB, there will be automatic switching to the RDS station which will allow continued
monitoring of the Service.
87.5 108.0 [MHz]
FMstation-A FMstation-C FMstation-D
RDSstation-B
Jazz music
175.04 249.984 [MHz] (Band III)
(225.648MHz)
channelchannel
BBC National
BBC R1 Digital
BBC R2 Digital
BBC R3 Digital
BBC R4 Digital
BBC R5L Dightal
BBCWorld Service
(---.---MHz)
DAB
Pops music
Jazz music
News
Sports
Drama
Parliament relay
Traffic announcement
Alarm announcement
Data Service
Service
components
[Audio programme]
[Data Service]
Frequency
Ensemble Ensemble Label
Service Label
12B
Main channel: Regular audio
Sub channel: With commentary
Primary: English
Secondary: French
Secondary: German
Secondary: Dutch
Secondary: Italian
Primary: Regular audio
Secondary: A team fans
Secondary: B team fans
DataService: Team results, player
introductions, etc.
(---.---MHz)
DAB
Pops music
Jazz music
News
Sports
Drama
(Stereo)
(Stereo)
(Monaural)
(Joint Stereo)
(Dual channel)
Dynamic Label:
Song name, singer, song introduction, and other
textual information related to the programme.
Link Function:
Where is the same programme being broadcast?
For example,
RDS station-B .
Alarm
When an emergency programme is broadcast in case of a disaster, all functions are
interrupted and switched to the alarm announcement.
• Audio programme services consist of;
•Audio Modes
There are four modes: stereo, dual channel (e.g., bilingual), joint stereo (in which high
frequency audio regions are converted to monaural), and single channel (e.g., mono).
• Sound Quality
There are a variety of levels which range from sound quality on par with a telephone to high
quality sound at the level of CD. There is also a mode that cuts the sampling frequency in half
to raise the transfer efficiency.
Audio mode and sound quality are each used to advantage in broadcasts depending on the
contents of the Service (Audio programme). In addition, the textual information (Dynamic Label)
related to the service (Audio programme) can be transmitted.
❈Single Frequency Network* :
A transmission network in which the signal is transmitted on the same frequency from each
transmitter throughout the coverage area. Because signals from neighbouring transmitters
combine, rather than causing interference.
❈Programme organization has been created for descriptive purposes and differs from actual
broadcasts. Also note that depending on time, the number of programmes is subject to
change.

98
DAB features
Selecting DAB Mode
Press the SRC button repeatedly until DAB mode is obtained. "DAB" is
displayed when the DAB mode is selected.
The DAB indicator lights whilst the DAB mode.
Selecting Seek Mode
In Ensemble, the channels to be transmitted are allotted as with TV
stations. Auto Ensemble Seek is used to seek these channels in order
and is normally used. The mode is set to Manual Seek when searching
by frequency as with FM stations or when making special adjustments
of the frequency.
The "AUTO" indicator lights up when Auto Ensemble Seek is selected.
Hold down the MENU button for one second or more.
"MENU" is displayed and the menu mode is turned on.
Press the ¢button repeatedly until the Seek Mode selection function
appears in the display.
Press the 4button to search in the other direction.
The function setting is indicated by "AUTO" or "MANUAL" in the display,
indicating Auto Ensemble Seek and Manual Seek, respectively.
Switching settings
Press either the AM button or FM button to switch the search mode.
The display and setting will change.
Press the MENU button to end the menu mode.
4
3
2
1
DAB Reception
In DAB, select Ensemble and then choose Service (Audio programme).
Switching the ensemble
•
In Auto Ensemble Seek mode
Hold down the ¢button for one second or more to start Auto
Ensemble Seek toward higher frequencies or hold down the 4
button for one second or more to start it toward lower frequencies.
•
In Manual Seek mode
Hold down the ¢button for one second or more to increase the
receiving frequency by one step or hold down the 4button for one
second or more to decrease it by one step.
Continuous frequency change is obtained whilst the button is held
down.
Switching service
Each time you press the ¢button, the service switches in sequence.
The service label of each service is shown on the display.
Pressing the 4button to switches the services in the reverse order.
•The number of services is variable depending on the ensemle.
•There is no switching to data service.
•The ST indicator lights during reception of a Stereo Audio programme.
•The DUAL indicator lights during reception of a Dual channel Audio
programme.
•When the receiving frequency is decreased in the Manual Seek mode,
the frequencies drop to the FM band without receiving FM broadcasting
(frequency modulated signals).
1451.072 MHz ~ 1492.000 MHz (16 kHz step)
0175.040 MHz ~ 0249.984 MHz (16 kHz step)
0087.552 MHz ~ 0107.968 MHz (16 kHz step)
NOTE
2
1
Primary/Secondary Switching
The Primary and Secondary can be switched with services that are
composed of more than one service components.
Each press of the AM button switches the service as described below.
▼
Primary ("PRIMARY", ["P/S P"])
▼
Secondary 1 ("SECONDARY", ["P/S S"])
▼
Secondary 2 ("SECONDARY", ["P/S S"])
▼
•The Primary is selected automatically when the service is switched or
the unit is turned off.
•The number of service components is variable depending on the service.
•The Primary/Secondary switching is not available when the service has
only one service component or its Secondaries consist of data services.
NOTE
…
AUD
DISC
DAB
MENU
LOUD
40W 4x
TI
DISP/
TEXT
VOL NAME. S
ADJ
EJECT PTY CLOSE
PWR OFF
TUNER
KRC-859R/859C/859W/759R
for KDC-8060R/7060R
for KRC-PS959R, KDC-PS9060R
MASK models
Flip-down TDF models
AUDIO
TI
12345 6
40W 4x
MENU
NAME.S
PROG/PTY
VOL ADJ
LOUD
PWR
OFF
ATT
MW/LW
DISP/TEXT
DISC
FM
SRC
AM
for KRC-659R, KDC-6060R, KMD-860R
for KRC-559R, KDC-5060R
SRCFMAM
MENU
4 ¢
SRC
DUALSTDAB
DUAL AUTO
AUTO
AUTO
AUTO
STDAB
Frequency
Frequency
Frequency
Frequency
FM
MENU 4 ¢
AM
NEWS
TEXT
ST
TP
B NRDUAL
MTL REG
1 2
LOUD DAB
III
AUTO
ATT IN TA
TI
DISC
FM
AM
+
-
III
ST 1
2
CHANGER
LOUD AUTO
NEWS
TPB NR PTY
DUAL
MTL DAB
REG
ATT
IN
TA TI
NEWS
TEXT
ST
TP
B NRDUAL
MTL REG
1 2
LOUD DAB
III
AUTO
ATT IN TA
TI
DISC
FM
AM
+
-
III
ST 1
2
CHANGER
LOUD AUTO
NEWS
TPB NR PTY
DUAL
MTL DAB
REG
ATT
IN
TA TI
DUAL
DUAL
ST DAB
DAB
ST
#1~6
Band display
Band display
Preset service number
Preset service
number
Band display
Preset service number
Preset service
number
Band display
#1~6
Service Preset Memory
The service being received can be stored in memory under a preset
button.
Press the FM button to select the preset band.
Each time you press the FM button, the preset band switches from
DAB1, DAB2 and DAB3.
Receive the service to be preset.
Hold down the preset button (#1-6) to preset the service for two
seconds or more.
The service is preset when the number of the button blinks once.
Recalling a Preset Service:
Press the FM button to select the preset band, and press the desired
preset number button (#1-6). The number of the pressed button is
shown in the display.
•Preset bands DAB1, DAB2 and DAB3 refer to the bands for use in preset
memory and do not mean different receiving bands.
•Up to 6 services can be preset in each of preset bands DAB1, DAB2 and
DAB3.
•As the preset memory consists of the storage of services, the distinction
of Primary and Secondary service components is not preset. The Primary
service component is received when a service is recalled.
NOTE
3
2
1

11
DAB features
10
in priority changes as shown below.
▼
Service Label ("SERVICE LABEL", ["SERVICE"])
▼
Ensemble Label ("ENSEMBLE LABEL", ["ENSEMBLE"])
▼
Dynamic Label ("DYNAMIC LABEL", ["DYNAMIC"])
▼
Clock ("CLOCK") (With the exception of some models)
▼
Received Frequency ("RECEIVE FREQUENCY", ["FREQ"])
Dynamic Label :
This is the character information associated with the current audio
programme and shown by scrolling in the display.
•The display of the Service Label and Ensemble Label will be abbreviated
to within 8 characters depending on the control unit.
•Depending on the type of characters of the Service Label, Ensemble
Label or Dynamic Label, some characters may not be displayable.
•The various messages are sent by scrolling when the Dynamic Label has
not been sent, or during accumulation.
•The clock is displayed only when the Switching Clock display function is
on. (Please refer to the control unit Instruction Manual.)
NOTE
This function permits the text to be scrolled and the entire text to be
displayed. Switching between manual scrolling and automatic
scrolling is permitted. The factory default is manual scrolling.
To scroll manually :
Press the DISP button to display the Dynamic Label.
Holding down the DISP button for one second or more results in one
scrolling display of the Dynamic Label.
Manual/Automatic scroll switching :
Hold down the MENU button for one second or more.
"MENU" is displayed and the menu mode is turned on.
Press the ¢button repeatedly to switch the function to be set to the
text scroll function.
Pressing the 4button results in the functions being switched in the
reverse order.
The text scroll function is displayed with "SCROLL MANU"["SCL MANU"]
or "SCROLL AUTO"["SCL AUTO"].
"SCROLL MANU"["SCL MANU"]……Manual scrolling
"SCROLL AUTO"["SCL AUTO"]……Automatic scrolling
Switching settings
Press either the AM button or FM button.
The display and setting will change.
Press the MENU button to end the menu mode.
To scroll automatically :
Press the DISP button to display the Dynamic Label. The display of the
Dynamic Label will be scrolled repeatedly.
The setting of Manual/Automatic scroll switching is a common setting
with Text Scroll of the CD mode and disc changer mode.
NOTE
1
4
3
2
1
2
1
Text Scroll
AUD
DISC
DAB
MENU
LOUD
40W 4x
TI
DISP/
TEXT
VOL NAME. S
ADJ
EJECT PTY CLOSE
PWR OFF
TUNER
KRC-859R/859C/859W/759R
for KDC-8060R/7060R
for KRC-PS959R, KDC-PS9060R
MASK models
Flip-down TDF models
AUDIO
TI
12345 6
40W 4x
MENU
NAME.S
PROG/PTY
VOL ADJ
LOUD
PWR
OFF
ATT
MW/LW
DISP/TEXT
DISC
FM
SRC
AM
for KRC-659R, KDC-6060R, KMD-860R
for KRC-559R, KDC-5060R
FMDISPAM
MENU 4 ¢
DISP
Frequency
Frequency
Frequency
Frequency
Service Label
FM
MENU 4 ¢
AM
NEWS
TEXT
ST
TP
B NRDUAL
MTL REG
1 2
LOUD DAB
III
AUTO
ATT IN TA
TI
DISC
FM
AM
+
-
III
ST 1
2
CHANGER
LOUD AUTO
NEWS
TPB NR PTY
DUAL
MTL DAB
REG
ATT
IN
TA TI
NEWS
TEXT
ST
TP
B NRDUAL
MTL REG
1 2
LOUD DAB
III
AUTO
ATT IN TA
TI
DISC
FM
AM
+
-
III
ST 1
2
CHANGER
LOUD AUTO
NEWS
TPB NR PTY
DUAL
MTL DAB
REG
ATT
IN
TA TI
Service Label
Service Label
Service Label
Dual Channel Audio Switching
The Dual Channel Audio can be switched between Main and Sub.
Hold down the MENU button for one second or more.
"MENU" is displayed and the menu mode is turned on.
Press the ¢button repeatedly until the Dual Channel Audio switching
function appears in the display.
Press the 4button to search in the other direction.
The function setting is indicated by "DUAL MAIN"["MAIN"] or "DUAL
SUB"["SUB"] in the display, indicating the output of the Main audio or
Sub audio, respectively.
The DUAL indicator lights during reception of a Dual Channel Audio
programme.
Switching settings
Press either the AM button or FM button to switch the Dual Channel
Audio mode.
The display and setting will change.
When "DUAL SUB"["SUB"] is selected, the Sub audio continues to be
received even when the service is switched to another, provided that the
new service also broadcast a Dual Channel Audio programme.
Press the MENU button to end the menu mode.
4
NOTE
3
2
1
When there is a lot of noise such as when driving, this function
narrows the dynamic range and corrects it to an easy-to-listen-to
volume. When the Dynamic Range Control is ON or when the car is
stopped or when listening closely to the music, the music can be heard
as is. When the Dynamic Range Control is OFF, selection can be made
to suit the wishes of the listener or suit the listening environment.
Switching DRC ON or OFF :
Hold down the MENU button for one second or more.
"MENU" is displayed and the menu mode is turned on.
Press the ¢button and change the function to be set to Dynamic
Range Control.
Press the 4button to search in the other direction.
The Dynamic Range Control is displayed as "DRC ON"["DRC ON"] or
"DRC OFF"["DRC OFF"].
The Dynamic Range Control is on during the display of "DRC ON"["DRC
ON"], and off during the display of "DRC OFF"["DRC OFF"].
Switching settings
Press either the AM button or FM button.
The display and setting will change.
Press the MENU button to end the menu mode.
The dynamic range is changed based on the Dynamic Range Control
information that is sent from the broadcast station and as such this
function will not operate unless the broadcast station is sending the
information.
NOTE
4
3
2
1
Dynamic Range Control (DRC)
Display Switching/Dynamic Label
The information shown in the display can be selected.
Switching the Display:
Each time you press the DISP button, the information that is displayed

DAB features
1312
Traffic Information Function
Traffic information can be received automatically. It is also possible to
play a tape or disc whilst waiting for a traffic announcement
programme to start.
Turning Traffic Information Function On/Off:
Press the TI button to switch this function on and off.
When the function is on, the TI indicator is turned on.
When the service supports traffic announcements, the TP indicator will
be lit.
When a traffic announcement programme starts, the TA indicator lights
up and the programme is received at the preset volume.
When a tape or disc is played, the playback is overridden automatically
by the reception of the traffic announcement programme whenever one
starts.
The previous source returns when the traffic announcement programme
has completed or the receiving condition deteriorates.
This setting is valid for both the DAB and RDS sources.
NOTE
Presetting Volume for Traffic Information/News
The volume to be used when traffic information or news overrides can
be set previously.
Receive the service to preset the volume.
Adjust the volume for use in traffic information and news.
Hold down the VOL ADJ button for two seconds or more. The volume is
preset when the volume display blinks once. From now on, the traffic
information and news can be received at the preset volume.
•This function can be set only whilst the traffic information function is
turned on.
•This function does not reduce the listening volume in the DAB and tuner
modes. The volume set here is recalled only when it is larger than the
volume which is currently used in the DAB or tuner mode.
•By turning the Traffic Information/News Function on, presetting the
traffic information/news volume and minimizing the current listening
volume, it is possible to listen only to the traffic information and news.
•The preset volume is valid for both DAB and RDS sources.
NOTE
3
2
1
News Bulletin Function with PTY News Timeout Setting
The News Bulletin information can be listened to in priority by
overriding another programme or source. When this function is turned
on, the interval for allowing the overriding of news (news timeout
period) can be set in the range between 10 and 90 minutes.
Turning News Bulletin Function On/Off :
Hold down the MENU button for one second or more.
"MENU" is displayed and the menu mode is turned on.
Press the ¢button repeatedly until the News Bulletin function
appears in the display.
Press the 4button to search in the other direction.
The function setting is indicated by "NEWS ##M" or "NEWS OFF" in the
display, indicating on and off of the News Bulletin function, respectively.
"##M" shows the current setting of the news timeout period. (00 to 90
minutes in 10-minute step)
Switching settings
Each time you press the FM button, the news timeout period decreases
by 10 minutes.
Each time you press the AM button, the news timeout period increases
by 10 minutes.
OFF Ô00M Ô~ Ô90M (10-minute step; M = minutes)
When the news timeout period is set, the News Bulletin function is
turned on and the NEWS indicator lights up.
When a news bulletin starts, the NEWS indicator starts to blink and the
preset volume is set.
•If "20M" is set, the overriding of news bulletins is inhibited for 20
minutes after the start of a news programme.
•If "00M" is set, news bulletins is searched permanently.
Press the MENU button to end the menu mode.
This setting is valid only with the DAB source. The similar function for the
RDS source can be set during reception of an FM station in the tuner mode.
NOTE
4
NOTE
3
NOTE
2
1
This function permits selection of either restricting the interruption of
alarm and traffic information programs to receiving regions (i.e.,
regional restriction is ON), or the interruption of all alarms and traffic
information programs (i.e., regional restriction is OFF).
Switching the Region Restrict Function ON or OFF :
Hold down the MENU button for one second or more.
"MENU" is displayed and the menu mode is turned on.
Press the ¢button and change the function to be set to Regional
restriction.
Press the 4button to search in the other direction.
Regional restriction is displayed as "REG INT ON"["REG ON "] or "REG
INT OFF"["REG OFF"].
Regional restriction is on during the display of "REG INT ON"["REG ON "]
and is off during the display of "REG INT OFF"["REG OFF"].
Switching settings
Press either the AM button or FM button.
The display and setting will change.
Press the MENU button to end the menu mode.
This setting is valid only with the DAB source. The similar function for the
RDS source can be set during reception of an FM station in the tuner
mode.
NOTE
4
3
2
1
Restricting DAB Region (Region Restrict Function)
AUD
DISC
DAB
MENU
LOUD
40W 4x
TI
DISP/
TEXT
VOL NAME. S
ADJ
EJECT PTY CLOSE
PWR OFF
TUNER
KRC-859R/859C/859W/759R
for KDC-8060R/7060R
for KRC-PS959R, KDC-PS9060R
MASK models
AUDIO
TI
12345 6
40W 4x
MENU
NAME.S
PROG/PTY
VOL ADJ
LOUD
PWR
OFF
ATT
MW/LW
DISP/TEXT
DISC
FM
SRC
AM
for KRC-659R, KDC-6060R, KMD-860R
for KRC-559R, KDC-5060R
TI / VOL ADJ FM AM
MENU 4 ¢
FMMENU
4 ¢
AM
NEWS
TEXT
ST
TP
B NRDUAL
MTL REG
1 2
LOUD DAB
III
AUTO
ATT IN TA
TI
DISC
FM
AM
+
-
III
ST 1
2
CHANGER
LOUD AUTO
NEWS
TPB NR PTY
DUAL
MTL DAB
REG
ATT
IN
TA TI
NEWS
TEXT
ST
TP
B NRDUAL
MTL REG
1 2
LOUD DAB
III
AUTO
ATT IN TA
TI
DISC
FM
AM
+
-
III
ST 1
2
CHANGER
LOUD AUTO
NEWS
TPB NR PTY
DUAL
MTL DAB
REG
ATT
IN
TA TI
TITP
TANEWS
TITP
TANEWS
TI TP
TA NEWS
TI TP
TA NEWS
TI / VOL ADJ
Flip-down TDF models

15
DAB features
Cancelling Search In the Middle :
Press the MENU button.
This setting is valid only with the DAB source. The similar function for the
RDS source can be set during reception of an FM station in the tuner mode.
NOTE
Programme Type (PTY) Function
This function permits desired program types from within the received
Ensemble to be searched and monitored.
Entering PTY Selection Mode :
Press the 38(PTY) button.
"PTY" is displayed and the Programme Type Selection (PTY) Mode
entered.
If you make no key input in 30 seconds, the mode will automatically turn
off.
This function is not available whilst the Traffic Information function is
turned on.
Changing the Display Language to French or German
In the PTY mode, hold down the 38(PTY) button for one second or more
to display the name of the language currently used.
If you want to change the language, press the preset button (#1-3) for the
desired language and then the 38(PTY) button.
English is #1, French is #2, and German is #3
Select the programme type
•
Each time you press the FM button or AM button, the programme type
changes as shown below.
Speech
Ô1.News Ô2.Current Affairs Ô3.Information Ô4.Sports
Ô5.Education Ô6.Drama Ô7.Culture Ô8.Science Ô9.Varied Ô
10.Pop Music Ô11.Rock Music Ô12.M,O,R Music Ô13.Light
Classical Ô14.Serious Classical Ô15.Other Music Ô16.Weather Ô
17.Finance Ô18.Children’s programmes Ô19.Social Affairs Ô
20.Religion Ô21.Phone In Ô22.Travel Ô23.Leisure Ô24.Jazz
Music Ô25.Country Music Ô26.National Music Ô27.Oldies Music
Ô28.Folk Music Ô29.Documentary Ô
Music
Ô
Speech
Ô
(
Speech
...1~9, 16~23, 29 :
Music
...10~15, 24~28)
•
Some programme types can be selected directly by pressing a preset
button. With the factory setup, the following programme types have
been preset in the preset buttons.
1.
Music
2.
Speech
3. News
4. Other Music 5. Serious Classical 6. Varied
Changing the preset programme types
Select the programme type to be preset and hold down a preset button
(#1-6) for two seconds or more. The previously preset programme type is
cleared and replaced with the newly selected programme type.
Search a service of the selected programme type
Press the 4button or ¢button. The display blinks and the search for
a service of the selected programme type starts. When such a
programme is found, the service label is displayed and it is received.
"PTY" blinks in the display for about 30 seconds.
If you make no key input in 30 seconds, the PTY selection mode will
turn off automatically.
"NO PTY" is displayed in case no service of the selected programme type
is found. If you want to find a service with another programme type,
repeat steps 2 and 3 again.
Switching to Another Service :
Repeat Step 3 whilst the "PTY" display is flashing.
Another service of the same programme type will be searched.
NOTE
3
NOTE
2
NOTE
NOTE
1
14
News NEWS1
AFFAIRS2 Current Affairs
Programme
type number KRC-PS959R,
KDC-PS9060R
Programme Type Display
Information INFO3
SPORT4 Sport
Education EDUCATE5
DRAMA6 Drama
Cultures CULTURE7
SCIENCE8 Science
Varied Speech VARIED9
POP M10 Pop Music
Rock Music ROCK M11
M.O.R. M12 M.o.R Music
Light Classics M LIGHT M13
CLASSICS14 Serious Classics
Other Music OTHER M15
WEATHER16 Weather& Metr
Finance FINANCE17
CHILDREN18 Children's Progs
Social Affairs SOCIAL A19
RELIGION20 Religion
Phone In PHONE IN21
TRAVEL22 Travel & Touring
Leisure & Hobby LEISURE23
JAZZ24 Jazz Music
Country Music COUNTRY25
NATION M26 National Music
Oldies Music OLDIES27
FOLK M28 Folk Music
Documentary DOCUMENT29
MUSIC– All Music
All Speech SPEECH–
KRC-859R/859C/859W/759R/659R/
559R, KDC-8060R/7060R/6060R/5060R,
KMD-860R
AUD
DISC
DAB
MENU
LOUD
40W 4x
TI
DISP/
TEXT
VOL NAME. S
ADJ
EJECT PTY CLOSE
PWR OFF
TUNER
KRC-859R/859C/859W/759R
for KDC-8060R/7060R
for KRC-PS959R, KDC-PS9060R
MASK models
Flip-down TDF models
AUDIO
TI
12345 6
40W 4x
MENU
NAME.S
PROG/PTY
VOL ADJ
LOUD
PWR
OFF
ATT
MW/LW
DISP/TEXT
DISC
FM
SRC
AM
for KRC-659R, KDC-6060R, KMD-860R
for KRC-559R, KDC-5060R
FMAM
4 ¢
FM
#1 #3#2 4 ¢
AM
NEWS
TEXT
ST
TP
B NRDUAL
MTL REG
1 2
LOUD DAB
III
AUTO
ATT IN TA
TI
DISC
FM
AM
+
-
III
ST 1
2
CHANGER
LOUD AUTO
NEWS
TPB NR PTY
DUAL
MTL DAB
REG
ATT
IN
TA TI
NEWS
TEXT
ST
TP
B NRDUAL
MTL REG
1 2
LOUD DAB
III
AUTO
ATT IN TA
TI
DISC
FM
AM
+
-
III
ST 1
2
CHANGER
LOUD AUTO
NEWS
TPB NR PTY
DUAL
MTL DAB
REG
ATT
IN
TA TI
PTY
#1 #3#2
#1~6
#1~6

DAB features with remote control
17
DAB features
16
Data Service mode / Radio Data Interface
This function will only be displayed when this unit is connected to a MASK
model control unit. Note that operation is only possible when the optional
Radio Data Interface (RDI) connector has been installed. (See page 3)
The Data Service Component from within the received Ensemble is
output from the RDI connector.
To set the Data Service control mode
Hold down the MENU button for one second or more.
This will display "MENU" and set the menu mode.
Repeatedly press the ¢button to switch the display to "DATA-SRV."
Press the 4button to switch the functions in the reverse order.
Press the FM button or AM button.
This will display the Data Service label and set the Data Service control
mode.
To switch the Data Service Component
Pressing the FM button will switch the Data Service Components within
the Ensemble in order. A press of the AM button will switch the
functions in the reverse order.
To cancel the Data Service control mode
Press the MENU button and exit the menu mode.
•Selection will not be possible when there is no Data Service within the
Ensemble.
•Data output from the Radio Data Interface (RDI) connector is only for the
one selected component.
•To use the data output from the Radio Data Interface (RDI) connector, a
separate RDI-enabled component is required.
NOTE
5
4
3
2
1
NOTE
CD
VOL.
TUNE
TRACK
REMOTE CONTROL UNIT
DISC
REW FF
123
456
789
0
DEF
MNOJKLGHI
WXYTUVPRS
QZ
ABC
TUNER
TAPE
CD·MD
CH
AM
–FM
+PROG
DIRECT
OK
DNPP
TUNER
#1~6
4/ ¢
AM
FM
–+
VOLUME
SRC
AM/DISC–
FM/DISC+
4
¢
ATT
DWN
UP
5
∞
SRC
•TUNER button (Switching Modes)
KCA-R6 only
Each press toggles between TUNER mode and DAB mode.
•SRC button (Switching Modes)
KCA-R700 only
Each press switches the usable source modes in order.
•#1 to 6 buttons (Preset Memory)
KCA-R6 only
Calls the services that have been stored to memory.
•4/ ¢buttons (Service Switching)
Pressing the ¢button switches the services from within the
Ensemble in order.
Pressing the 4button switches the services in the reverse
order.
•AM button (Primary/Secondary Switching)
Each press of the AM button switches between
Primary/secondary within the services.
•FM button (Preset Band Switching)
Each press of the FM button switches one step among the
DAB1, DAB2, and DAB3 bands.
for KCA-R6 for KCA-R700
Automatic Switching from DAB to RDS
Presently, the coverage areas of DAB stations are smaller than those of
RDS stations. Therefore, when the receiving condition of a DAB station
deteriorates, the reception can be switched automatically to the RDS
station broadcasting the same radio programme to minimize the
sound interruption. The DAB indicator blinks during the period of
switching to the RDS station.
Turning Automatic DAB-RDS Switching Function On/Off :
Hold down the MENU button for one second or more.
"MENU" is displayed and the menu mode is turned on.
Press the ¢button repeatedly until the automatic DAB-RDS switching
function appears in the display.
Press the 4button to search in the other direction.
The function setting is indicated by "RDS CHG ON"["RDS ON"] or "RDS
CHG OFF"["RDS OFF"] in the display, indicating the automatic switching
on and off, respectively.
Switching settings
Press either the AM button or FM button to switch the DAB-RDS
switching mode.
The display and setting will change.
Press the MENU button to end the menu mode.
The DAB source is received again when the DAB receiving condition
improves.
NOTE
4
3
2
1
AUD
DISC
DAB
MENU
LOUD
40W 4x
TI
DISP/
TEXT
VOL NAME. S
ADJ
EJECT PTY CLOSE
PWR OFF
TUNER
KRC-859R/859C/859W/759R
for KDC-8060R/7060R
for KRC-PS959R, KDC-PS9060R
MASK models
Flip-down TDF models
AUDIO
TI
12345 6
40W 4x
MENU
NAME.S
PROG/PTY
VOL ADJ
LOUD
PWR
OFF
ATT
MW/LW
DISP/TEXT
DISC
FM
SRC
AM
for KRC-659R, KDC-6060R, KMD-860R
for KRC-559R, KDC-5060R
FMAM
MENU 4 ¢
DAB
DAB
DAB
DAB
FM
MENU 4 ¢
AM
NEWS
TEXT
ST
TP
B NRDUAL
MTL REG
1 2
LOUD DAB
III
AUTO
ATT IN TA
TI
DISC
FM
AM
+
-
III
ST 1
2
CHANGER
LOUD AUTO
NEWS
TPB NR PTY
DUAL
MTL DAB
REG
ATT
IN
TA TI
NEWS
TEXT
ST
TP
B NRDUAL
MTL REG
1 2
LOUD DAB
III
AUTO
ATT IN TA
TI
DISC
FM
AM
+
-
III
ST 1
2
CHANGER
LOUD AUTO
NEWS
TPB NR PTY
DUAL
MTL DAB
REG
ATT
IN
TA TI

1918
The use of any accessories except for those provided might result in damage to the unit. Make
sure only to use the accessories shipped with the unit, as shown above.
NOTE
Accessories
External view Number of items
......................1
1
......................2
2
......................4
3
......................4
4
......................1
5
......................5
6
......................1
7
......................1
8
Installation Procedure
1. To prevent short circuits, remove the key
from the ignition and disconnect the -
terminal of the battery.
2. Install the DAB antenna and connect the
antenna cable to the DAB hideaway tuner.
3. Connect the DAB hideaway tuner and the
control unit using the provided DAB
connection cable.
4. Make the proper input and output cable
connections for each unit.
5. Connect the battery cable and ground cable
to the DAB hideaway tuner.
6. Install the unit in your car.
7. Reconnect the -terminal of the battery.
8. Press the reset button.
•Do not connect the DAB control cable
whilst the control unit is turned ON.
•Be sure to press the reset button after
installation.
•If your car is not prepared for this special
connection-system, consult your kenwood
dealer.
•Make sure that all cable connections are
securely made by inserting jacks until they
lock completely.
•If the fuse blows, first make sure that the
cables have not caused a short circuit, then
replace the old fuse with one with the
same rating.
•Do not let unconnected cables or terminals
touch metal on the car or anything else
CAUTION
conducting electricity. To prevent short
circuits, also do not remove the caps on the
ends of the unconnected cables or the
terminals.
•Some disc changers need conversion cables
for connection. See the section on "Safety
Precautions" for details.
•Insulate unconnected cables with vinyl tape
or other similar material.
•Be sure to use the provided DAB antenna
(Accessory 7) as the DAB antenna. Using
other antenna than provide may lead to
malfunction.
•Take care so that the antenna cable and other
connection cables are not caught by mobile
parts. Otherwise cable disconnection or
other trouble may result.
•Do not apply too much force on the antenna
cable, other connection cables and
connectors by bending a cable, etc.
Otherwise cable disconnection or other
trouble may result.
•Securely fasten the screws that fix the DAB
antenna as well as the screws of the DAB
antenna itself. Screws that loosen introduce
the danger of the antenna coming apart
during travel.
•DC voltage is output from the DAB antenna
terminal of the DAB hideaway tuner to supply
power to the DAB antenna. Be sure to
connect the supplied DAB antenna only.
Otherwise, the unit may be damaged.
•After the unit is installed, check whether the
brake lamps, indicators, wipers, etc. on the
car are working properly.
External view Number of items
Connecting Cables to Terminals
+ -
KENWOOD disc changer
control input
•To connect the Disc changer,
consult your Disc changer manual.
•Be always sure to connect the Disc
changer to the "To DISC
CHANGER" terminal of the DAB
hideaway unit. Do not connect it to
a connection terminal of the Main
unit.
NOTE
Fuse (3A)
DAB connection cable
(Accessory1)
Battery
DAB antenna
cable DAB antenna
(Accessory7)
Battery cable
(Commercially available)
Ground cable
(Commercially available)
Power terminal
Pass battery and ground cables through
supplied terminal cover and connect to
respective terminals. After completing
connections, fasten terminal cover5over
terminal bracket.
Terminal cover
(Accessory5)
Lead terminal
(Commercially
available)
DAB hideaway tuner
control input
Control unit
DAB
hideaway
tuner
DC voltage is output from the
DAB antenna terminal of the
DAB hideaway tuner to supply
power to the DAB antenna. Be
sure to connect the supplied
DAB antenna only. Otherwise,
the unit may be damaged.
2CAUTION
Disc changer
To control unit

21
What might appear to be a malfunction in your unit may just be the result of
slight misoperation or miswiring. Before calling service, first check the following
table for possible problems.
SOLUTIONPOSSIBLE CAUSEPROBLEM
No sound can be heard, or
the volume is low.
Nothing happens when the
buttons are pressed. The computer chip in the unit is not
functioning normally. Press the reset button on the Control
unit .
The fuse has blown. After checking for short circuits in the
cables, replace the fuse with one
having the same rating.
The input/output cables or wiring
harness are connected incorrectly. Reconnect the input/output cables
and/or the wiring harness correctly.
See the section on "Connecting Cables
to Terminals".
Troubleshooting Guide
The DAB mode cannot be
selected. The DAB connection cable is not
connected. Use the DAB connection cable to
connect the control unit and the DAB
hideaway tuner.
Connect the power supply of the DAB
hideaway tuner. Connect the battery cable and ground
cable to the DAB hideaway tuner.
The unit is connected to the CD
changer. Connect directly to the control unit.
The frequency is displayed,
but no sound can be heard. The DAB antenna is not connected. Connect it properly by referring to
"Connecting Cables to Terminals".
The Ensemble frequency is not
matched. The unit is outside the
reception area.
Check the reception area for the
Ensemble frequency and match the
frequency. Try receiving after you have
entered the receiving area.
The following messages are displayed when certain problems are occurring in
your system. Take the recommended actions.
NO CNT The power supply to the DAB hideaway tuner is not connected to its power supply
terminal.
Connect the power supply terminal of the DAB hideaway tuner properly. After
connection, press the reset button on the Control unit.
]
20
Installation
■
Mounting the DAB Antenna to the Roof
•Make a hole in the roof and mount the DAB
antenna. Specialized knowledge is required for
this job and an installer should be requested
for the installation work.
• The DAB antenna should be mounted so that it
does not protrude beyond the width and length
of the car.
• Do not install at a spot where the roof is
markedly curved. Doing so will allow water to
enter from a gap between the roof and the
waterproof rubber.
• Securely fasten the screws that fix the DAB
antenna as well as the screws of the DAB
antenna itself. Screws that loosen introduce
the danger of the antenna coming apart during
travel.
Determine the mounting position of the
DAB antenna.
Wipe away any dirt from the mounting
position.
Remove the inner lining at the position
where the hole will be made in the roof.
Make a 16 mm diameter hole in the roof.
Mount the DAB antenna and fasten it by
tightening the nut from the inside.U
Use a cable clamp to fix the antenna cable
and perform the wiring as far as the DAB
hideaway unit.
5
4
3
2
1
2CAUTION
,,,,,,
,,,,,,
DAB HIDEAWAY TUNER KTC-959DAB
CENTER UNIT
TO DAB ANTENNA
TO
FUSE
3A BATT
GND
DISC CHANGER
TO
Accessory2
Accessory4
(ø4 ×16 mm) Accessory4(ø4 ×16 mm)
Accessory3
(M5 ×6 mm)
Accessory3
(M5 ×6 mm)
Audio board,
etc.
Carpet
•Installation using the self-tapping
screws4
• Installation using the velcro tapes8
Carpet
Accessory8
Separable sheet
Bottom case of the
DAB hideaway unit
DAB antenna
(Accessory7)
ø16
DAB antenna cable
■
Mounting the DAB Hideaway Unit
•Install the DAB hideaway unit in a well-
ventilated location and do not place objects on
top of it.
• The DAB hideaway unit is equipped with a
cooling fan to lower the internal temperature.
Do not block the holes of the cooling fan at the
time of installation. Blocking the holes of the
cooling fan will cease to allow the temperature
to be lowered and will cause breakdown.
• When installing to the car, the unit should be
securely fastened at a location that will not
interfere with driving.
• When making a hole in the chassis, check that
the gas tank, break pipe, wire harness, or
other part is not located on the other side, and
be careful not to cause scratches.
• When attaching the mounting fittings 2to the
DAB hideaway unit, use only the supplied
mounting screws 3(M5 x 6 mm). Use of
screws other than those supplied may result in
internal damage or insecure mounting and is
very dangerous.
2CAUTION
Car roof
Nut
DAB antenna cable
Accessory6

22
Specifications
DAB tuner section
Frequency range (L Band) ..............................1451.072 MHz ~ 1492.0 MHz
Frequency range (Band III) ................................175.04 MHz ~ 249.984 MHz
Frequency range (Band II) ................................87.552 MHz ~ 107.968 MHz
Frequency raster ................................................................................16 kHz
Usable sensitivity (L Band) ............................................+ 2 dBm ~ - 85 dBm
Usable sensitivity (Band III, II) ....................................+ 10 dBm ~ - 90 dBm
Mode ..................................................................................Mode I, II, III, IV
General
Operating voltage..............................................14.4 V (11 ~ 16 V allowable)
Current consumption ..............................................600 mA at Rated power
Installation size (W ×H ×D)............................................210 ×34 ×160 mm
Weight ..............................................................................................1100 g
Specifications subject to change without notice.
Table of contents
Other Kenwood Tuner manuals

Kenwood
Kenwood KT-7500 User manual

Kenwood
Kenwood KT-593 User manual

Kenwood
Kenwood KTC-9090DAB User manual

Kenwood
Kenwood KT-9X User manual

Kenwood
Kenwood KT-7500 User manual

Kenwood
Kenwood KTC-WB100 User manual

Kenwood
Kenwood KT-660 User manual

Kenwood
Kenwood AT-250 User manual

Kenwood
Kenwood KT-1000 User manual

Kenwood
Kenwood AT-200 User manual

Kenwood
Kenwood KT-6050 User manual

Kenwood
Kenwood KT-3050 User manual

Kenwood
Kenwood AT-50 User manual

Kenwood
Kenwood KT-3050 User manual

Kenwood
Kenwood KT-8300 User manual

Kenwood
Kenwood AT-230 User manual

Kenwood
Kenwood KAT-1 User manual

Kenwood
Kenwood KT-57 User manual

Kenwood
Kenwood KT-592 User manual

Kenwood
Kenwood Z-838W User manual