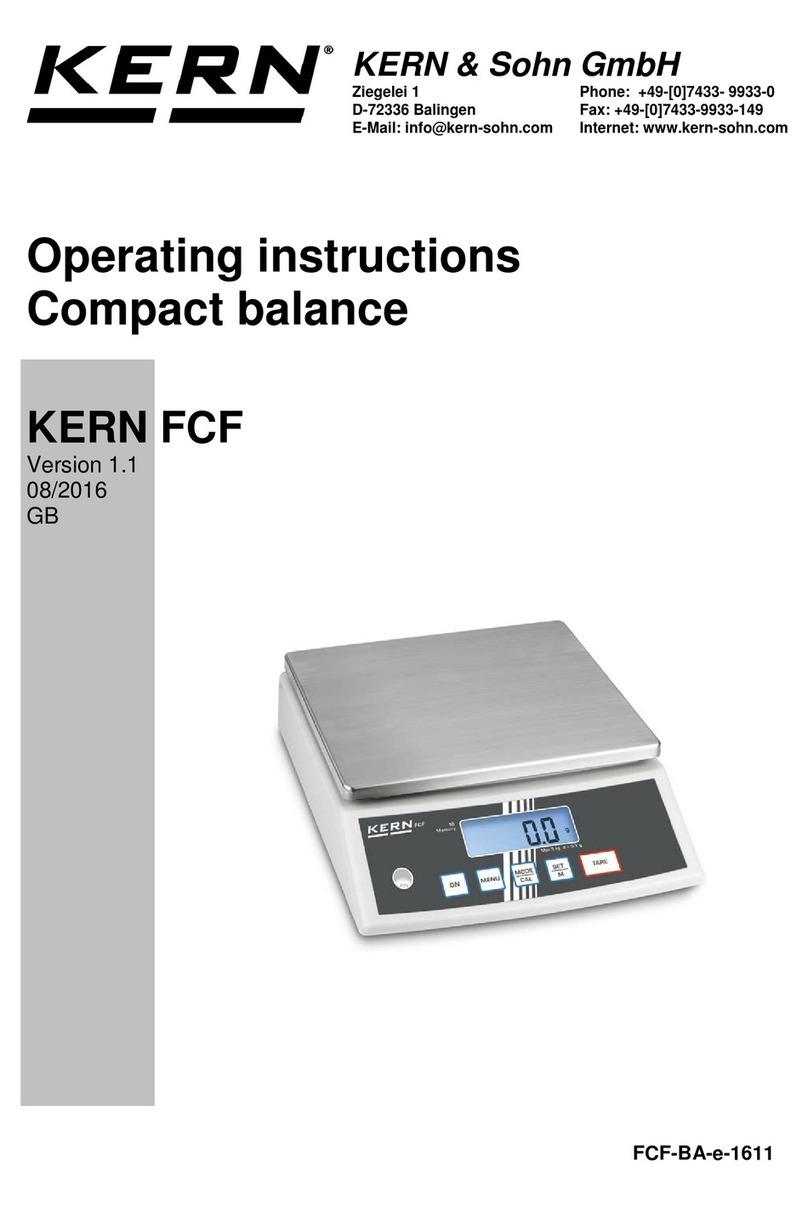
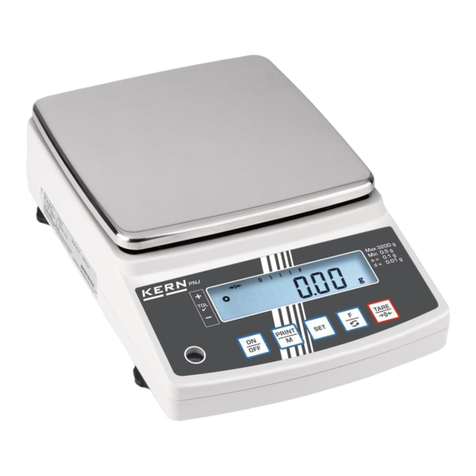
KERN ITS 600K200M User manual

Operating Instructions
GB Electronic Platform Balance
KERN ITB
Version 1.0 04/03
KERN & Sohn GmbH
Ziegelei1
D-72336Balingen
Tel: +49-[0]7433-9933-0
Fax:+49-[0]7433-9933-149
Internet:www.kern-sohn.com
E-Mail:[email protected]

Overview of your ITB scale
Rear view
Overview
Display
Keypad
27 26 25 24
1311
10
14

Overview
1 Terminal (benchtop version)
2Operating keys (see detailed illustration)
3Display (see detailed illustration)
4 Type plate
5 Weighing platform
6 Weighing pan
7 Leveling feet
Level indicator (certified scales only)
9 AccuPac (optional)
Rear view
10 Po er supply cable
11 Connector cable to eighing platform
13 RS232C interface (standard)
14 AccuPac (optional)
Display
15 Piece counting unit (has no function)
16 Weighing unit
17 Stability detector
1 Changed resolution (certified scales only)
19 Active interface (only displayed if more than one interface is installed)
20 Weighing range
21 Net eight symbol
22 Storage battery charge status (only on scales ith storage battery)
23 Dynamic eighing display
Keypad
24 Transfer key
25 Tare key
26 Zeroing key
27 On/off key

Contents
4
Contents
1 Setting up the scale ..................................................................................................................................... 6
1.1 Important ......................................................................................................................................................6
1.2 Unpacking and checking the delivered items .................................................................................................... 6
1.3 Safety and environment ..................................................................................................................................6
1.4 Selecting a location and leveling the scale ....................................................................................................... 7
1.5 Connecting the po er supply ..........................................................................................................................7
1.6 Monitoring the test substances ........................................................................................................................8
1.7 Verification ....................................................................................................................................................8
2 Weighing .....................................................................................................................................................9
2.1 S itching on/off and setting to zero .................................................................................................................9
2.2 Simple eighing ............................................................................................................................................9
2.3 Weighing ith tare .........................................................................................................................................9
2.4 Dynamic eighing ....................................................................................................................................... 10
3 The menu ...................................................................................................................................................11
3.1 Overvie and operation ................................................................................................................................ 11
3.2 Calling up the menu and entering the pass ord ............................................................................................. 11
3.3 Menu overvie ............................................................................................................................................. 12
3.4 Scale settings (SCALE) ................................................................................................................................. 14
3.4.1 Adjust/calibrate scale (SCALE > Cal) ............................................................................................................ 14
3.4.2 Display accuracy and eighing unit (SCALE > Display) ................................................................................ 17
3.4.3 Automatic taring (SCALE > A-Tare) .............................................................................................................. 17
3.4.4 Automatic zero point correction (SCALE > A-Zero) ......................................................................................... 17
3.4.5 Automatic save of tare and zero values (SCALE > Restart) ............................................................................. 18
3.4.6 Aadaptation to environmental conditions and eighing mode (SCALE > Filter) ................................................ 18
3.4.7 Reset scale settings to factory settings (SCALE > Reset) ................................................................................. 18
3.5 Application settings (APPLICATION) ................................................................................................................ 19
3.5.1 Activating the dynamic eighing function (APPLICATION > Dynamic) .............................................................. 19
3.5.2 Reset application settings to factory settings (APPLICATION > Reset) ............................................................... 19
3.6 Terminal settings (TERMINAL) ........................................................................................................................ 20
3.6.1 Standby, energy-saving mode, and display backlighting (TERMINAL > Device) ............................................... 20
3.6.2 Pass ord for menu access (TERMINAL > Access) ......................................................................................... 21
3.6.3 Reset terminal settings to factory settings (TERMINAL > Reset) ........................................................................ 21

Contents
5
3.7 Configure interfaces (COMMUNICATION) .......................................................................................................... 22
3.7.1 Operating mode of interface (COMMUNICATION > Mode) ................................................................................ 22
3.7.2 Communication parameters (COMMUNICATION > Parameters) ........................................................................ 23
3.7.3 Settings for printed reports (COMMUNICATION > Definition String) ................................................................... 24
3.7.4 Inserting line feeds into the report (COMMUNICATION > Add Line Feed) ...........................................................25
3.7.5 Reset interface settings to factory settings (COMMUNICATION > Reset) ............................................................. 25
3.8 Diagnosis and printout of menu settings (DIAGNOSTICS) ................................................................................. 25
3.8.1 Checking the keyboard (DIAGNOSTICS > Keyboard) ...................................................................................... 26
3.8.2 Checking the display (DIAGNOSTICS > Display) ............................................................................................ 26
3.8.3 Display serial number (DIAGNOSTICS > SNR) ............................................................................................... 26
3.8.4 Printing the menu settings (DIAGNOSTICS > List) .......................................................................................... 26
3.8.5 Reset all menu settings to the factory settings (DIAGNOSTICS > Reset All) ........................................................ 27
3.9 Saving the settings and quitting the menu (End ) ........................................................................................... 27
4 Additional important information ................................................................................................................ 2
4.1 Preconditions for communication bet een scale and PC ................................................................................. 28
4.2 Warning and error messages ........................................................................................................................ 28
4.3 Sample reports ............................................................................................................................................ 29
4.4 Cleaning instructions .................................................................................................................................... 29
5 Technical data and interface ......................................................................................................................... 30
5.1 General data and delivered items .................................................................................................................. 30
5.2 Dimensions and eights .............................................................................................................................. 31
5.2.1 Terminal ...................................................................................................................................................... 31
5.2.2 Weighing platforms ...................................................................................................................................... 31
5.3 RS232C interface.......................................................................................................................................... 32
5.4 Declaration of conformity .............................................................................................................................. 33
5.5 Emergency pass ord .................................................................................................................................. 37

Chapter 1: Setting up the scale
6
1 Setting up the scale
Please read these operating instructions carefully and follo them exactly! If you find that any items are missing or incorrect, or if
you have any other problems ith your scale, please contact your authorized METTLER TOLEDO representative.
1.1 Important
Various different models of the ITB scale terminal are available. Only the benchtop model is described in these instructions.
If you ordered a wall- or stan -mount terminal, please refer to the installation instructions delivered separately. The AccuPac
(special equipment) can contain a number of options, such as additional interfaces or a storage battery. If you ordered an
AccuPac it ill have been configured at the factory ith the options you requested and fastened belo the terminal. The installation
of an AccuPac after delivery is possible, but it is very costly.
1.2 Unpacking and checking the delivered items
Remove the scale and accessories from the packaging and check the delivered items:
Terminal and eighing plaform ith installed eighing pan and level indicator (certified scales only)
Open-end rench for leveling the eighing platform
Operating instructions (this document)
Special accessories (if any) as per packing list
1.3 Safety and environment
For safe and environmentally harmless operation of your scale, observe the follo ing instructions:
Do not use the scale in hazar ous environments (unless it is specially marked).
Although the ITB scale is protected to IP65, it must not be used in environments here
there is a corrosion hazar . Never flood the scale or immerse it in liquids!
If the power supply cable is damaged, the scale must not be used. Check the cable
regularly.
Do not open the weighing platform or terminal since this ill void the guarantee. Do
not use rigid objects to clean inside the eighing platform.
Treat the scale with care, it is a precision instrument. Avoid knocking the eighing pan
or placing excessively heavy loads on it.
If the ITB scale ill be used in foo processing areas: Those parts of the scale
hich may come into contact ith food have a smooth surface and are easy to clean.
The materials used do not shatter and contain no harmful substances. In food
processing areas, it is advisable to use the protective cover (accessory). This must
be regularly cleaned like the scale itself. A damaged or heavily soiled protective cover
must be replaced immediately.
When isposing of the scale, observe the applicable environmental regulations. If the
scale is fitted ith a storage battery, note that the battery contains heavy metals and
must therfore not be disposed of as normal aste! Observe local regulations for disposal
of environmentally harmful substances.
IP 65

Chapter 1: Setting up the scale
7
1.4 Selecting a location and leveling the scale
The proper location can influence the accuracy of the eighing results!
Choose a stable, vibration-free flat surface. The surface must be able to bear the
eight of the fully loaded scale safely.
Pay attention to environmental conditions:
No direct sunlight
No strong drafts (e.g. from fans or air conditioning)
No excessive temperature fluctuations
Adjust the scale horizontally by turning the leveling feet, then use the open-end rench
supplied to tighten the locknuts of all the leveling feet so as to prevent unintentional
movement.
On certified scales, the eighing platform has a level indicator. The air bubble must lie
ithin the inner circle of the indicator.
Note: The level indicator can be mounted in a different position. Undo the t o fastening
scre s and move the level indicator to one of the positions provided (drilled holes in
the eighing platform).
Major changes of geographical location
Each scale is adjusted by the manufacturer for the local gravitational conditions (geo
value). If there is a major change of geographical location, this adjustment must be
corrected by a service technician (see chapter 3.4.1). Certified scales must also be
recertified in accordance ith local national regulations for certification.
=000Ð
Before connecting the po er supply, check that the voltage printed on the back of
the scale is the same as the local po er supply. If it is not, do not connect the scale,
and contact your authorized representative.
If the voltage is correct, connect the plug on the po er cable to the po er supply.
After the scale has been connected, it performs a display test. When the display sho s
zero, the scale is ready for operation. For maximum precision, after installing the scale
carry out an adjustment/calibration (Chapter 3.4.1). Important: Certified scales must
be adjusted by an authorized laboratory. Ask your authorized representative.
Scales hich have an AccuPac with built-in storage battery can operate under
normal conditions for approx. 30 hours disconnected from the po er supply ( ith
backlighting turned off and no accessories connected). As soon as the po er supply
is interrupted, the scale automatically s itches over to battery operation. When po er
is restored, the scale automatically s itches back to po er supply operation. The
battery symbol indicates the current charge status of the storage battery (1 segment =
approx. 25% capacity). If the symbol flashes, the storage battery must be recharged
(8 hours minimum). If ork continues hile recharging, it takes longer. The storage
battery is protected against ovecharging, so the scale can be permanently connected
to the po er supply ithout problem.
1.5 Connecting the power supply
Chapter 1: Setting up the scale
The metrology features of the balance and any possible available adjusting eight must be checked at regular intervals
ithin the scope of quality assurance. For this purpose, the ans erable user must define a suitable interval as ell as
the nature and scope of this check. Information is available on KERNs home page ( .kern-sohn.com) ith regard to
the monitoring of balance test substances and the test eights required for this. Test eights and balances can be
adjusted quickly and at a reasonable price in KERNs accredited DKD calibration laboratory (return to national normal).
General:
According to the EU guideline 90/384/EEC balances must be verified officially if they are to be used as follo s (legally
regulated area):
a) For commercial transactions if the price of goods is determined by eighing
b) For the production of medines in pharmacies as ell as for analyses in the medical and pharmaceutical
laboratory
c) For official purposes
d) For the production of finished packages
In case of doubt, please contact your local office of eights and measures.
Verification information
An EU qualification approval is available for those balances marked as appropriate for verification in the technical data.
In the event that the balance is applied in an area subject to verification as described above, it must be officially verified
and re-verified at regular intervals.
Re-verification of a balance is carried out in compliance ith the respective legal provisions of the states. The term of
verification validity for balances in Germany, for example, is normally 2 years.
The legal provisions of the country of use are to be observed.
1.7 Verification
1.6 Monitoring the test substances

Chapter 2: Weighing
9
=00ÐNET
2 Weighing
This chapter explains ho you s itch the scale on and off, adjust the zero setting, tare the scale, carry out eighings, and record
eighing results.
2.1 Switching on/off and setting to zero
You s itch the scale on and off by pressing the key.
After it has been s itched on, the scale carries out a display test. When the eight
display appears, the scale is ready for eighing and is automatically set to zero.
Note: The key can be used to set the scale to zero at any time.
2.2 Simple weighing
Place the eighing sample on the pan.
Wait until the stability detector (small ring at left-hand edge of display) goes off and then
read the eighing result.
You can use the key to transmit the eighing result via the interface to a
peripheral device (printer, computer) (see Chapter 4.3 for sample report).
(65Ð
2.3 Weighing with tare
Place the empty eighing container or the packaging material on the eighing pan
and press the key to tare the scale.
The zero display and the NET (net eight) symbol appear. Note: If the automatic
tare function is active (Chapter 3.4.3), you need not press the key, since the first
eight added is taken to be the tare (T flashes in the display until the tare is added).

Chapter 2: Weighing
10
Place the eighing sample on the eighing pan and ...
... read the result (net eight of the eighing sample).
Note: The tare eight is retained until either a ne tare is determined, or the scale is set
to zero or s itched off.
If the automatic taring function is active, the tare is automatically cleared hen eighing
is completed and the eighing pan emptied; the scale is then ready for the next taring
and eighing.
"46ÐNET
2.4 Dynamic weighing
For unstable eighing objects (e.g. animals) the dynamic eighing function ith
automatic or manual start can be activated (section 3.5.1). If the dynamic eighing
function is active, the mouse symbol appears at the bottom edge of the display.
With dynamic eighing the scale measures 56 eighing values in 4 seconds and
calculates their mean value.
With dynamic eighing and automatic start the measurement begins automatically as
soon as there is a change in eight.
With dynamic eighing and manual start the measurement is started by touching
the key.
During dynamic eighing, horizontal segments appear in the display, after hich the
calculated mean value is displayed. The star symbol at the left-hand edge indicates that
the result is a calculated one. To start a ne eighing cycle, the scale must be unloaded.
Note: Only activate the dynamic eighing function to eigh unstable goods. In normal
operation the standard eighing function yields more accurate results more rapidly.
2(55Ð

Chapter 3: The menu
11
3The menu
The menu can be used to change the settings for the scale and to activate functions, thereby allo ing the scale to be adapted to
individual eighing neeeds.
Important: To avoid incorrect operation of the scale in normal use, the menu can be protected ith a pass ord. The scale
differentiates bet een a user and a supervisor. When the scale leaves the factory, the entire menu can be accessed by both user
and supervisor. We therefore recommend you to define your own supervisor password as soon as you set up the scale
(Chapter 3.6.2). This limits access by the user to a small number of menu items (calibration, and settings for energy-saving
mode and backlighting).
3.1 Overview and operation
Chapter 3.3 contains a complete overvie of the menu and all the possible settings.
3.2 Calling up the menu and entering the password
COdE Press the key and hold it do n until the prompt to enter the pass ord appears.
User: No pass ord required, just press the key.
Supervisor: Enter pass ord (sequence of keystrokes) immediately and confirm ith
the key, other ise after a fe seconds the scale returns to eighing mode. If an
incorrect pass ord is entered, the menu cannot be called up.
Note: When the scale leaves the factory no supervisor pass ord is defined, so hen
the pass ord is requested, just press the key.
If the pass ord entered is correct, the first block of the menu appears (SCALE).
J
○○○○○
Request password
CodE
=.00Ð
Weighing mode
Chapter 3.2
Enter password
- - - -
J
Operator Supervisor
J
Quit menu
End
Diagnosis
d1AGNOS
Interfaces
COMMUN1
Terminal
tERM1NL
Applications
APPL1C
Scale
SCALE
J
J
J
J
J
J
J
J
Chapter 3.4
J
Chapter 3.5
J
Chapter 3.6
J
Chapter 3.7
J
Chapter 3.8 Chapter 3.9
J
Press and hold do n (call up menu)
Press key briefly (Yes)
Press key briefly (No)
key jumps direct to end of menu (End)
navigates back ard through the menu
If no key is operated for 3 min. the menu is closed ( ithout saving changes
to settings)
J
JJ

Chapter 3: The menu
12
3.3 Menu overview
Operation
Press key (Yes)
Press key (No)
key jumps direct to the end of the menu (End)
navigates back ard through the menu
0.00 ∆
ãããã
±
±
CodE
0.00 ∆
CAL d1SPLAY
RESOLU
ã 0 ã
6.000∆0.0001∆
0.05∆
Un1t
Un1t
Un1t
Un1t
RESEt
UN1t
2.000∆
donE
Un1t
NJ
OE
J
R]
W
AãtARE
OFF
ON
Aã2ERO
ON
OFF
REStARt
OFF
ON
FiLtER
V1bRAt
UN1VEr
dOS1NG
PROCESS
LOW
MEd
H1GH
SCALE
SURE?
APPL1C dYNAM1C
SURE?
RESEt
tERM1NL
SLEEP
OFF
ON
ACCESS
SURE?
RESEt
dEV1CE
PWROFF
YES
NO
b.L1GHt
SUPERV1
ENtER.C
ãããã
REtYPE.C
ãããã
On
OFF
OFF
AUtO
MAnuAL
3
2
3
21
21
* * *
*
*
33
*
*
*
*
4
5
Scale
Applications
Terminal

Chapter 3: The menu
13
Menu (continued)
* Factory setting
1) Available settings depend on model.
2) Factory setting depends on model.
3) Not available on certified scales.
4) Not available on scales ith storage battery.
5) Not available on scales driven from po er supply ( ithout storage battery).
6) Only available for Print and AutoPrint operating modes.
7) Not available for COM2.
8) Only available if Handshake is set to Net 422 or Net 485.
9) In DigiTOL operating modes dtb and dtg the eights to betransmitted can also be specified (tare, net, gross).
0.00 ∆
CON 1
MOdE
CON 2
PARAMEt
bAUd
CONNUN1
H.SHAKE
nEt.Addr
L1NE.FNt
Print
A.Print
CONt1NU
d1ALOG
2nd.d1SP
300
600
1200
2400
4800
9600
19200
38400
7 EVEN
7 nonE
8 nonE
7 odd
HONOFF
nEt 422
nEt 485
NO
0
MULt1
S1NGLE
FORMAt
StdArd
31
L1NE 1
L1NE 20
CUStOM
NOt.USEd
HEAdEr
GROSS
tArE
NEt
StARLN
CrLF
F FEEd
4
0
Add LF
SURE?
rSt.CON.
PAritY
dEFStr
CONt.OLd
d1AL.OLd
dt-b
9
dt-G 9
COnt-IIt
8 EVEN
8 odd
KboARd d1SPLAY
d1AGNOS
PUSH 1
PUSH 10
SURE?
rESEt.ALSNR
0000000
LiSt
End
SAVE
*
*
*
*
7
7
8
*
*
6 6
Interfaces
Diagnosis
Quit menu

Chapter 3: The menu
14
Scale settings and functions:
Adjust/calibrate scale > Chapter 3.4.1
Display accuracy and eighing unit > Chapter 3.4.2
Automatic taring > Chapter 3.4.3
Automatic zero point correction > Chapter 3.4.4
Automatic storage of tare and zero values > Chapter 3.4.5
Adaptation to environmental conditions/ eighing mode > Chapter 3.4.6
Reset scale settings to factory settings > Chapter 3.4.7
3.4.1 Adjust/calibrate scale (SCALE > Cal )
3.4.1.1 Calibration adusting) of non verifiable balances
Calling up the menu:
JJJ
J
J
CAL
d1SPLA
A - tARE
SCALE
JJJ
A - 2ERO
REStARt
FiLtEr
J
RESEt
3.4 Scale settings (SCALE )
Display Explanation
COdE
SCALE
CAL
Press and hold do n the key until "CODE" appears.
Press the key.
The first block of the menu is sho n.
Press the key.
Display "CAL"

Chapter 3: The menu
15
Sequence (adjustment by means of adjusting eights):
Press the key in order to start the calibration procedure.
Display "0."
You ill subsequently be asked to adjust your eighing system at a certain value.
In the event that you do not ish to make the adjustment using this value
e.g. because you do not have sufficient eights at your disposal, keep pressing the key until the desired adjusting
eight appears on the display screen (the adjusting eight is reduced each time the key is pressed).
Note: It is recommended in general to adjust the balance hen fully loa e
Apply the selected adjusting eight and use the key to confirm.
Successful completion of adjustment is confirmed hen done appears on the display screen.
" isplay ill appear automatically on the display screen.
Press the key until "END" appears.
Remove the a justing weights from the weighing plate!
Press the key order to save the alterations.
SAVE ill appear on the display screen.
Press the key to confirm.
Follo ing this the balance ill return to eighing mode.
After you exit from the service mode, the scale must be s itched off and then
back on again!
3.4.1.2 Calibration adjusting) of verifiable balances
S itch off the terminal (do not isolate from the po er supply!).
Undo the rear cover plate of the terminal (6 Torx T20 scre s) and fold do n
carefully (cable connections!).
Important: The seal must be broken to remove the rear cover plate. Once the
seal is broken, the scale must be recertified by an approved certification center
and a ne seal applied before it can be used again as a certified scale!
The service switch (push button) must first be pressed to call up the service
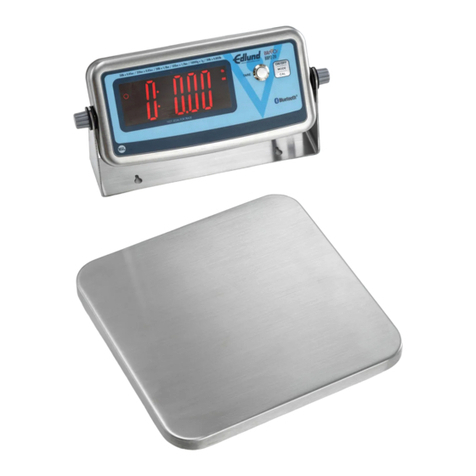
level. This is recessed and located next to the connector for the eighing
platform (see opposite figure). Use a suitable object or instrument to press
do n the s itch (the blunt tip of a pencil is recommended). Note: Before
pressing the service s itch, the s itch of battery-operated terminals
must first be s itched on.
The terminal is s itched on by pressing the s itch, and the first block of the
menu (SCALE) is sho n in the display.
Reassemble the rear cover plate of the terminal.

Chapter 3: The menu
16
Display SCALE
Press the key
Display METROLO
Press the key until "GEO" appears..
Display GEO adjustment by means of GEO value)
The GEO value can be set in this block and the balance also adapted to the local gravity ratios ithout adjusting eights.
Case a)You are familiar ith the GEO values.
In this case, adjustment can be carried out ithout adjusting eights.Once the key has been pressed, the
current GEO value ill be displayed. Press the key in order to alter the GEO value. The next value is displayed
every time the key is pressed (adjustment range: 0 - 31). See the GEO value chart in chapter 5.4 for the
appropriate value. Confirm the selected GEO value using the key . LIN-CAL ill appear on the display screen
and adjustment is no completed. Press the key until "END" appears. Press the key SAVE ill appear on
the display screen.Use the key to confirm. Follo ing this the balance ill return to eighing mode.
Please note: The GEO value may not be re-adjusted follo ing this adjustment by means of GEO value, as this
ould cause the set adjusting values to become invalid.
Case b)You are NOT familiar ith the GEO values.
In this case adjustment must be made using adjusting eights.
Press the key .
Display LIN-CAL
Press the key .
Display CAL adjustment by means of adjusting weights)
Press the key. PRELOAD ill appear on the display screen.
Press the key in ordfer to start the calibration procedure.
You ill subsequently be asked to adjust your eighing system at a certain value
In the event that you do not ish to make the adjustment using this value
(e.g. because you do not have sufficient eights at your disposal, keep pressing the key
until the desired adjusting eight appears on the display screen (the adjusting eight is
reduced each time the key is pressed).
Note: It is recommended in general to adjust the balance hen fully loa e
Apply the selected adjusting eight and use the key to confirm.
Successful completion of adjustment is confirmed hen done appears on the display screen.
" isplay ill appear automatically on the display screen.
Press the key until "END" appears.
Remove the a justing weights from the weighing plate!
Press the key order to save the alterations.
SAVE ill appear on the display screen.
Press the key to confirm.
Follo ing this the balance ill return to eighing mode.
After you exit from the service mode, the scale must be s itched off and then
back on again!

Chapter 3: The menu
17
J
JJ
J
J
J
J
J J
d1SPLA
RESOLU
oz
kg
lb
t
UN1t
J
J
J
J
JJ
=0001Ð
=05Ð
J
3.4.2 Display accuracy and weighing unit (SCALE > Display)
Display Explanation
Block can only be accessed by supervisor.
Display accuracy (resolution):
Setting values and factory setting depend on model.
On certified scales, resolutions hich deviate from the scale
definition are displayed ithout the eighing unit and ith
a star symbol ( eighing result does not correspond to
calibrated resolution). On dual-range balances resolutions
marked ith I<>I 1/2 are spread over t o eighing
ranges (e.g. B 2 x 3,000d).
Weighing unit (factory setting according to type plate):
Kilogram
Ounce (not availble on certified scales)
Pound (not available on certified scales)
Ton (metric ton)
Gram
g
OFF
On
A - tARE
J
J
J
J
Block can only be accessed by supervisor.
Automatic taring function s itched off (factory setting).
Automatic taring function s itched on. The first eight placed on the scale
isinterpreted as the tare.
3.4.3 Automatic taring (SCALE > A-Tare)
Display Explanation
J
Can only be accessed by supervisor. Not available on certified scales.
Auto zero s itched on (factory setting).
Auto zero s itched off (display can be set to zero manually ith the key).
On
OFF
A - 2ERO
J
J
J
J
3.4.4 Automatic zero point correction (SCALE > A-Zero)
Display Explanation

Chapter 3: The menu
1
Resets all scale settings to the factory settings. This block can only be accessed by
the supervisor.
Confirm resetting or cancel.
J
SURE?
RESEt
J
J
3.4.7 Reset scale settings to factory settings (SCALE > Reset )
Display Explanation
J
J
J
J
Block can only be accessed by supervisor. Not available on certified scales.
Automatic save s itched off (factory setting).
Automatic save s itched on, last tare and zero values are saved and are available
again after a po er outage or s itching off.
OFF
On
REStARt
J
J
J
J
3.4.5 Automatic save of tare and zero values (SCALE > Restart )
Display Explanation
J J
FiLtEr
V1bRAt
dOS1NG
UN1VEr
PROCESS
J
J
J
MEd
H1GH
J
J
3.4.6 Aadaptation to environmental conditions and weighing mode (SCALE > Filter)
Display Explanation
Block can only be accessed by supervisor.
Environmental conditions (vibration adapter):
Normal environmental conditions (medium): scale operates
at medium speed (factory setting).
Unstable environment (high): scale operates more slo ly but
is less sensitive to external influences.
Very stable and stable enviroment (lo ): scale operates very
quickly but is more sensitive to external influences.
Weighing mode (weighing process adapter):
Universal setting for all eighing types and normal eighing
goods (factory setting).
Dispensing liquids or po dery substances.
LOW
J
J
J
J

Chapter 3: The menu
19
Application settings: can only be accessed by supervisor!
Activate dynamic eighing function > Chapter 3.5.1
Reset application settings to factory settings > Chapter 3.5.2
This function facilitates eighing unstable eighing goods (e.g. animals).
Dynamic eighing function s itched off (factory setting).
Dynamic eighing function ith automatic start s itched on (for notes on use, see
Chapter 2.4).
Dynamic eighing function ith manual start s itched on (for notes on use, see
Chapter 2.4).
JJ
APPL1C
J
J
d NAMIC
RESEt
3.5 Application settings (APPL CAT ON)
Display Explanation
Resets all application settings to the factory settings.
Confirm resetting or cancel.
J
SURE?
RESEt
J
J
J
3.5.2 Reset application settings to factory settings (APPL CAT ON > Reset)
Display Explanation
J
OFF
AUtO
d NAM1C
J
J
J
MAnuAL
J
J
3.5.1 Activating the dynamic weighing function (APPL CAT ON > Dynamic)
Display Explanation

Chapter 3: The menu
20
JJJ
Only the Device block is available to the user!
Standby, energy-saving mode, and display backlighting > Chapter 3.6.1
Pass ord for menu access > Chapter 3.6.2
Reset terminal settings to factory settings > Chapter 3.6.3
JJJ
tERM1NL
J
J
dEV1CE
ACCESS
RESEt
3.6 Terminal settings (TERM NAL)
Display Explanation
Can be accessed by user!
Standby (only for scales operated from po er supply):
Standby s itched off, display permanently activated (factory
setting).
Standby s itched on. If there is no activity for 3 minutes,thedis-
play and backlighting are deactivated (SLEEP). They arere-
activated hen a key is pressed or the eight is changed.
Energy saving mode (for battery-operated scales only):
Energy saving mode active. If there is no activity for 3 minutes,
the scale is s itched off (factory setting).
Energy saving mode inactive, scale does not s itch off auto-
matically.
Display backlighting:
Backlighting s itched on (factory setting). Battery-operated
scales: s itches off automatically after 5 seconds.
Backlighting s itched off.
J J
dEV1CE
SLEEP
NO
ES
PWROFF
J
J
J
OFF
ON
J
J
J
J
J
3.6.1 Standby, energy-saving mode, and display backlighting (TERM NAL > Device)
Display Explanation
J
OFF
On
b.L1GHt
J
J
This manual suits for next models
5
Table of contents
Other KERN Scale manuals