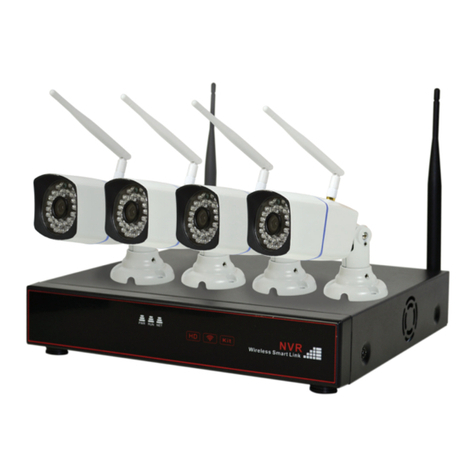
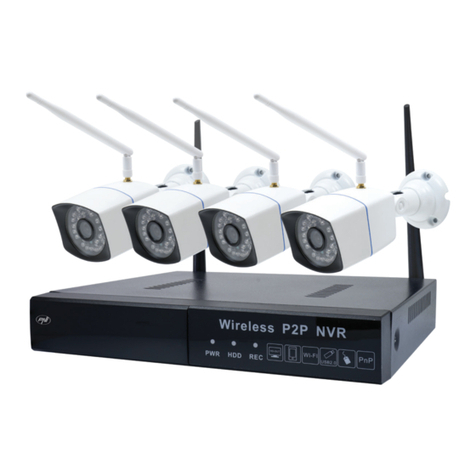
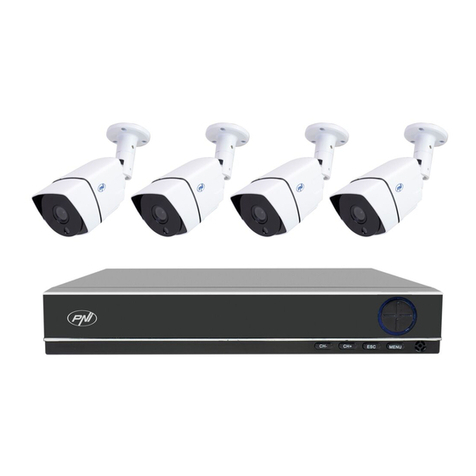
PNI HOUSE WiFi650 User manual

PNI HOUSE WiFi650
Video surveillance system / Система за видеонаблюдение / Videoüberwachungssystem /
Sistema de videovigilancia / Système de surveillance vidéo / Videófelügyeleti rendszer / Sistema
di videosorveglianza / System nadzoru wideo / Kit supraveghere video
EN Quick guide ............................................. 2
BG Бързо ръководство ................................ 11
DE Kurzanleitung .......................................... 20
ES Guía rápida ............................................. 29
FR Guide rapide ............................................ 38
HU Gyors útmutató ........................................ 47
IT Guida veloce ............................................ 56
PL Szybka porada ......................................... 65
RO Ghid rapid ................................................ 74

EN
2User manual
WARNINGS
• Before using this surveillance system, please read carefully the instructions below.
• Immediately after your rst login, we recommend that you change the password.
• Do not install the central unit of the surveillance system in a humid or dusty place or within
reach of children.
• Ensure good ventilation of the central unit.
• Use the surveillance system in the recommended temperature range (-26 ~ + 60 ° C).
• Do not open the case or repair the product by yourself. In case of malfunction, call a specialist
center or contact the seller.
INCLUDED ACCESSORIES
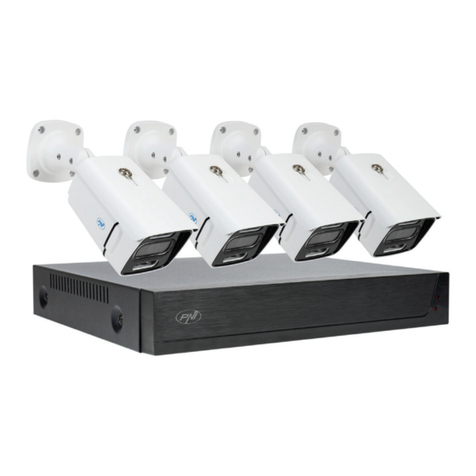
Monitor 4 x IP camera
1 x power
adapter for
monitor
4 x power
adapter for
cameras
Mouse
PRODUCT DESCRIPTION

EN
3
User manual
HARD DISK INSTALLATION
Remove the
power adapter,
loosen the
screws and
remove the
hard drive
compartment.
Install inside a
2.5“ hard drive
Use the included
screws to secure
the hard drive.
Connect the hard
drive cables.
Reinstall and
screw the
hard drive
compartment.
Note: We recommend using a dedicated hard drive for surveillance systems.
WIRELESS CONNECTION

EN
4User manual
WIRED CONNECTION
Note: There are two types of connections: LAN to connect the cameras to the NVR and WAN to
access the system from a outer network.
ACCESSING AND CONTROLLING THE SYSTEM
1. Power the cameras and the NVR.
2. Login.
Note: By default, the Admin user is protected by the password “1234”. We recommend changing
your password after your rst login.
3. Set your language, date and time
4. Scan the QR code to download the “XMEye” mobile app
5. Scan the QR code with the serial number to add the cameras into the app.

EN
5
User manual
Note:
The cameras of this kit were paired with the NVR from the factory. So, immediately after powering
the cameras and the NVR, you can see the images captured by the cameras on the screen.
If you do not see on the screen the images taken by the cameras, in the interface below click in
the list on the desired camera, then click on “Code for Wireless” and follow the instructions on the
screen.
OPTIONS MENU
Right-click on the screen to display the following options: Main menu, Guide, Wireless settings,
Record mode, Playback, IPC parameters (IPC param.), PTZ control, High Speed PTZ, Color
setting, Output adjustment, Logout, View 1 or View 4.
RECORD CONFIG.
Right-click on the screen - Main Menu - Record cong.
Note: The HDD must be set to read/write mode.
Channel - Select the channel for which you want to make the recording settings
Length - Set the length of each video le.
Mode - Set the recording mode: Schedules on certain days and at certain time intervals and
Manual. In the programmed mode you can set the recording type: Regular - the system will record

EN
6User manual
throughout the set period, Detect - the system will record only when it detects movement and
Alarm - the system only records when an alarm is triggered.
PLAYBACK
Right-click on the screen - Main Menu - Playback
Select the channel and the time that the recordings were made. Double-click a result in the list to
playback.
NETWORK CONFIGURATION
Right-click on the screen - Main Menu - Network
You can manually set network parameters (IP Address, Subnet mask, Gateway, DNS, Port) or
automatically by selecting the DHCP option.
BACKUP
Right-click on the screen - Main menu - System - Backup
Note: The USB memory must be installed in the NVR before running the backup. Once the
procedure is executed, the created backup le can be played back individually.

EN
7
User manual
Detects: detects the USB recording drive connected to the NVR
Erase: format the selected unit
Stop: stops running the backup
Backup: by pressing this button, the backup conguration screen pops up.
CHANNELS AND SUPPORTED RESOLUTIONS
Right-click on the screen - Main menu - System - Digital - Channel type
PNI House WiFi650 supports 4 cameras with IP 1080P or 8 cameras with IP 960P.
DMOTION DETECTION
Right-click on the screen - Main menu - Alarm - Motion detect
Channel: choose the channel you want to set up
Enable: means that the motion detection function is on
Sensitivity: choose one of the 6 sensitivity levels
Period: activates motion detection within the specied rtime ange. You can set dierent time
intervals depending on the day of the week. Each day is divided into 4 sections of time.

EN
8User manual
STORAGE UNIT MANAGEMENT
Right-click on the screen - Main menu - Advanced - HDD Info
The interface displays HDD information: type, status, and storage capacity.
Choose the storage device and then click on the function you want to perform: formatting,
partitioning, read/write or read only mode setting.
RESTORE
Right-click on the screen - Main menu - Advanced - Restore
The system can be brought to the factory default settings. You can select from the menu the
functions to reset.
INTERNET EXPLORER ACCESS
In Internet Explorer, in the address bar enter the system’s IP as http://192.168.1.9
Download and install the recommended plug-in.
After installing plug-in, enter your username (admin) and password (1234).

EN
9
User manual
Note: Internet Explorer by default blocks the plug-in. That’s why you need to change your security
level: Internet option - Security - Custom level - ActiveX controls and plug-ins; enable all options.
SYSTEM ACCESS VIA CMS WINDOWS
Install the softwares General CMS (Windows) or VMS (MAC) from the CD included in the package.
Note: Detailed instructions on using the software can be found on the CD included in the package.
SYSTEM ACCESS VIA XMEYE APP (ANDROID / iOS)
Note: Detailed instructions on how to use XMEye can be found on the CD included in the package.
TECHNICAL SPECIFICATIONS
Monitor
Type 12” TFT-LCD
Screen size 256.32 x 114.18 mm
Resolution 1920 x 1080px
System Processor Hi3536D
Operating system Embedded LINUX
Video
Video compression H.265
Video inputs 4 x 1080P (20-25FPS)
Video outputs 1 x HD port / 1 x VGA
Display resolution 1080P Full HD
Audio Audio compression G.711a
Recording
Recording modes Manual, scheduled, alarm
Recording resolution 1080P Full HD (4 channels)
Frames per second 20-30fps @ 1080P
Storage HDD 2.5” 1 x max. 8TB (not included)

EN
10 User manual
Control APP XMEye Android, iOS
Web/CMS P2P
Connections
Network 1 x RJ45
HD port output 1 x HD port (1.3)
VGA output 1 x VGA
USB 2 x USB 2.0
General Power voltage DC12V/2A
Dimensions 294 x 188 x 45 mm
Temperature of use -26°C ~ +60°C
IP Camera
System Processor Hi3516EV100
Sensor and lenses Sensor 1/2.9” 2MP CMOS
Focal length 3.6mm
Video Video compression H.265
Video resolution 1080P
Visibility IR LED 3 x IR-III LED, 850nm
Visibility up to 30 meters
General
IR-cut lter Yes
Power voltage DC 12V/1A
Dimensions 60 x 65 x 180 mm
Temperature of use -26°C ~ +60°C

BG
11
Ръководство за употреба
ATENTIONARI SPECIALE
• Inainte de a folosi acest kit de supraveghere, va rugam sa cititi cu atentie instructiunile de
mai jos.
• Imediat dupa prima autenticare, va recomandam sa schimbati parola de acces.
• Nu instalati unitatea centrala a sistemului de supraveghere intr-un loc cu umezeala si praf sau
la indemana copiilor.
• Asigurati o buna ventilatie a unitatii centrale.
• Folositi sistemul de supraveghere in gama de temperatura recomandata (-26°C ~ +60°C).
• Nu desfaceti si nu reparati singur produsul. In caz de defectiune, apelati la un centru specializat
sau contactati vanzatorul.
ВКЛЮЧЕНИ АКСЕСОАРИ
Монитор 4 x камера с IP
1 x зарядно
за монитор 4
x зарядно за
камери
Мишка
ОПИСАНИЕ НА ПРОДУКТА

BG
12 Ръководство за употреба
МОНТАЖ НА ХАРД ДИСК
Махнете
зарядното,
развийте
винтовете
и извадете
отделението за
хард диска.
Инсталирайте
във
вътрешността
2.5” хард диск
Използвайте
винтовете,
включени в
кутията, за да
закрепите хард
диска.
Свържете
кабелите на
хард диска.
Поставете
на място и
закрепете
с винтове
отделението с
хард диска.
Забележка: Препоръчваме използване на хард диск, предназначен за системи за
наблюдение.
СХЕМА НА БЕЗЖИЧНО СВЪРЗВАНЕ

BG
13
Ръководство за употреба
СХЕМА НА СВЪРЗВАНЕ С КАБЕЛ
Забележка: Има два вида връзки: LAN за свързване на камери към NVR и WAN за достъп
до системата в друга мрежа.
ДОСТЪП И КОНТРОЛ НА СИСТЕМАТА
1. Захранете камерите и NVR-а.
2. Влезте в системата.
Забележка: По подразбиране, потребителят Admin е защитен с парола “1234“.
Препоръчваме ви да смените паролата след първото влизане.
3. Конфигурирайте езика, датата и часа
4. Сканирайте QR кода от екрана, за да свалите приложението за мобилен “XMEye”
5. Сканирайте QR кода от екрана със серийния номер, за да добавите системата в
приложението

BG
14 Ръководство за употреба
Забележка:
Камерите от комплекта са свързани фабрично с NVR-а. Така, веднага след захранването
на камерите и на NVR-а, ще можете да видите на екрана изображенията, взети от
камерите.
Ако не виждате на екрана изображенията, взети от камерата, в интерфейса по-долу,
кликнете в списъка, показан на желаната камера, после кликнете върху “Code for Wireless“
и следвайте инструкциите от екрана.
МЕНЮ ОПЦИИ
Кликнете вдясно на екрана, за да се покажат следните опции: Главно меню (Main menu),
Бързо ръководство (Guide), настройки wireless (Wireless), режим запис (Record mode),
Възпроизвеждане (Playback), IPC параметри (IPC param.), PTZ контрол (PTZ control),
високоскоростен PTZ (HighSpeed PTZ), настройки цветове (Color setting), Настройки
показване (Output adjust), излизане от профила (Logout), режим разглеждане 1 (View 1)
или 4 камери (View 4).
ЗАПИС (RECORD CONFIG.)
Кликнете вдясно на екрана - Главно меню (Main Menu) - Настройки запис (Record cong.)
Забележка: HDD-то трябва да бъде настроено в режим четене/писане.

BG
15
Ръководство за употреба
Канал (Channel) - Изберете канала, за който искате да направите настройките за запис
Продължителност (Length) - Настройте продължителността всеки видео файл.
Режим (Mode) - Настройте режим запис: Програмиран (Schedules) в определени дни и в
определени часови интервали и Ръчно. В програмирания режим можете да настроите вида
на записа: Нормалер (Regular) - системата ще записва през цялата продължителност на
настроения период, Улавяне (Detect) - системата ще записва само когато улови движение и
Аларма (Alarm) – системата записва само когато се задейства аларма.
ВЪЗПРОИЗВЕЖДАНЕ НА ЗАПИСИ
Натиснете вдясно на екрана - Главно меню (Main Menu) - Възпроизвеждане (Playback)
Изберете канала и времевия период, в който са направени записите. Двойно кликване върху
резултат от списъка за възпризвеждане.
КОНФИГУРИРАНЕ НА МРЕЖАТА
Кликнете вдясно на екрана - Главно меню (Main Menu) - Network
Можете да настроите ръчно мрежовите параметри (IP адрес, Subnet mask, Gateway, DNS,
Port) или автоматично, отбелязвайки опцията DHCP.
РЕЗЕРВНО КОПИЕ (BACKUP)
Кликнете вдясно на екрана - Главно меню (Main menu) - Система (System) - Backup

BG
16 Ръководство за употреба
ЗАБЕЛЕЖКА: USB паметта трябва да бъде инсталирана в NVR преди да започне
изпълнението на резервното копие. Веднъж изпълнена процедурата, създаденият
резервен файл може да се възпроизведе самостоятелно.
Улавя (Detect): улавя записаното USB звено, свързано към NVR
Изтрива (Erase): форматира избраното звено
Stop: прекъсва изпълнението на резервното копие
Backup: Чрез натискането на този бутон, се появява интерфейса за конфигуриране на
резервното копие.
БРОЙ КАМЕРИ И ПОДДЪРЖАНИ РЕЗОЛЮЦИИ
Кликнете вдясно на екрана - Главно меню (Main menu) – Система (System) - Цифрова -
Вид канал (Channel type)
PNI House WiFi650 поддържа 4 камери с IP 1080P или 8 камери с IP 960P.
УЛАВЯНЕ НА ДВИЖЕНИЕ
Кликнете вдясно на екрана - Главно меню (Main menu) - Аларма (Alarm) – Улавяне на
движение (Motion detect)
Канал (Channel): изберете канала за конфигуриране
Активирай (Enable): означава, че функцията за улавяне на движението е включена
Чувствителност (Sensitivity): изберете едно от 6 нива на чувствителност
Период (Period): активира улавянето на движението в специфицирания интервал. Можете

BG
17
Ръководство за употреба
да настроите различни часови интервали в зависимост от деня през седмицата. Всеки ден
се разделя не 4 времеви раздела.
УПРАВЛЕНИЕ НА ЕДИНИЦАТА ЗА СЪХРАНЕНИЕ
Кликнете вдясно на екрана - Главно меню (Main menu) - Напреднал (Advanced) - HDD Info
Интерфейсът показва информация за вътрешния HDD: вид, статус и капацитет на
съхранение. Изберете устройството за съхранение, после кликнете върху функцията, която
искате да бъде изпълнена: форматиране, подялба, настройване режим четене/писане или
само четене.
НУЛИРАНЕ НА СИСТЕМАТА (RESTORE)
Кликнете вдясно на екрана - Главно меню (Main menu) - Напреднал (Advanced) - Reset
(Restore)
Системата може да бъде върната до фабричните настройки по подразбиране. Можете да
изберете от менюто функциите, които да настроите.
ДОСТЪП ДО СИСТЕМАТА ПРЕЗ INTERNET EXPLORER
В Internet Explorer в адресната лента въведете IP на системата като http://192.168.1.9
Изтеглете и инсталирайте препоръчания plug-in. След като инсталирате plug-in-а, въведете

BG
18 Ръководство за употреба
потребителското си име (admin) и паролата (1234).
Забележка: По подразбиране, Internet Explorer блокира plug-in-а. Затова трябва да
промените нивото на сигурност: Internet option - Security - Custom level - ActiveX controls
and plug-ins; активирайте всички опции.
ДОСТЪП ДО СИСТЕМАТА ПРЕЗ CMS WINDOWS ИЛИ VMS MAC
Инсталирайте софтуераGeneral CMS (Windows) или VMS (MAC) от CD-то включено в
кутията.
Забележка: Подробни инструкции за използването на софтуера ще намерите в CD-то
включено в кутията.
ДОСТЪП ДО СИСТЕМАТА ЧРЕЗ ПРИЛОЖЕНИЕТО XMEYE (ANDROID / iOS)
Забележка: Подробни инструкции за използването на приложениетоi XMEye ще намерите
в CD-то включено в кутията.
ТЕХНИЧЕСКИ СПЕЦИФИКАЦИИ
МОНИТОР
Вид 12” TFT-LCD
Размер на екрана 256.32 x 114.18 mm
Резолюция 1920 x 1080px
СИСТЕМА Процесор Hi3536D
Операционна система Embedded LINUX
ВИДЕО
Видео компресия H.265
Видео входове 4 x 1080P (20-25FPS)
Видео изходи 1 x HD port / 1 x VGA
Резолюция на показване 1080P Full HD

BG
19
Ръководство за употреба
АУДИО Аудио компресия G.711a
Запис
Режими на записване Ръчен, програмирана, при
аларма
Резолюция на записване 1080P Full HD (4 canale)
Кадъра в секунда 20-30fps @ 1080P
СЪХРАНЕНИЕ HDD 2.5” 1 x max. 8TB (nu este inclus)
УПРАВЛЕНИЕ Приложение XMEye Android, iOS
Web/CMS P2P
ВРЪЗКИ
Мрежа 1 x RJ45
HD port изход 1 x HD port (1.3)
VGA изход 1 x VGA
USB 2 x USB 2.0
ОБЩИ Захранване DC12V/2A
Размери 294 x 188 x 45 mm
Температура на използване -26°C ~ +60°C
IP КАМЕРА
СИСТЕМА Процесор Hi3516EV100
СЕНЗОР И ЛЕЩИ Сензор 1/2.9” 2MP CMOS
Фокусна дължина 3.6мм
ВИДЕО Видео компресия H.265
Видео резолюция 1080P
НОЩНА ВИДИМОСТ IR светодиоди 3 x IR-III LED, 850nm
разстояние IR видимост до 30 м
ОБЩО
IR-Cut филтър Да
Захранване DC 12V/1A
Размери 60 x 65 x 180 мм
Температура на използване -26°C ~ +60°C

DE
20 Benutzerhandbuch
ACHTUNG
• Bevor Sie diesen Überwachungskit benutzen, bitte lesen Sie aufmerksam die
Gebrauchsanweisungen.
• Nach der ersten Authentizierung empfehlen wir Ihnen das Passwort zu ändern.
• Die Haupteinheit des Überwachungssystems nicht bei Feuchtigkeit oder Staub oder in der
Reichweite der Kinder einbauen. Ventilieren Sie gut die Haupteinheit.
• Benutzen Sie das Überwachungssystem bei den empfohlenen Temperaturen (-26°C~+60 °C)
• Bauen Sie nicht allein das Produkt aus, reparieren Sie das Produkt nicht allein. Bei Störungen,
kontaktieren Sie einen Service oder den Verkäufer.
ZUBEHÖR
Monitor 4 x Kamera
mit IP
1 x Versorger für
den Monitor
4 x Versorger für
die Kameras
Mouse
PRODUKT BESCHREIBUNG
Table of contents
Languages:
Other PNI Security System manuals

PNI
PNI SafeHouse HS007LR User manual

PNI
PNI PG2710 User manual

PNI
PNI SafeHouse HS008 User manual

PNI
PNI HOUSE IP516 User manual

PNI
PNI SafeHome PT700 User manual

PNI
PNI House PTZ1350 User manual

PNI
PNI S004 User manual

PNI
PNI A014 User manual

PNI
PNI House PTZ1500 User manual

PNI
PNI House WiFi550 User manual

PNI
PNI SmartHome SM400 User manual
PNI
PNI Safe House PG300 User manual

PNI
PNI House AHD1250 User manual

PNI
PNI HOUSE AHD808 User manual

PNI
PNI SafeHouse HS550 User manual

PNI
PNI SafeHouse HS007 User manual

PNI
PNI PG600LR User manual
PNI
PNI HOUSE PTZ1300 User manual

PNI
PNI PNI S004 User manual
PNI
PNI IP590 User manual