manuals.online logo
Brands
  1. Home
  2. •
  3. Brands
  4. •
  5. Kestrel
  6. •
  7. Measuring Instrument
  8. •
  9. Kestrel 3500 Series Instruction Manual

Kestrel 3500 Series Instruction Manual

Thank you for purchasing the Kestrel 3500 Pocket Weather Meter.This instrument will
measure the following environmental conditions:
• wind speed • heat stress index
• maximum wind gust • dewpoint
• average wind speed • wet bulb temperature
• temperature (air,water snow) • barometric pressure
• wind chill • altitude
• relative humidity
Plus additional features:
• clock • 3-hour pressure trend
• data hold function • backlight
• automatic power-down function
OPERATION
1) Slide off cover.
2) Turn on. Press the center button ( ) to turn on the unit.
3) Select measurement. Press the right arrow ( ) to scroll through the measurements
listed below. Press the left arrow ( ) to scroll through the measurements in reverse order.
The instantaneous measurements will be displayed. Each measurement screen is
preceded by a brief hint to clarify which measurement is being displayed. (See
Understanding the Measurements section for more information.)
4) Select the unit of measure. While holding , press to scroll through the units of
measure listed below.
Mode Hint Icon Units of Measure
Clock --- --- 12-hr, 24-hr
Wind Speed SPd m/s, ft/min, km/h, mph, kt, B
Max Gust SPd MAX m/s, ft/min, km/h, mph, kt, B
Avg Speed SPd AVG m/s, ft/min, km/h, mph, kt, B
Temperature dEG C,F
Wind Chill chill C,F
Humidity r.h. %
Heat Stress Index H.I. C,F
Dewpoint d.P. C,F
Wet Bulb Temp bulb C,F
Barometric Pressure* bAro hPa, inHg
Altitude Alt m, ft
* Only one of the pressure icons will be displayed, indicating the 3-hour pressure trend.
pressure rising quickly (rise more than +0.18 inHg)
pressure rising (rise within +0.06 inHg and +0.18 inHg)
pressure stable (remain within -0.06 and +0.06 inHg)
pressure falling (drop within -0.06 inHg and -0.18 inHg)
pressure falling quickly (drop more than -0.18 inHg)
5) Hold mode. While holding , press to hold the time and all of the measured values.
The word“HOLD” will blink to indicate the Hold Mode. Press or to view the other
measurements in Hold Mode. While holding , press to exit the Hold Mode. This mode
can be useful for taking measurements when unable to view the display.
6) Turn on the backlight. Press to activate the backlight for 10 seconds. If or are
pressed while the backlight is illuminated, the backlight will remain illuminated for another
10 seconds. Press while the backlight is illuminated to manually turn off the backlight.
7) Adjust the clock. Simultaneously press and to adjust the clock. While the clock
is blinking, press or to adjust the clock. Hold or to adjust the times quickly.
Simultaneously press and to exit the clock adjustment.
8) Adjust the reference altitude. Obtain your altitude from a topographic map or
landmark to use as your reference altitude. From the barometric pressure screen,
simultaneously press and buttons to adjust the reference altitude. Press or to
adjust the reference altitude, or hold or to adjust the value quickly. Simultaneously
press and to exit the reference altitude adjustment.
9) Adjust the reference pressure. Obtain your barometric pressure reading from a
local weather source to use as your reference pressure. From the altitude screen,
simultaneously press and buttons to adjust the reference pressure. Press or to
adjust the reference pressure, or hold or to adjust the value quickly. Simultaneously
press and to exit the reference pressure adjustment.
10)Turn off. Hold for 2 seconds to manually turn off the unit. The unit will automatically
turn off if no buttons have been pressed for 45 minutes.
UNDERSTANDING THE MEASUREMENTS
Wind Speed - average over the previous three seconds. The measurement will be
accurate for air flow through the front or rear of the unit.
Maximum Wind Gust - maximum 3 - second wind speed since the unit was turned on.
Average Wind Speed - average wind speed since the unit was turned on.
Temperature - instantaneous temperature of the thermistor,which is located at the end
of the long coiled leads in the open cavity below the impeller.The exposed thermistor will
respond quickly to changes in temperature when air flows past it. For fastest response,
either hold the unit into the wind or wave the unit side to side for 15 seconds. Readings
should be taken in the shade. Water and snow temperatures can be taken by hold the
unit in the water or snow.
Wind Chill - combination of wind speed and temperature, as defined by the US National
Weather Service. Wind chill is the effective temperature on a human or animal at low
temperatures due to wind speed. Wind chill readings will be the same as the temperature
readings above 45ºF or below 3 mph.
Relative Humidity - amount of moisture in the air compared to the amount of moisture
the air can hold for the given temperature, represented as a percent. Because relative
humidity is also a function of the temperature, the response time will be dependent on
the temperature response time (see temperature section above). Readings should be
taken in the shade.
Heat Stress – combination of temperature and humidity, as defined by the US National
Weather Service. Heat stress is the effective temperature on a human or animal at high
temperatures due to humidity. Heat stress readings will be the same as the temperature
readings below 70ºF.
Dewpoint – calculated based on temperature and humidity measurements, as a
measure of moisture content in the air.If the dewpoint is very close to the temperature,
the air is humid. If the temperature and dewpoint are the same, dew will form. If this
happens below freezing, frost will form.
Wet Bulb Temperature - calculated based on temperature and humidity measurements,
as a measure of evaporation rate. If the wet bulb temperature is very close to the air
temperature, the air is humid. Wet bulb temperature is typically measured by swinging
a mercury thermometer with a wet sock on its end for several minutes.
Altitude and Barometric Pressure - the Kestrel 3500 will measure station pressure in
order to calculate barometric pressure and altitude. Changes in either air pressure or
altitude will affect these readings,so it’s important to make adjustments as necessary.
First, you will need to obtain either (a) the current barometric pressure or (b) the altitude
of your location.You can obtain your current barometric pressure by contacting a local
airport or weather service. Set this value as your reference pressure on the ALTITUDE
screen to determine your altitude. Otherwise, you can obtain your altitude from a
topographic map or local landmark. Set this value as your reference altitude on the
BAROMETRIC PRESSURE screen to determine your barometric pressure.
There are two examples for when and how to use the BAROMETRIC PRESSURE and
ALTITUDE screens. First, assume that you know the altitude from one of the sources
above. Set the reference altitude on the BAROMETRIC PRESSURE screen to this elevation.
As long as you remain at home, you can accurately track changes in the barometric
pressure.However,the measurement on the ALTITUDE screen also changes.This value
will fluctuate as pressure fronts pass through your location. Since you know your house
in not changing elevation, you can ignore this screen.
Now let’s assume that you are planning a day hike and you’d like to track your altitude.
Before starting,you’ll need to adjust the reference pressure on the ALTITUDE screen.You
can do this by simply adjusting the reference pressure until you reach the elevation of
your house. The reference pressure will be the same as the pressure reading on the
BAROMETRIC PRESSURE screen.You can now track the altitude as you hike.You can ignore
the values on the BAROMETRIC PRESSURE screen, since the pressure changes are
predominantly due to changes in elevation.
As with all pressure altimeters, it must be assumed that any change in pressure due to
weather is small over the course of one day. If you were to encounter an elevation landmark,
you can adjust the reference pressure until the altitude matches the landmark elevation.
This will correct the altitude for any pressure changes due to weather.
MAINTENANCE
StoringYour Kestrel
Avoid storing your Kestrel where it will be exposed to temperatures above 80° C [176° F]
or below -30°C [-22°F] for extended periods of time. Doing so may cause permanent
damage. (Note that the inside of a car parked in the hot sun can reach very high
temperatures.)
Use of the Lanyard and Cover
The cover can be captured on the lanyard to avoid loss. First, remove the cord poplock.
Then feed the lanyard end through the large opening in the cover and out the slot.
Replace the poplock on the lanyard.
Replacing the Battery
When your display flashes the low battery indicator ( ) , replace the
battery. Use a large coin to open the battery compartment. Insert a new
CR2032 coin cell (available where watch batteries are sold), positive (+)
pole up. When replacing the battery door, be sure to keep the black
rubber o-ring seated in the groove on the case back.
Thank you for purchasing a Kestrel Pocket Weather Meter! This information will be kept confidential. Any
information collected about our customers will not be sold or distributed, and will be used for the business of
Nielsen-Kellerman only. We are conducting this survey in order to improve the quality of our product.Thank you
for your cooperation and we appreciate your time.
The team at Nielsen-Kellerman stands proudly behind our products. If you have any questions or comments
please feel free to call us at 1.800.784.4221 or visit our website at www.nkhome.com.
+
CR2032
3V
!
CR2032
Battery
A
s
s
e
m
b
l
e
d
i
n
U
S
A
Kestrel®
3500
Pocket Weather™Meter
with Backlight
®
Kestrel
Pocket Weather Meters
Rev’d 9/23/04
Sensors
Impeller:25 mm.[1 in.] diameter,sapphire bearings,light weight.User-replaceable
impeller/housing assembly.
Temperature Sensor:Hermetically sealed precision thermistor.
Humidity Sensor:Capacitive sensor.
Pressure Sensor:Monolithic Silicon Piezoresisitive sensor.
Display
Type: Reflective 4.5 digit LCD.
Digit Height: 8 mm. [0.31 in.].
Update: 1 second.
Temperature Limitations:Normal operation from -15°C to 50°C [5°F to 122°F].Below
-15°C [5°F] the display fluid will freeze. Above 50°C, the display will turn black. This is
temporary and display will function properly when unit is returned to normal temps.
Accurate readings may be taken by keeping the unit warmer than -15°C [5°F], or
cooler than 50°C [122°F] and exposing it for the minimum time necessary to take a
reading (less than one minute).
Auto Shutdown: After 45 minutes of no button presses.
Environmental
Sealing: Electronics enclosure IP67 – water resistant to 1 m. [3 ft.]. Floats.
Shock: Drop tested to 2 m. [6 ft.].
StorageTemperature:-30°C to 80°C [-22°F to 176°F].
Physical
Buttons: Three sealed tactile rubber buttons control all functions.
Battery: User-replaceable CR2032 coin cell. Typical life, 300 hours.
Impeller:25 mm.[1 in.] diameter,sapphire bearings,light weight.User-replaceable
impeller/housing assembly.
Case: Slip-on case prevents damage to display and moving parts.
Dimensions: Unit: 4.8 x 1.7 x 0.7 in [122 x 42 x 18 mm]; case: 4.8 x 1.9 x 1.1
(122 x 48 x 28 mm].
Weight: Unit 2.3 oz [65g]; case 1.3 oz [37 g].
For more information or more detailed specifications, please visit www.nkhome.com.
Force Description Kts
0 Calm 0
1 Light Air 1-3
2 Light Breeze 4-6
3 Gentle Breeze 7-10
4 Moderate Breeze 11-16
5 Fresh Breeze 17-21
6 Strong Breeze 22-27
7 Near Gale 28-33
8 Gale 34-40
9 Strong Gale 41-47
1 0 Storm 4 8- 55
11 Violent Storm 56-63
12+ Hurricane 64+
Why does the Impeller Appear Imbalanced?
It is NORMAL for the impeller to oscillate as it comes to a stop. It is NOT improperly balanced.
Rather,it contains a very small magnet which responds to the earth’s magnetic fields.
This does not affect the accuracy of the wind speed readings because the magnetic
field applies both a braking and an accelerating force which cancel each other. The
impeller has been calibrated to provide wind speed readings accurate to within at least
± 3%.
High Speed Use
After several hours of sustained operation over 25 M/S (~49 KT,90 KM/H,56 MPH or 4,923
FPM), the Kestrel will lose some accuracy due to wear of the sapphire bearings in the
impeller.
Replacing the Impeller
Press FIRMLY on the sides of the black impeller housing with your thumbs to remove
the entire assembly. When inserting the new impeller, be sure the arrow is facing the
display side of the unit, and is aligned with the top of the meter. Press on the sides of
the housing rather than the center.
Taking Accurate Humidity,Heat Stress and Dewpoint Measurements
The patented system for measuring relative humidity allows for extremely fast and
accurate readings. The sensor is located in the large hole on the rear of the unit. Even
extreme and abrupt changes in the surrounding humidity will be measured within
several minutes.To test this,place your hand around the rear of the unit.Within several
seconds, the humidity will increase dramatically. After removing your hand, the humidity
will quickly begin to decrease. Next, place your hand near the rear of the unit and wave
the unit back and forth. The humidity will not change because the air flow is diluting
the humidity from your hand.
This example shows the importance of keeping air flow past the sensor while taking a
measurement. If there is no natural air flow past the sensor, wave the unit back and
forth. It is also reasonable to lay the unit down on a solid surface for several minutes to
allow the sensor to adjust.
Sensor Calibration
All the sensors have been factory calibrated to be accurate within specifications. For
recalibration, you may either return it to Nielsen-Kellerman for factory calibration, or
contact NK for field calibration instructions. Humidity Field Calibration Kits are also
available for sale online.
BEAUFORT SCALE
The Beaufort Scale is a system for estimating wind force
without the use of instruments based on the visible effects
of the wind on the physical environment. The behavior of
smoke, waves, trees, etc., is rated on a 13 point scale. The
scale was devised in 1805 by the British naval Commander
Sir Francis Beaufort (1774-1857) and is still commonly used
by mariners.
WARRANTY & SERVICE
Warranty
Every unit is fully tested at our factory for measurement accuracy and waterproof integrity.
Your Kestrel is covered by a full parts and labor warranty for two years from your date
of purchase. The provisions of this warranty do not apply to: a) batteries, whether
contained in a unit or sold individually; b) units which have been subjected to misuse,
negligence, accident or improper maintenance or application; c) humidity sensors
damaged by excess contact with salt water; or d) units which have been repaired or
altered by a party other than Nielsen-Kellerman’s employees or agents without Nielsen-
Kellerman’s prior written consent.
Parts and Service
To order replacement parts for your Kestrel or obtain service please contact Nielsen-
Kellerman or your original place of purchase.
ADDITIONAL INFORMATION
What is a“Kestrel”?The American Kestrel is the smallest North American
falcon. Beautiful and highly adaptable, it can be found virtually
everywhere in North America. It is unique among falcons for its ability to
both hover at very low speeds and dive at very high speeds.
Assembled in the USA. The Kestrel 3500 is protected by US Patents
5,783,753, 5,939,645 and 6,257,079. Other patents pending. Nielsen-
Kellerman reserves the right to change product specifications. © 2004.
Kestrel, the Kestrel logo, Pocket Weather, NK and the NK logo are
trademarks of the Nielsen-Kellerman Co.
AVERAGE HOUSEHOLD INCOME: <$25,000 $26,000-45,000
46,000-75,000 $76,000-100,000 $100,000+
WHERE DID YOU PURCHASE YOUR KESTREL?
HOW DID YOU LEARN ABOUT KESTREL POCKET WEATHER METERS?
PRIMARY USE (CAMPING, FIRE FIGHTING, AGRICULTURE, ETC.):
SECONDARY USE:
FAVORITE MAGAZINE:
NAME:
ADDRESS:
CIT Y: STATE: ZIP:
COUNTRY: TELEPHONE NUMBER:
EMAIL ADDRESS:
SERIAL NUMBER: DATE OF PURCHASE:
MODEL: 1000 2000 3000 4000
MALE: FEMALE:
AGE: 18-24 25-36 37-48 49-56 57+
Please fill out the product registration below and mail it to: Kestrel Registration, 21 Creek Circle, Boothwyn, PA 19061.
NIELSEN
-
KELLERMAN
21 Creek Circle, Boothwyn, PA 19061 USA
Phone (610) 447-1555 • Fax (610) 447-1577
Web www.nkhome.com
E-mail [email protected]
SPECIFICATIONS
Accuracy (Within OPERATIONAL RANGE at right)
Wind Speed ±3% of reading
Temperature ±1°C
Wind Chill ±2°C
Wet Bulb Temp ±2°C
Dewpoint ±3°C (above 20% RH)
Heat Index ±3°C
Relative Humidity ±3%
Pressure ±3hPa
Altitude ±30m (atstandard atmosphericconditions)
Altitude Resolution 1m
Response Time
Wind Speed, Pressure, Altitude 1 Second
Temperature, Relative Humidity <1 Minute
Wind Chill, Heat Index, under most conditions.
Dewpoint, Wet Bulb
Operational Range
Units of Measure Low High
Knots 0.6 78
Meters per Second 0.3 40
Kilometers per Hour 1.0 144
Miles per Hour 0.7 89
Feet per Minute 59 7877
Beaufort Force 1 16
Celsius -29 70
Fahrenheit -20 158
Percent Humidity 5 95
Meters -500 9000
Feet -1500 30000
Hectopascal (or mbar) 870.0 1080.0
Inches Mercury 25.70 31.90

Other manuals for 3500 Series

2

Other Kestrel Measuring Instrument manuals

Kestrel Sportsman 4500 User manual

Kestrel

Kestrel Sportsman 4500 User manual

Kestrel 2500 NV User manual

Kestrel

Kestrel 2500 NV User manual

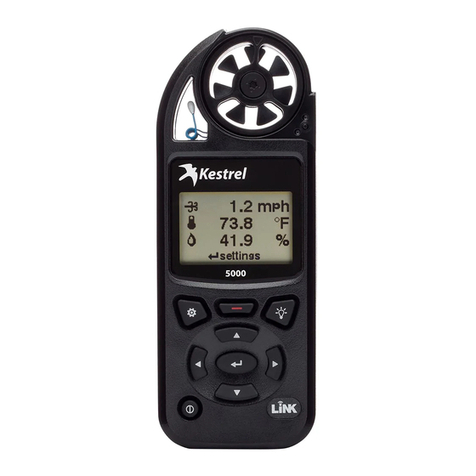
Kestrel 5000 User manual

Kestrel

Kestrel 5000 User manual

Kestrel 2000 Pocket Weather User manual

Kestrel

Kestrel 2000 Pocket Weather User manual

Kestrel 1000 User manual

Kestrel

Kestrel 1000 User manual

Kestrel 1000 User manual

Kestrel

Kestrel 1000 User manual

Kestrel 3000 Pocket Weather User manual

Kestrel

Kestrel 3000 Pocket Weather User manual

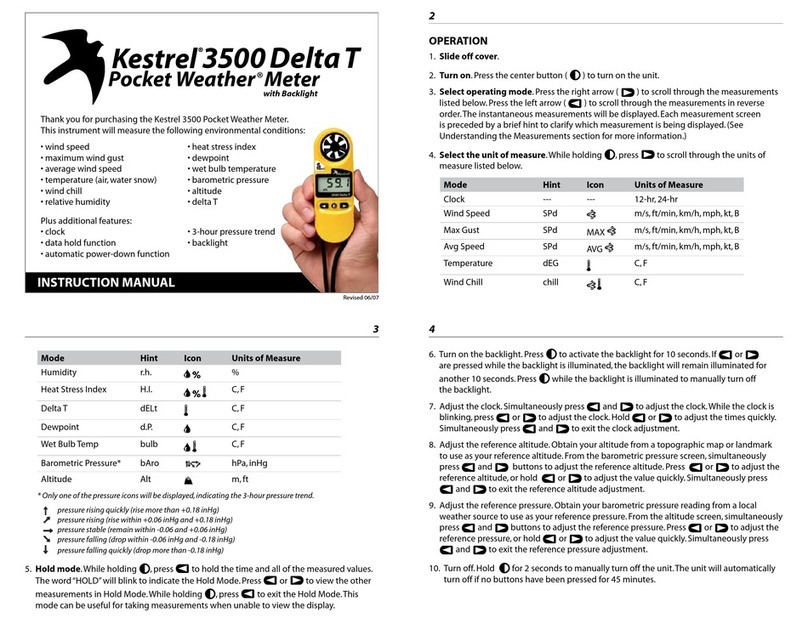
Kestrel 3500 Delta T User manual

Kestrel

Kestrel 3500 Delta T User manual

Kestrel Elite User manual

Kestrel

Kestrel Elite User manual

Kestrel 2000 User manual

Kestrel

Kestrel 2000 User manual

Kestrel 5400 User manual

Kestrel

Kestrel 5400 User manual

Kestrel 5700 Elite User manual

Kestrel

Kestrel 5700 Elite User manual

Kestrel 5000 User manual

Kestrel

Kestrel 5000 User manual

Kestrel 5000 User manual

Kestrel

Kestrel 5000 User manual

Kestrel 2500 Instruction Manual

Kestrel

Kestrel 2500 Instruction Manual

Kestrel 4250 User manual

Kestrel

Kestrel 4250 User manual

Kestrel 4200 User manual

Kestrel

Kestrel 4200 User manual

Kestrel 1000 User manual

Kestrel

Kestrel 1000 User manual

Kestrel 5 Series User manual

Kestrel

Kestrel 5 Series User manual

Kestrel 1000 User manual

Kestrel

Kestrel 1000 User manual

Kestrel 1000 User manual

Kestrel

Kestrel 1000 User manual

Kestrel 4400 Operating and maintenance manual

Kestrel

Kestrel 4400 Operating and maintenance manual

Kestrel 2500 User manual

Kestrel

Kestrel 2500 User manual

Kestrel 5000 User manual

Kestrel

Kestrel 5000 User manual

Popular Measuring Instrument manuals by other brands

DPS Telecom NetGuardian 480 Techno Knowledge Paper

DPS Telecom

DPS Telecom NetGuardian 480 Techno Knowledge Paper

mru NOVAplus biogas user manual

mru

mru NOVAplus biogas user manual

Test Equipment Depot XFTP SAT LITE Operation manual

Test Equipment Depot

Test Equipment Depot XFTP SAT LITE Operation manual

meibes Rossweiner Logoplus installation guide

meibes

meibes Rossweiner Logoplus installation guide

DAKOTA ULTRASONICS UMX-2 Operation manual

DAKOTA ULTRASONICS

DAKOTA ULTRASONICS UMX-2 Operation manual

Hioki 3490 instruction manual

Hioki

Hioki 3490 instruction manual

Fluke CO-220 Instruktionsblad

Fluke

Fluke CO-220 Instruktionsblad

ANDERSON-NEGELE IZMSA operating manual

ANDERSON-NEGELE

ANDERSON-NEGELE IZMSA operating manual

VOLTCRAFT 1000BASIC DE operating instructions

VOLTCRAFT

VOLTCRAFT 1000BASIC DE operating instructions

Leupold GX-3 operating instructions

Leupold

Leupold GX-3 operating instructions

Niigata seiki GDG Series instruction manual

Niigata seiki

Niigata seiki GDG Series instruction manual

GEONiN DM-100 manual

GEONiN

GEONiN DM-100 manual

NORTHROP GRUMMAN Patara I user manual

NORTHROP GRUMMAN

NORTHROP GRUMMAN Patara I user manual

bredent HELBO TheraLite user manual

bredent

bredent HELBO TheraLite user manual

General DSM403SD user manual

General

General DSM403SD user manual

Olympus OmniScan MX user manual

Olympus

Olympus OmniScan MX user manual

Riftek RF096-30/75-120 user manual

Riftek

Riftek RF096-30/75-120 user manual

SMART EX505 Installation and operation manual

SMART

SMART EX505 Installation and operation manual

manuals.online logo
manuals.online logoBrands
  • About & Mission
  • Contact us
  • Privacy Policy
  • Terms and Conditions

Copyright 2025 Manuals.Online. All Rights Reserved.