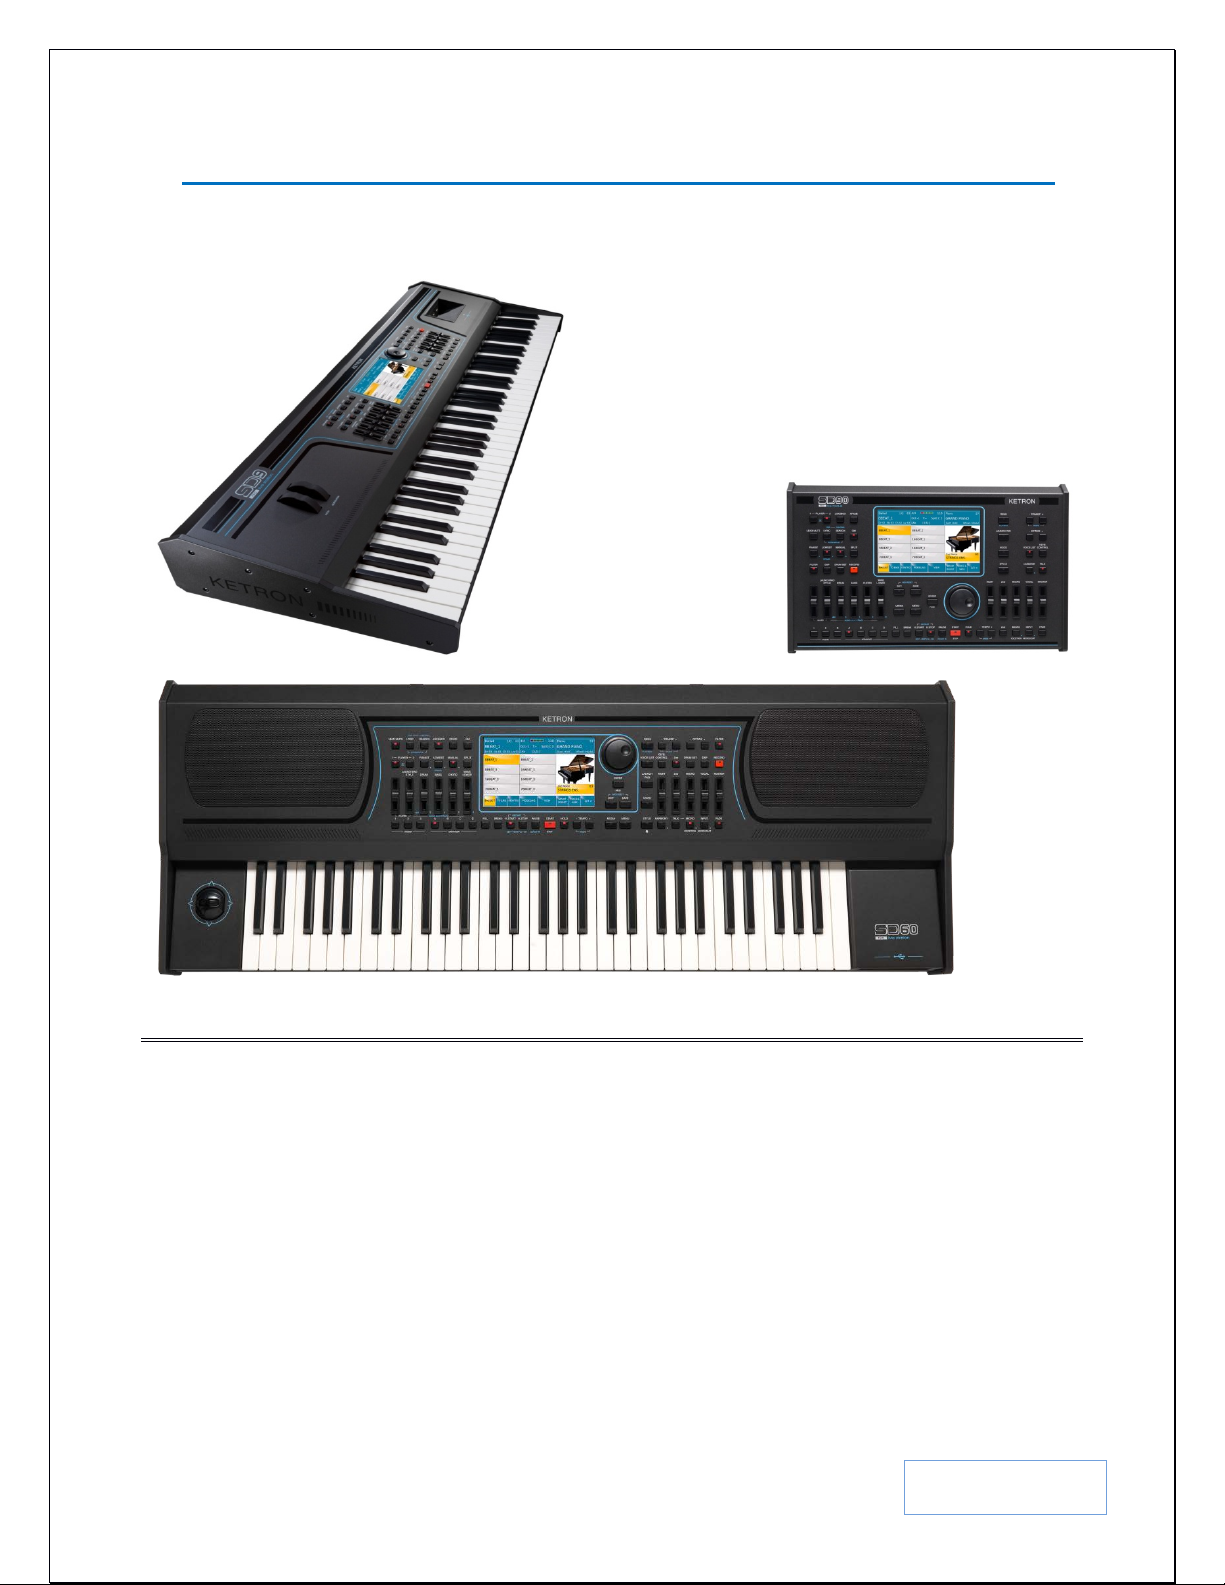
KETRON SD9 Manual & Tutorial
Page change, voice change, vocalizer on/off, mic on/off, chord tonalities … etc. A complete list of these
functions and how to program the effects pedals are under MENU – FOOTSWITCH on page 174.
•DVI:-Video monitor output to connect the SD9 Pro to an external TV screen or monitor. Using the
appropriate adaptor, you can connect the SD9 Pro to an external monitor with HDMI or VGA input jacks.
You can also determine if all data shown on the SD9 Pro’s screen is projected onto the external monitor
(MIRROR on) or only lyrics, pdf and data related to songs (MIRROR off). The details of this can be seen
under MENU – VIDEO – MIRROR on page 176.
•MIDI PORTS:- The various 5 pin DIN midi ports are used as follows (more in the MIDI section found on
page 160):-
oTHRU:-This connector is used to pass onto another device all information received at the MIDI
IN (GM) jack. So if you daisy chain your instruments such that you have a controller connected to
the SD9 Pro and another instrument connected to the SD9 Pro which you also want controlled
from your controller, connect your controller’s MIDI OUT to the SD9 PRO’s MIDI IN 1 (GM)
and then the other instrument’s MIDI IN to the MIDI THRU of the SD9 PRO. This way, all data
the SD9 PRO receives at it’s MIDI IN 1 GM is automatically passed (with non interference from
the SD9 PRO) onto the next instrument in the Midi chain.
oOUT:-Connect the SD9 Pro’s MIDI out to another MIDI device (slave) you want the SD9 PRO
to control (master). You can use this to get other sounds out of other sound modules or to control
other musical devices from the SD9 PRO.
oIN2 (KEYB):-If you want to control the SD9 PRO from another MIDI controller and be able to
control/play with its internal styles and lead voices, connect the device’s MIDI OUT to the SD9
PRO’s MIDI IN2 (KEYB).
oIN1 (GM):-Use this to control the SD9 Pro from an external Midi Sequencer program on a
computer or equivalent. This gives you access to the entire Sound engine of the SD9 PRO.
•OUT (Right & Left):- Used to connect the SD9 PRO to a Sound system or equivalent. It is strongly
recommended you use both Left and Right outputs (stereo) to get the best sound quality and take
advantage of the built in effects. Using only one (mono) may not yield the same high quality results.
•HEADPHONE (AUX):- This connector is used to connect a good pair of headphones to the SD9 PRO. It
can also be programmed to be used as an additional output (AUXILARY) which can be programmed to be
the output of just bass, drums, lead/right hand voices or other tracks per software upgrade.
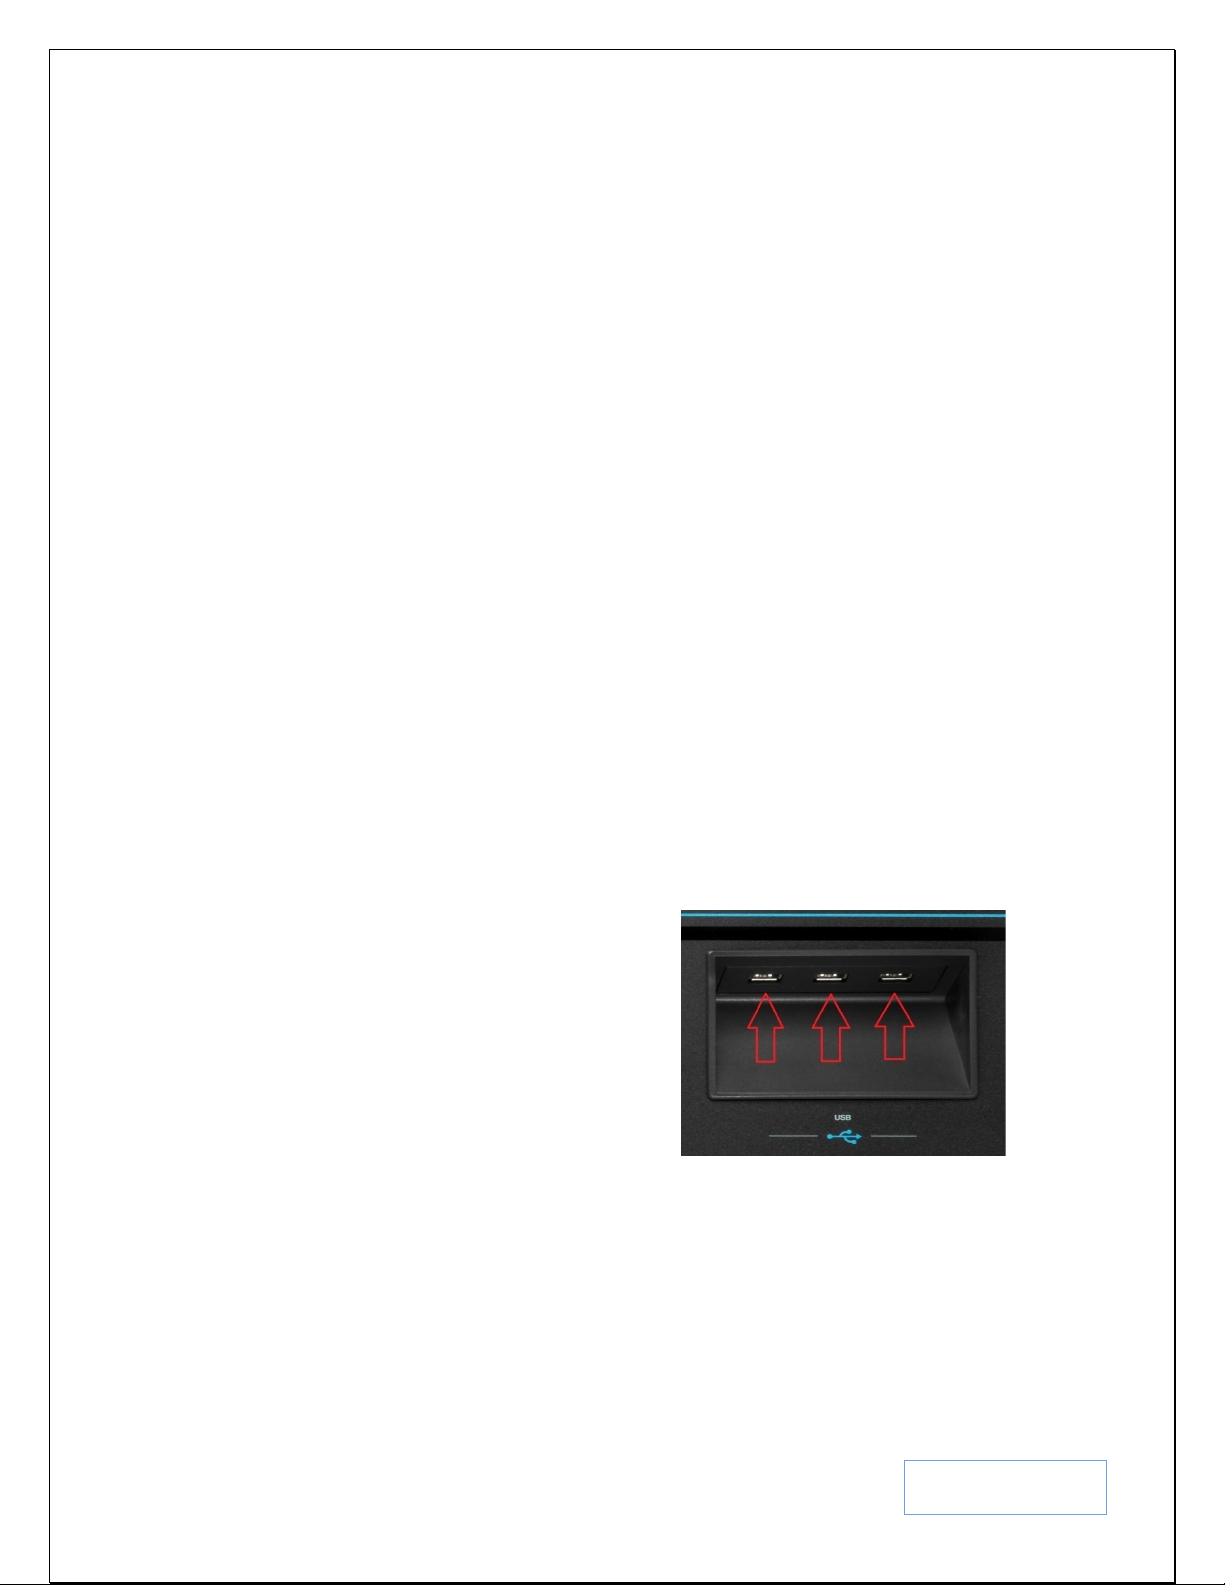
•MICRO:- The dedicated microphones are described and used as follows (more details in the
MICROPONE section found in page 117:-
oOUT:- This is used to connect the output of the microphone and vocal harmonizer to an external
mixer. This ensures total control of just the voice of the musician (e.g. using an external unit to
add special effects to just the lead vocalist), while keeping the voice out of the general mix of the
instrument.
oGAIN:- This knob is used to set the input/gain level of the signal coming into the MICRO
(1/4”/XLR) Combo input jack. A good starting point it to turn the knob completely anti-clockwise
(0) and then turn ½ way up (line should be at the 12 o’clock position) to avoid feedback.
oCOMBO MIC INPUT JACK:- Connect a dynamic microphone (either with XLR or ¼” jack) to
this connector.
o¼” INPUT JACK:- Connect a line in (e.g. external music player or Ipad … etc) or a GUITAR
into this ¼” jack. If you connect a GUITAR, the SD9 Pro also has ‘stomp box’ editable guitar
effects already built plus a guitar tuner for your electric or acoustic electric guitar to always be in
tune (more under INPUT – MICRO2/GUITAR on page 125).
Navigating the SD9 PRO is very easy and can be done in a number of ways using these useful key buttons:-