VZ-390 Function setting guide
■Enter to the function setting mode
1Make sure that the paper is set in the printer and the power
of the printer is off.
2Press the POWER switch and the FEED switch simultane-
ously. The POWER LED and the FEED LED will light. Keep
pressing the both switches for around six seconds, the
POWER LED and the ERROR LED will start blinking. When
they started blinking, release your ngers from the switches
immediately.
FEED +
ON/OFF
.
* At this point, when ve or more seconds elapse without
releasing your ngers from the switches and the lit POWER
LED and ERROR LED start blinking, the function setting
mode will be exited. In this case, turn the power off and start
from (1) again.
3When the following message are printed, press the FEED
switch.
Select Function
Setting Mode: Feed SW/HEX Dump Mode: Power SW
FEED
* When neither of both switches is pressed within 30 seconds
after the message is printed, the printer will go back to the
power-off state.
4To change the settings after the following message are print-
ed, press the FEED switch and perform operation described
in “ Change the setting contents”.
When no change is necessary, press the POWER switch.
→6
[SETTING MODE] Yes: Feed SW / No: Power SW
FEED
The printer will enter to the function setting mode and go in
the switch operation standby state by the above operation.
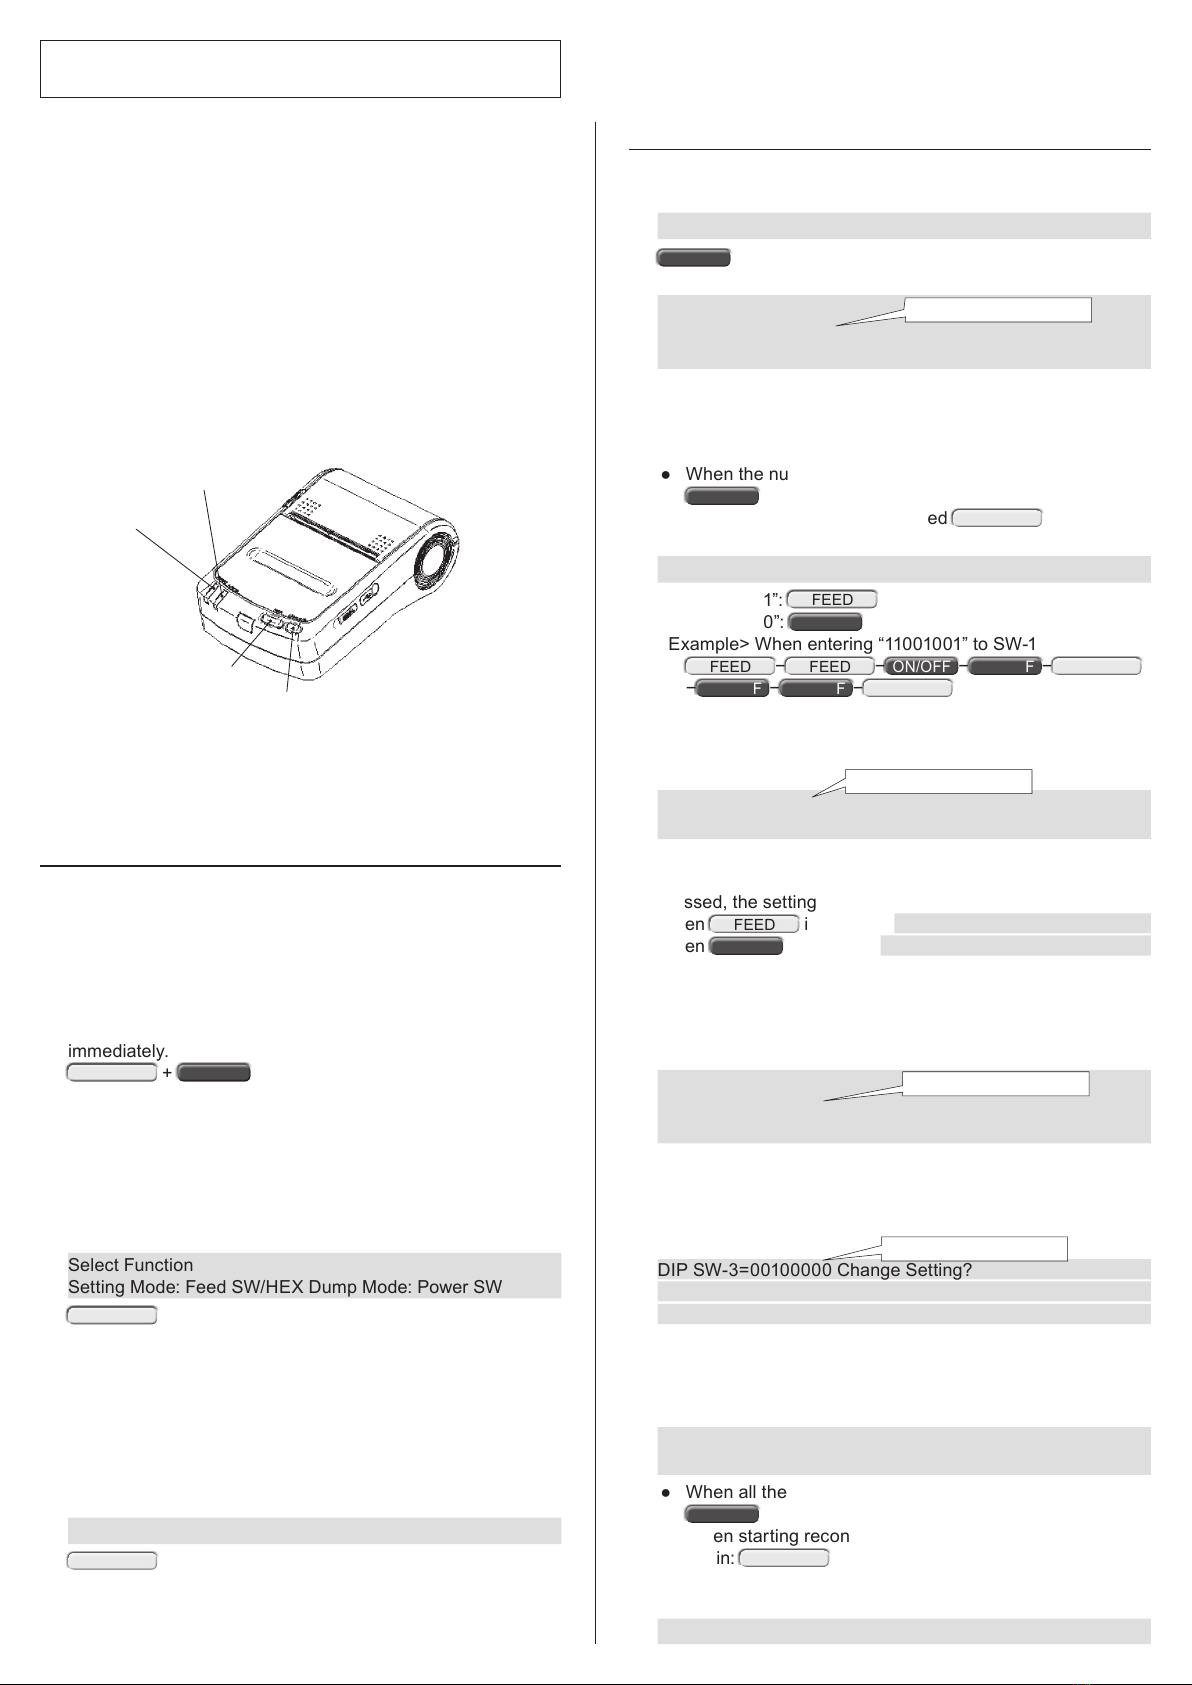
ERROR LED
POWER LED
Power switch
FEED switch
<Name of each part>
Thank you for purchasing our printer, VZ-390.
This printer allows users to set up each function by
key operation in accordance with use conditions
and use purposes. Normally, it is not necessary to
change the settings. However, if the settings are
changed due to some sort of causes, congure the
settings as indicated below.
■Change the setting contents
1Enter to the function setting mode and then press the POW-
ER switch when the following message is printed.
Load Default Setting? Yes: Feed SW/No: Power SW
ON/OFF
2The following message will be printed.
DIP Switch setting mode.
DIP SW-1=110 01111 Change Setting?
Yes: Feed SW/No: Power SW
* This 8-digit number indicates the setting content of SW-1.
Match the settings from SW-1-8 to 1-1 with the numbers de-
scribed in the next section.
Compare the printed 8-digit number of SW-1 with the above number.
●When the numbers arranged as intended are printed
ON/OFF
→4
●When other numbers are printed FEED →3
3Enter numbers when the following message are printed.
Input 8 bits. 1: Feed SW/0: Power SW
●To enter “1”: FEED
●To enter “0”:
ON/OFF
<Example> When entering “11001001” to SW-1
FEED −FEED −
ON/OFF
−
ON/OFF
−FEED
−
ON/OFF
−
ON/OFF
−FEED
Press the switches in the above order. Each time when the
switches are pressed, the POWER LED will light. When the
switches are pressed for all digits, the following will be print-
ed.
DIP SW-1=11001001 Save Setting?
Yes: Feed SW/No: Power SW
When the FEED switch is pressed, the setting will be saved
with the entered number. When the POWER switch is
pressed, the setting will not be saved.
When FEED is pressed: DIP SW-1=11001001 Saved.
When
ON/OFF
is pressed: DIP SW-1 Not Changed.
Even when entered numbers incorrectly, complete up to the
setting of SW-10.
The settings can be congured again later from SW-1.
4Now, shift to the setting of SW-2. The following message will
be printed.
DIP Switch setting mode.
DIP SW-2=11111101 Change S et ting?
Yes: Feed SW/No: Power SW
In the same manner as 2, press the POWER switch when
the numbers arranged as intended are printed or press the
FEED switch when other numbers are printed.
Similarly, proceed the following for SW-3, SW-4 and SW-10.
DIP SW-3=00100000 Change Setting?
DIP SW- 4=0111110 0 Change Set ting?
DIP SW-10 =11111111 Change Setting?
5The following message will be printed when completed up to
the setting of SW-10.
At this point, the settings can be recongured from the begin-
ning by pressing the FEED switch.
DIP Switch setting mode.
Continue : Feed SW / Quit : Power SW
●When all the numbers for SW-1 to SW-10 are correct:
ON/OFF
● When starting reconguration from the setting of SW-1
again: FEED →2
6The function setting is completed when the following is print-
ed and the power is turned off.
Setting Mode Finished.
Numbers may be different.
Numbers may be different.
Numbers may be different.
Numbers may be different.


