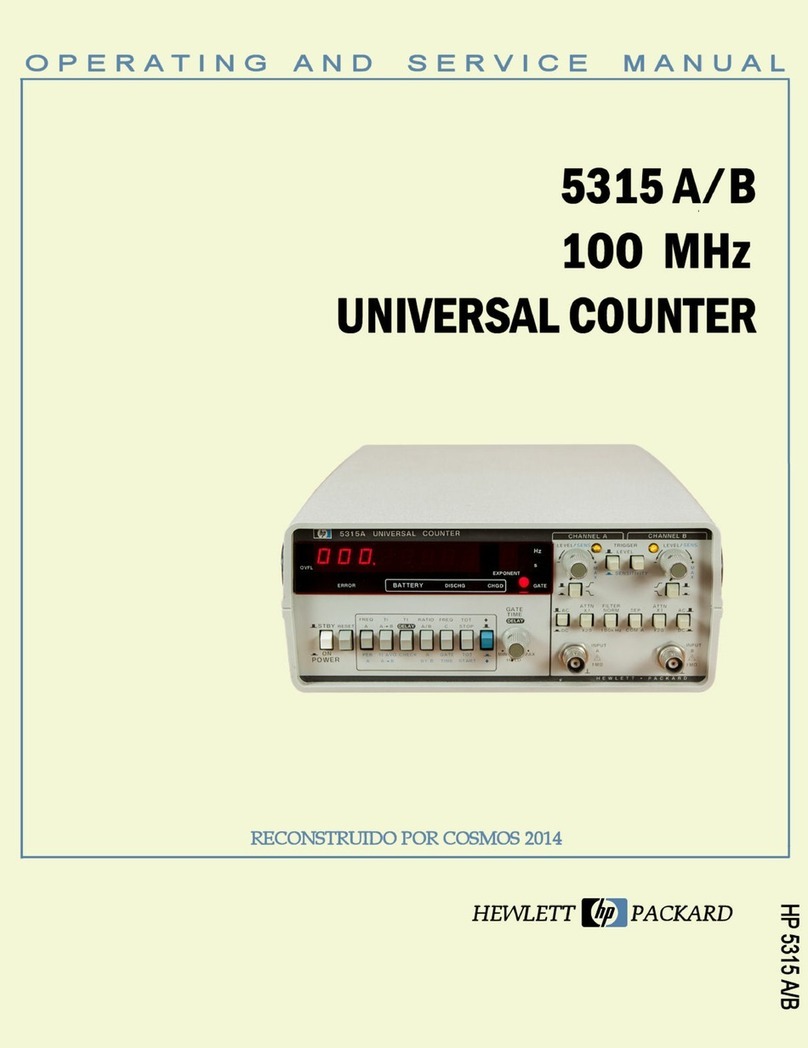
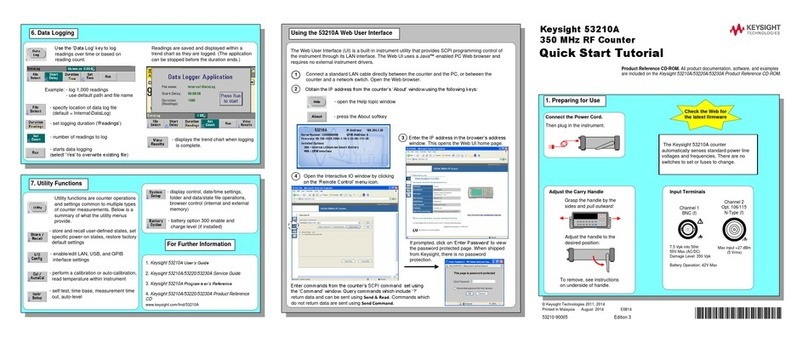
Keysight Technologies 53210A User manual

Keysight 53210A/53220A/
53230A 350 MHz Universal
Frequency Counter/Timer
Assembly Level
Service Guide

2 Keysight 53210A/53220A/53230A Assembly Level Service Guide
Notices
Copyright Notice
© Keysight Technologies 2011–2018
No part of this manual may be repro-
duced in any form or by any means
(including electronic storage and
retrieval or translation into a foreign
language) without prior agreement and
written consent from Keysight Technol-
ogies as governed by United States and
international copyright laws.
Trademarks
Microsoft and Windows are U.S.
registered trademarks of Microsoft
Corporation.
Manual Part Number
53220-90010
Edition
Edition 8, March 2018
Printed in:
Printed in Malaysia
Published by:
Keysight Technologies
Bayan Lepas Free Industrial Zone,
11900 Penang, Malaysia
Technology Licenses
The hardware and/or software
described in this document are fur-
nished under a license and may be
used or copied only in accordance with
the terms of such license.
Declaration of Conformity
Declarations of Conformity for this
product and for other Keysight prod-
ucts may be downloaded from the
Web. Go to http://www.keysight.com/
go/conformity. You can then search by
product number to find the latest Dec-
laration of Conformity.
U.S. Government Rights
The Software is “commercial computer
software,” as defined by Federal Acqui-
sition Regulation (“FAR”) 2.101. Pursu-
ant to FAR 12.212 and 27.405-3 and
Department of Defense FAR Supple-
ment (“DFARS”) 227.7202, the U.S.
government acquires commercial com-
puter software under the same terms
by which the software is customarily
provided to the public. Accordingly,
Keysight provides the Software to U.S.
government customers under its stan-
dard commercial license, which is
embodied in its End User License
Agreement (EULA), a copy of which can
be found at http://www.keysight.com/
find/sweula. The license set forth in the
EULA represents the exclusive authority
by which the U.S. government may use,
modify, distribute, or disclose the Soft-
ware. The EULA and the license set
forth therein, does not require or per-
mit, among other things, that Keysight:
(1) Furnish technical information
related to commercial computer soft-
ware or commercial computer software
documentation that is not customarily
provided to the public; or (2) Relinquish
to, or otherwise provide, the govern-
ment rights in excess of these rights
customarily provided to the public to
use, modify, reproduce, release, per-
form, display, or disclose commercial
computer software or commercial com-
puter software documentation. No
additional government requirements
beyond those set forth in the EULA
shall apply, except to the extent that
those terms, rights, or licenses are
explicitly required from all providers of
commercial computer software pursu-
ant to the FAR and the DFARS and are
set forth specifically in writing else-
where in the EULA. Keysight shall be
under no obligation to update, revise or
otherwise modify the Software. With
respect to any technical data as
defined by FAR 2.101, pursuant to FAR
12.211 and 27.404.2 and DFARS
227.7102, the U.S. government
acquires no greater than Limited Rights
as defined in FAR 27.401 or DFAR
227.7103-5 (c), as applicable in any
technical data.
Warranty
THE MATERIAL CONTAINED IN THIS
DOCUMENT IS PROVIDED “AS IS,”
AND IS SUBJECT TO BEING
CHANGED, WITHOUT NOTICE, IN
FUTURE EDITIONS. FURTHER, TO THE
MAXIMUM EXTENT PERMITTED BY
APPLICABLE LAW, KEYSIGHT DIS-
CLAIMS ALL WARRANTIES, EITHER
EXPRESS OR IMPLIED, WITH REGARD
TO THIS MANUAL AND ANY INFORMA-
TION CONTAINED HEREIN, INCLUD-
ING BUT NOT LIMITED TO THE
IMPLIED WARRANTIES OF MER-
CHANTABILITY AND FITNESS FOR A
PARTICULAR PURPOSE. KEYSIGHT
SHALL NOT BE LIABLE FOR ERRORS
OR FOR INCIDENTAL OR CONSE-
QUENTIAL DAMAGES IN CONNECTION
WITH THE FURNISHING, USE, OR
PERFORMANCE OF THIS DOCUMENT
OR OF ANY INFORMATION CON-
TAINED HEREIN. SHOULD KEYSIGHT
AND THE USER HAVE A SEPARATE
WRITTEN AGREEMENT WITH WAR-
RANTY TERMS COVERING THE MATE-
RIAL IN THIS DOCUMENT THAT
CONFLICT WITH THESE TERMS, THE
WARRANTY TERMS IN THE SEPARATE
AGREEMENT SHALL CONTROL.
Safety Information
CAUTION
A CAUTION notice denotes a hazard. It
calls attention to an operating proce-
dure, practice, or the like that, if not
correctly performed or adhered to,
could result in damage to the product
or loss of important data. Do not pro-
ceed beyond a CAUTION notice until
the indicated conditions are fully
understood and met.
WARNING
A WARNING notice denotes a hazard. It
calls attention to an operating proce-
dure, practice, or the like that, if not
correctly performed or adhered to,
could result in personal injury or death.
Do not proceed beyond a WARNING
notice until the indicated conditions are
fully understood and met.

Keysight 53210A/53220A/53230A Assembly Level Service Guide 3
Software Updates/Licenses
Periodically, Keysight releases software updates to fix known defects and
incorporate product enhancements. To search for software updates and the latest
documentation for your product, go to the product page at:
www.keysight.com/find/53210A
www.keysight.com/find/53220A
www.keysight.com/find/53230A
A portion of the software in this product is licensed under terms of the General
Public License Version 2 (“GPLv2”). The text of the license and source code can be
found at:
www.keysight.com/find/GPLV2
This product utilizes Microsoft Windows CE. Keysight highly recommends that all
Windows-based computers connected to Windows CE instruments utilize current
anti-virus software. For more information, go to the product page at:
www.keysight.com/find/53210A
www.keysight.com/find/53220A
www.keysight.com/find/53230A

4 Keysight 53210A/53220A/53230A Assembly Level Service Guide
Assistance
This product comes with the standard product warranty. Warranty options,
extended support contacts, product maintenance agreements and customer
assistance agreements are also available. Contact your nearest Keysight
Technologies Sales and Service office for further information on Keysight
Technologies' full line of Support Programs.
Certification
Keysight Technologies certifies that this product met its published specifications
at time of shipment from the factory. Keysight Technologies further certifies that
its calibration measurements are traceable to the United States National Institute
of Standards and Technology, to the extent allowed by the Institute's calibration
facility, and to the calibration facilities of other International Standards
Organization members.
Exclusive Remedies
The remedies provided herein are the customer's sole and exclusive remedies.
Keysight Technologies shall not be liable for any direct, indirect, special,
incidental, or consequential damages, whether based on contract, tort, or any
other legal theory.

Keysight 53210A/53220A/53230A Assembly Level Service Guide 5
Lithium Battery Recycling
The 53210A/53220A/53230A counters contain a 3 V “coin cell” lithium battery.
Keysight recommends that this battery be replaced every year at the instrument’s
1-year calibration interval. Replacement procedures are provided in the 53210A/
53220A/53230A Service Guide.
Option 300 provides battery operation of the 53210A/53220A/53230A using a 12
lithium battery. Performance of this battery will degrade over time as a function of
the number of battery charge/discharge cycles.
Refer to local, state, or Federal regulations when disposing of, or recycling either
battery.
Safety Symbols
The following symbols on the instrument and in the documentation indicate
precautions which must be taken to maintain safe operation of the instrument.
Standby Power. Unit is not completely
disconnected from AC mains when
power switch is in standby position.
Frame or chassis (ground) terminal
Caution, risk of danger (refer to this
manual for specific Warning or Caution
information)
IEC Measurement Category I. Do NOT
connect inputs to AC mains or to
circuits derived from AC mains.
CAT I

6 Keysight 53210A/53220A/53230A Assembly Level Service Guide
Safety Information
The following general safety precautions must be observed during all phases of
operation of this instrument. Failure to comply with these precautions or with
specific warnings or operating instructions in the product manuals violates safety
standards of design, manufacture, and intended use of the instrument. Keysight
Technologies assumes no liability for the customer's failure to comply with these
requirements.
General
Do not use this product in any manner not specified by the manufacturer. The
protective features of this product may be impaired if it is used in a manner not
specified in the operation instructions.
Before applying power
Verify that all safety precautions are taken. Note the instrument's external
markings described under "Safety Symbols".
Ground the instrument
The Keysight 53210A/53220A/53230A is provided with a grounding-type power
plug. The instrument chassis and cover must be connected to an electrical ground
to minimize shock hazard. The ground pin must be firmly connected to an
electrical ground (safety ground) terminal at the power outlet. Any interruption of
the protective (grounding) conductor or disconnection of the protective earth
terminal will cause a potential shock hazard that could result in personal injury.
Fuses
The Keysight 53210A/53220A/53230A is provided with an internal line fuse
appropriate for the line voltages listed on the instrument. This fuse is not user
accessible.

Keysight 53210A/53220A/53230A Assembly Level Service Guide 7
Do not operate in an explosive atmosphere
Do not operate the instrument in the presence of flammable gases or fumes.
Do not operate near flammable liquids
Do not operate the instrument in the presence of flammable liquids or near
containers of such liquids.
Do not remove the instrument cover
Only qualified, service-trained personnel who are aware of the hazards involved
should remove instrument covers. Always disconnect the power cable and any
external circuits before removing the instrument cover.
Do not modify the instrument
Do not install substitute parts or perform any unauthorized modification to the
product. Return the product to a Keysight Sales and Service Office for service and
repair to ensure that safety features are maintained.
In case of damage
Instruments that appear damaged or defective should be made inoperative and
secured against unintended operation until they can be repaired by qualified
service personnel.
Cleaning the instrument
Clean the outside of the instrument with a soft, lint-free, slightly-dampened cloth.
Do not use detergents or chemical solvents.

8 Keysight 53210A/53220A/53230A Assembly Level Service Guide
Protection limits
The Keysight 53210A/53220A/53230A 350 MHz Universal Frequency Counter/
Timer provides protection circuitry to prevent damage to the instrument and to
protect against the danger of electric shock, provided the Protection Limits are
not exceeded and the instrument is properly grounded. To ensure safe operation
of the instrument, do not exceed the Protection Limits defined on the front panel:
WARNING
Do not connect the input channels of the 53210A/53220A/53230A to AC
line-voltage mains or to circuits derived from AC mains. The instrument
must be used in CAT I (isolated from mains) applications only. Do not use in
other IEC Measurement Category (CAT II, CAT III, or CAT IV) applications.
Failure to observe these precautions may result in electric shock and serious
personal injury.
WARNING
The BNC shells of the input terminals are connected to the instrument
chassis. Verify signal polarity before making any connections to the input
terminals.
1 Watt Max into 50W
!
Channel / Setup
WARNING
During battery operation, the maximum measured signal supplied by the
user is +42 V.
WARNING
Product Options 201/202 add parallel Channel 1 and Channel 2 inputs to the
rear panel of the instrument. Signals on the center conductor of either
panel’s channel BNCs are also present on the corresponding center
conductor of the BNC on the opposite panel.

Keysight 53210A/53220A/53230A Assembly Level Service Guide 9
Installing the instrument
The Keysight 53210A/53220A/53230A operates in the following line-voltage
ranges:
100 V to 240 V, 50 Hz to 60 Hz
100 V to 127 V, 440 Hz
90 VA Max
Instrument ventilation is through the sides and rear. Do not obstruct the
ventilation holes in any of these locations.
Battery operation
When operating the 53210A or 53220A under battery power (Option 300), failure
to observe the following warnings may result in damage to the instrument,
electric shock, and serious personal injury:
WARNING
Connect the instrument chassis to earth ground during battery operation to
minimize shock hazard. Any interruption or disconnection of the protective
earth terminal will cause a potential shock hazard that could result in
personal injury.
WARNING
Under battery power, the instrument chassis may float to the potential of the
measured signal supplied by the user.

10 Keysight 53210A/53220A/53230A Assembly Level Service Guide
Waste Electrical and Electronic Equipment (WEEE) Directive
This instrument complies with the WEEE Directive marking requirement. This
affixed product label indicates that you must not discard this electrical or
electronic product in domestic household waste.
Product category:
With reference to the equipment types in the WEEE directive Annex 1, this
instrument is classified as a “Monitoring and Control Instrument” product.
The affixed product label is as shown below.
Do not dispose in domestic household waste.
To return this unwanted instrument, contact your nearest Keysight Service Center,
or visit http://about.keysight.com/en/companyinfo/environment/takeback.shtml
for more information.
Sales and Technical Support
To contact Keysight for sales and technical support, refer to the support links on
the following Keysight websites:
–www.keysight.com/find/53210A
www.keysight.com/find/53220A
www.keysight.com/find/53220A
(product-specific information and support, software and
documentation updates)
–www.keysight.com/find/assist
(worldwide contact information for repair and service)

Keysight 53210A/53220A/53230A Assembly Level Service Guide 11
Table of Contents
Software Updates/Licenses . . . . . . . . . . . . . . . . . . . . . . . . . . . . . . . . . . .3
Assistance . . . . . . . . . . . . . . . . . . . . . . . . . . . . . . . . . . . . . . . . . . . . . . . . .4
Certification . . . . . . . . . . . . . . . . . . . . . . . . . . . . . . . . . . . . . . . . . . . . . . . .4
Exclusive Remedies . . . . . . . . . . . . . . . . . . . . . . . . . . . . . . . . . . . . . . . . .4
Lithium Battery Recycling . . . . . . . . . . . . . . . . . . . . . . . . . . . . . . . . . . . .5
Safety Symbols . . . . . . . . . . . . . . . . . . . . . . . . . . . . . . . . . . . . . . . . . . . . .5
Safety Information . . . . . . . . . . . . . . . . . . . . . . . . . . . . . . . . . . . . . . . . . .6
General . . . . . . . . . . . . . . . . . . . . . . . . . . . . . . . . . . . . . . . . . . . . . . . . .6
Before applying power . . . . . . . . . . . . . . . . . . . . . . . . . . . . . . . . . . . . .6
Ground the instrument . . . . . . . . . . . . . . . . . . . . . . . . . . . . . . . . . . . .6
Fuses . . . . . . . . . . . . . . . . . . . . . . . . . . . . . . . . . . . . . . . . . . . . . . . . . .6
Do not operate in an explosive atmosphere . . . . . . . . . . . . . . . . . . . .7
Do not operate near flammable liquids . . . . . . . . . . . . . . . . . . . . . . . .7
Do not remove the instrument cover . . . . . . . . . . . . . . . . . . . . . . . . .7
Do not modify the instrument . . . . . . . . . . . . . . . . . . . . . . . . . . . . . . .7
In case of damage . . . . . . . . . . . . . . . . . . . . . . . . . . . . . . . . . . . . . . . .7
Cleaning the instrument . . . . . . . . . . . . . . . . . . . . . . . . . . . . . . . . . . .7
Protection limits . . . . . . . . . . . . . . . . . . . . . . . . . . . . . . . . . . . . . . . . . .8
Installing the instrument . . . . . . . . . . . . . . . . . . . . . . . . . . . . . . . . . . .9
Battery operation . . . . . . . . . . . . . . . . . . . . . . . . . . . . . . . . . . . . . . . . .9
Waste Electrical and Electronic Equipment (WEEE) Directive . . . . . . .10
Product category: . . . . . . . . . . . . . . . . . . . . . . . . . . . . . . . . . . . . . . .10
Sales and Technical Support . . . . . . . . . . . . . . . . . . . . . . . . . . . . . . . . .10
1PerformanceTests
Introduction . . . . . . . . . . . . . . . . . . . . . . . . . . . . . . . . . . . . . . . . . . . . . .24
Chapter overview . . . . . . . . . . . . . . . . . . . . . . . . . . . . . . . . . . . . . . . .25
Recommended calibration cycle . . . . . . . . . . . . . . . . . . . . . . . . . . . .27
Internal auto-calibration . . . . . . . . . . . . . . . . . . . . . . . . . . . . . . . . . .27
Equipment required . . . . . . . . . . . . . . . . . . . . . . . . . . . . . . . . . . . . . .28
Power-On Test . . . . . . . . . . . . . . . . . . . . . . . . . . . . . . . . . . . . . . . . . . . .29

12 Keysight 53210A/53220A/53230A Assembly Level Service Guide
Self-Test (Q) . . . . . . . . . . . . . . . . . . . . . . . . . . . . . . . . . . . . . . . . . . . . . . 31
Run internal self-test . . . . . . . . . . . . . . . . . . . . . . . . . . . . . . . . . . . . . 31
Keysight 53210A/53220A/53230A Operational Verification . . . . . . . . . 33
Frequency checks . . . . . . . . . . . . . . . . . . . . . . . . . . . . . . . . . . . . . . . 33
Termination checks (optional) . . . . . . . . . . . . . . . . . . . . . . . . . . . . . . 35
Keysight 53210A/53220A/53230A Complete Performance Tests . . . . 37
Test 1: (Q) Absolute time base . . . . . . . . . . . . . . . . . . . . . . . . . . . . . 38
Test 2: (Q) Frequency accuracy - channels 1 and 2 . . . . . . . . . . . . . 43
Test 3: Single period . . . . . . . . . . . . . . . . . . . . . . . . . . . . . . . . . . . . . 49
Test 4: (Q) Pulse width . . . . . . . . . . . . . . . . . . . . . . . . . . . . . . . . . . . 55
Test 5: (Q) Time interval . . . . . . . . . . . . . . . . . . . . . . . . . . . . . . . . . . 60
Test 6a: (Q) Frequency accuracy - channel 2/3, option 106
(6 GHz microwave channel) . . . . . . . . . . . . . . . . . . . . . . . . . . . . . 65
Test 6b: (Q) Frequency accuracy - channel 2/3, option 115
(15 GHz microwave channel) . . . . . . . . . . . . . . . . . . . . . . . . . . . . 71
Test 7a: (Q) Pulse burst frequency - 53230A channel 3 option 150
with option 106 . . . . . . . . . . . . . . . . . . . . . . . . . . . . . . . . . . . . . . . 77
Test 7c: (Q) Pulse burst frequency - 53230A channel 3 option 150
with option 115 . . . . . . . . . . . . . . . . . . . . . . . . . . . . . . . . . . . . . . . 83
Keysight 53210A/53220A/53230A Operational Verification and
Performance Test Record . . . . . . . . . . . . . . . . . . . . . . . . . . . . . . . . . 89
Keysight 53210A/53220A/53230A Performance Test Record
(Tests 1 to 7) . . . . . . . . . . . . . . . . . . . . . . . . . . . . . . . . . . . . . . . . . . . 90
2Service
Introduction . . . . . . . . . . . . . . . . . . . . . . . . . . . . . . . . . . . . . . . . . . . . . 100
Returning the counter to Keysight Technologies for service . . . . . 100
About the Keysight 53210A/53220A/53230A calibration menu . . 100
The Keysight 53210A/53220A/53230A calibration procedures . . 100
Pre-troubleshooting information . . . . . . . . . . . . . . . . . . . . . . . . . . 100
Troubleshooting information . . . . . . . . . . . . . . . . . . . . . . . . . . . . . . 100
Returning the Instrument to Keysight Technologies for Service . . . . 104
Operating checklist . . . . . . . . . . . . . . . . . . . . . . . . . . . . . . . . . . . . . 104
Is the instrument inoperative? . . . . . . . . . . . . . . . . . . . . . . . . . . . . 104

Keysight 53210A/53220A/53230A Assembly Level Service Guide 13
Does the instrument fail self-test? . . . . . . . . . . . . . . . . . . . . . . . . .104
Types of service available . . . . . . . . . . . . . . . . . . . . . . . . . . . . . . . .104
Extended service contracts . . . . . . . . . . . . . . . . . . . . . . . . . . . . . . .104
Obtaining repair service (worldwide) . . . . . . . . . . . . . . . . . . . . . . . .105
To provide repair information . . . . . . . . . . . . . . . . . . . . . . . . . . . . .106
To pack in the original packaging materials . . . . . . . . . . . . . . . . . .107
To pack in commercially available materials . . . . . . . . . . . . . . . . .107
Warranty . . . . . . . . . . . . . . . . . . . . . . . . . . . . . . . . . . . . . . . . . . . . .108
About the Keysight 53210A/53220A/53230A Calibration Menu . . . .109
Overview of the Keysight 53210A/53220A/53230A calibration
menu . . . . . . . . . . . . . . . . . . . . . . . . . . . . . . . . . . . . . . . . . . . . . .109
To get help with the calibration menu functions . . . . . . . . . . . . . .111
To view the calibration menu and security status from the counter
front panel . . . . . . . . . . . . . . . . . . . . . . . . . . . . . . . . . . . . . . . . . .113
To lock the counter against calibration . . . . . . . . . . . . . . . . . . . . . .114
To unlock the counter for calibration: . . . . . . . . . . . . . . . . . . . . . . .116
To change to a new security code . . . . . . . . . . . . . . . . . . . . . . . . . .117
The Keysight 53210A/53220A/53230A Calibration Procedures . . . . .118
Equipment required . . . . . . . . . . . . . . . . . . . . . . . . . . . . . . . . . . . . .118
Determine the counter firmware version . . . . . . . . . . . . . . . . . . . . .119
Calibration cycle . . . . . . . . . . . . . . . . . . . . . . . . . . . . . . . . . . . . . . .121
Calibration string: . . . . . . . . . . . . . . . . . . . . . . . . . . . . . . . . . . . . . .121
Internal reference oscillator calibration . . . . . . . . . . . . . . . . . . . . .121
Summary of oscillator calibration procedure: . . . . . . . . . . . . . . . . .126
Remote oscillator calibration summary: . . . . . . . . . . . . . . . . . . . . .126
Voltage calibration (internal DACs) . . . . . . . . . . . . . . . . . . . . . . . . .127
Option 106 microwave channel frequency calibration . . . . . . . . . .133
Option 115 microwave channel frequency calibration . . . . . . . . . .140
Internal auto-calibration . . . . . . . . . . . . . . . . . . . . . . . . . . . . . . . . .147
To view the calibration count . . . . . . . . . . . . . . . . . . . . . . . . . . . . .150
Resetting the security code to a null . . . . . . . . . . . . . . . . . . . . . . . .151
Pre-Troubleshooting Information . . . . . . . . . . . . . . . . . . . . . . . . . . . . .152
Safety considerations . . . . . . . . . . . . . . . . . . . . . . . . . . . . . . . . . . .152
Recommended test equipment . . . . . . . . . . . . . . . . . . . . . . . . . . . .153
Repair considerations . . . . . . . . . . . . . . . . . . . . . . . . . . . . . . . . . . .154

14 Keysight 53210A/53220A/53230A Assembly Level Service Guide
After service considerations . . . . . . . . . . . . . . . . . . . . . . . . . . . . . . 155
Troubleshooting the Counter . . . . . . . . . . . . . . . . . . . . . . . . . . . . . . . . 160
Unit is inoperative . . . . . . . . . . . . . . . . . . . . . . . . . . . . . . . . . . . . . . 160
Unit fails self-test . . . . . . . . . . . . . . . . . . . . . . . . . . . . . . . . . . . . . . 160
Power supply check . . . . . . . . . . . . . . . . . . . . . . . . . . . . . . . . . . . . 160
Checking the battery and battery charger . . . . . . . . . . . . . . . . . . . 164
Performing the counter self-test . . . . . . . . . . . . . . . . . . . . . . . . . . . 169
To determine the counter firmware version . . . . . . . . . . . . . . . . . . 170
Reseat the boards . . . . . . . . . . . . . . . . . . . . . . . . . . . . . . . . . . . . . . 172
Re-run the counter self test . . . . . . . . . . . . . . . . . . . . . . . . . . . . . . 173
Error Messages . . . . . . . . . . . . . . . . . . . . . . . . . . . . . . . . . . . . . . . . . . . 174
Command errors (-100...) . . . . . . . . . . . . . . . . . . . . . . . . . . . . . . . . 174
Execution errors (-200...) . . . . . . . . . . . . . . . . . . . . . . . . . . . . . . . . 174
Hardware errors (-240, -241, -250...) . . . . . . . . . . . . . . . . . . . . . . . 175
Device-specific errors (-300..., +800) . . . . . . . . . . . . . . . . . . . . . . . 176
Query errors (-400...) . . . . . . . . . . . . . . . . . . . . . . . . . . . . . . . . . . . . 177
Calibration errors (700...) . . . . . . . . . . . . . . . . . . . . . . . . . . . . . . . . 177
Self-test errors (901...) . . . . . . . . . . . . . . . . . . . . . . . . . . . . . . . . . . 178
3 Replacing Assemblies
Introduction . . . . . . . . . . . . . . . . . . . . . . . . . . . . . . . . . . . . . . . . . . . . . 182
Tools Required . . . . . . . . . . . . . . . . . . . . . . . . . . . . . . . . . . . . . . . . . . . 183
Do this first . . . . . . . . . . . . . . . . . . . . . . . . . . . . . . . . . . . . . . . . . . . 183
Electrostatic discharge . . . . . . . . . . . . . . . . . . . . . . . . . . . . . . . . . . 184
To Remove the Cover and Rear Bezel . . . . . . . . . . . . . . . . . . . . . . . . . 185
To Remove the Internal DC Battery Assembly (Option 300) . . . . . . . . 187
To Remove the GPIB Assembly . . . . . . . . . . . . . . . . . . . . . . . . . . . . . . 189
To Remove a 6.0 GHz or 15.0 GHz Microwave Channel Assembly
(Options 106/115) . . . . . . . . . . . . . . . . . . . . . . . . . . . . . . . . . . . . . . 190
Re-installing the microwave channel assembly . . . . . . . . . . . . . . . 190
To Remove the Processor Board . . . . . . . . . . . . . . . . . . . . . . . . . . . . . 193
To Remove the Front Panel Assembly . . . . . . . . . . . . . . . . . . . . . . . . . 194
To remove the display assembly from the front panel . . . . . . . . . . 197

Keysight 53210A/53220A/53230A Assembly Level Service Guide 15
To Remove the Motherboard . . . . . . . . . . . . . . . . . . . . . . . . . . . . . . . .198
To Remove the AC Power Supply Assembly . . . . . . . . . . . . . . . . . . . .199
4 Retrofitting Options
Introduction . . . . . . . . . . . . . . . . . . . . . . . . . . . . . . . . . . . . . . . . . . . . .202
Tools required . . . . . . . . . . . . . . . . . . . . . . . . . . . . . . . . . . . . . . . . .202
Do This first . . . . . . . . . . . . . . . . . . . . . . . . . . . . . . . . . . . . . . . . . . .203
To Retrofit Ultra-High Stability Timebase (Option 010) . . . . . . . . . . .204
To Retrofit the GPIB Connector . . . . . . . . . . . . . . . . . . . . . . . . . . . . . .205
GPIB connector parts (P/N 53200U-400) . . . . . . . . . . . . . . . . . . . .205
Preliminary steps . . . . . . . . . . . . . . . . . . . . . . . . . . . . . . . . . . . . . . .205
GPIB connector installation procedure . . . . . . . . . . . . . . . . . . . . . .206
To Retrofit the Internal Battery DC Power (Option 300) . . . . . . . . . . .207
Option 300 DC power input assembly parts . . . . . . . . . . . . . . . . . .207
Preliminary steps . . . . . . . . . . . . . . . . . . . . . . . . . . . . . . . . . . . . . . .207
Battery assembly installation procedure . . . . . . . . . . . . . . . . . . . . .208
To Retrofit the 53210A (Channel 1) or 53220A/53230A
(Channels 1/2) Rear Panel Inputs (Option 201) . . . . . . . . . . . . . . .213
Option 201 rear panel channel 1/2 parts . . . . . . . . . . . . . . . . . . . .213
Preliminary steps . . . . . . . . . . . . . . . . . . . . . . . . . . . . . . . . . . . . . . .213
Channels 1/2 rear panel retrofit procedure . . . . . . . . . . . . . . . . . .215
To Retrofit the 53210A Channel 2 Front Panel Input
(Option 106 or Option 115, plus Front Panel Option 202) . . . . . . .217
Option 106/115 channel 2 parts . . . . . . . . . . . . . . . . . . . . . . . . . . .217
Option 202 front panel channel 2 parts . . . . . . . . . . . . . . . . . . . . .217
Preliminary steps . . . . . . . . . . . . . . . . . . . . . . . . . . . . . . . . . . . . . . .218
Channel 2 front panel retrofit procedure (53210A) . . . . . . . . . . . .220
To Retrofit the 53210A Channel 2 Rear Panel Input, 6.0 GHz (Option 106)
or 15.0 GHz (Option 115) plus Rear Panel Option 203 . . . . . . . . . .227
Option 106/115 channel 2 parts . . . . . . . . . . . . . . . . . . . . . . . . . . .227
Option 203 rear panel channel 2 parts . . . . . . . . . . . . . . . . . . . . . .227
Preliminary steps . . . . . . . . . . . . . . . . . . . . . . . . . . . . . . . . . . . . . . .228
Channel 2 rear panel retrofit procedure (53210A) . . . . . . . . . . . . .230

16 Keysight 53210A/53220A/53230A Assembly Level Service Guide
To Retrofit the 53220A/53230A Channel 3 Input, 6.0 GHz
(Option 106) or 15.0 GHz (Option 115) plus Front panel
option 202 . . . . . . . . . . . . . . . . . . . . . . . . . . . . . . . . . . . . . . . . . . . . 232
Option 202 front panel channel 3 parts . . . . . . . . . . . . . . . . . . . . . 232
Preliminary steps . . . . . . . . . . . . . . . . . . . . . . . . . . . . . . . . . . . . . . . 233
Front panel installation procedure (Option 202 only) . . . . . . . . . . 235
To Retrofit the 53220A/53230A Channel 3 Input, 6.0 GHz
(Option 106) or 15.0 GHz (Option 115) plus Rear Panel
Option 203 . . . . . . . . . . . . . . . . . . . . . . . . . . . . . . . . . . . . . . . . . . . . 242
Option 203 rear panel channel 3 parts . . . . . . . . . . . . . . . . . . . . . . 242
Preliminary steps . . . . . . . . . . . . . . . . . . . . . . . . . . . . . . . . . . . . . . . 243
Rear panel installation procedure (Option 203 only) . . . . . . . . . . . 245
To Retrofit Option 150 (Pulse Microwave Measurements) for the
53230A . . . . . . . . . . . . . . . . . . . . . . . . . . . . . . . . . . . . . . . . . . . . . . . 247
Retrofitting procedure . . . . . . . . . . . . . . . . . . . . . . . . . . . . . . . . . . . 247
5ReplaceableParts
Introduction . . . . . . . . . . . . . . . . . . . . . . . . . . . . . . . . . . . . . . . . . . . . . 250
Contacting Keysight Technologies . . . . . . . . . . . . . . . . . . . . . . . . . . . 251
By telephone (in the United States): . . . . . . . . . . . . . . . . . . . . . . . . 251
For mail correspondence, use the address below: . . . . . . . . . . . . . 251
How To Order A Part . . . . . . . . . . . . . . . . . . . . . . . . . . . . . . . . . . . . . . 252
Parts Identification . . . . . . . . . . . . . . . . . . . . . . . . . . . . . . . . . . . . . 252
Replaceable Parts . . . . . . . . . . . . . . . . . . . . . . . . . . . . . . . . . . . . . . . . 254
6Backdating
Introduction . . . . . . . . . . . . . . . . . . . . . . . . . . . . . . . . . . . . . . . . . . . . . 260
Serial numbers . . . . . . . . . . . . . . . . . . . . . . . . . . . . . . . . . . . . . . . . 260
Backdating Firmware . . . . . . . . . . . . . . . . . . . . . . . . . . . . . . . . . . . . . . 262
To determine the counter firmware version . . . . . . . . . . . . . . . . . . 262
Procedure Changes . . . . . . . . . . . . . . . . . . . . . . . . . . . . . . . . . . . . . . . 264
Information concerning Option 106 “Microwave Input”, FW
Rev (27.0) . . . . . . . . . . . . . . . . . . . . . . . . . . . . . . . . . . . . . . . . . . . 264

Keysight 53210A/53220A/53230A Assembly Level Service Guide 17
Option 106 microwave channel frequency calibration . . . . . . . . . .264
Backdating Hardware . . . . . . . . . . . . . . . . . . . . . . . . . . . . . . . . . . . . . .271
Backdating Specifications . . . . . . . . . . . . . . . . . . . . . . . . . . . . . . . . . .272

18 Keysight 53210A/53220A/53230A Assembly Level Service Guide
THIS PAGE HAS BEEN INTENTIONALLY LEFT BLANK.

Keysight 53210A/53220A/53230A Assembly Level Service Guide 19
List of Figures
Figure 1-1 Operational verification setup for Keysight
53210A/220A/230A . . . . . . . . . . . . . . . . . . . . . . . .33
Figure 1-2 Termination Check Setup . . . . . . . . . . . . . . . . . . . . . . .35
Figure 1-3 Absolute timebase test setup . . . . . . . . . . . . . . . . . . .39
Figure 1-4 Test setup for channel 1/2 frequency accuracy tests .43
Figure 1-5 Test Setup for Single Period . . . . . . . . . . . . . . . . . . . .50
Figure 1-6 Pulse width test setup . . . . . . . . . . . . . . . . . . . . . . . . .56
Figure 1-7 Time interval (channel 1 to 2) test setup . . . . . . . . . . .61
Figure 1-8 Option 106 ( 6 GHz ) microwave channel 2/3 test
setup . . . . . . . . . . . . . . . . . . . . . . . . . . . . . . . . . . . .66
Figure 1-9 Option 115 ( 15 GHz ) microwave channel 2/3 test
setup . . . . . . . . . . . . . . . . . . . . . . . . . . . . . . . . . . . .72
Figure 1-10 Option 106/150 microwave channel 3 test setup . . . .78
Figure 1-11 Option 115/150 microwave channel 3 test setup . . . .84
Figure 2-1 The front panel at a glance . . . . . . . . . . . . . . . . . . . .101
Figure 2-2 Front panel display . . . . . . . . . . . . . . . . . . . . . . . . . . .102
Figure 2-3 Calibration procedure summary . . . . . . . . . . . . . . . .112
Figure 2-4 Information screen . . . . . . . . . . . . . . . . . . . . . . . . . . .120
Figure 2-5 Oscillator calibration setup . . . . . . . . . . . . . . . . . . . .122
Figure 2-6 DC voltage source and DMM connections . . . . . . . .130
Figure 2-7 Microwave source connection to Channel 3 . . . . . . .133
Figure 2-8 Microwave source connection to Channel 3 . . . . . . .141
Figure 2-9 Counter top internal view . . . . . . . . . . . . . . . . . . . . . .158
Figure 2-10 Bottom internal view . . . . . . . . . . . . . . . . . . . . . . . . .159
Figure 2-11 ac Power Supply Testpoint Locations on the
Motherboard assembly (top view, internal battery
removed, test points visible.) . . . . . . . . . . . . . . . .162
Figure 2-12 Battery folded in the service position . . . . . . . . . . . .165
Figure 2-13 Test Button and Charge Indicator . . . . . . . . . . . . . . .166
Figure 3-1 Handle removal . . . . . . . . . . . . . . . . . . . . . . . . . . . . .185
Figure 3-2 Rear Bezel And Cover Removal . . . . . . . . . . . . . . . . .186
Figure 3-3 Battery assembly temporary position for service or
Removal . . . . . . . . . . . . . . . . . . . . . . . . . . . . . . . . .188
Figure 3-4 Top view of counter showing GPIB assembly . . . . . .189

20 Keysight 53210A/53220A/53230A Assembly Level Service Guide
Figure 3-5 Front flange resting on plastic tab . . . . . . . . . . . . . . 191
Figure 3-6 Processor PC board . . . . . . . . . . . . . . . . . . . . . . . . . . 193
Figure 3-7 Front rubber bumper removal . . . . . . . . . . . . . . . . . . 194
Figure 3-8 Front panel removal . . . . . . . . . . . . . . . . . . . . . . . . . . 195
Figure 4-1 Connector Locking Tab . . . . . . . . . . . . . . . . . . . . . . . 208
Figure 4-2 Jumper cable installed . . . . . . . . . . . . . . . . . . . . . . . 209
Figure 4-3 Digital and Y-cables. . . . . . . . . . . . . . . . . . . . . . . . . . 210
Figure 4-4 Test button and charge indicator . . . . . . . . . . . . . . . 210
Figure 4-5 Battery assembly connectors . . . . . . . . . . . . . . . . . . 211
Figure 4-6 Battery assembly held by three small tabs . . . . . . . . 212
Figure 4-7 Option 201 rear input channels 1 and 2 . . . . . . . . . . 215
Figure 4-8 53210A channel 2 front panel Option 106/202 . . . . 219
Figure 4-9 Processor printed circuit board . . . . . . . . . . . . . . . . . 220
Figure 4-10 T20 TORX screw on motherboard . . . . . . . . . . . . . . . 221
Figure 4-11 Connector-adapter installation . . . . . . . . . . . . . . . . . 222
Figure 4-12 Semi-rigid cable position . . . . . . . . . . . . . . . . . . . . . . 223
Figure 4-13 Front flange resting on plastic tab . . . . . . . . . . . . . . 225
Figure 4-14 53210A channel 2 rear panel Option 106/203 . . . . . 229
Figure 4-15 Channel 2 assembly installed on top of the
motherboard, with the SMA edge connector
pointing toward the rear of the counter. . . . . . . . 230
Figure 4-16 53220A/53230A Option 106/202. . . . . . . . . . . . . . . . 234
Figure 4-17 Processor printed circuit board. . . . . . . . . . . . . . . . . 235
Figure 4-18 T20 TORX screw on motherboard . . . . . . . . . . . . . . . 236
Figure 4-19 Connector-adapter parts . . . . . . . . . . . . . . . . . . . . . . 238
Figure 4-20 Semi-rigid cable position . . . . . . . . . . . . . . . . . . . . . . 239
Figure 4-21 53220A/53230A rear panel option 106/203. . . . . . . 244
Figure 4-22 Channel 3 assembly installed on top of the
motherboard, with the female SMA edge
connector pointing toward the rear. . . . . . . . . . . 245
Figure 5-1 Keysight 53210A/53220A/53230A Counters, top view
(cover off) . . . . . . . . . . . . . . . . . . . . . . . . . . . . . . . 257
Figure 5-2 Keysight 53210A/53220A/53230A Counters, bottom
view (cover off) . . . . . . . . . . . . . . . . . . . . . . . . . . . 258
Figure 6-1 Information screen . . . . . . . . . . . . . . . . . . . . . . . . . . . 263
Figure 6-2 Microwave source connection to channel 3 . . . . . . . 265
Other manuals for 53210A
1
This manual suits for next models
2
Table of contents
Other Keysight Technologies Cash Counter manuals
Keysight Technologies
Keysight Technologies 53210A User manual
Keysight Technologies
Keysight Technologies E1420B User manual
Keysight Technologies
Keysight Technologies VXI bus 75000 C Series User manual
Keysight Technologies
Keysight Technologies 53150A User manual

Keysight Technologies
Keysight Technologies 53150A User manual


