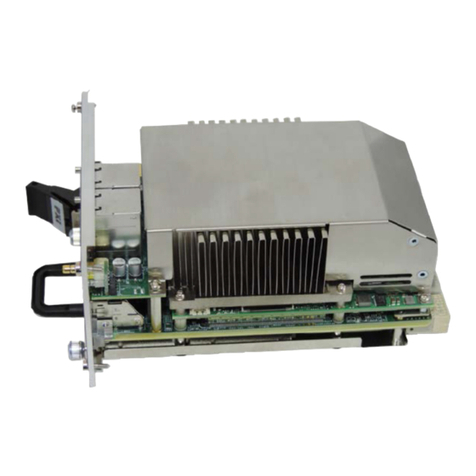
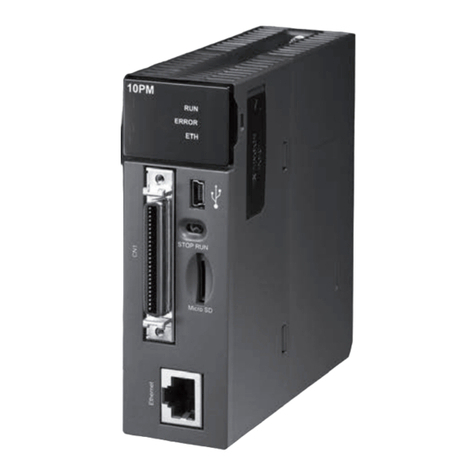
Keysight Technologies M9036A PXIe Quick start guide

M9036A PXIe Embedded
Controller BIOS
Upgrade or
Restore


iii
Notices
© Keysight Technologies, Inc. 2017
No part of this manual may be repro-
duced in any form or by any means
(including electronic storage and retrieval
or translation into a foreign language)
without prior agreement and written con-
sent from Keysight Technologies, Inc. as
governed by United States and interna-
tional copyright laws.
Manual Part Number
M9036-90021
Edition
Third Edition, June 2017
Printed in
Malaysia
Published by
Keysight Technologies, Inc.
900 S. Taft Ave.
Loveland, CO 80537 USA
Trademarks
PICMG®, Compact PCI® are registered
trademarks of the PCI Industrial Com-
puter Manufacturers Group.
AdvancedTCA®and ATCA are registered
trademarks of the PCI Industrial Com-
puter Manufacturers Group.
PCI-SIG®, PCI Express®, and PCIe®are
registered trademarks of PCI-SIG.
Technology Licenses
The hardware and/or software described
in this document are furnished under a
license and may be used or copied only in
accordance with the terms of such
license.
Declaration of Conformity
Declarations of Conformity for this prod-
uct and for other Keysight products may
be downloaded from the Web. Go to
http://keysight.com/go/conformity.
You can then search by product number
to find the latest Declaration of Confor-
mity.
U.S. Government Rights
The Software is “commercial computer
software,” as defined by Federal Acquisi-
tion Regulation (“FAR”) 2.101. Pursuant
to FAR 12.212 and 27.405-3 and Depart-
ment of Defense FAR Supplement
(“DFARS”) 227.7202, the U.S. govern-
ment acquires commercial computer
software under the same terms by which
the software is customarily provided to
the public. Accordingly, Keysight pro-
vides the Software to U.S. government
customers under its standard commercial
license, which is embodied in its End
User License Agreement (EULA), a copy
of which can be found at http://
www.keysight.com/find/sweula. The
license set forth in the EULA represents
the exclusive authority by which the U.S.
government may use, modify, distribute,
or disclose the Software. The EULA and
the license set forth therein, does not
require or permit, among other things,
that Keysight: (1) Furnish technical infor-
mation related to commercial computer
software or commercial computer soft-
ware documentation that is not custom-
arily provided to the public; or (2)
Relinquish to, or otherwise provide, the
government rights in excess of these
rights customarily provided to the public
to use, modify, reproduce, release, per-
form, display, or disclose commercial
computer software or commercial com-
puter software documentation. No addi-
tional government requirements beyond
those set forth in the EULA shall apply,
except to the extent that those terms,
rights, or licenses are explicitly required
from all providers of commercial com-
puter software pursuant to the FAR and
the DFARS and are set forth specifically
in writing elsewhere in the EULA. Key-
sight shall be under no obligation to
update, revise or otherwise modify the
Software. With respect to any technical
data as defined by FAR 2.101, pursuant
to FAR 12.211 and 27.404.2 and DFARS
227.7102, the U.S. government acquires
no greater than Limited Rights as defined
in FAR 27.401 or DFAR 227.7103-5 (c), as
applicable in any technical data.
Warranty
THE MATERIAL CONTAINED IN THIS
DOCUMENT IS PROVIDED “AS IS,” AND
IS SUBJECT TO BEING CHANGED,
WITHOUT NOTICE, IN FUTURE EDI-
TIONS. FURTHER, TO THE MAXIMUM
EXTENT PERMITTED BY APPLICABLE
LAW, KEYSIGHT DISCLAIMS ALL WAR-
RANTIES, EITHER EXPRESS OR IMPLIED,
WITH REGARD TO THIS MANUAL AND
ANY INFORMATION CONTAINED
HEREIN, INCLUDING BUT NOT LIMITED
TO THE IMPLIED WARRANTIES OF MER-
CHANTABILITY AND FITNESS FOR A
PARTICULAR PURPOSE. KEYSIGHT
SHALL NOT BE LIABLE FOR ERRORS OR
FOR INCIDENTAL OR CONSEQUENTIAL
DAMAGES IN CONNECTION WITH THE
FURNISHING, USE, OR PERFORMANCE
OF THIS DOCUMENT OR OF ANY INFOR-
MATION CONTAINED HEREIN. SHOULD
KEYSIGHT AND THE USER HAVE A SEP-
ARATE WRITTEN AGREEMENT WITH
WARRANTY TERMS COVERING THE
MATERIAL IN THIS DOCUMENT THAT
CONFLICT WITH THESE TERMS, THE
WARRANTY TERMS IN THE SEPARATE
AGREEMENT SHALL CONTROL.
Keysight Technologies does not warrant
third-party system-level (combination of
chassis, controllers, modules, etc.) per-
formance, safety, or regulatory compli-
ance unless specifically stated.
Safety Information
A CAUTION denotes a hazard. It calls
attention to an operating procedure
or practice that, if not correctly per-
formed or adhered to, could result in
damage to the product or loss of
important data. Do not proceed
beyond a CAUTION notice until the
indicated conditions are fully under-
stood and met.
A WARNING denotes a hazard. It
calls attention to an operating pro-
cedure or practice, that, if not cor-
rectly performed or adhered to,
could result in personal injury or
death. Do not proceed beyond a
WARNING notice until the indicated
conditions are fully understood and
met.

Safety Information
The following general safety precau-
tions must be observed during all
phases of operation of this instrument.
Failure to comply with these precau-
tions or with specific warnings or oper-
ating instructions in the product
manuals violates safety standards of
design, manufacture, and intended use
of the instrument. Keysight Technolo-
gies assumes no liability for the cus-
tomer's failure to comply with these
requirements.
General
Do not use this product in any manner not
specified by the manufacturer. The protec-
tive features of this product must not be
impaired if it is used in a manner specified in
the operation instructions.
Before Applying Power
Verify that all safety precautions are taken.
Make all connections to the unit before
applying power. Note the external markings
described under “Safety Symbols”.
Ground the Instrument
Keysight chassis’ are provided with a
grounding-type power plug. The
instrument chassis and cover must be
connected to an electrical ground to
minimize shock hazard. The ground pin
must be firmly connected to an electri-
cal ground (safety ground) terminal at
the power outlet. Any interruption of
the protective (grounding) conductor
or disconnection of the protective
earth terminal will cause a potential
shock hazard that could result in per-
sonal injury.
Do Not Operate in an Explosive
Atmosphere
Do not operate the module/chassis in
the presence of flammable gases or
fumes.
Do Not Operate Near Flammable
Liquids
Do not operate the module/chassis in
the presence of flammable liquids or
near containers of such liquids.
Cleaning
Clean the outside of the Keysight mod-
ule/chassis with a soft, lint-free,
slightly dampened cloth. Do not use
detergent or chemical solvents.
Do Not Remove Instrument Cover
Only qualified, service-trained person-
nel who are aware of the hazards
involved should remove instrument
covers. Always disconnect the power
cable and any external circuits before
removing the instrument cover.
Keep away from live circuits
Operating personnel must not remove
equipment covers or shields. Proce-
dures involving the removal of covers
and shields are for use by service-
trained personnel only. Under certain
conditions, dangerous voltages may
exist even with the equipment
switched off. To avoid dangerous elec-
trical shock, DO NOT perform proce-
dures involving cover or shield removal
unless you are qualified to do so.
DO NOT operate damaged
equipment
Whenever it is possible that the safety
protection features built into this prod-
uct have been impaired, either through
physical damage, excessive moisture,
or any other reason, REMOVE POWER
and do not use the product until safe
operation can be verified by service-
trained personnel. If necessary, return
the product to an Keysight Technolo-
gies Sales and Service Office for ser-
vice and repair to ensure the safety
features are maintained.
DO NOT block the primary
disconnect
The primary disconnect device is the
appliance connector/power cord when
a chassis used by itself, but when
installed into a rack or system the dis-
connect may be impaired and must be
considered part of the installation.
Do Not Modify the Instrument
Do not install substitute parts or per-
form any unauthorized modification to
the product. Return the product to an
Keysight Sales and Service Office to
ensure that safety features are main-
tained.
In Case of Damage
Instruments that appear damaged or
defective should be made inoperative
and secured against unintended oper-
ation until they can be repaired by
qualified service personnel
Do NOT block vents and fan exhaust:
To ensure adequate cooling and venti-
lation, leave a gap of at least 50mm
(2") around vent holes on both sides of
the chassis.
Do NOT operate with empty slots: To
ensure proper cooling and avoid dam-
aging equipment, fill each empty slot
with an AXIe filler panel module.
Do NOT stack free-standing chassis:
Stacked chassis should be rack-
mounted.
All modules are grounded through the
chassis: During installation, tighten
each module's retaining screws to
secure the module to the chassis and
to make the ground connection.
Operator is responsible to maintain
safe operating conditions. To ensure
safe operating conditions, modules
should not be operated beyond the
full temperature range specified in the
Environmental and physical specifica-
tion. Exceeding safe operating condi-
tions can result in shorter lifespan,
improper module performance and
user safety issues. When the modules
are in use and operation within the
specified full temperature range is not
maintained, module surface tempera-
tures may exceed safe handling con-
ditions which can cause discomfort or
burns if touched. In the event of a
module exceeding the full tempera-
ture range, always allow the module
to cool before touching or removing
modules from the chassis.
iv

Safety Symbols
A CAUTION denotes a hazard. It
calls attention to an operating
procedure or practice, that, if not
correctly performed or adhered to
could result in damage to the
product or loss of important data.
Do not proceed beyond a CAU-
TION notice until the indicated
conditions are fully understood
and met.
A WARNING denotes a hazard. It
calls attention to an operating
procedure or practice, that, if not
correctly performed or adhered to,
could result in personal injury or
death. Do not proceed beyond a
WARNING notice until the indi-
cated conditions are fully under-
stood and met.
Products display the following sym-
bols:
The CSA mark is a registered trade-
mark of the Canadian Standards Asso-
ciation and indicates compliance to
the standards laid out by them. Refer
to the product Declaration of Confor-
mity for details.
Notice for European Community: This
product complies with the relevant
European legal Directives: EMC Direc-
tive (2004/108/EC) and Low Voltage
Directive (2006/95/EC).
The Regulatory Compliance Mark
(RCM) mark is a registered trademark.
This signifies compliance with the Aus-
tralia EMC Framework regulations
under the terms of the Radio Commu-
nication Act of 1992.
ICES/NMB-001 indicates that this ISM
device complies with the Canadian
ICES-001.
This symbol represents the time period
during which no hazardous or toxic
substance elements are expected to
leak or deteriorate during normal use.
Forty years is the expected useful life
of this product.
South Korean Class A EMC Declara-
tion. this equipment is Class A suitable
for professional use and is for use in
electromagnetic environments outside
of the home.
Waste Electrical and
Electronic
Equipment (WEEE)
Directive
2002/96/EC
This product complies with the WEEE
Directive (2002/96/EC) marking
requirement. The affixed product label
(see below) indicates that you must not
discard this electrical/electronic prod-
uct in domestic household waste.
Product Category: With reference to
the equipment types in the WEEE
directive Annex 1, this product is clas-
sified as a “Monitoring and Control
instrumentation” product.
Do not dispose in domestic household
waste.
To return unwanted products, contact
your local Keysight office for more
information.
Warning, risk of electric
shock
Refer to manual for addi-
tional safety information.
Earth Ground.
Chassis Ground.
Alternating Current (AC).
Standby Power. Unit is not
completely disconnected
from AC mains when
switch is in standby.
Antistatic precautions
should be taken.
CAT I
CAT II
CAT III
CAT IV
IEC Measurement Cate-
gory I, II, III, or IV
For localized Safety Warnings, Refer
to Keysight Safety document (p/n
9320-6792).
v

vi

M9036A PXIe Embedded Controller BIOS vii
1 Keysight Technologies M9036A PXIe Embedded Controller
Installation Process Overview . . . . . . . . . . . . . . . . . . . . . . . . . . . . . . . . . . . . . . 10
Step 1: Download the BIOS from www.Keysight.com . . . . . . . . . . . . . . . . . . . 11
Step 2: Download the AFUWin utility from AMI.com . . . . . . . . . . . . . . . . . . . . 12
Step 3: Update the M9036A BIOS . . . . . . . . . . . . . . . . . . . . . . . . . . . . . . . . . . 14

viii M9036A PXIe Embedded Controller BIOS

9
Keysight Technologies M9036A PXIe Embedded Controller
Keysight Technologies M9036A
PXIe Embedded Controller
The following instructions describe how to upgrade or restore BIOS versions
AG22, AG23, or later in your M9036A PXIe Embedded Controller.
If you are using your M9036A to control 3 or 4 PXIe chassis, use BIOS version
AG21-M. Please refer to the installation instructions for BIOS AG21-M.
To determine which BIOS is currently installed use either of these methods:
-In windows, run the command msinfo32.exe. The first screen displayed will
show the BIOS version number.
-Boot to the BIOS screen by hitting DEL on boot-up when the splash screen
appears. The first screen displayed will show the BIOS version number.
If your currently installed BIOS version is AG20 or later, you may proceed with
installation of the new BIOS versions AG22, AG23, or later. If your BIOS is AG19
or a earlier, please first install AG20, AG21, or AG21-M before proceeding. The
installation instructions for each of those BIOS can be found from the page
where you down load that BIOS.

10 M9036A PXIe Embedded Controller BIOS
Keysight Technologies M9036A PXIe Embedded Controller Installation Process Overview
Installation Process Overview
The instructions on the following pages contain detailed steps on how to restore
or upgrade the Keysight M9036A BIOS.
The process contains these three Steps:
1Download the BIOS files from www.Keysight.com.
2Download the AFUWin utility from AMI.com.
3Update the M9036A BIOS.
Perform Steps 1 and 2 from a PC that has access to Keysight.com and AMI.com,
then for Step 3 move the files to the M9036A for the BIOS update or restore.

M9036A PXIe Embedded Controller BIOS 11
Step 1: Download the BIOS from www.Keysight.com Keysight Technologies M9036A PXIe Embedded Controller
Step 1: Download the BIOS from www.Keysight.com
1Open your browser to: www.keysight.com/find/M9036A.
2Click on Visit Technical Support.
3Click the Drivers, Firmware & Software tab.
4Select M9036A BIOS Downloads.
5Click the Download button. Click on the BIOS you want to download.
6Save the downloaded zip file for Step 3.

12 M9036A PXIe Embedded Controller BIOS
Keysight Technologies M9036A PXIe Embedded Controller Step 2: Download the AFUWin utility from AMI.com
Step 2: Download the AFUWin utility from AMI.com
1Go to the American Megatrends, Inc. (AMI) website: ami.com
2From the AMI home page, click on Support:
3In the drop down menu Click BIOS/UEFI Firmware Support:

M9036A PXIe Embedded Controller BIOS 13
Step 2: Download the AFUWin utility from AMI.com Keysight Technologies M9036A PXIe Embedded Controller
4Scroll down to near the bottom of the web page to the section called
“BIOS/UEFI Support Links for End Users”. Then in the column with the wrench
icon, called “Firmware Update Tool”, click on the middle of the 3 items:
“Firmware Update Tool for Aptio 4”.
5At the bottom of the license agreement, check the box to indicate that you are
not a robot, then click on “submit”. The download will start.
6Save the downloaded zip file for Step 3.

14 M9036A PXIe Embedded Controller BIOS
Keysight Technologies M9036A PXIe Embedded Controller Step 3: Update the M9036A BIOS
Step 3: Update the M9036A BIOS
1Copy the zip file you downloaded in Step 1 to the M9036A. Unzip the files.
Remember the folder name that was just created. We will call it your BIOS
folder. You now have files like the ones in this example for AG22:
2Copy the zip file you downloaded in Step 2 to the M9036A.
3The goal is to move two specific files to your BIOS folder. Double click the zip
file to open Windows Explorer. Double click the folder. You will find a afuwin
folder. Double click the afuwin folder and notice that it contains two folders
32 and 64.
4Open the appropriate folder that matches your M9036A Operating System –
either 32 for 32-bit OS or 64 for 64-bit OS. See the Note at the end of this
document for instructions on how to tell which OS you have on your M9036A.
5Notice that this folder contains a zip file. Double click the zip file. Navigate the
folder to find two specific files and copy them to your BIOS folder. Those two
files are:
6At this point, you should have at least four files in your BIOS folder. They look
like this using AG22 as an example:
In order to restore or upgrade the BIOS, you must be logged in on
the Keysight M9036A controller as a single user with
Administrator privileges. If you are not, you must logout and then
login again as a single user to an account with Administrator
privileges. Set the User Account Control to the default position.
AG22 BIOS Files:
3970AG22.rom
FLASHROM.CMD
For a 32-bit system: For a 64-bit system:
afuwin.exe afuwinx64.exe
amifldrv32.sys amifldrv64.sys
For a 32-bit system: For a 64-bit system:
3970AG22.rom 3970AG22.rom
FLASHROM.CMD FLASHROM.CMD
afuwin.exe afuwinx64.exe
amifldrv32.sys amifldrv64.sys

M9036A PXIe Embedded Controller BIOS 15
Step 3: Update the M9036A BIOS Keysight Technologies M9036A PXIe Embedded Controller
7You have all the files for the BIOS upgrade. Double click on the
FLASHROM.CMD file. This opens the following screen:
8Type Y and press Enter. When done, the screen will look like this:.
9After the utility completes, press any key, then restart the M9036A. The
chassis will power off twice while applying the BIOS and then the M9036A will
boot to Windows. You are done with the update.

16 M9036A PXIe Embedded Controller BIOS
Keysight Technologies M9036A PXIe Embedded Controller Step 3: Update the M9036A BIOS
Verify BIOS Version
To determine which BIOS is currently installed use either of these methods:
–In windows, run the command msinfo32.exe. The first screen displayed will
show the BIOS version number.
–Boot to the BIOS screen by hitting DEL on boot-up when the splash screen
appears. The first screen displayed will show the BIOS version number.
You can determine whether you have a 32-bit or a 64-bit Operating
System in Start->Control Panel->System.

17
Other manuals for M9036A PXIe
3
Table of contents
Other Keysight Technologies Controllers manuals
Keysight Technologies
Keysight Technologies M9037A General instructions
Keysight Technologies
Keysight Technologies N1002A User manual
Keysight Technologies
Keysight Technologies M9036A PXIe User guide
Keysight Technologies
Keysight Technologies M9537A User guide
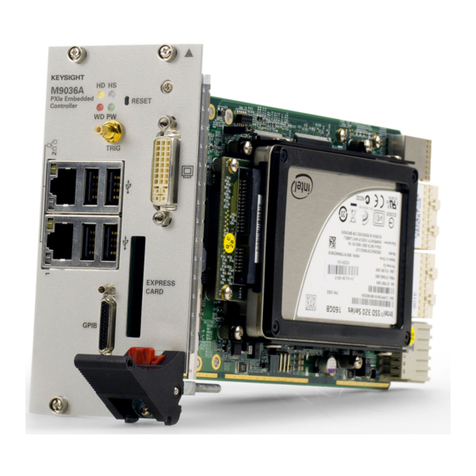
Keysight Technologies
Keysight Technologies M9036A PXIe User manual
Keysight Technologies
Keysight Technologies M9035A User guide
Keysight Technologies
Keysight Technologies M9038A User guide
Keysight Technologies
Keysight Technologies N5261A Manual
Keysight Technologies
Keysight Technologies M9037A User manual

Keysight Technologies
Keysight Technologies M9037A User guide

