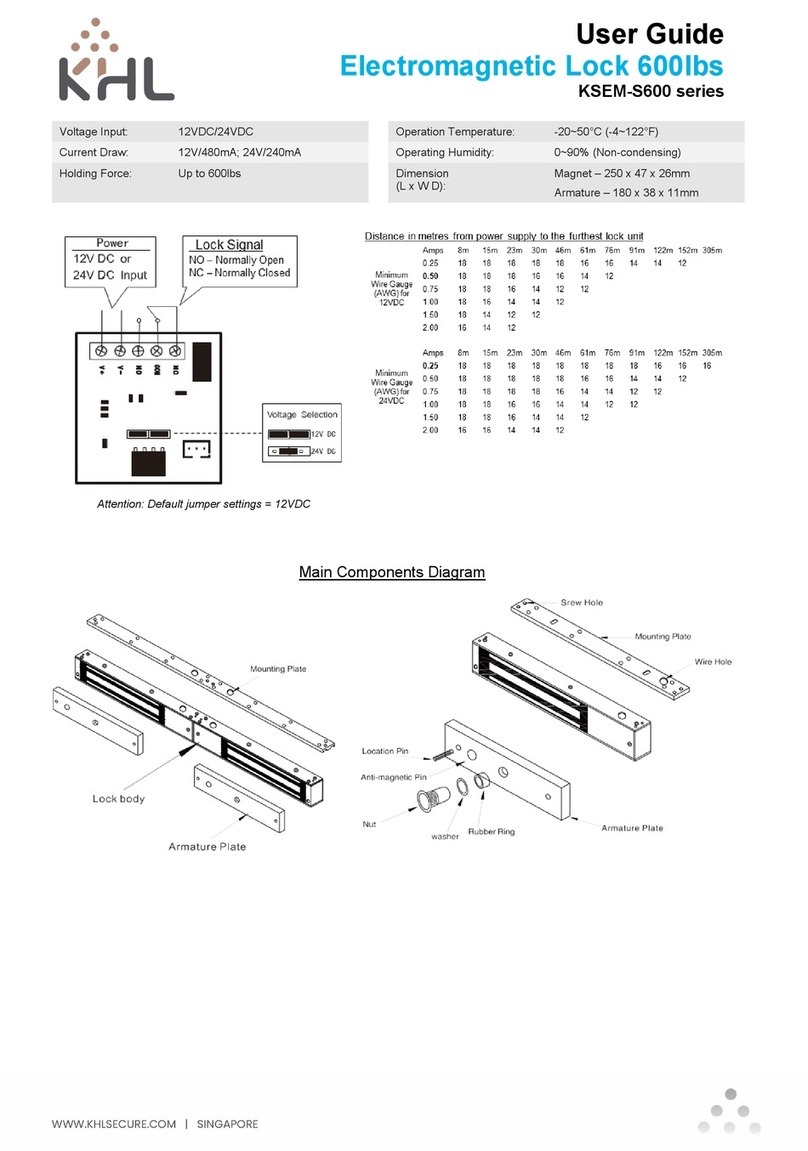
General Installation Steps & Maintenance
1. Fold the installation template provided along the
dotted line up to 90°.
2. Close the door & position the template at the lock
jamb side of the frame with a gap 10mm.
3. Mark & drill holes according to template indications.
4. Install the Armature Plate to the door.
5. Loosely tighten screw through the adjustable slot on
mounting plate to the door frame as indicated on
installation template.
6. Make sure the mounting plate & armature are well
aligned, then screw in the balance mounting screws.
7. Use allen wrench to unscrew anti tamper nut and
install the lock by tighten the fixing screws on the
mounting plate. Pull cable wire through frame to lock
housing.
8. Screw in the anti-tamper nuts to prevent
unauthorized access and make sure to fully tighten
the fixing screw with proper tool "T" Handle Allen
Key.
9. Connect the power wires accordance with NFPA
101 & all wiring to be completed inside protect area.
10. Connect the magnetic contact wire to the door
monitoring system; according to the system guides.
11. It is recommended that to apply a light coat of silicon
lubricant to the mating surface on a monthly basis to
prevent rust.
Troubleshooting
1. Sensor not functioning
•Improper attachment of electromagnet and armature plate
•Modification of the PCB
2. Door not locked
•Incorrect wiring or no power from power supply
3. Reduced holding force
•Poor contact of electromagnet and armature.
•Be sure armature is loose enough that it can fully contact
electromagnet along the entire length.
•Contact surface is dusty or damaged.
•Improper input voltage or wire size.


