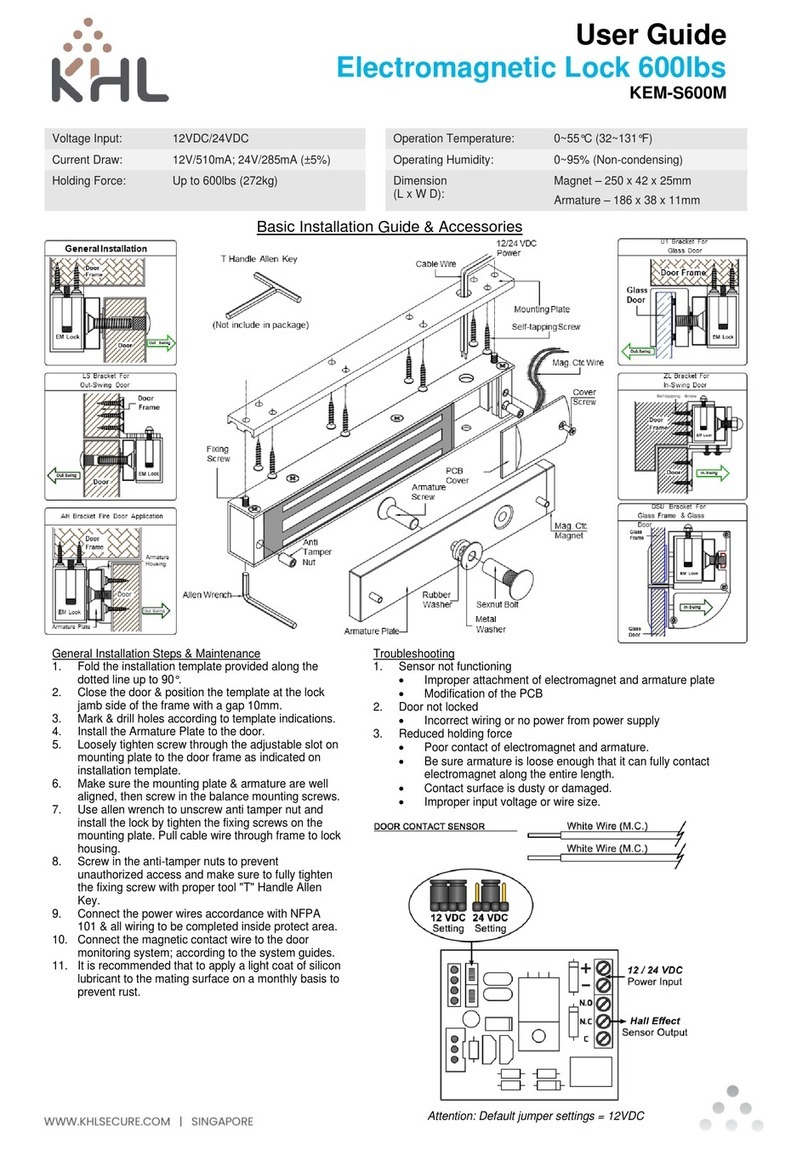
Basic Installation Guide
1. Disassemble Procedure
2. Standard Mounting Method
i. Use the supplied template to determine the correct location and size of mounting holes for both the door and frame
header. Ensure that the door opens away from the Maglock. In the case of a single door, we recommend the Maglock
is positioned 30mm or more to the vertical section of the door jamb. Drill door and frame as indicated.
ii. Loosely install the mounting plate using two of the supplied Philips head mounting screws in the elongated slots.
Attach the Maglock to the mounting plate.
iii. Using a hammer, lightly tap both roll pins into the armature plate until they are secure.
iv. Before installing the Hex nut, the hole in the door may need to be drilled or tapped. Using the components shown in
the image to the right, mount the armature to the door. Make sure that the armature plate is not over tightened and
that it is installed as shown in the following diagram. The armature plate must be free to self align with the door.
v. Ensure the armature and magnet are aligned. Adjust the mounting plate to suit and then drill the appropriate sized
holes in the door header for the remaining attachment screws.
vi. Close the door to test the holding force. The angle between armature plate and magnetic lock can be adjusted by
adding or reducing washers.
3. Bracket Mounting Method
All drawings shown are for illustration purposes only. KHL reserves all rights
to modify the design, specifications or price without notice. All information
stated within this document are current at time of publication.
Ver.01-0422


