AcousticsLimitedWarranty
Kicker warrants this product to be free from defects in material and workmanship under normal use for a period of
THREE (3) MONTHS from date of original purchase with receipt. When purchased from an Authorized KICKER Dealer
it is warranted for ONE (1) YEAR from date of original purchase with receipt. In all cases you must have the original
receipt. Should service be necessary under this warranty for any reason due to manufacturing defect or malfunction
during the warranty period, Kicker will repair or replace (at its discretion) the defective merchandise with equivalent
merchandise at no charge. Warranty replacements may have cosmetic scratches and blemishes. Discontinued
products may be replaced with more current equivalent products.
This warranty is valid only for the original purchaser and is not extended to owners of the product subsequent to the
original purchaser. Any applicable implied warranties are limited in duration to a period of the express warranty as
provided herein beginning with the date of the original purchase at retail, and no warranties, whether express or
implied, shall apply to this product thereafter. Some states do not allow limitations on implied warranties; therefore
these exclusions may not apply to you. This warranty gives you specific legal rights; however you may have other
rights that vary from state to state.
WHAT TO DO IF YOU NEEDWARRANTY OR SERVICE
Defective merchandise should be returned to your local Authorized Stillwater Designs (Kicker) Dealer for warranty
service. Assistance in locating an Authorized Dealer can be found at www.kicker.com or by contacting Stillwater
Designs directly. You can confirm that a dealer is authorized by asking to see a current authorized dealer window
decal.
If it becomes necessary for you to return defective merchandise directly to Stillwater Designs (Kicker), call the Kicker
Customer Service Department at (405) 624-8510 for a Return Merchandise Authorization (RMA) number. Package all
defective items in the original container or in a package that will prevent shipping damage, and return to:
Stillwater Designs, 5021 North Perkins Road, Stillwater, OK 74075
The RMA number must be clearly marked on the outside of the package. Please return only defective components.
The return of functioning items increases your return freight charges. Non-defective items will be returned freight-
collect to you.
Include a copy of the original receipt with the purchase date clearly visible, and a "proof-of-purchase" statement listing
the Customer's name, Dealer's name and invoice number, and product purchased. Warranty expiration on items
without proof-of-purchase will be determined from the type of sale and manufacturing date code. Freight must be
prepaid; items sent freight-collect, or COD, will be refused.
WHAT ISNOT COVERED?
This warranty is valid only if the product is used for the purpose for which it was designed.
It does not cover:
o Damage due to improper installation
o Subsequent damage to other components
o Damage caused by exposure to moisture, excessive heat, chemical cleaners, and/or UV radiation
o Damage through negligence, misuse, accident or abuse. Repeated returns for the same damage may be
considered abuse
o Any cost or expense related to the removal or reinstallation of product
o Speakers damaged due to amplifier clipping or distortion
o Items previously repaired or modified by any unauthorized repair facility
o Return shipping on non-defective items
o Products with tampered or missing barcode labels
o Products returned without a Return Merchandise Authorization (RMA) number
o Freight Damage
o The cost of shipping product to Kicker
o Service performed by anyone other than Kicker
HOW LONG WILL IT TAKE?
Kicker strives to maintain a goal of 24-hour service for all acoustics (subwoofers, midrange and coaxial drivers,
tweeters, crossovers, etc) returns. Delays may be incurred if lack of replacement inventory or parts is encountered.
Failure to follow these steps may void your warranty. Any questions can be directed to the Kicker Customer Service
Department at (405) 624-8510.
KSCOAXIALSPEAKER
67
PERFORMANCE
WARRANTY
08312007-J+08KS
P.O. Box 459 • Stillwater, Oklahoma 74076 • U.S.A. • (405) 624-8510
Model:
Speaker Design
Woofer Size, in (mm)
Tweeter Size, in (mm)
Rated Impedance, ohm
DC Resistance, ohm
Power Range, Watts RMS
Peak Power Handling, Watts
Sensitivity [SPLo], dB @ 1W, 1m
Effective Frequency Range, Hz
Mounting Hole Diameter, in (mm)
Top Mount Depth, in (mm)
Bottom Mount Depth, in (mm)
Tweeter Protrusion, in (mm)
Specifications common to all models:
Tweeter Magnet Material - Neodymium
Tweeter Dome Material - Kaladex
Tweeter Design - Balanced Dome
Woofer Cone Material - Polypropylene
Woofer Surround Material - Santoprene
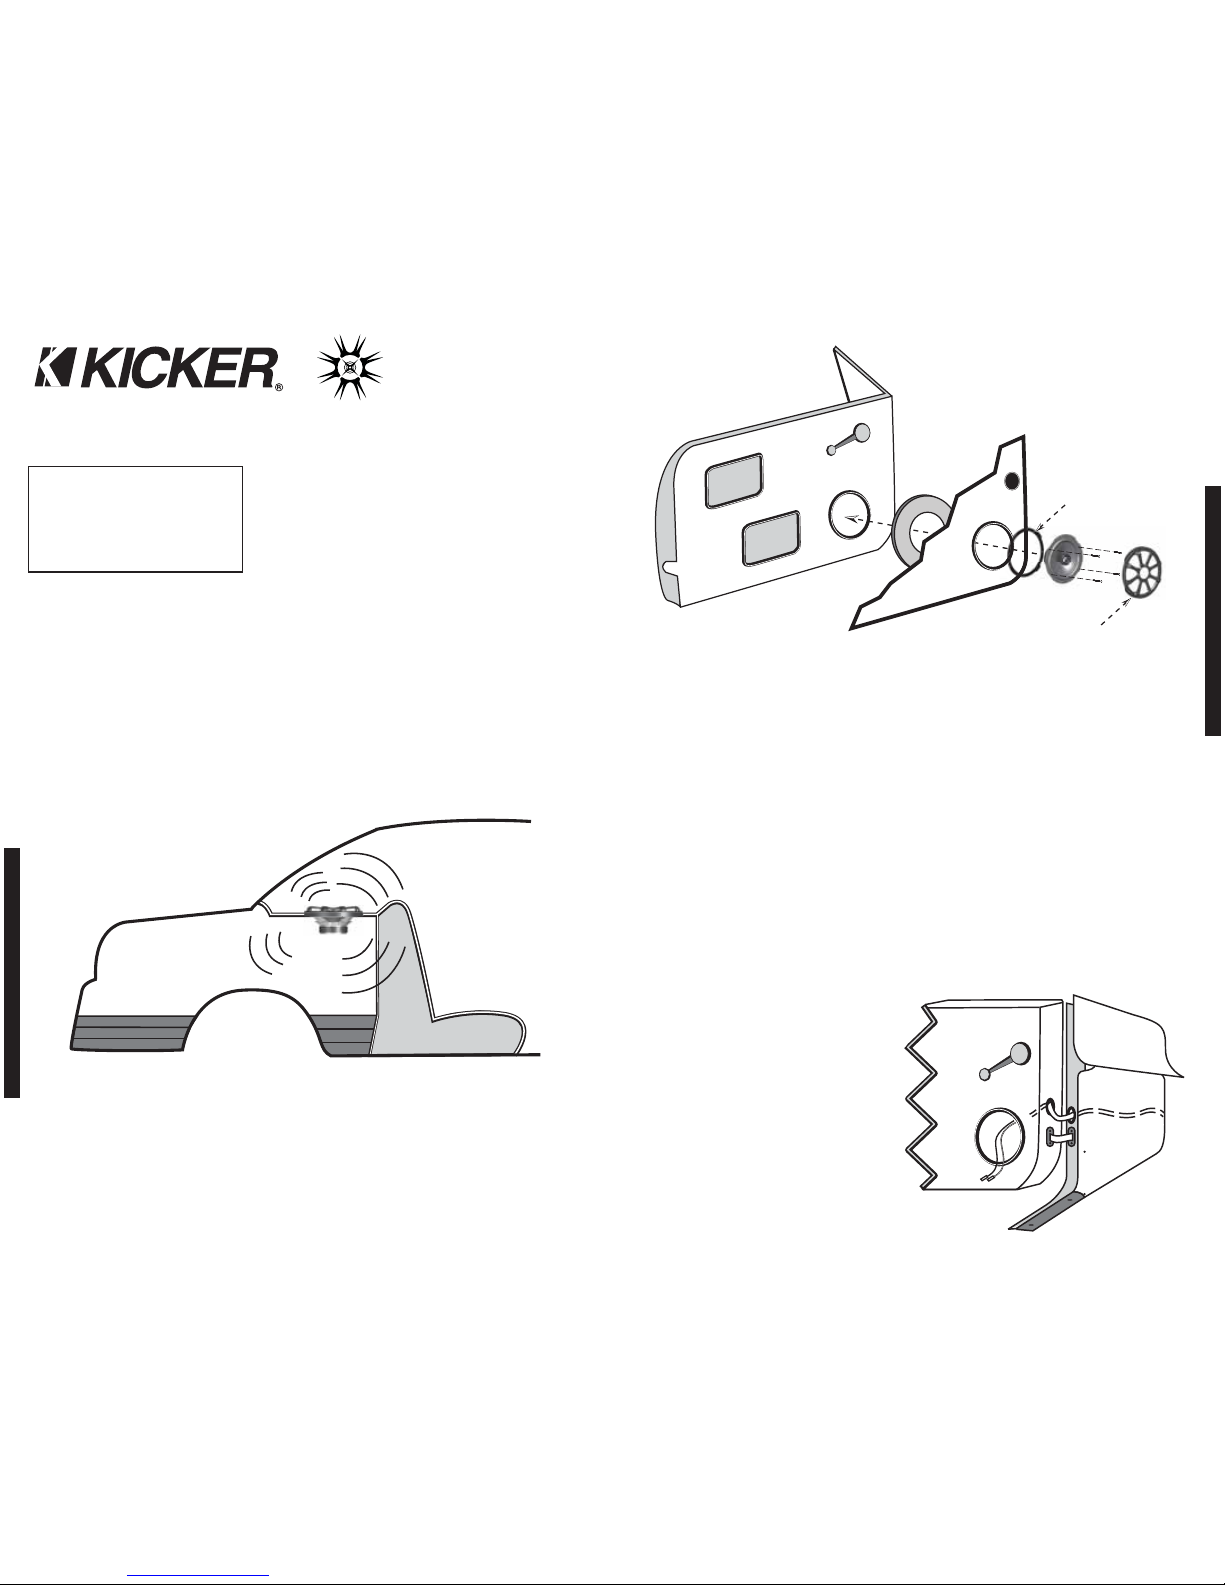
If you have any questions about the installation of your Kicker KS-Series Coax Speakers, see the Authorized Kicker Dealer where you made your
purchase. For more advice on installation, click on the SUPPORT tab on the Kicker homepage, www.kicker.com. Choose the Technical Support
tab, choose subject you are interested in, and then download or view the corresponding information. Please E-mail support@kicker.com or call
Technical Services (405) 624-8583 for specific or unanswered questions.
Performance
KS600
2 - Way
6 (160)
3/4 (20)
4
3
6-65
195
90
43-21k
5 (127)
1 15/16 (49)
2 1/4 (57.2)
3/16 (4.8)
KS650
2 - Way
6 1/2 (165)
3/4 (20)
4
3
6-65
195
90
40-21k
5 5/8 (143)
2 1/8 (54)
2 3/8 (60)
3/16 (4.8)
KS6930
3 - Way
6x9 (150x230)
3/4 (20)
4
3
6-100
300
92
30-21k
6x8 9/16(152x217)
3 3/16 (81)
3 5/8 (92)
5/8 (15.9)
KS680
2 - Way
6x8 (150x200)
3/4 (20)
4
3
6-60
180
90
45-21k
5x7 (127x178)
2 3/8 (60)
2 3/4 (70)
0 (0)
KS690
2 - Way
6x9 (150x230)
1 (25.4)
4
3
6-90
270
92
30-21k
6x8 9/16(152x217)
3 3/16 (81)
3 5/8 (92)
0 (0)
Pro Tip: You are one Kicker Loaded-Subwoofer enclosure, one ZX
Mono-Amplifier and a few cables away from a slamm’in system!
The Kicker ZX line of mono-amplifiers make it easy to upgrade to
solid bass with your existing or stock source unit. Please ask your
dealer about the Kicker Comp and CompVR Subwoofer upgrades.