Kiloview RMG-300 User manual

RMG-300 Media Gateway
Easily Bridges Most IP Protoco
Leading solution provider of IP-based video transmission
Quick Start Guide
Contents
◼Device interfaces, installation and functions
◼Device connection, login and applications
◼Device upgrade and restore the factory settings
Before using this product, it is recommended that you read the guide carefully. To ensure your personal safety and avoid physical or electrical damage to the
device, please strictly follow the instructions of this guide to install and use it under the guidance of professionals. Incorrect electrical connections or physical
installation may cause permanent damage to the device and even threaten personal safety.

1.Device Interfaces
(1) Device reset button, press and hold for 5s to restore the device
to factory settings.
(2) 100M/1000M Ethernet port
(3) 100M/1000M Ethernet port
(4) HDMI output
(5) SDI output
(6) 3.5mm line in/o
2.Device Installation
2.1 Card Installation
Align the card assembly with the card slots and push in parallel, then tighten the double-sided screws.
1. Align the card assembly with the card slots and push in parallel.
2. Tighten the left and right screws

2.2 Device Connection
Note:Please use the standard power adapter to power the device. Other unqualified power
supplies may damage the device.
3.Login to the device webpage
Login to the device webpage via the default IP address 192.168.1.168. That is, enter http://192.168.1.168/
in the browser to access the web UI. The username and the password are admin by default.
Internet
PC
Monitor
HDMI OUT
SDI OUT
power AC

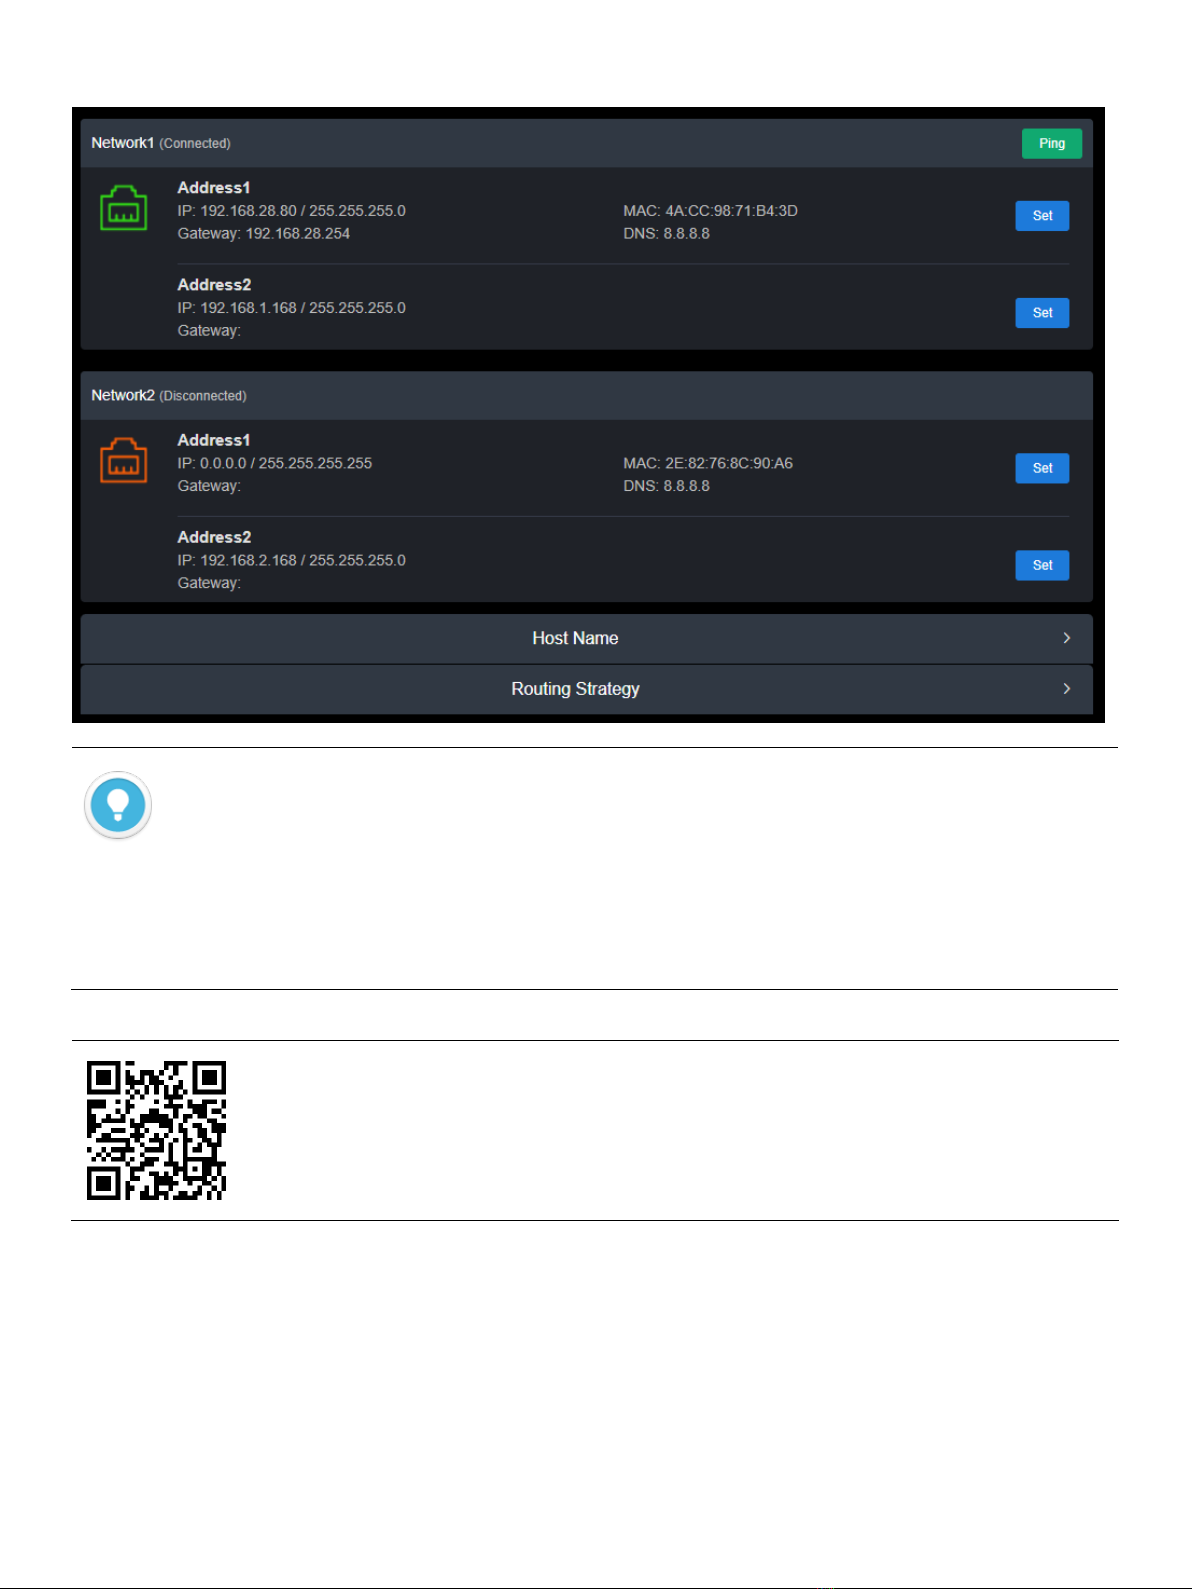
If using the device for the first time, please configure the device IP address based on your working network.
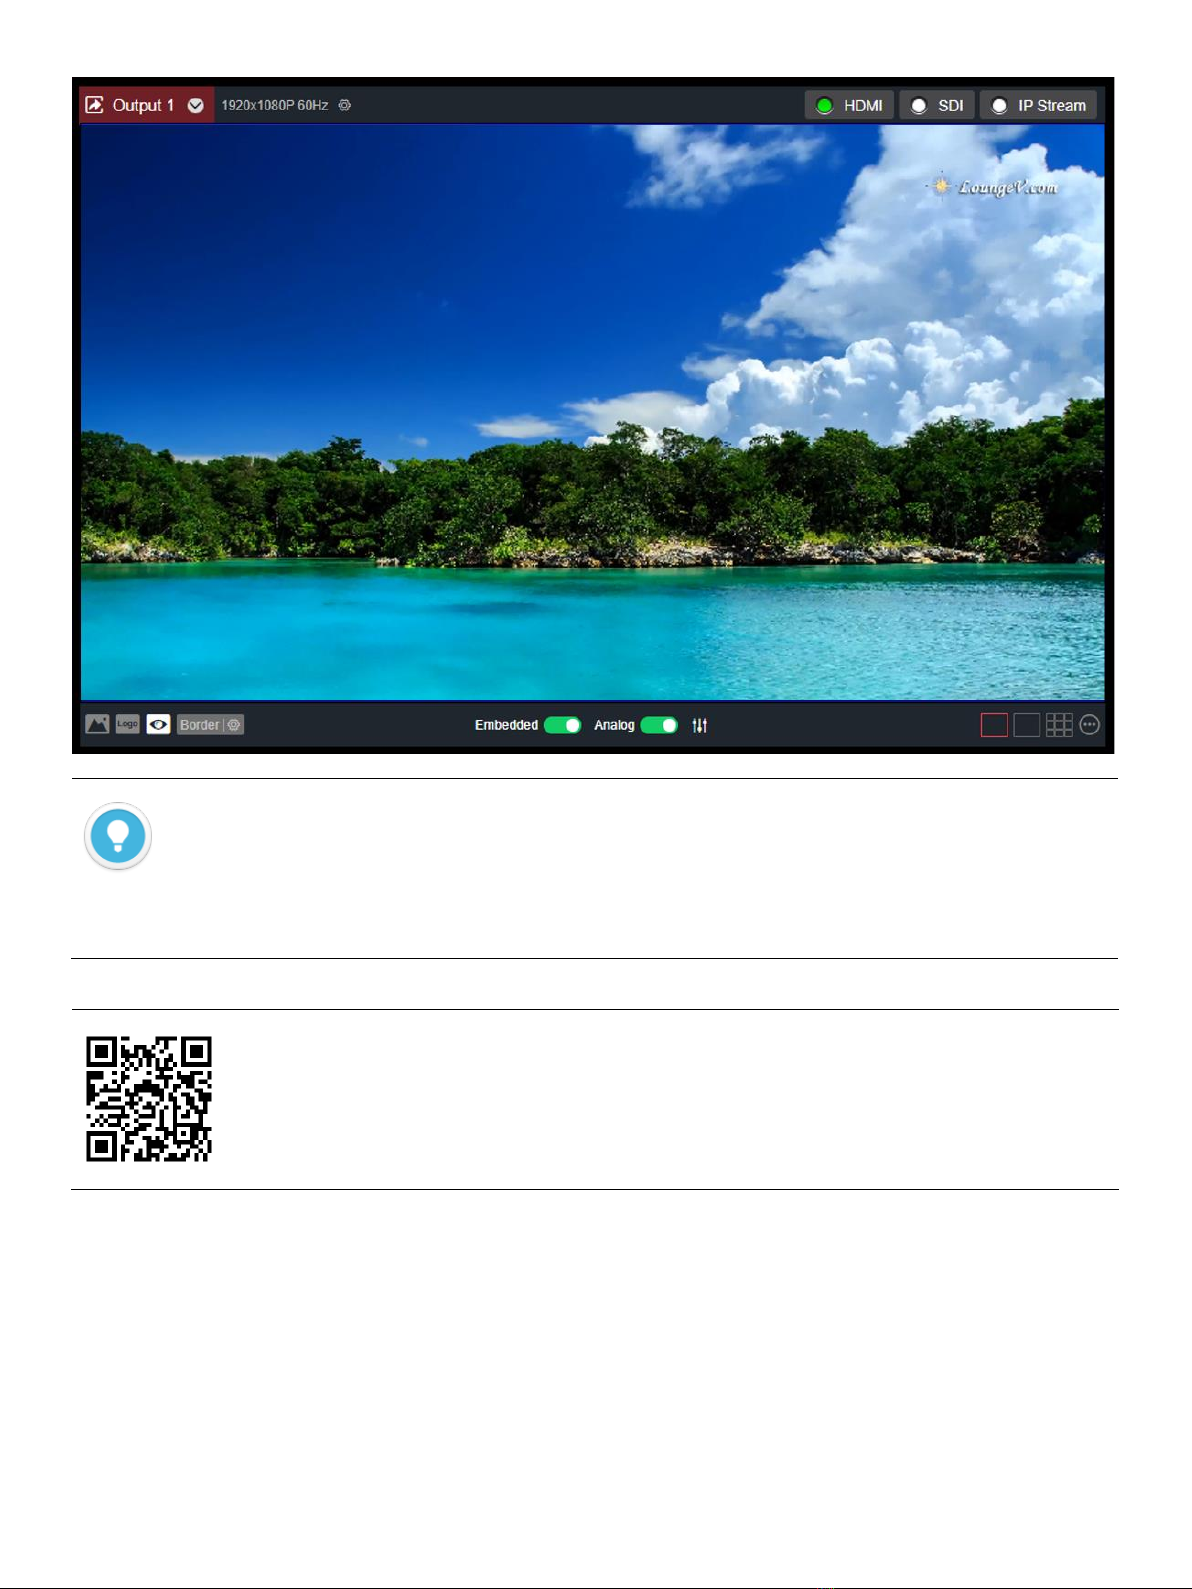
4.Decoding and Output
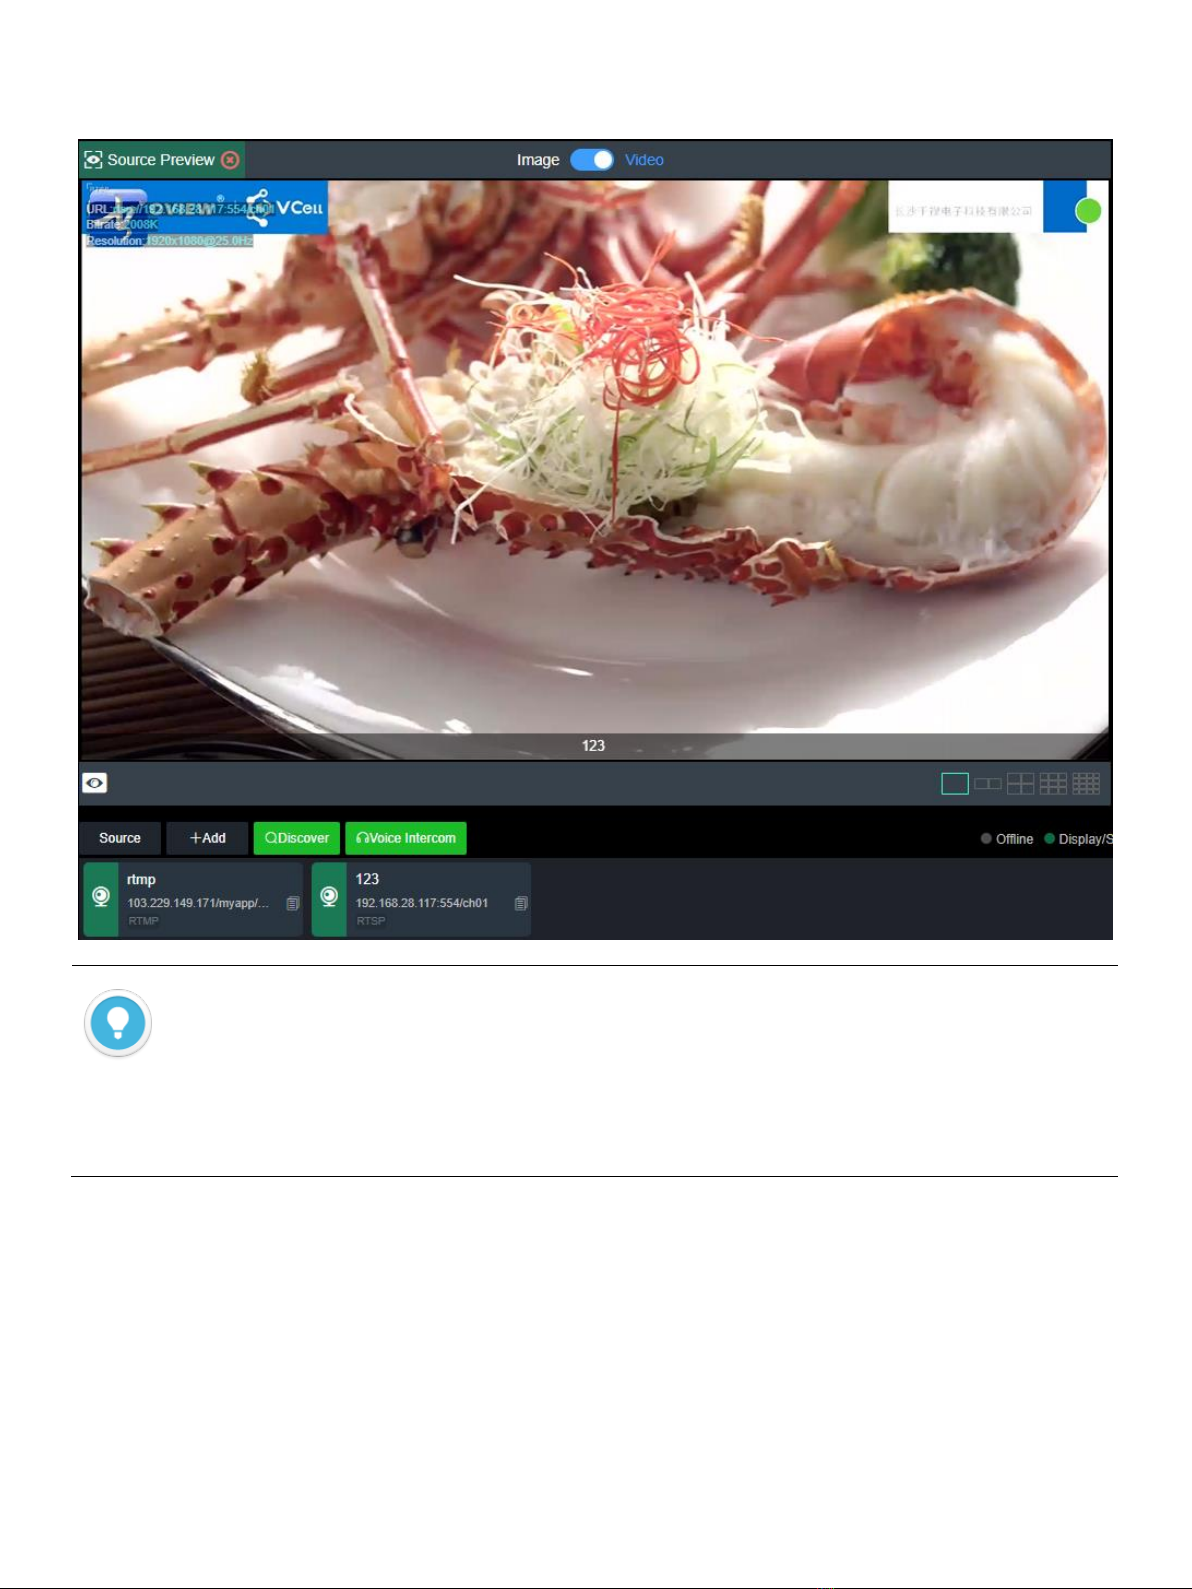
4.1 Add video source
In the lower left of the "Media", click "Add", and then select the "Source Type" and configure the parameters
in the pop-up dialog box, and click "OK" to add the video source to the video list.
Introduction
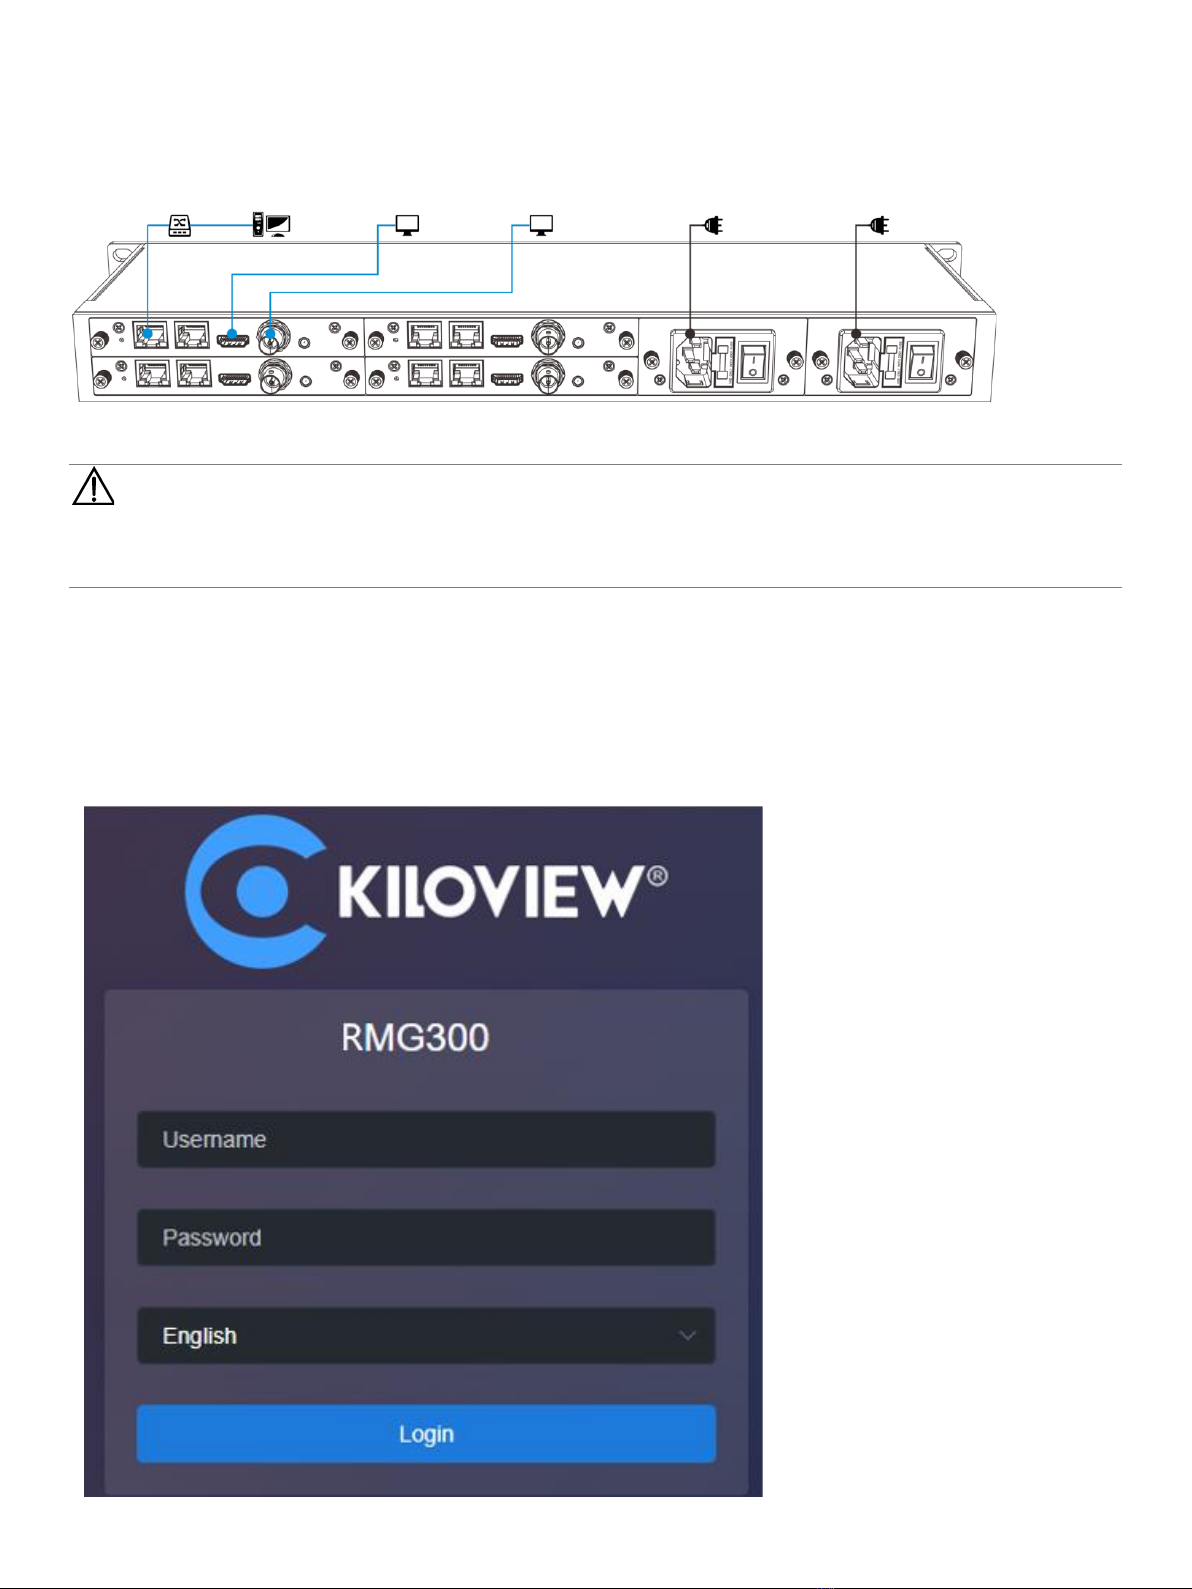
⚫To login with the default address, make sure that the computer is configured under the same network segment
(192.168.1.*, * refers to numbers between 1-255 except 168)!
⚫After change the device IP, please restore the computer network to the working network IP address.
⚫If the RMG-300 device is connected to the network by Ethernet port 2, the default IP address is: 192.168.2.168!
⚫To ensure information security, it is recommended to change your password immediately after your first login.
⚫
Due to the browser compatibility issues, it is recommended to use Chrome, Firefox or Edge.
For more information about the configurations, please refer to:
https://www.kiloview.com/en/support/docs/RMG-300/

4.2 Preview
The added sources will be displayed in the “Video Source”, drag the source to the upper “Source Preview”
Introduction
⚫The IP address of video source can be tested with a player such as VLC.
⚫For video sources from the network, the playback buffer needs to be configured with a high buffer time until the video
decoding output is smooth.
For more information about how to add the video source to RMG-300, please refer to:
https://www.kiloview.com/en/support/docs/RMG-300/

window to preview the source images and to configure the output parameters.
4.3 Output
There are two output windows on the RMG-300 webpage. You can select SDI or HDMI to decode and output
the same or different content in the upper right corner of the window. Drag the video source into the output
window, that is, output with the selected SDI or HDMI interface.
Introduction
⚫It is recommended to use the latest version of Chrome and Edge for preview function.
⚫Preview in browser does not support video sources with B-frame and H.265.
⚫To preview, please use the service network IP address to login to the device.
⚫The “Source Preview” window is under "Image" mode by default, and the image refreshes every 3 seconds; if the CPU
performance of the computer is well, you can click and switch to "Video" mode, and there will be smooth video.

5.Stream service
Login to the MG300 webpage, click “Stream Service”- “Add Publishing Points” to add a publishing point, and
select the video source that needs to be forwarded.
1. Click “Source” and select the video source in the source list on the right, then the border of the selected
video source will turn to red.
Introduction
⚫The output resolution should be the resolution and frame rate that the receiving monitor can support.
⚫The audio is turned off by default, and it can be turned on by click the red speaker in the lower left corner of the output
window.
⚫Multi-screen output needs to be configured by adding a layout, and supports up to 9 grids output
For more info about RMG-300 output layout configurations, please refer to:
https://www.kiloview.com/en/support/docs/RMG-300/

2. Click “Service”- “Add Stream Service”, and then choose the “Service Type”.
For more information about the RMG-300 streaming service:
https://www.kiloview.com/en/support/docs/RMG-300/

6.Firmware Upgrading
6.1 Download upgrade firmware
6.2 Upgrade device firmware
Login to the web page of RMG-300, click "Settings"-- "Firmware Upgrade" to check whether the latest
firmware version downloaded is higher than your current version. If yes, select the downloaded firmware
and click "Firmware Upgrade".
After uploaded the firmware successfully, it needs to reboot the device. After clicking “ok”, the device will
restart, please be patient.
Note
⚫Please not power off during the upgrade process, otherwise the device couldn’t work.
⚫Generally, it will take 3-5 minutes to upgrade the device. If it’s still not completed after 5 minutes, please try refreshing
webpage, if you still can’t access it, please try to contact technical support.
Kiloview will continue to provide the firmware of updating functions and fixing bug for
RMG-300, please refer to:
https://www.kiloview.com/en/support/download/
Select “video decoders” > “RMG-300”, find and download the latest firmware

7. Restore factory settings
If the device cannot work normally after modified the parameters or forgot internet IP configuration and
couldn’t search and find the device, please restore factory settings.
Two methods for restoring factory settings:
1) If you can login to web page, then via the WEB page, click "Settings—System settings--Restore factory
settings".
2) If you can’t login to web page, press the RESET button for 5 seconds in the bottom of device.。
Note: After restoring factory setting, below parameters will be turned to default value:
⚫Login user name and password will be “admin”;
⚫IP address will be restored as 192.168.1.168, subnet mask will be 255.255.255.0;
⚫All encoding parameters of video and audio will be restored to default value.

8. Others
To prolong the device life,please unplug the power and keep it properly if you do not use it for a long time
For more questions, please contact us via:
https://www.kiloview.com/en/support
KILOVIEW Electronics CO., LTD.
Tel:86-18573192787 Email:support@kiloview.com Web:www.kiloview.com/en
Address: B4-106/109, Jiahua Intelligence Valley Industrial Park, 877 Huijin Road, Yuhua District,
Changsha City, Hunan Province, China.
Table of contents
Other Kiloview Gateway manuals
Popular Gateway manuals by other brands

HMS Networks
HMS Networks Intesis INMBSMEB 0100 Series Installation sheet

AudioCodes
AudioCodes Mediant 800B Hardware installation manual

Wiznet
Wiznet WizFi630 user manual

B+B
B+B KNX-GSM Gateway Documentation

Cisco
Cisco DDR2201 Series Installation and operation guide

ZyXEL Communications
ZyXEL Communications AMG1202-T series quick start guide

Tadiran Telecom
Tadiran Telecom TGW1E1-2G User configuration guide

Magnum First
Magnum First M9-EBOX Setup manual

ZyXEL Communications
ZyXEL Communications Unified Security Gateway ZyWALL 1000 user guide

Cisco
Cisco Firepower 1100 Getting started guide

Techroutes
Techroutes WG3100 Series user manual

Comm-Tec
Comm-Tec CTG-KNX/IP quick start guide