5
4. Gerätebeschreibung
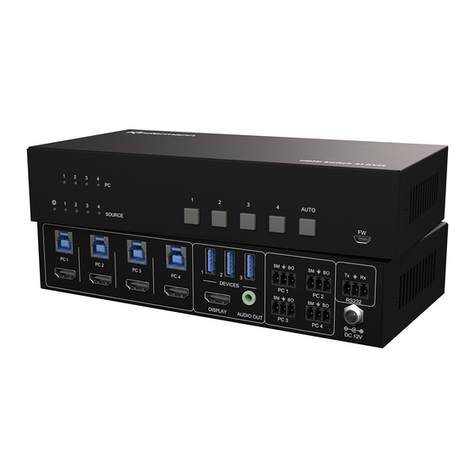
4.1 Vorderseite
Power LED:
• Leuchtet im Stand-by rot und im Betrieb grün.
Video source:
• Drücken Sie die Taste 1 bis 4 um eine Eingangsquelle manuell auszuwählen. Die entsprechende LED
leuchtet dann grün.
• Drücken Sie die AUTO Taste für mindestens drei Sekunden, um zwischen manueller und automa-
tischer Umschaltung hin und her zu schalten. Die LED leuchtet grün, wenn die Automatik aktiv ist.
Display Steuerung per CEC:
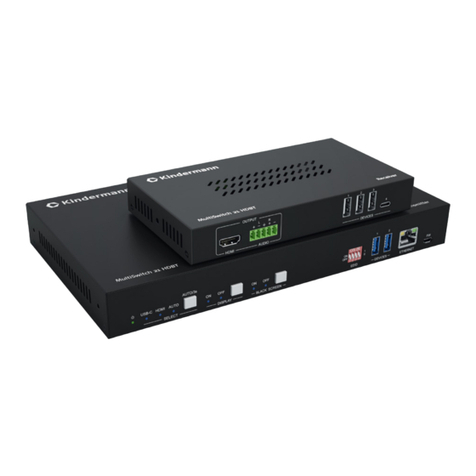
Der MultiSwitch 41 4K60 unterstützt CEC. Mit den Tasten kann ein kompatibles Display entsprechend
ferngesteuert werden.
• ON schaltet das Display an.
• OFF schaltet das Display aus.
•
HDMI V2.0 4x1 Presentation Switcher with Audio Extraction
3. Panel Description
3.1 Front Panel
①Power LED: Illuminates red when the device is in standby, or illuminates green
when the device is power on.
②VIDEO SOURCE:
lPress 1~4button to select input source respectively, and its corresponding LED
illuminatesgreen.
lPress and hold the AUTO button at least three seconds to enable automatic
switching mode, and its LED illuminates green.
③DISPLAY CONTROL:
lPress ON to turn on the display device.
lPress OFF to turn off the display device.
lPress to mute/unmute audio of display device.
lPress to decrease the audio volume gradually, or press and hold it to
decrease the audio volume constantly.
lPress to increase the audio volume gradually, or press and hold it to
increase the audio volume constantly.
④VGA RESOLUTION:
lWhen the VGA input is selected, press RES button repeatedly can set the
output resolution to 1280x720, 1920x1080 or 1920x1200.
lOne of three LEDs illuminates green to indicate which output resolution is
selected.
⑤FW: Micro-USB port for firmware upgrade.
FW
VIDEO SOURCE DISPLAY CONTROL
ON OFF1 2 34AUTO RES
1920x10801280x720 1920x1200
VGA RESOLUTION
12345
Aktiviert oder deaktiviert die Stummschaltung am Display.
•
HDMI V2.0 4x1 Presentation Switcher with Audio Extraction
3. Panel Description
3.1 Front Panel
①Power LED: Illuminates red when the device is in standby, or illuminates green
when the device is power on.
②VIDEO SOURCE:
lPress 1~4button to select input source respectively, and its corresponding LED
illuminatesgreen.
lPress and hold the AUTO button at least three seconds to enable automatic
switching mode, and its LED illuminates green.
③DISPLAY CONTROL:
lPress ON to turn on the display device.
lPress OFF to turn off the display device.
lPress to mute/unmute audio of display device.
lPress to decrease the audio volume gradually, or press and hold it to
decrease the audio volume constantly.
lPress to increase the audio volume gradually, or press and hold it to
increase the audio volume constantly.
④VGA RESOLUTION:
lWhen the VGA input is selected, press RES button repeatedly can set the
output resolution to 1280x720, 1920x1080 or 1920x1200.
lOne of three LEDs illuminates green to indicate which output resolution is
selected.
⑤FW: Micro-USB port for firmware upgrade.
FW
VIDEO SOURCE DISPLAY CONTROL
ON OFF1 2 34AUTO RES
1920x10801280x720 1920x1200
VGA RESOLUTION
12345
Reduziert die Lautstärke graduell. Wird die Taste länger gedrückt, reduziert sich die Lautstärke
konstant.
•
HDMI V2.0 4x1 Presentation Switcher with Audio Extraction
3. Panel Description
3.1 Front Panel
①Power LED: Illuminates red when the device is in standby, or illuminates green
when the device is power on.
②VIDEO SOURCE:
lPress 1~4button to select input source respectively, and its corresponding LED
illuminatesgreen.
lPress and hold the AUTO button at least three seconds to enable automatic
switching mode, and its LED illuminates green.
③DISPLAY CONTROL:
lPress ON to turn on the display device.
lPress OFF to turn off the display device.
lPress to mute/unmute audio of display device.
lPress to decrease the audio volume gradually, or press and hold it to
decrease the audio volume constantly.
lPress to increase the audio volume gradually, or press and hold it to
increase the audio volume constantly.
④VGA RESOLUTION:
lWhen the VGA input is selected, press RES button repeatedly can set the
output resolution to 1280x720, 1920x1080 or 1920x1200.
lOne of three LEDs illuminates green to indicate which output resolution is
selected.
⑤FW: Micro-USB port for firmware upgrade.
FW
VIDEO SOURCE DISPLAY CONTROL
ON OFF1 2 34AUTO RES
1920x10801280x720 1920x1200
VGA RESOLUTION
12345
Erhöht die Lautstärke graduell. Wird die Taste länger gedrückt, steigt die Lautstärke konstant an.
VGA Auflösung:
• Die RES Taste schaltet sequentiell zwischen den verfügbaren Ausgangsauflösungen 1280x720,
1920x1080 oder 1920x1200 um.
• Die entsprechende LED leutet grün.
FW: Über den Micro-USB Anschluss kann ein FW Update aufgespielt werden.
Hinweis: Eine genauere Funktionsbeschreibung finden Sie im Kapitel 6.
HDMI V2.0 4x1 Presentation Switcher with Audio Extraction
3. Panel Description
3.1 Front Panel
①Power LED: Illuminates red when the device is in standby, or illuminates green
when the device is power on.
②VIDEO SOURCE:
lPress 1~4button to select input source respectively, and its corresponding LED
illuminatesgreen.
lPress and hold the AUTO button at least three seconds to enable automatic
switching mode, and its LED illuminates green.
③DISPLAY CONTROL:
lPress ON to turn on the display device.
lPress OFF to turn off the display device.
lPress to mute/unmute audio of display device.
lPress to decrease the audio volume gradually, or press and hold it to
decrease the audio volume constantly.
lPress to increase the audio volume gradually, or press and hold it to
increase the audio volume constantly.
④VGA RESOLUTION:
lWhen the VGA input is selected, press RES button repeatedly can set the
output resolution to 1280x720, 1920x1080 or 1920x1200.
lOne of three LEDs illuminates green to indicate which output resolution is
selected.
⑤FW: Micro-USB port for firmware upgrade.
FW
VIDEO SOURCE DISPLAY CONTROL
ON OFF1 2 34AUTO RES
1920x10801280x720 1920x1200
VGA RESOLUTION
12345
