manuals.online logo
Brands
  1. Home
  2. •
  3. Brands
  4. •
  5. King Canada
  6. •
  7. Power Tools
  8. •
  9. King Canada 8150CT User manual

King Canada 8150CT User manual

COPYRIGHT © 2009 ALL RIGHTS RESERVED BY KING CANADA TOOLS INC.
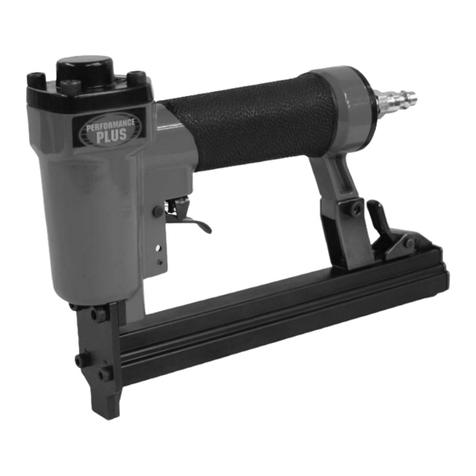
4.8V CORDLESS STAPLER KIT-
DRIVES ARROW®T50®STAPLES
plusplus
performanceperformance
INSTRUCTION MANUAL
MODEL: 8150CT
WARRANTY INFORMATION
2-YEAR
LIMITED WARRANTY
FOR THIS 4.8V CORDLESS STAPLER
KING CANADA TOOLS
OFFERS A 2-YEAR LIMITED WARRANTY
FOR NON-COMMERCIAL USE.
PROOF OF PURCHASE
Please keep your dated proof of purchase for warranty and servicing purposes.
LIMITED TOOL WARRANTY
King Canada makes every effort to ensure that this product meets high quality and
durability standards. King Canada warrants to the original retail consumer a 2-year
limited warranty as of the date the product was purchased at retail and that each
product is free from defects in materials. Warranty does not apply to defects due
directly or indirectly to misuse, abuse, normal wear and tear, negligence or
accidents, repairs done by an unauthorized service center, alterations and lack of
maintenance. King Canada shall in no event be liable for death, injuries to persons
or property or for incidental, special or consequential damages arising from the use
of our products.
To take advantage of this limited warranty, return the product at your expense
together with your dated proof of purshase to an authorized King Canada service
center. Contact your retailer or visit our web site at www.kingcanada.com for an
updated listing of our authorized service centers. In cooperation with our authorized
serviced center, King Canada will either repair or replace the product if any part or
parts covered under this warranty which examination proves to be defective in
workmanship or material during the warranty period.
PARTS DIAGRAM & PARTS LISTS
Refer to the Parts section of the King Canada web site for the most updated parts
diagram and parts list.
KING CANADA INC. DORVAL, QUÉBEC, CANADA H9P 2Y4
www.kingcanada.com
SPECIFIC CORDLESS STAPLER
SAFETY INSTRUCTIONS
Operational Safety Instructions
1) Secure your workpiece. Your workpiece should be clamped with clamping devices or in a vise, this
is much safer than securing your workpiece by hand.
2) Before starting any work on the stapler itself (changing staples, maintenance), as well as when in
storage or in transport, remove the battery from the stapler housing.
3) Keep your fingers away from the staple/nail discharge area, danger of accidental injury.
4) Never point this cordless stapler at any person or aminals. Staples or nails fired from a short
distance can cause conciderable injuries.
5) Do not use this cordless stapler to fasten electrical wiring. Accidental contact with electrical lines
can lead to fire and electric shock.
6) Check walls, ceilings, floors, roofing carefully to avoid possible electric shock, gas leakage,
explosion caused by stapling into live wires, conduits or gas pipes.
7) Only use recommended staples/brad nails as specified in this manual. The use of any other
staples/brad nails may cause the tool to malfunction.
8) Do not operate the tool without staples/brad nails. This shortens the service life of the tool.
9) Never actuate the trigger and the safety lever at the same time unless you are prepared to staple
aworkpiece. Never tamper with the safety lever, always make sure it functions properly. If this
safety lever does not function properly,do not use the tool, have it repaired before using again.
Battery & Charger Safety Instructions
1) NEVER open the battery. Danger of short-circuiting.
2) Protect the battery against heat, continuous sun exposure and fire. Risk of explosion!
3) Keep the battery charger and adaptor away from rain or moisture. Penetration of water in the
battery charger increases the risk of electric shock.
4) Keep the battery charger and adaptor clean.
5) Always remove the battery from the tool before loading staples, making an adjustment, inspection,
maintenance or after the operation is done.
6) Do not charge the battery when temperature is below 100C(500F) or above 400C(1040F).
7) Do not store tool or battery in temperatures exceeding 500C(1220F).
8) No not allow anything to cover the charger vents.
9) Do not store your battery in a container with other metal objects such as nails, screws, etc.
10) Never incinerate the battery even if it is severely damaged or worn out. Risk of explosion. Dispose
of used battery at your local recycling and/or disposal centre.
GETTING TO KNOW
YOUR CORDLESS STAPLER
SPECIFICATIONS
Model ....................................................................................................................................8150CT
Voltage ........................................................................................................................................4.8V
Battery type ....................................................................................................................1.3Ah Ni-Mh
Staple size ....................................................................................................................20 Ga. x 3/8”
Staple size range ..............................................................................................................1/4” - 9/16”
Brad nail size ..........................................................................................................................18 Ga.
Brad nail range ..................................................................................................................3/8” - 5/8”
Magazine capacity ..........................................................................................100 staples/brad nails
Discharge rate ........................................................................................................................30/min
Magazine latch
Safety
lever
4.8V Rechargeable
Ni-Mh battery
Trigger
Magazine
Staple/Brad nail
discharge area
Staple/Brad nail view finder
Force selector knob (depth setting)
Charger and charger adaptor
OPERATION
CHARGING 4.8V NI-MH BATTERY
A battery that is new or has not been used for a long period
of time will not develop its full charge capacity until after 5 to
6hours of charging. It is not recommended to recharge the
battery after use if you do not intend on using the tool for an
extended period of time, recharge the battery when it is
required. Regular charge time is 3 hours.
The battery comes installed in the tool housing, remove the
battery (B) Fig.1 from the tool housing by pressing both
battery tabs (A) and then pulling battery out.
To charge battery, connect the power adaptor (A) Fig.2 to the
input on the back of the charger (B), then connect the power
adaptor (C) to a polarized 120V receptacle as shown. Before
inserting battery into charger, make sure the green indicator
light (D) is on. Then insert the battery into the charger.
Charging has begun once the red indicator light (D) is on.
Charging is complete once the green indicator light turns on.
Once the battery is fully charged, reinsert the battery into the
tool housing and push until the locking tabs snap in place.
The battery will only fit one way in the tool housing. A
significantly reduced working period after charging indicates
that the battery is used and will need to be replaced.
INSTALLING STAPLES OR BRAD NAILS IN MAGAZINE
Warning! Disconnect the battery from the tool before
attempting to install staples or brad nails.
This cordless stapler can drive 20 Ga. x 3/8” crown Arrow®
T50®staples among other brands from 1/4” to 9/16” in
length, it can also drive 18 Ga. brad nails from 3/8” to 5/8”.
Toinstall staples in the magazine;
1) Press down on the magazine latch (A) Fig.3 and pull the
magazine strip outwards.
2) Flip the cordless stapler upside down, then insert a strip
of Arrow®T50®staples (A) Fig.4 upside down inside the
magazine.
3) Push the magazine strip closed and make sure the latch
is engaged.
To install brad nails in the magazine;
1) Press down on the magazine latch (A) Fig.3 and pull the
magazine strip outwards.
2) Flip the cordless stapler upside down, then insert a strip
of brad nails (B) Fig.4 upside down inside and against the
inner wall (C) of the magazine.
3) Slightly tilt the stapler so the brad nails stay against the
inner wall (C) of the magazine and then push the
magazine strip closed and make sure the latch is engaged.
Figure 1
Figure 2
Figure 3
Figure 4
OPERATION
DEPTH ADJUSTMENT- FORCE SELECTOR KNOB
This cordless stapler comes with an adjustable force
selector knob (A) Fig.5 which sets the driving force of the
tool. The driving force required will depend on the type of
staples or brad nails used and the density of the workpiece.
It is recommended to make trial tests in scrap pieces of
wood before driving fasteners in workpiece.
The force selector knob has 6 settings, setting 1 being the
setting with the least amount of force and setting 6 being the
setting with the highest amount of force. Simply turn the
knob to the desired setting. Make sure the knob setting lines up with the front index mark (B). Fig.5
shows the force selector positioned in setting 1.
Once the work is done, it is recommended to set the force
selector knob at setting 1 in order to relieve the spring
tension.
USING THE CORDLESS STAPLER
Follow these instructions to use your cordless stapler;
1) Load the cordless stapler with staples or brad nails.
2) Insert a fully charged battery (A) Fig.6 into the tool housing.
3) Turn the force selector knob (B) to select the appropriate
driving force.
4) Press the safety lever (C) against the workpiece and then
squeeze the trigger (D) to drive the fastener.You will hear
the spring recoil and then the fastener will discharge. It
may be necessary to raise the heel of the stapler to get flush results.
Important note: The safety lever must be fully depressed or the cordless stapler will not fire.
WARNING! This cordless tool is not designed to be used with 3/4” (19mm) staples, therefore do not
use this cordless stapler to fasten ceiling paneling with profiled wood or grooves.
Figure 5
Figure 6
MAINTENANCE
WARNING: Before making any adjustments, installing staples/brad nails or cleaning, remove the
battery from the tool housing.
PROTECTING THE ENVIRONMENT- BE RESPONSIBLE
Should you find one day that your tool needs replacement, or if it is of no further use to you, think of
the protection of the environment. If you want to dispose of the tool yourself, the battery must be
removed and disposed of in accordance with local regulations. Take the battery to your service agent
or a local recycling station. Collected batteries will be recycled or disposed of properly.
WARNING: THERE ARE NO USER SERVICEABLE PARTS INSIDE
Preventative maintance performed by an unauthorized personnel may result in the misplacement of
internal wires and components which could cause serious hazards. We recommend that all servicing
be performed by a qualified KING CANADA service centre technician.
BATTERY MAINTENANCE
If you notice a decrease in battery performance or a significant difference in running power between
charges, then it is time to replace the battery. Failure to do so may damage the charger and cause
improper operation.
LONG TERM BATTERY STORAGE SHOULD BE IN THE DISCHARGED STATE. Batteries last longer
and recharge better when they are stored discharged. Fully recharge the battery before using after
prolonged storage.
CHARGER MAINTENANCE
Unplug your charger when there is no battery being recharged. Keep charger clean, but do not use
solvents or water, simply wipe it with a dry cloth. Do not expose it to rain or high humidity.
CLEANING
To avoid accidents, always remove the battery from the cordless stapler before cleaning. The tool is
most effectively cleaned with the use of an air compressor. Always wear safety glasses when using
an air compressor.if you do not have an air compressor, use a moistened cloth. Ventilation openings
and switch must be kept clean and free of foreign objects. Do not insert pointed objects through these
openings in the attempt to clean them.
Caution: Some cleaning products and solvents can damage the plastic parts of your cordless stapler
such as gasoline, chlorinated cleaning agents, ammonia and household detergents that contain
ammonia.
MAINTENANCE

Other King Canada Power Tools manuals

King Canada KC-117N User manual

King Canada

King Canada KC-117N User manual

King Canada KC-150C User manual

King Canada

King Canada KC-150C User manual

King Canada KC-13C-FC User manual

King Canada

King Canada KC-13C-FC User manual

King Canada 8040L User manual

King Canada

King Canada 8040L User manual

King Canada KHP-20T-GGN User manual

King Canada

King Canada KHP-20T-GGN User manual

King Canada 8332 User manual

King Canada

King Canada 8332 User manual

King Canada King Industrial KC-899LSB User manual

King Canada

King Canada King Industrial KC-899LSB User manual

King Canada 8330 User manual

King Canada

King Canada 8330 User manual

King Canada 8332 User manual

King Canada

King Canada 8332 User manual

King Canada KC-3900S User manual

King Canada

King Canada KC-3900S User manual

King Canada KC-110C User manual

King Canada

King Canada KC-110C User manual

King Canada KC-110C User manual

King Canada

King Canada KC-110C User manual

King Canada KC-117C/FC User manual

King Canada

King Canada KC-117C/FC User manual

King Canada KSB-10 User manual

King Canada

King Canada KSB-10 User manual

King Canada 8101S User manual

King Canada

King Canada 8101S User manual

King Canada KSB-110N-LED User manual

King Canada

King Canada KSB-110N-LED User manual

King Canada 8216S-2 User manual

King Canada

King Canada 8216S-2 User manual

King Canada 8353N User manual

King Canada

King Canada 8353N User manual

King Canada KC-116C/FC User manual

King Canada

King Canada KC-116C/FC User manual

King Canada KC-16C-FC User manual

King Canada

King Canada KC-16C-FC User manual

King Canada 8329 User manual

King Canada

King Canada 8329 User manual

King Canada 8121S User manual

King Canada

King Canada 8121S User manual

King Canada 8348VS User manual

King Canada

King Canada 8348VS User manual

King Canada KC-110N User manual

King Canada

King Canada KC-110N User manual

Popular Power Tools manuals by other brands

Klarstein STEAKHOUSE PRO 233 manual

Klarstein

Klarstein STEAKHOUSE PRO 233 manual

Secabo TS5 Economy operating instructions

Secabo

Secabo TS5 Economy operating instructions

HIKOKI G1810DA Handling instructions

HIKOKI

HIKOKI G1810DA Handling instructions

GOMARK LANCMAN VS-A Instructions for safe use

GOMARK

GOMARK LANCMAN VS-A Instructions for safe use

EINHELL GE-CG 7,2 Li Original operating instructions

EINHELL

EINHELL GE-CG 7,2 Li Original operating instructions

Raider RDP-ER13 user manual

Raider

Raider RDP-ER13 user manual

CLAS OM 0797 manual

CLAS

CLAS OM 0797 manual

Performance Tool M552DB owner's manual

Performance Tool

Performance Tool M552DB owner's manual

Twilight TQ-8803 Operation manual

Twilight

Twilight TQ-8803 Operation manual

RAMSET D60 Operator's saffety & operating instruction manual

RAMSET

RAMSET D60 Operator's saffety & operating instruction manual

Slugger 2x2 Operator's manual

Slugger

Slugger 2x2 Operator's manual

Steren CAU-35 instruction manual

Steren

Steren CAU-35 instruction manual

DUO-FAST EIC-3118 quick start guide

DUO-FAST

DUO-FAST EIC-3118 quick start guide

Huskie Tools REC-6NDSL Operation manual

Huskie Tools

Huskie Tools REC-6NDSL Operation manual

Sthor 73473 Original instructions

Sthor

Sthor 73473 Original instructions

EIBENSTOCK EPG 400 Original instructions

EIBENSTOCK

EIBENSTOCK EPG 400 Original instructions

Yokota YLT70AL manual

Yokota

Yokota YLT70AL manual

Magnum MI-76150 operating manual

Magnum

Magnum MI-76150 operating manual

manuals.online logo
manuals.online logoBrands
  • About & Mission
  • Contact us
  • Privacy Policy
  • Terms and Conditions

Copyright 2025 Manuals.Online. All Rights Reserved.