manuals.online logo
Brands
  1. Home
  2. •
  3. Brands
  4. •
  5. KING
  6. •
  7. Heater
  8. •
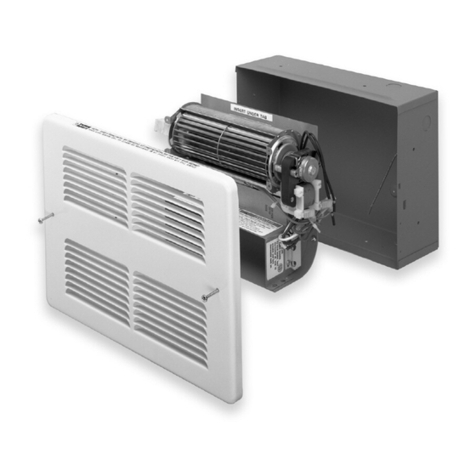
  9. KING H412 2/3-FS-GW User manual

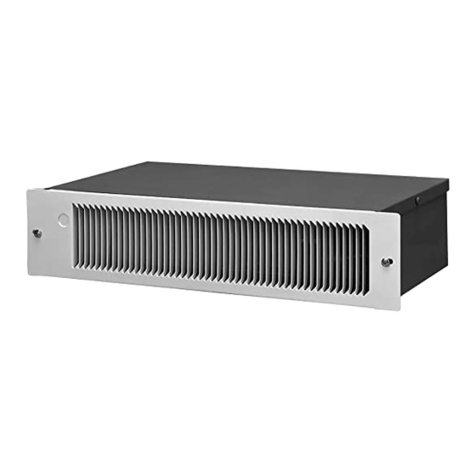
KING H412 2/3-FS-GW User manual

READ ALL WIRE SIZING, VOLTAGE REQUIREMENTS AND SAFETY
DATA TO AVOID PROPERTY DAMAGE AND PERSONAL INJURY tested to: 1995 standards
412 shown
GENERAL INFORMATION
WARNING
H SERIES
Hydronic Wall Heaters
SAVE THESE INSTRUCTIONS
KING ELECTRICAL MFG. COMPANY · 9131 10TH AVENUE SOUTH · SEATTLE, WA 98108 · PH: 206.762.0400 · FAX: 206.763.7738 · www.king-electric.com
DANGER
ELECTRIC SHOCK OR FIRE HAZARD
READ CAREFULLY - These instructions were written to help prevent difficulties that might arise during installation of this
heater. Studying the instructions first may save you considerable time and money later. Observing the following procedures
will cut the installation time to a minimum. King encourages you to save these instructions for future reference.
Thank you for buying this King H series heater. It should provide years of trouble-free service and comfort to your home.
Please inspect the package to ensure the heater coil and fan, with cover and screws to attach it to the wallbox, are included.
Here are a few tips in getting the heater installed correctly!
1. LOCATION: If possible find a location that is not on an outside wall - this will maintain the insulation value of your home and reduce cold air
leaks that come from gaps in the outside wall. Mount the heater in a location that will not have furniture blocking the front of the unit within
2 feet - a corner wall is ideal. Blowing heat towards the coldest part of the room (like a window) is best. To heat the room evenly warm air needs
to circulate freely without obstructions.
2. BEDROOMS:Agood location for a heater in a bedroom is just to the inside of the door of that room, blowing heat towards a cold glass window.
The thermostat should be located just above the light switch, with the heater in a stud bay over from the thermostat. Many times this one
stud bay over is not possible due to very small bedrooms, where the thermostat will be in the same stud bay as the heater. Temperature control
and accuracy will suffer in this instance due to the coils giving off convected heated air, the heated air moving up the wall where it will then effect
the thermostat’s sensors.
3. LIVING ROOMS: Mount the heater in a location that will not have furniture blocking the front of the unit within 2 feet. Often, a corner wall is ideal
because it is a traffic area with less chance of furniture placement. Blowing heat towards the coldest part of the room (like a large window area)
is best. Mount thermostat near a light switch for that room if it is in an open area.
4. MOUNTING: The heater should be located a minimum of 4 inches off a finished floor, although, to dramatically reduce the lint and dust intake,
up to 10 inches off the floor. However, too high placement on a wall may change the visual appearance of the product. King further recom
mends placement 4 inches from any side wall longer than 18 inches, and 8 inches below a ceiling or shelf that protrudes more than 6 inches.
5. THERMOSTATS: Only King model HB / HBP or HW / HWP / HWPT-120 thermostats are designed to control this heater.Any other line voltage
electric heat thermostats will not control the pump and fan in a sequential preheat start up, nor have a definate off for both fan and pump.
Standard bi-metal electric heat thermostats are not designed for, and should never be used for, control of hydronic fan heating.AKing
H series thermostat should not, when possible, be mounted above the fan coil heater, instead off to the side, where the convective heat from the
coils will not effect the temperature sensing when the fan heater is off. For best performance, pipes running to the heater (if they enter in to the
thermostat’s stud bay) should not have a total combined length (inlet / outlet) of over 10 feet, and, should not be closer than 16 inches in
any direction the the thermostat’s junction box in that stud bay. If the thermostat must be in the stud bay with the heater the thermostat should
be mounted on the left side of the stud bay as that side has no heat fins thereby having the least impact on thermostat accuracy.
H.indd : 1/10 1
Electrical Circuit Sizing
Maximum 15Amps
circuit breaker or fusing
MODEL* FINS PER INCH FT. OF WATER
PRESSURE
DROP @ 2 GPM AMPS RPM CFM BTU@2GPM 120° 140°*160°*180° 200°
H412 2/3 4 .36 .54 2000 80 High Speed 1,800 2,500 3,600 3,500 4,100
H412 2/3 4 .36 .51 1750 50 Low Speed 1,200 1,400 1,700 2,000 2,300
H412 3/4 8 .54 .54 2000 80 High Speed 2,200 3,100 4,000 4,800 6,100
H412 3/4 8 .54 .51 1750 50 Low Speed 1,200 1,800 2,400 3,000 3,800
H612 4/5 4 .36 .48 2550 120 High Speed 3,600 4,700 5,800 7,100 8,500
H612 4/5 4 .36 .40 1850 105 Low Speed 3,200 4,000 5,000 6,100 7,300
H612 6/8 8 .54 .48 2500 120 High Speed 4,100 6,000 7,600 9,100 10,500
H612 6/8 8 .54 .40 1850 105 Low Speed 3,700 5,200 6,500 7,900 9,600
* Most common operating temperatures
CAUTION
The heater should not be covered or blocked in any manner.
INSTALLATION INSTRUCTIONS
SAVE THESE INSTRUCTIONS
KING ELECTRICAL MFG. COMPANY · 9131 10TH AVENUE SOUTH · SEATTLE, WA 98108 · PH: 206.762.0400 · FAX: 206.763.7738 · www.king-electric.com
WATER TEMPERATURE AND AIR FLOW RATES
Following are installation guidelines:
• Disconnect power at main panel.
• Make certain all wiring is in accordance with all local codes.
• Ensure units are properly grounded.
• Heater voltage rating should be the same as supply load.
1. The heater should be located a minimum of 4 inches off a finished floor, although, to dramatically reduce the lint and dust intake, mount up to 10 inches off the
floor. However, too high of placement on a wall may change the visual appearance of the product. King further recommends placement of 4 inches from any side
wall longer than 18 inches, and 8 inches below a ceiling or shelf that protrudes more than 6 inches. Screws or nails can be used to secure the can to the studs.
The wall can should take up the room of a standard 2 x 4 stud cavity. If deeper than a 2 x 4 stud wall make sure the can reveals itself outside the finished wall
by ¾". Make sure the “Up” sticker is clearly observed in the can and on the grill.
2. Feed the power to the center of the can, with a maximum of 15Amp circuit protection. Provide a ½" strain relief and follow all local and national electrical
codes for wire sizing and proper connection.Aluminum wire will require special connectors and preparation to the connections for a safe connection.
3. Feed both the water lines to the upper left corner of the can. Offset 5/8" threaded copper pipe fittings are provided for easy hook up, in or out of the box.
4. Complete piping and bleed air out of coil for 5 minutes with system pump operating at maximum flow rate.
5. Copper coils are manufactured to be used with potable water and pressures up to 125 psi. Copper tubing used in the coil isAlloy 122 made toASTM-B-75
specifications. This is the same Coper used in homes for drinking water.
6. Connect the electrical power to the motor leads selecting the speed required for the application. The white wire is the common lead, black is high speed and red is
low speed. Use only two leads, white and black for high speed or white and red for low speed. Connect the green groundwire to the bare groundwire.
7. Aproper thermostat per heater should be used to maintain and provide the best comfort and energy efficiency from your King heaters. King requires the use of
King models HW120, HWP120, and one timer thermostat per system, the HWPT120, as they were specifically designed for use with the heater. King thermostat
models HB and HBP are also approved for use.
8. Test fan coil for motor operation and check for leaks at pipe connections.
9. Place grille on, using the 2 screws provided. Do not over tighten.
H.indd : 1/10
2
15¾"
Louvered Grille Depth
7/8"
4 ¾"
14 3/8"
Wall Can Front
see size chart page 4 Wall Can
Side Louvered Grille
see size chart page 4
8"
4"
4"
wall
shelf or ceiling
floor
Minimum Clearance
• 4 inches minimum from finished floor
• 4 inches from finished side wall
• 8 inches above heater wall can
Recommended Mounting
• 6 inches to 8 inches off floor
• 14 inches from outside wall
(interior walls prefered)
see
size chart
pg. 4
see
size chart
pg. 4
SAVE THESE INSTRUCTIONS
INSTALLATION INSTRUCTIONS
KING ELECTRICAL MFG. COMPANY · 9131 10TH AVENUE SOUTH · SEATTLE, WA 98108 · PH: 206.762.0400 · FAX: 206.763.7738 · www.king-electric.com
H.indd : 1/10
Specifications:
H Model Number Legend
H 6 12 6/8 AS-FS GW
H
6
12
6
/
8
HSeries Hot Water
Voltage 120
6000 BTU heat output @ 140 Degree water input
8000 BTU heat output @ 160 Degree water input
Inlet water temperature range: 100 to 200 Degree F
Power Supply: 110 to 125 Volt AC
Daily circulation is required if used on a potable water system.
Use an HWPT120 thermostat for this.
Electrical Circuit Sizing
Maximum 15 Amps
circuit breaker or fusing
One year warranty from date of installation
Number of copper tubes in coil
AS-FS
GW Grille White or Black color
Aqua Stat / Fan Switch
3
UPC
#093319 MODEL
NUMBER DESCRIPTION WT.
(lbs.) LIST
PRICE
19048
19047
19049
HW120
HWP120
HWPT120
120V 12AELECTRONIC, 2 STEP - 3 WIRE
120V 12AENERGY STAR 2 STEP - 3 WIRE
120V 12AELECTRONIC 2 STEP, WITH PUMP TIMER .7 $109.45
$138.46
$155.54
UPC
#093319 MODEL
NUMBER DESCRIPTION WT.
(lbs.) LIST
PRICE
19050
19051 HB
HBP 240/208V 12ASINGLE POLE, 2 STEP HYDRONIC, 3-WIRE
120/208/240V SINGLE POLE, 7-DAY PROGRAMMABLE THERMOSTAT .7 $99.83
$122.43
ELECTRONIC BATTERY POWERED 2 STEP HYDRONIC FAN COIL THERMOSTATS
SIZE CHART
UPC
#093319 MODEL
NUMBER* BTU 140° / 160°
(high speed) VOLTS CAN SIZE
H x W x D GRILLE SIZE
H x W x D WALL CAN
21090 H412 2/3-FS-GW 2,500 / 3,600 120 9½" x 14 3/8" x 4¾" 11" x 15¾" x 7/8" HC9
21091 H412 3/4-FS-GW 3,100 / 4,000 120 9½" x 14 3/8" x 4¾" 11" x 15¾" x 7/8" HC9
21081 H612 4/5-FS-GW 4,700 / 5,800 120 11" x 14 3/8" x 4 ¾" 12 ½" x 15 ¾" x 7/8" HC11
21092 H612 6/8-FS-GW 6,000 / 7,600 120 11" x 14 3/8" x 4 ¾" 12 ½" x 15 ¾" x 7/8" HC11
* Aqua Stat not required when using a King hydronic thermostat. In-built aquastat is available by special order only,
consult factory for price and availability.
ELECTRONIC LINE POWERED 2-STEP HYDRONIC FAN COIL THERMOSTATS
PRODUCT SELECTION
SAVE THESE INSTRUCTIONS
KING ELECTRICAL MFG. COMPANY · 9131 10TH AVENUE SOUTH · SEATTLE, WA 98108 · PH: 206.762.0400 · FAX: 206.763.7738 · www.king-electric.com
H.indd : 1/10
H SERIES HYDRONIC FAN COIL HEATER
HYDRONIC THERMOSTATS
ENERGY STAR ENERGY STAR
HW120
HWP120
Part # 19048
120V, 12.5Amps
Part # 19047
120V, 12.5Amps
Programmable
HWPT120
Part # 19049
120V, 12.5Amps
with timer
Programmable
HB
HBP
Part # 19050
208 / 240V, 16Amps
Part # 19051
120 / 208 / 240V, 16Amps
Programmable
Line Power Operated Battery Operated
4

This manual suits for next models

3

Other KING Heater manuals

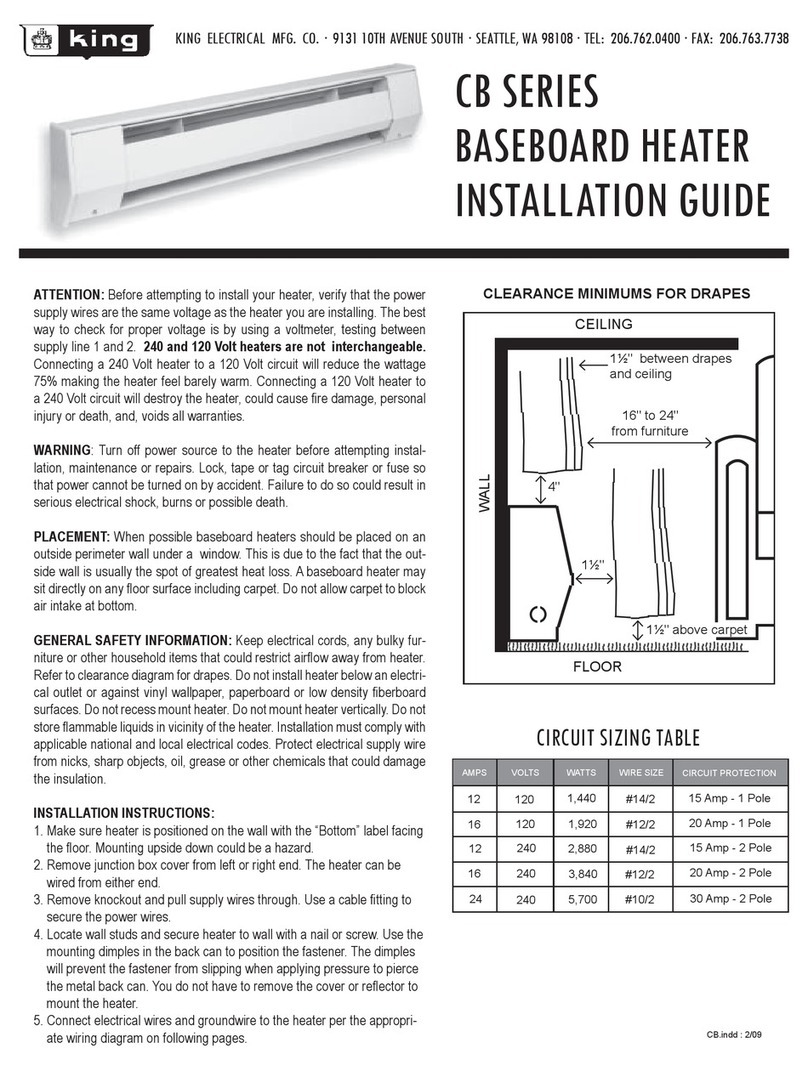
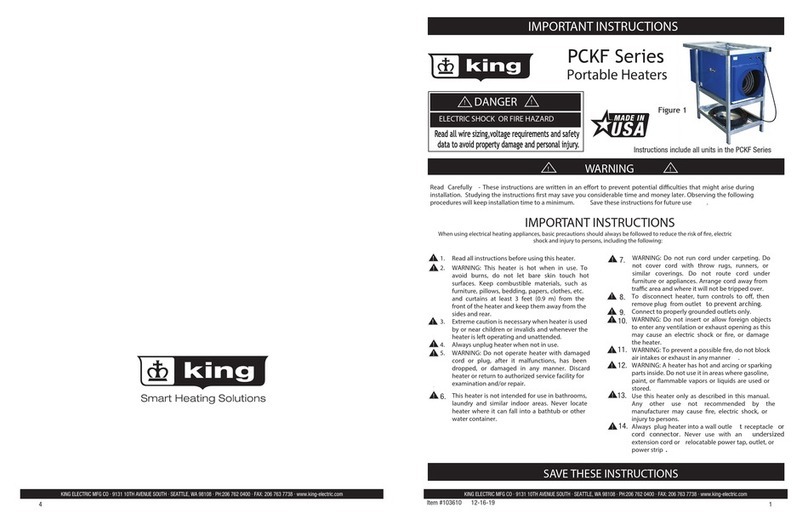
KING PCKF Series Installation instructions manual

KING

KING PCKF Series Installation instructions manual

KING EKB Series Installation instructions manual

KING

KING EKB Series Installation instructions manual

KING W SERIES Service manual

KING

KING W SERIES Service manual

KING PAW Series User manual

KING

KING PAW Series User manual

KING PAW Series Installation instructions manual

KING

KING PAW Series Installation instructions manual

KING KCV Series User manual

KING

KING KCV Series User manual

KING CB SERIES User manual

KING

KING CB SERIES User manual

KING PGH2440TB Instruction Manual

KING

KING PGH2440TB Instruction Manual

KING K series Guide

KING

KING K series Guide

KING 2016E User manual

KING

KING 2016E User manual

KING PSH2440TB Instruction Manual

KING

KING PSH2440TB Instruction Manual

KING RH Series User manual

KING

KING RH Series User manual

KING U Series User manual

KING

KING U Series User manual

KING KBP2406 User manual

KING

KING KBP2406 User manual

KING KVC Series User manual

KING

KING KVC Series User manual

KING SL Series User manual

KING

KING SL Series User manual

KING PCKW Series Instruction Manual

KING

KING PCKW Series Instruction Manual

KING PCKF Series Installation instructions manual

KING

KING PCKF Series Installation instructions manual

KING KTW1215 Installation instructions manual

KING

KING KTW1215 Installation instructions manual

KING K Series Guide

KING

KING K Series Guide

KING WHF Fan Force Electric Space Heater User manual

KING

KING WHF Fan Force Electric Space Heater User manual

KING PCK Series Installation instructions manual

KING

KING PCK Series Installation instructions manual

KING KT Series Installation instructions manual

KING

KING KT Series Installation instructions manual

KING PGH2440TB Instruction Manual

KING

KING PGH2440TB Instruction Manual

Popular Heater manuals by other brands

Hyco Fiji FH-201Z instruction manual

Hyco

Hyco Fiji FH-201Z instruction manual

Scarlett SC-1163 instruction manual

Scarlett

Scarlett SC-1163 instruction manual

S&P TL-32 Installation manual and operating instructions

S&P

S&P TL-32 Installation manual and operating instructions

Tylo Combi Installation and operating instructions

Tylo

Tylo Combi Installation and operating instructions

HOMCOM 820-244 operation instruction

HOMCOM

HOMCOM 820-244 operation instruction

Toyotomi Laser Clean LC-41 user manual

Toyotomi

Toyotomi Laser Clean LC-41 user manual

KENT KPE216-260 Owner's instruction manual

KENT

KENT KPE216-260 Owner's instruction manual

Sonnenkonig CUBY manual

Sonnenkonig

Sonnenkonig CUBY manual

AQ Elteknik HJSA 089 - 572 manual

AQ Elteknik

AQ Elteknik HJSA 089 - 572 manual

simatherm IH 240 Instructions for use

simatherm

simatherm IH 240 Instructions for use

Consort WMH3RX Installation & guide for operation

Consort

Consort WMH3RX Installation & guide for operation

VTS  Euroheat VOLCANO Series Technical documentation

VTS Euroheat

VTS Euroheat VOLCANO Series Technical documentation

Desa B225 CEE owner's manual

Desa

Desa B225 CEE owner's manual

KALOS KLEH161-0600 Assembly instructions

KALOS

KALOS KLEH161-0600 Assembly instructions

EUROM WALL DESIGNHEAT 2000R Instruction booklet

EUROM

EUROM WALL DESIGNHEAT 2000R Instruction booklet

EAST OAK CTH22001 owner's manual

EAST OAK

EAST OAK CTH22001 owner's manual

AEG WKL 753 F Operation and installation

AEG

AEG WKL 753 F Operation and installation

DiscreteHeat ThermaSkirt installation instructions

DiscreteHeat

DiscreteHeat ThermaSkirt installation instructions

manuals.online logo
manuals.online logoBrands
  • About & Mission
  • Contact us
  • Privacy Policy
  • Terms and Conditions

Copyright 2025 Manuals.Online. All Rights Reserved.