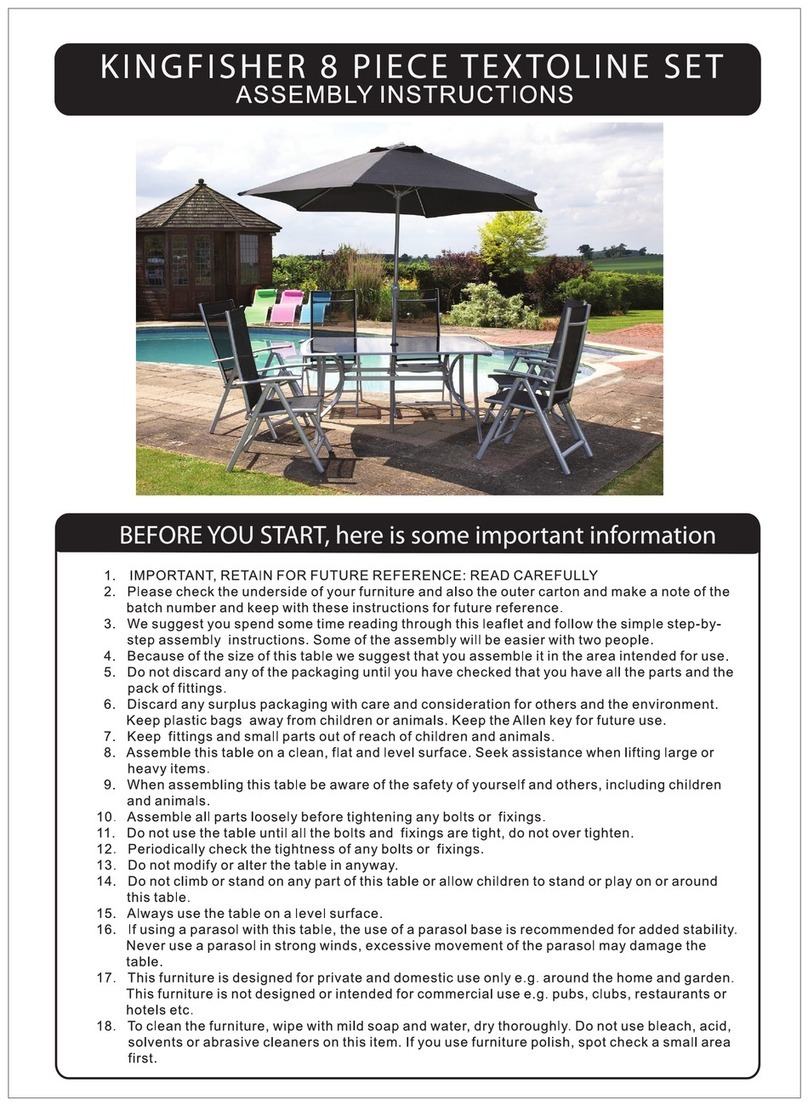
Kingfisher FS6DLDPS User manual

Instruction Manual

FS6DLDPS/V1-B1612P/A2
1. Reading and storing the user manual
2. Explanation of symbols
Congratulations! With your purchase you have decided on a high-quality product. Now please
take time to familiarise yourself with the product prior to assembly. It is important to read all of
these instructions and safety tips carefully before using the product.
To avoid any accidents or damage to the product, please follow all assembly instructions,
only use the product as instructed and only for its intended use. Retain these instructions for
future reference and if you are passing this product to a third party, always make sure this
documentation is included.
The following pictograms are used in these user manuals, on the appliance or on the packaging:
WARNING! This symbol designates a hazard with moderate degree of risk which may
lead to death or severe injury if not avoided.
3. Intended use
4. Safety notes
This product is for OUTDOOR USE ONLY! This product is designed for use in private households and is not
suitable for commercial purposes.
When using this appliance, basic safety precautions should always be followed to protect you against
personal injury.
THIS PRODUCT IS INTENDED FOR DOMESTIC, OUTDOOR USE BY PERSONS AND OBJECTS WITHIN THE LOAD
CAPACITIES STATED BELOW.
ALTHOUGH THE PARASOL PROVIDES SHADE, USERS OF THIS PRODUCT SHOULD STILL WEAR PROTECTION
AGAINST THE BURNING EFFECTS OF THE SUN ON THEIR SKIN.
ALWAYS USE THE FURNITURE SET ON A FLAT, LEVEL AND STABLE SURFACE.
ALWAYS REPLACE THE PLASTIC CAP IN THE CENTRE OF THE TABLE IF REMOVED FOR CLEANING, TO ENSURE
THERE IS NO DIRECT CONTACT BETWEEN THE GLASS SURFACE AND PARASOL POLE.
ALWAYS USE A PARASOL BASE (NOT INCLUDED) WITH THE PARASOL.
DO NOT JUMP ON OR USE EXCESSIVE FORCE WITH THESE PRODUCTS.
DO NOT LEAVE THIS PRODUCT EXPOSED TO ADVERSE WEATHER CONDITIONS. WE RECOMMEND THAT YOU USE
A COVER OR STORE AWAY DURING PERIODS OF BAD WEATHER TO PROTECT YOUR FURNITURE.
DO NOT ALLOW CHILDREN TO CLIMB ON THIS PRODUCT.
IT ISADVISED THAT YOU ONLY USE THIS PRODUCT IN THE CORRECT MANNER, WE DO NOTACCEPT RESPONSIBILITY
FOR MISUSE OR SUBSEQUENT DAMAGE.
PLEASE NOTE THAT THE TABLE TOP IS MADE FROM GLASS!
MAX WEIGHT CAPACITY: 110KG PER SEAT
HANDLE WITH CARE. A DAMAGED TEMPERED GLASS EDGE OR SCRATCHED SURFACE CAN IN EXCEPTIONAL
CASES CAUSE THE GLASS TO CRACK SUDDENLY. TEMPERED GLASS NEVER BREAKS INTO SHARP FRAGMENTS,
ONLY INTO SMALL PIECES. AVOID COLLISIONS FROM THE SIDE – THIS IS WHERE GLASS IS MOST VULNERABLE.
TO AVOID DAMAGES TO THE SURFACE, WE RECOMMEND TO ALWAYS USE PLACE MATS AND DRINK COASTERS.
DO NOT DRAG THE TABLE ACROSS THE GROUND.
WE RECOMMMEND TWO PEOPLE LIFT THE TABLE WHEN MOVING IT.
THE CHAIRS ARE FOR SINGLE PERSON USE.
NEVER PLACE HOT ITEMS DIRECTLY ONTO THE SURFACE OF THE GLASS TABLE TOP.
THE PARASOL SHOULD NOT BE USED IN ADVERSE WEATHER CONDITIONS.
SAFETY INSTRUCTIONS

FS6DLDPS/V1-B1612P/A 3
- Table Top
- Small Bolt
- Small Screw
- Table Support Brace
- Leg
- Washer
- Plastic Table Ring
- Large Bolt
- Nut
6. Product parts and features
Product Contents - Table
Remove the product from the box and check all the parts listed below are included before proceeding with the
assembly. Remove all the packaging from the product and place it in the box or dispose of safely. Please make sure
children and pets are not present during unpacking assembly - packaging foils and small parts are not toys!
A
A
2
2
5
5
C
C
B
B
3
3
6
6
1
1
4
4
x1
x4
x4
x1
x4
x12
x1
x4
x8
5. Disposal of packaging/appliance
Never leave children unattended with the packaging material. Risk of suffocation.
Your appliance is wrapped in packaging to protect it against transportation damage. Dispose of the
packaging in the most environmentally friendly way possible.
If possible, keep the appliance’s original packaging during the warranty period so that in the event of
warranty claim, you can package the appliance safely for its return.

FS6DLDPS/V1-B1612P/A4
7. Assembly Information
The following safety instructions should always be followed to reduce the risk of personal injury or re. It is important
to read all of these instructions carefully before using the product and to retain them for future reference or new users.
This product is intended for normal domestic use. Using this product in any other environment may result in a
shortened working life.
- Seat
- Washer
- Back Rest
- Cushion
- Leg
- Small Bolt
- Large Bolt
Product Contents - Chair
A
A
2
2
C
D
C D
B
B
3
3
1
1
x1
x8
x1
x1
x2
x2
x6

FS6DLDPS/V1-B1612P/A 5
8. Assembly - Table
Insert the rst (B) Leg as shown
above into the leg support. The
support can be found in each
corner of the (A) Table Top.
Insert the nal (B) Leg as shown
above into the leg support.
Secure each (B) Leg to the (C)
Table Support Brace using 1x (4)
Large Bolt, 1x (3) and 1x (4) from
the lowest point.
Insert the second (B) Leg as shown
above into the leg support.
Using 4x (5) Small Screw insert one
of each of the legs as shown.
Secure each (B) Leg to the extruding
bracket located on each corner of (C)
Table Support Brace using 1x (2), 1x
(3) and 1x (4) at the highest point.
Place the (A) Table Top, upside down
on a clear and at surface.
Insert the third (B) Leg as shown
above into the leg support.
Place (C) Table Support Brace into
position between the legs ensuring
that the extruding bracket is pointed
upwards on each leg.
5
8
3
6
9
1
4
A
AA
A A A
2
3/4
3/4
C
C
BB
BB
B
1
2
7
5

FS6DLDPS/V1-B1612P/A6
Your table should now look as
shown above.
The centre ring should look as
shown above when installed
correctly.
Locate and hold into position the
(A) Seat on the inner side of the
(B) leg.
Turn the assembled upright ready for
the nal stage of assembly.
You assembled table is now ready for
use. Please place on a level surface.
Using 1x (1) Large Bolt and 1x (2)
Washer secure the main frame of
the (A) Seat to the frame of (B) Leg.
Using 1x (3) and (2) secure the seat
bracket to the leg.
Ensure that each tting is secure and
tight.
Locate 1x (6) and place into the
centre of the table. The clip should
clip nicely into place. DO NOT force
it into place as it will cause damage.
Place 1x (B) Leg onto a clear at
surface ready for the next stage of
the assembly process.
14
2
12
15
3
10
13
11
1
9. Assembly - Chair
6
A
A
B
B
1/2
3/2

FS6DLDPS/V1-B1612P/A 7
10. Declaration of conformity
This product complies with all applicable European Directives and legally prescribed standards.
Imported and Distributed by:
Bonnington Plastics Limited
Kingsher House
Glaisdale Parkway
Nottingham
NG8 4GP
UK
Repeat steps 1-4 for the other leg.
Ensure the ttings are all secure
and tight before proceeding to the
next stage.
The main seat construction is now
complete. Please ensure that all
the ttings are secure and tight.
Turn the assembled unit upright
ready for the next stage of assembly.
Finally please attach the (D) Seat
Cushion to the unit. On the reverse
side are straps. Please attach them
to the main frame.
Using 1x (1) Large Bolt and 1x (2)
Washer secure the rear of Seat
Frame to the Leg frame.
Locate 1x (C) Back Rest and insert
it into the slots located on the rear of
the (A) Seat panel. Secure either side
with 1x (1) and 1x (2) for each side.
8
6
9
4
7
5
A
C
1/2
1/2
D

If the below box doesn’t state the batch number, please copy it from the
retail packaging or rating plate. The batch number is located below the
barcode on the back of the box and on the rating label on the product.
If problems are encountered with this appliance, please quote your product
code (FS6DLDPS) and the above batch number every time you contact the
manufacture, distributer or retailer your purchase was made at.
Imported and Distributed by:
Bonnington Plastics Limited, Kingsher House
Glaisdale Parkway, Nottingham. NG8 4GP. UK
BATCH NUMBER:
Table of contents
Other Kingfisher Outdoor Furnishing manuals
Popular Outdoor Furnishing manuals by other brands

TREX
TREX Outdoor Furniture TXC71 Assembly instructions

Members Mark
Members Mark Adler FRA10323ST Assembly instructions & user manual

Polywood
Polywood SBD12 Assembly instructions

Polywood
Polywood AD420 Assembly instructions

Polywood
Polywood Rockford RKB48 Assembly instructions

HAMPTON BAY
HAMPTON BAY Morgan Springs MM21-03 Use and care guide

FLORABEST
FLORABEST 311044 Instructions for use

Polywood
Polywood Nautical PWS720-1 Assembly instructions

HAMPTON BAY
HAMPTON BAY HEATHER GLEN FRN-312641 Use and care guide

HAMPTON BAY
HAMPTON BAY HEATHER GLEN FRN-312640-5S Use and care guide

HAMPTON BAY
HAMPTON BAY 176-411-CL Use and care guide

Yard Craft
Yard Craft Octagon Cedar Gazebo Assembly manual