5
INSTALLATION
INSTALLATION
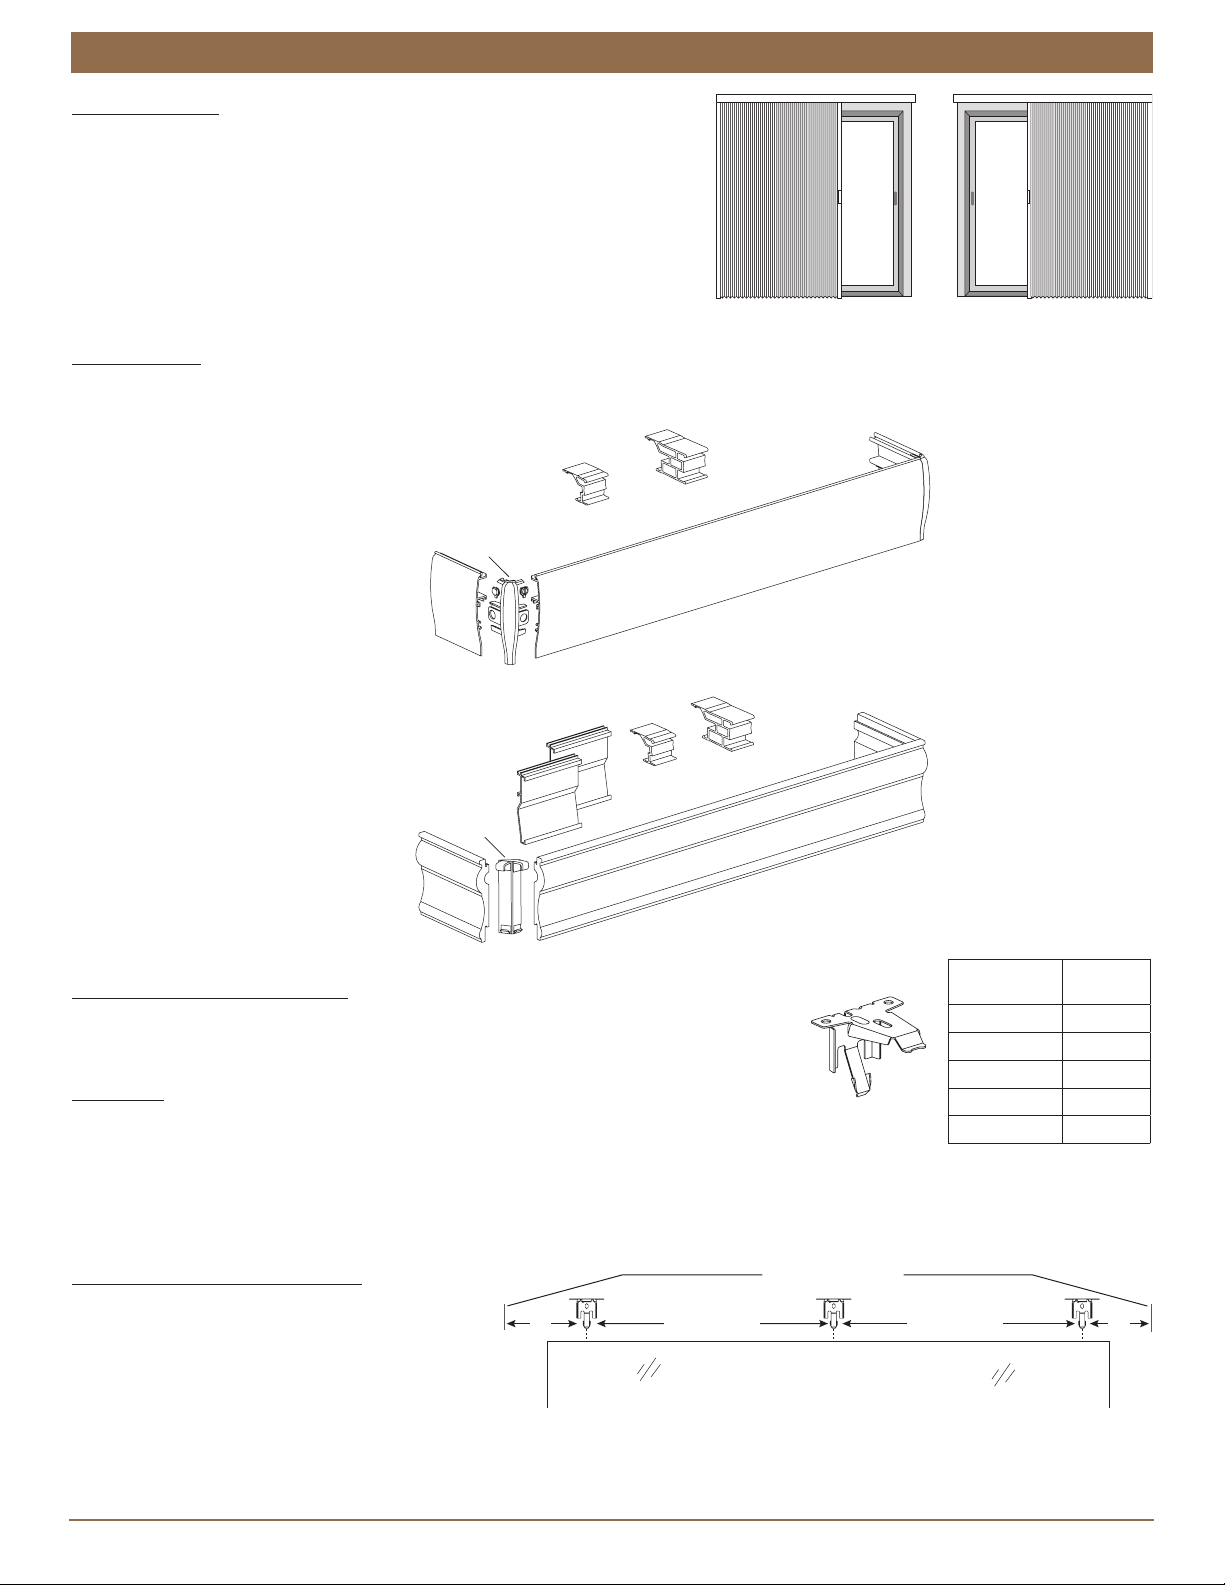
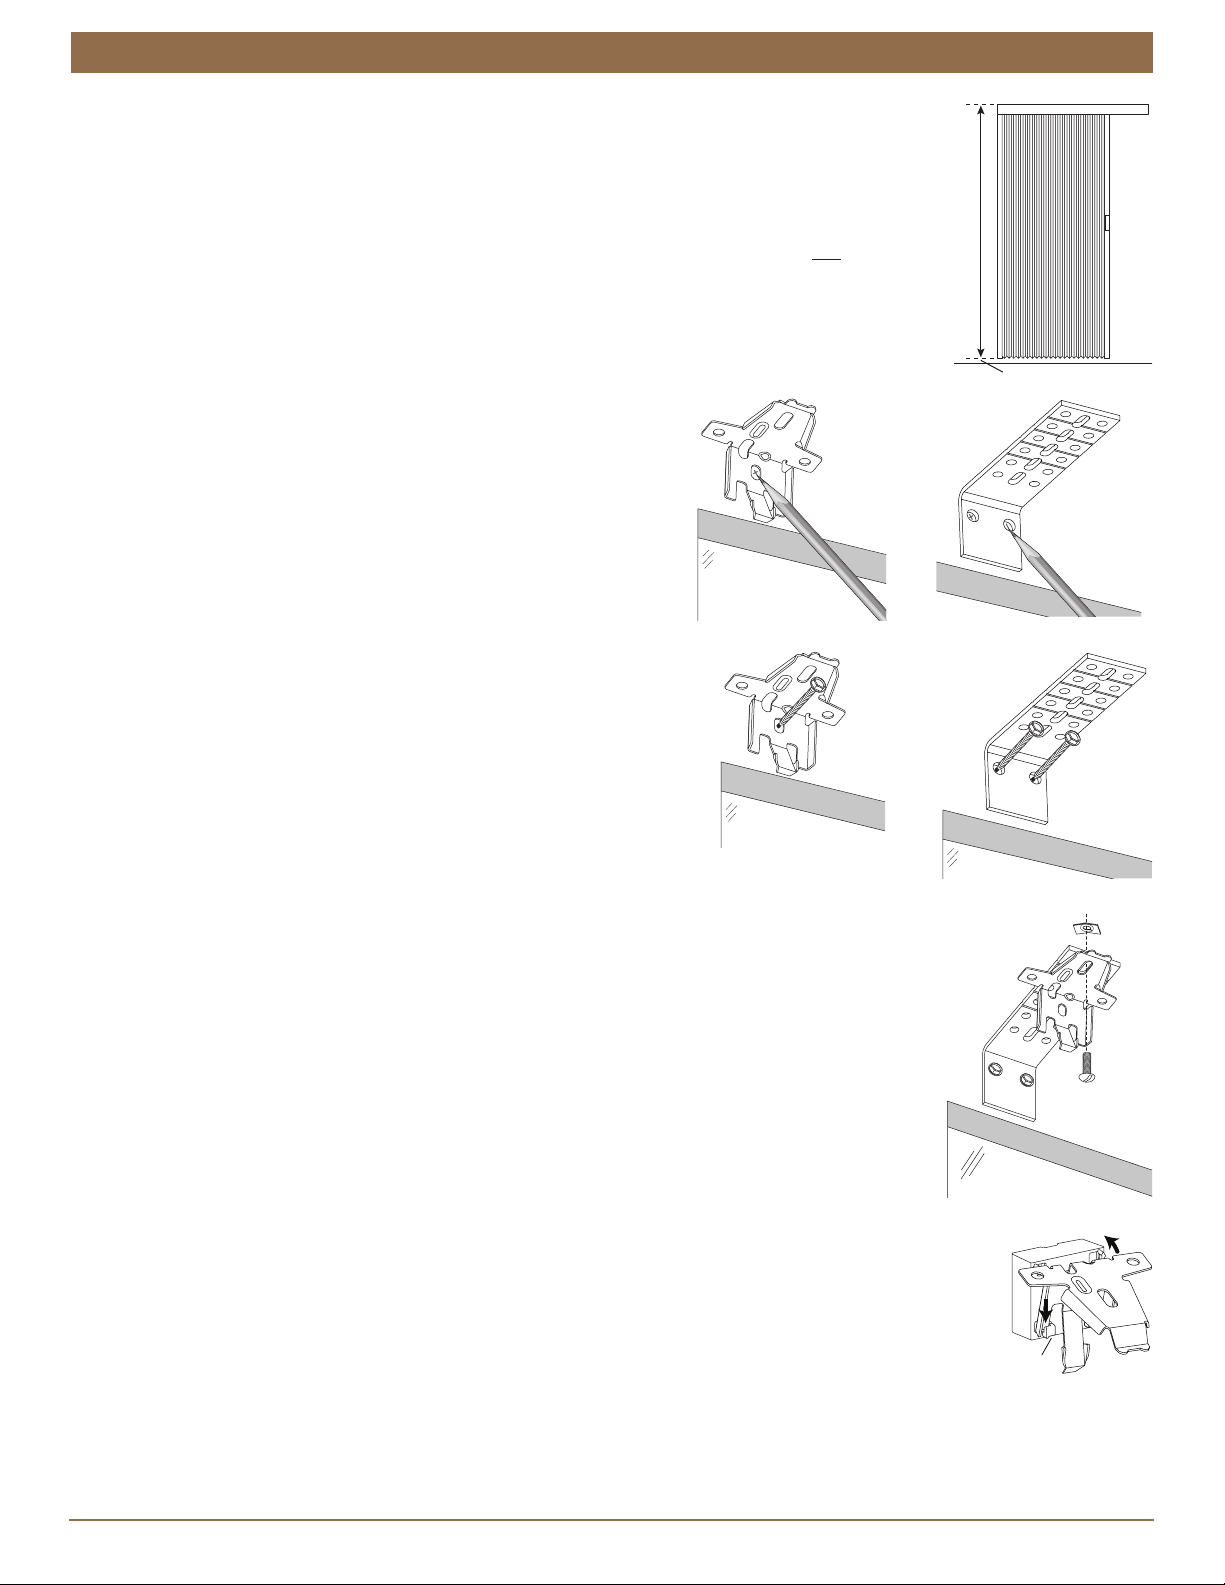
Attach the spacer blocks and installation brackets with #6 hex head mounting screws long
enough for a secure installation. (See chart below.) Longer screws are not provided.
The top of the spacer blocks should be at the desired shade height.
The front edges of the installation brackets must be level and aligned to each other.
CAUTION: Use drywall anchors when mounting into drywall.
CAUTION: The rear of the spacer blocks must be flush against a flat surface. Do not mount
spacer blocks and installation brackets on curved molding.
IMPORTANT: The provided 1
1
⁄
2
" screws can only be used with a maximum of one
1
⁄
8
" shim. You
will need to supply longer screws if additional clearance is required.
A minimum 1
1
⁄
4
" length of screw threads must extend beyond the last spacer block or shim. Use
appropriate wall anchors when mounting into drywall.
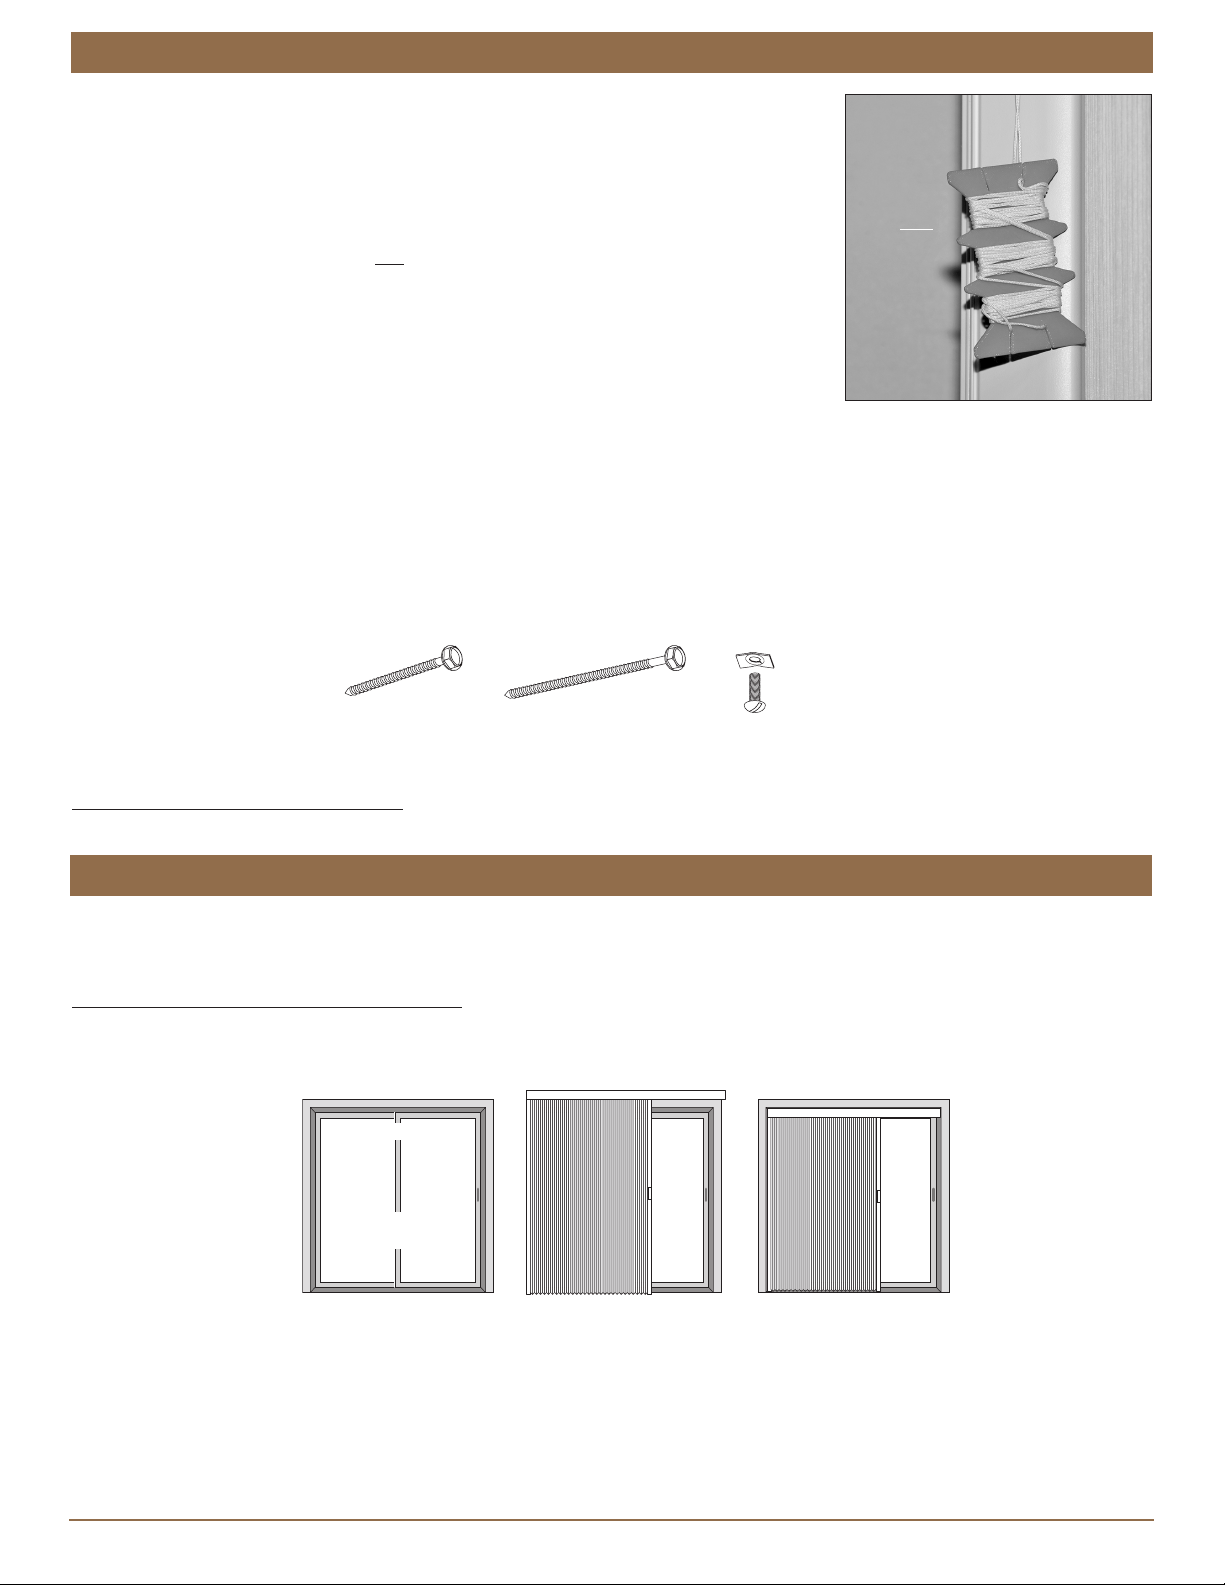
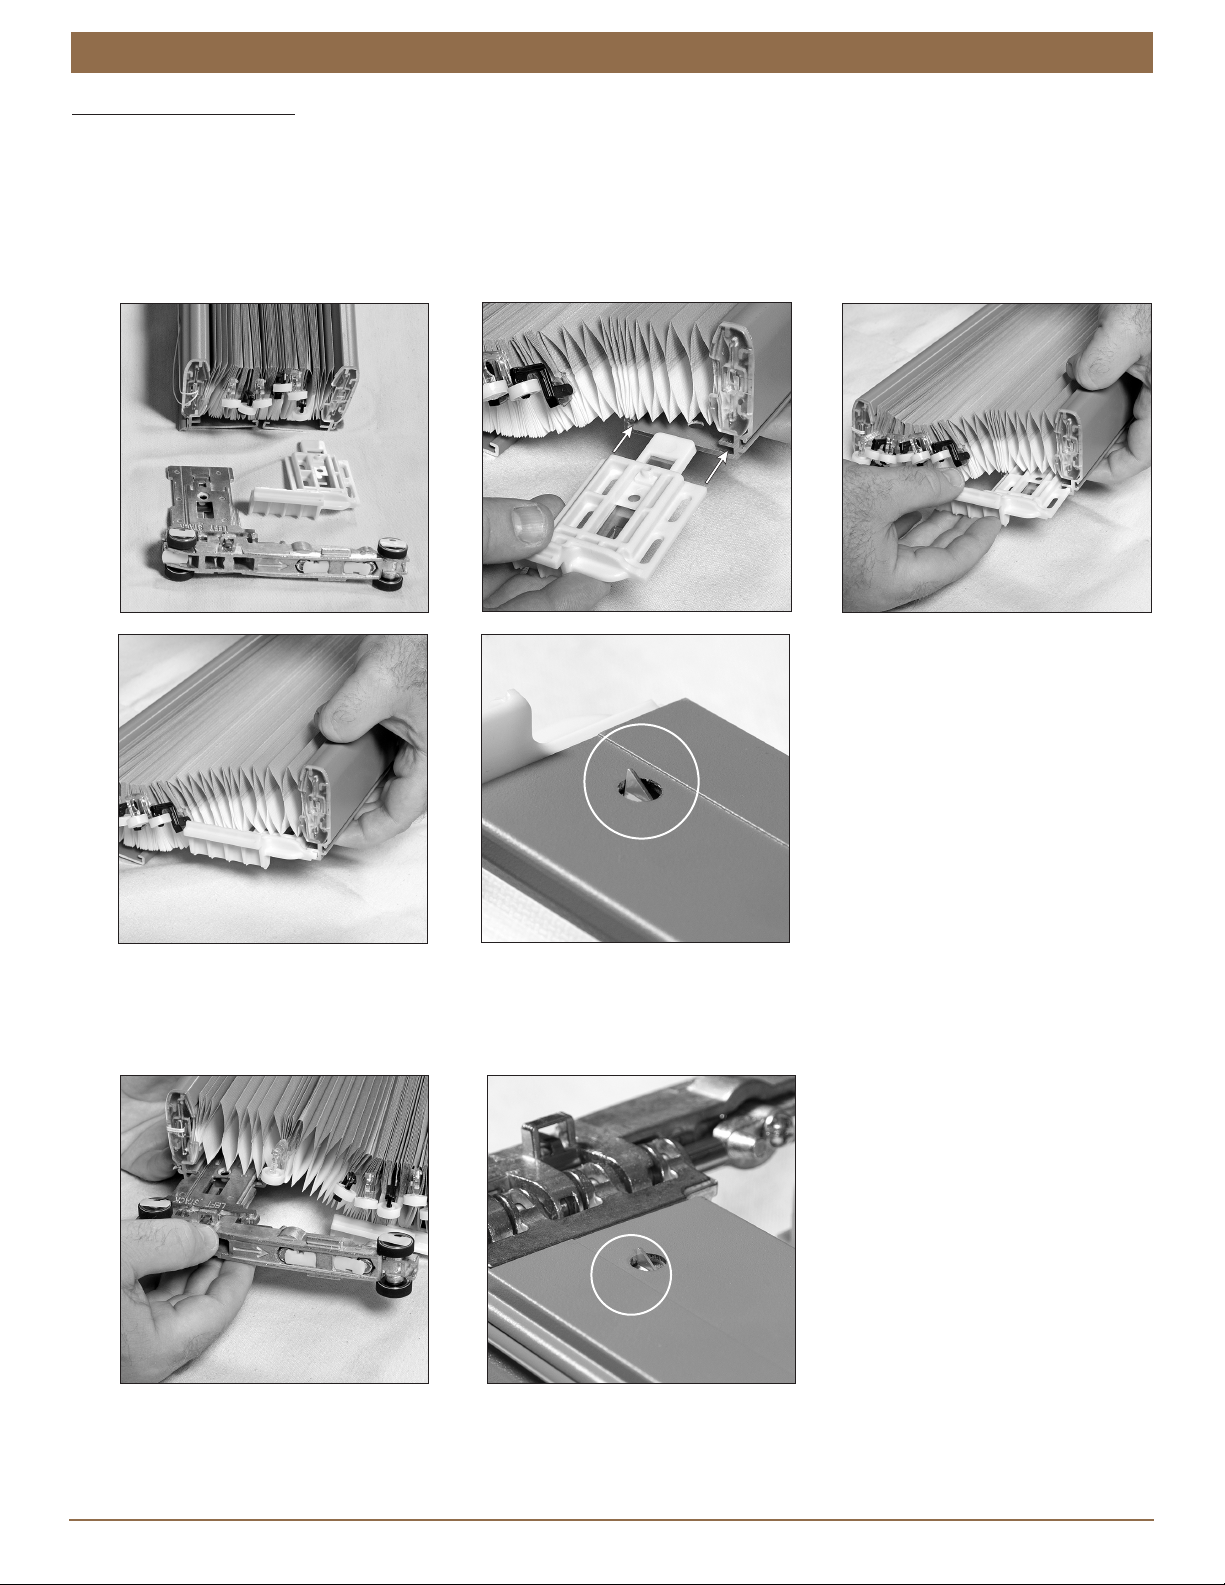
Mount the Headrail
NOTE: A left stack design is shown throughout these
instructions. Procedures for a right stack design are the
same but at opposite sides of the fabric stack and headrail.
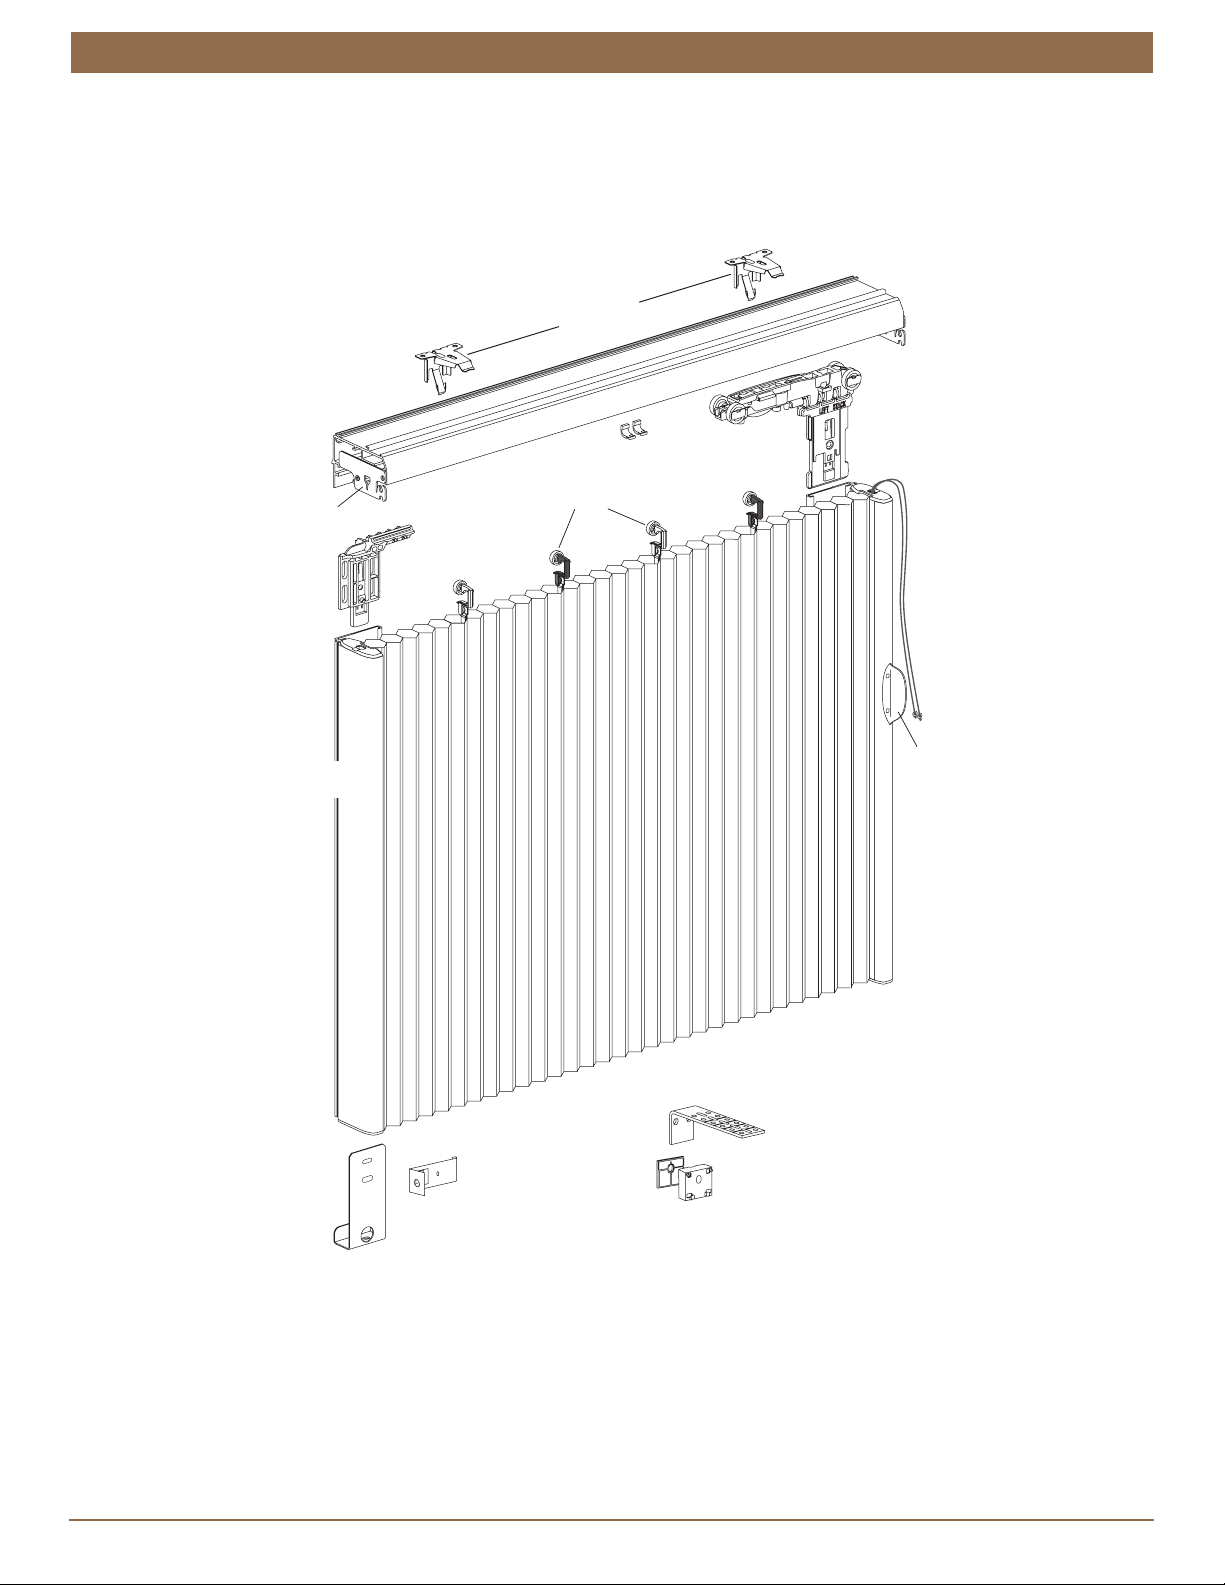
First, remove the moving rail brackets from the headrail.
Remove the end plate from the left end of the
headrail.
Slide out the moving rail brackets.
Do not remove the cord tensioners from the
headrail.
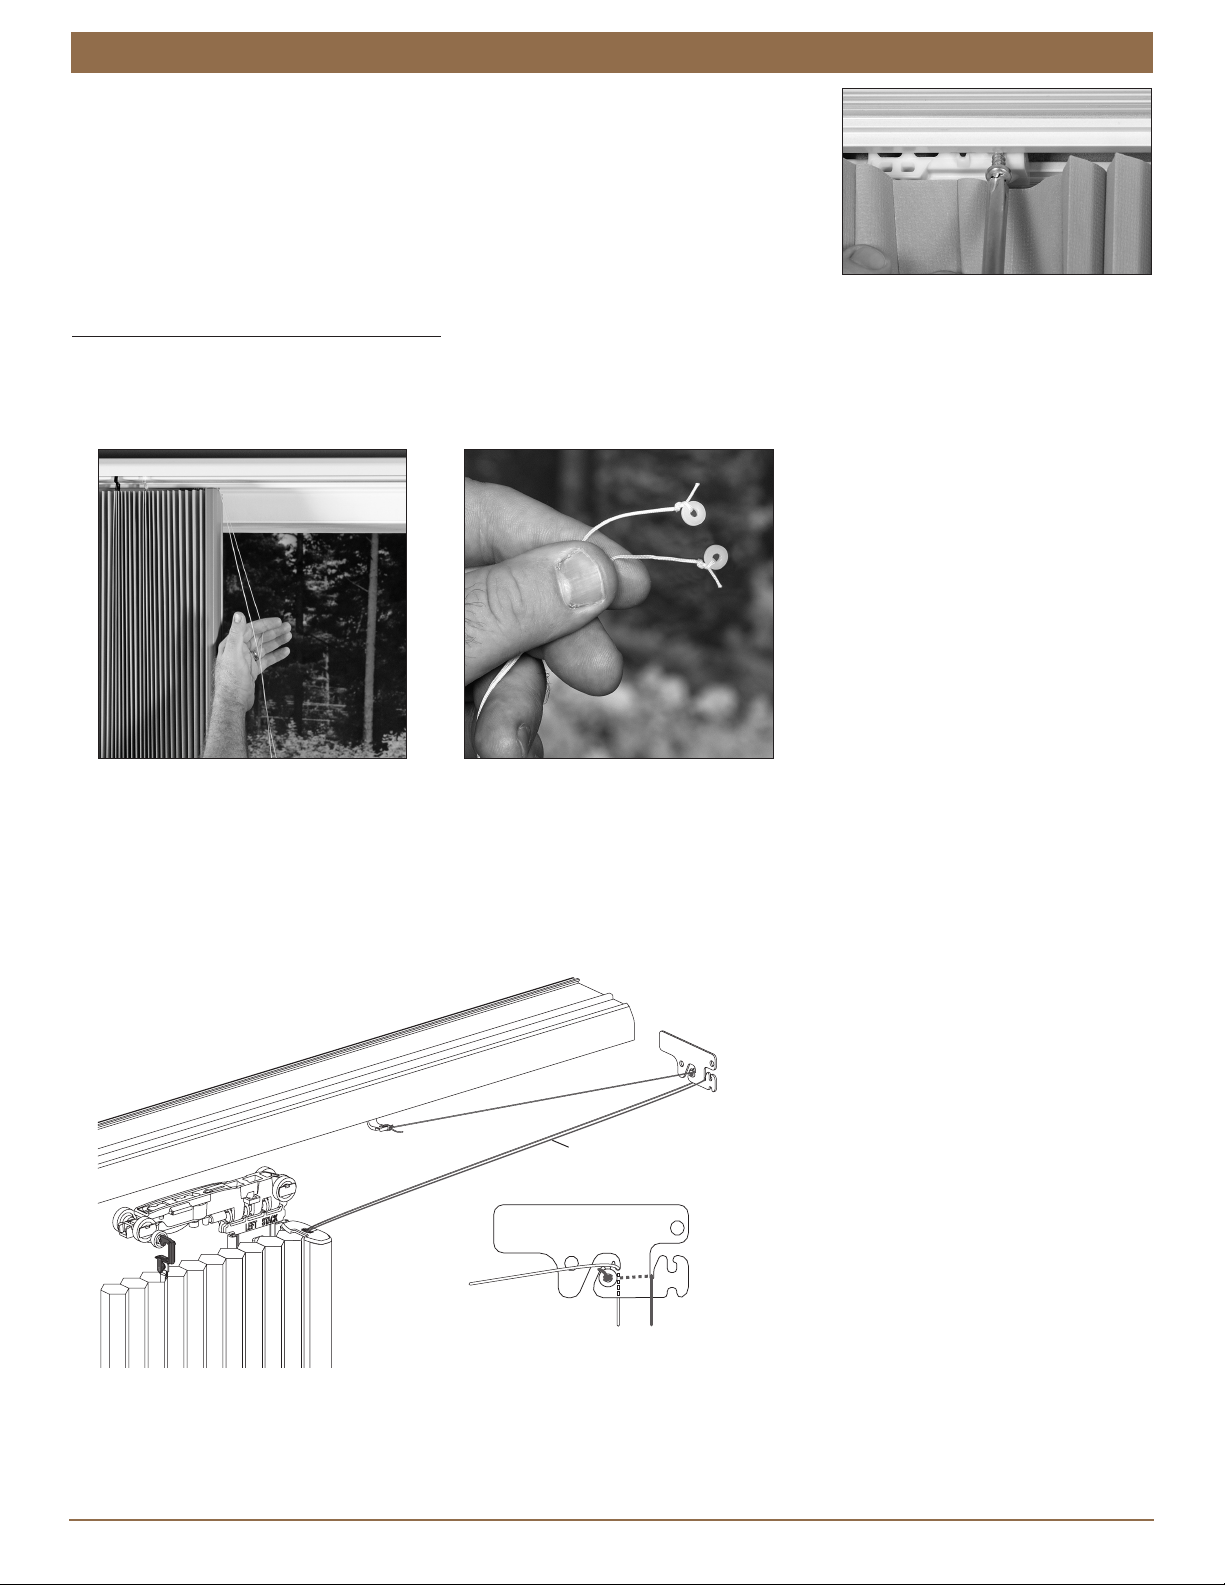
Without reattaching the end plate, mount the headrail.
Carefully align the headrail with the end marks on the mounting surface. (Headrail position cannot be easily adjusted after
the headrail is mounted.)
Place the front groove on the headrail onto the front lip of the installation brackets.
Rotate the rear of the headrail up and push back until the headrail snaps in place.
3" (Not provided; up to 1
1
∕
2
" of spacer blocks/shims)
2
1
∕
2
" (Not provided; up to 1
1
⁄
8
" of spacer blocks/shims)
Never use more than 1
1
∕
2
" of spacer blocks/shims!
2" (Not provided; up to
5
∕
8
" of spacer blocks/shims)
1
1
∕
4
" Minimum
Shim
Maximum of One
Shim with Provided
1
1
∕
2
" Screws
Do Not Remove
Cord Tensioners
Align Headrail with End Marks
Front of Bracket
Snap in Place
Longer Screw
(Not Provided)
Maximum
1
1
∕
2
"