Electrical requirements
Electrical Shock Hazard
Plug Into a grounded 3 prong
outlet.
Do not remove ground prong.
Do not use an adapter.
Do not use an extension cord.
Failure to follow these
instructions can result in death,
fire, or electrical shock.
If codes permit and a separate
ground wire Is used, It Is
recommended that a qualified
electrician determine that the
ground path is adequate.
A120-volt,60-Hz, AC-only 15- or
20- ampere fused, grounded
electrical supply is required. It is
recommended that a separate circuit
serving only your hot water dispenser
be provided. Use an outlet that
cannotbe turned on/offby a switch.
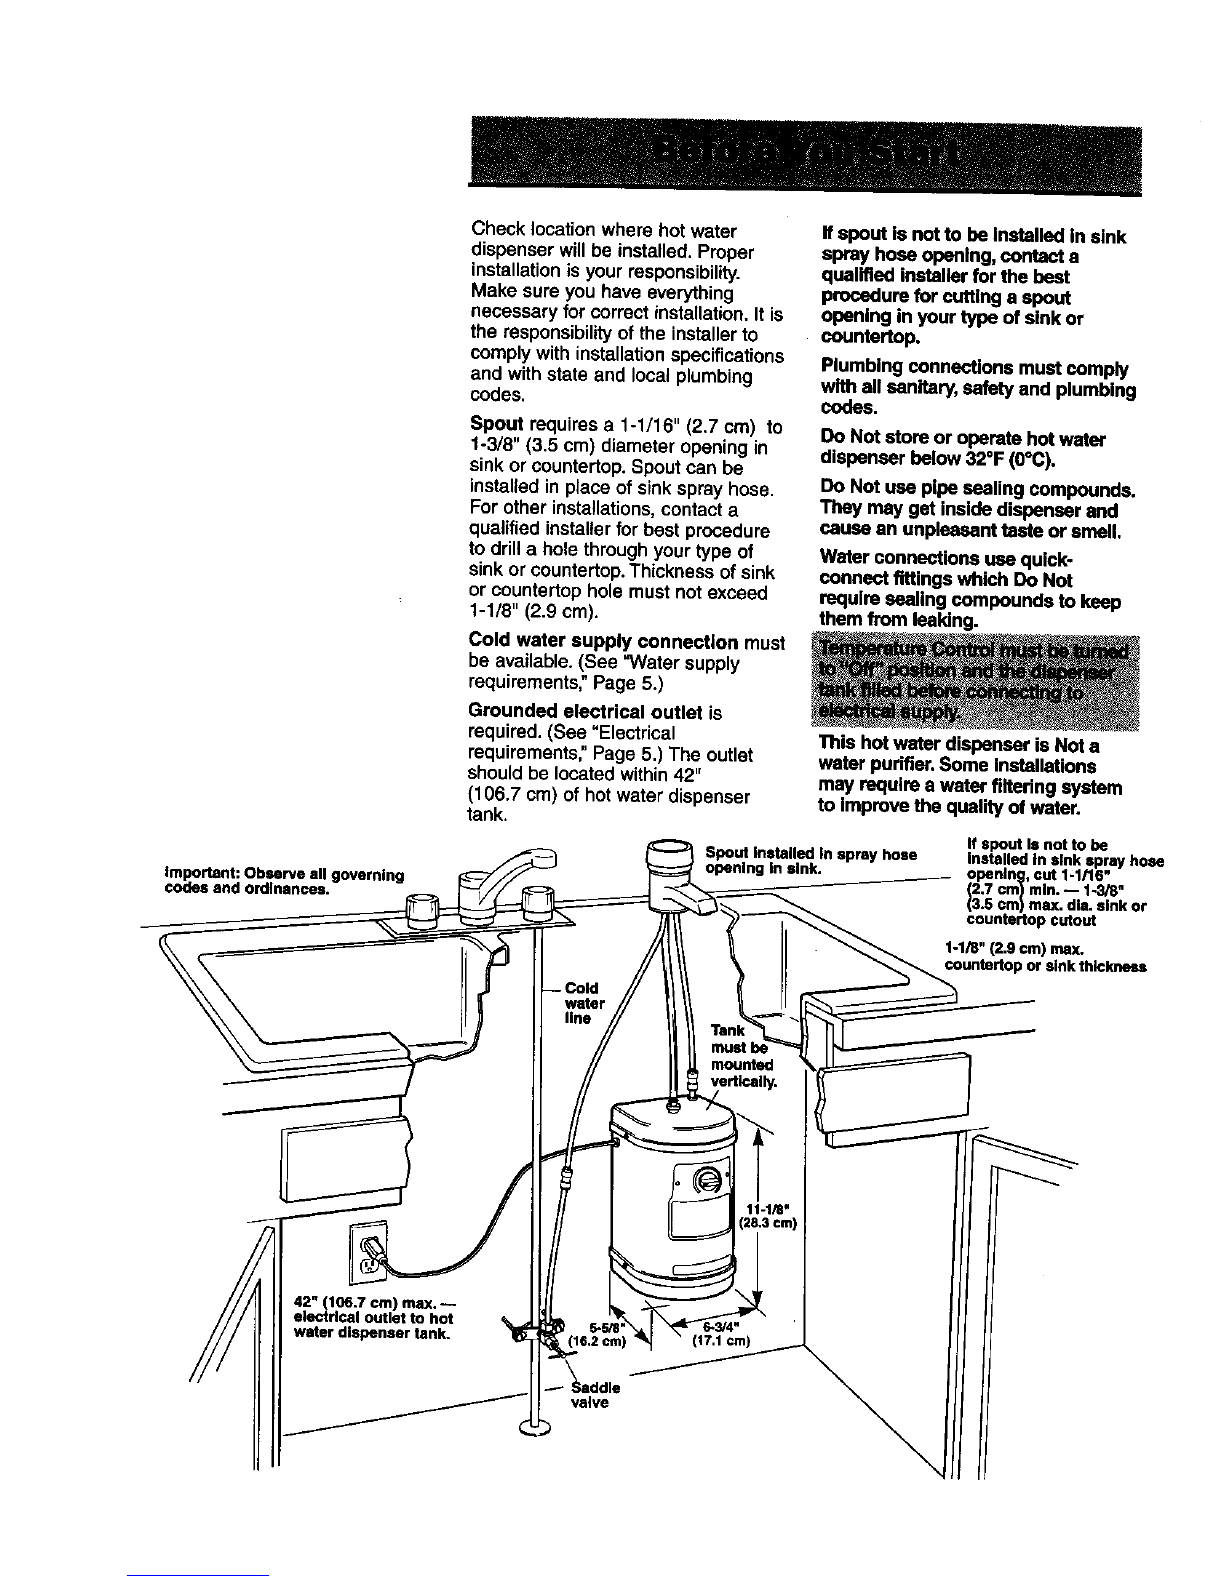
Water supply requirements
If localcodes permit,the hotwater
dispenserfeed line shouldbe
connectedto thecoldwater supply
line usinga saddletappingvalve.
Important: If local codes Do Not
permit the use of saddle valves,
special feed valves can be
obtained from your local plumbing
supply distributor.
Connectionto hot water lineis not
recommended. Energywillbe wasted
in heatingthe watertwice and the
magnesiumrodused in household
heatingmay producea "rotten egg"
taste.
3-prong
ground-type
wall receptacle
prong
power
supplycord
Recommended ground method
Foryour personal safety,the hot
waterdispensermustbe grounded.
Thisappliance isequippedwitha
powersupplycordhavinga 3-prong
groundplug. To minimizepossible
shock hazard,the cordmustbe
plugged intomating,3-prong,ground-
type wall receptacle,groundedin
accordancewith all nationaland local
codes and ordinances. If a mating
wall receptacleis not available,itis
the personalresponsibilityand
obligationofthe customerto have a
properlygrounded,3-prong,wall
receptacleinstalledby a qualified
electrician.
If this unitis replacinga hot water
dispenser connected toa hotwater
supply,the existingconnectionmay
be used.
A waterfilteris recommendedif
yourwater supplycontainssand,
gritor otherparticles.If a filter is
used,the water pressuretothe
dispensershouldnotdropbelow
20 psi(138 kPa).