manuals.online logo
Brands
  1. Home
  2. •
  3. Brands
  4. •
  5. KitchenAid
  6. •
  7. Garbage Disposal
  8. •
  9. KitchenAid KWC-200 User manual

KitchenAid KWC-200 User manual

Other KitchenAid Garbage Disposal manuals

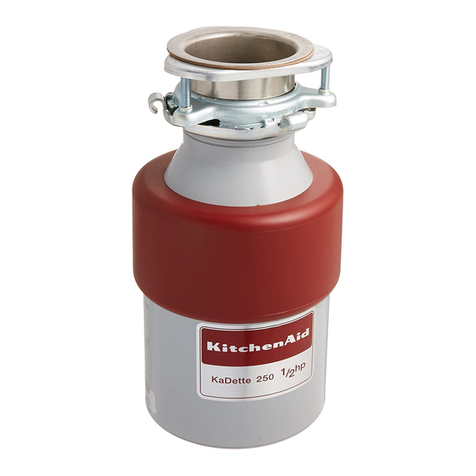
KitchenAid KCDB150 User manual

KitchenAid

KitchenAid KCDB150 User manual

KitchenAid KCDB250S0 User manual

KitchenAid

KitchenAid KCDB250S0 User manual

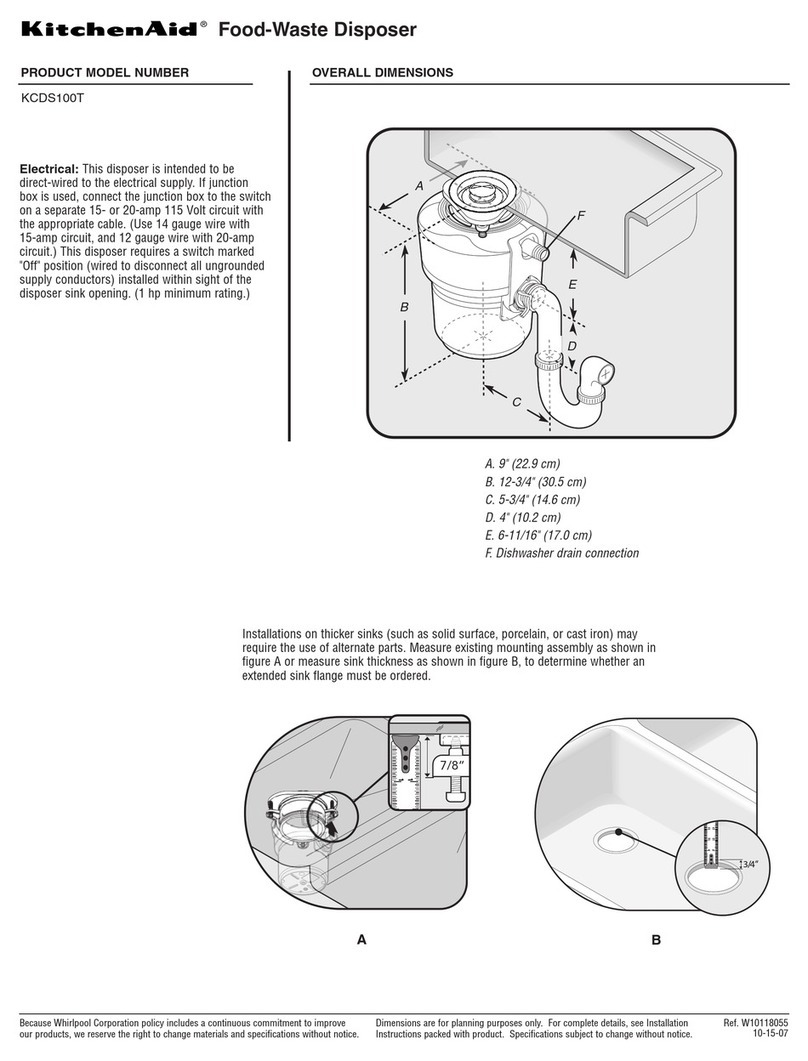
KitchenAid KCDS100T - 1 HP Continuous Feed Waste... User manual

KitchenAid

KitchenAid KCDS100T - 1 HP Continuous Feed Waste... User manual

KitchenAid TC707S1 User manual

KitchenAid

KitchenAid TC707S1 User manual

KitchenAid KCDS250X User instructions

KitchenAid

KitchenAid KCDS250X User instructions

KitchenAid KCDB250 User manual

KitchenAid

KitchenAid KCDB250 User manual

KitchenAid KD-100 User manual

KitchenAid

KitchenAid KD-100 User manual

KitchenAid KBDS100T - NA Batch Feed 1 HP MultiGrind User manual

KitchenAid

KitchenAid KBDS100T - NA Batch Feed 1 HP MultiGrind User manual

KitchenAid IMPERIAL KCDI075V User manual

KitchenAid

KitchenAid IMPERIAL KCDI075V User manual

KitchenAid SUPERBA KCDS075T User manual

KitchenAid

KitchenAid SUPERBA KCDS075T User manual

KitchenAid Superba KCDS100T User manual

KitchenAid

KitchenAid Superba KCDS100T User manual

KitchenAid INTEGRATED COMPACTOR User manual

KitchenAid

KitchenAid INTEGRATED COMPACTOR User manual

KitchenAid KCDS075T User manual

KitchenAid

KitchenAid KCDS075T User manual

KitchenAid KCDS100T0 User manual

KitchenAid

KitchenAid KCDS100T0 User manual

KitchenAid KBDS250X - 1 HP Superba Batch Feed Disposer Installation manual

KitchenAid

KitchenAid KBDS250X - 1 HP Superba Batch Feed Disposer Installation manual

KitchenAid KCDS100T - 1 HP Continuous Feed Waste... Manual

KitchenAid

KitchenAid KCDS100T - 1 HP Continuous Feed Waste... Manual

KitchenAid 4151847 WHITE User manual

KitchenAid

KitchenAid 4151847 WHITE User manual

KitchenAid KBDS100T0 User manual

KitchenAid

KitchenAid KBDS100T0 User manual

KitchenAid KCDS075T0 User manual

KitchenAid

KitchenAid KCDS075T0 User manual

KitchenAid KCCC151EBL1 User manual

KitchenAid

KitchenAid KCCC151EBL1 User manual

KitchenAid KCDI075VA Use and maintenance manual

KitchenAid

KitchenAid KCDI075VA Use and maintenance manual

KitchenAid KCDB250G2 User manual

KitchenAid

KitchenAid KCDB250G2 User manual

KitchenAid KBDS100T - NA Batch Feed 1 HP MultiGrind Service manual

KitchenAid

KitchenAid KBDS100T - NA Batch Feed 1 HP MultiGrind Service manual

KitchenAid SUPERBA KCDS100T User manual

KitchenAid

KitchenAid SUPERBA KCDS100T User manual

Popular Garbage Disposal manuals by other brands
Franke CE-50 User and installation manual
Franke

Franke CE-50 User and installation manual

Leafield Environmental Envirobank 140 Installation guidelines
Leafield Environmental

Leafield Environmental Envirobank 140 Installation guidelines

Insinger I-6 brochure

Insinger

Insinger I-6 brochure

Scheppach HP3000S Translation from the original instruction manual
Scheppach

Scheppach HP3000S Translation from the original instruction manual

Zanussi DU 4400 Instruction booklet

Zanussi

Zanussi DU 4400 Instruction booklet

MULTIQUIP Mikasa series MVH-306D Operation and parts manual

MULTIQUIP

MULTIQUIP Mikasa series MVH-306D Operation and parts manual

Max Maxmatic 4000c operating instructions

Max

Max Maxmatic 4000c operating instructions

Belle PCX 20/50 Operator's manual

Belle

Belle PCX 20/50 Operator's manual

InSinkErator Model LC-50 installation manual

InSinkErator

InSinkErator Model LC-50 installation manual

Rubbermaid Infinity 9W31 manual

Rubbermaid

Rubbermaid Infinity 9W31 manual

Westinghouse 3/4 HP owner's manual

Westinghouse

Westinghouse 3/4 HP owner's manual

Haigh Quattro Vanguard Original manual
Haigh

Haigh Quattro Vanguard Original manual

Central Machinery 70167 Owner's manual & safety instructions

Central Machinery

Central Machinery 70167 Owner's manual & safety instructions

Teral DSP-125H-AWV Quick start manual

Teral

Teral DSP-125H-AWV Quick start manual

Mistral Ultra 10504 Specifications

Mistral

Mistral Ultra 10504 Specifications

Atlas Copco HC 150 Safety and operating instructions

Atlas Copco

Atlas Copco HC 150 Safety and operating instructions

Teral DSP-100H-AWS user manual

Teral

Teral DSP-100H-AWS user manual

Gispen BINIT user manual

Gispen

Gispen BINIT user manual

manuals.online logo
manuals.online logoBrands
  • About & Mission
  • Contact us
  • Privacy Policy
  • Terms and Conditions

Copyright 2025 Manuals.Online. All Rights Reserved.

DISPOSER
INSTALLATION
INSTRUCTIONS
ELECTRICAL INSTALLATION INSTRUCTIONS:
(115 Volt, 60 Hertz)
I
Follow your electrical code in all details. In
older houses with limited circuits, or if it
appears the circuit is heavily loaded, run a line
directly to the main fuse box.
1. Remove the electrical access cover on the
bearing bracket assembly.
2. Install standard connector (not furnished)
into threaded opening in bearing bracket
assembly.
3. Install an operating control switch where
it is easily accessMe, for the owner.
Recommended: On-Off switch suitable
for operation of l/2 H.P. motor. (Switch
not furnished.)
‘4. Run flexible conduit, or equivalent, from
the control switch to the electrical power
supply. Insulate all connections.
5. Run flexible conduit, or equivalent, from
the control switch to the disposer motor
leads located in the bearing bracket assem-
bly. Connect unit to ground. (See illustra-
tion).
6. Press wires into the electrical access com-
partment and replace cover.
NOTE:
Follow your local electrical code in all
details. In older houses with limited circuits,
or if it appears the circuit is heavily loaded,
run a line directly to the main fuse box.
GREEN LEAD TWIST. SOLDER &
TO GROUND INSULATE BOTH
CONNECTION CONNECTIONS
/
MANUALLY
OPERATED RESET
BUTTON. PUSH
TO RESET IF
MOTOR STOPS
ONOVERLOAD
OR JAM,
GENERAL INSTRUCTIONS.
1. In old houses, it is generally good practice
to clean out the existing drain line from,
sink to sewer before installing the
DISPOSER.
2. The disposer can be installed in steel,
monel, stainless steel or cast iron sinks.
with a sink opening of 3-l/2” to
4”
without sink alteration.
3. Standard l-I/Z” O.D. or 2” O.D. drain
pipe is satisfactory for drain lines. Long
horizontal drain lines should be elimi-
nated. Drum traps and grease traps should
not be used.
4. Where possible, the reversing toggle switch
should be positioned where it is readily
accessible. !
PLUMBING INSTALLATION INSTRUCTIONS:
1. Remove existing sink drain connections
and
clean drain opening.
2. Remove disposer cover.
3. Insert screwdriver under lever (I) and pry
outward. Disengage hooks (J) and (F)
from support plate (D).
4. Disassemble items A, B, C, and D of
mounting assembly by prying snap ring
(E) from groove in sink flange (A).
5. Apply a bead of permanent pliable sealing
compound underneath sink flange (A).
Insert the sink flange (A) into the drain
opening.
NOTE: THE SINK FLANGE MUST BE
LEVEL BEFORE MOUNTING DISPOSER.
6. Assemble paperboard flange seal (B), pres-
sure washer (C), and support plate (D)
onto the sink flange and lock in place
with snap ring (E). Tighten the three jack
screws (K) EVENLY against pressure
washer (C) to secure the mounting assem-
bly to the sink.
7. Be sure the isolating splash guard (G) is In
place. Lirt disposer and engage hook (F)
onto support plate (D), then engage hc
(J) onto support plate (D) Turn dispoh.
to align with drain trap. Snap lever (I)
downward to lock.
8. Connect the drain trap to the spout (H).
Ii necessary, pry lever
(I) outward and
tllrn dispqser for better all_nment
9 Check to assure that the grinding chamber
is clean of any foreign objecls and the
flywheel is free to rotate. Place the cover
in position.
10. Installation must be in accordance with
local plumbing codes.
[FFisiiE]
DISHWASHER CONNECTION:
Connecting the discharge of a. dlshwasher
to a disposer will assure all waste particles
discharged by the dishwasher are properly
sized and flushed through to the main drain
system. A dishwasher drain inlet that will
accept a 3/4” I.D. hose is provided In the side
the upper housing grlnding chamber for
-,nnection of the dishwasher discharge
I. Use a small cold chisel to cut out the back
wall “knockout” of the dishwasher Inlet
boss of the disposer.
2. Remove any
pieces
of the “knockout”
and chips from the grindInT chamber.
3. Connect the dishwasher drain host to tllc
disposer inlet with a hose clamp
nPlCAL INSTALLATIONS: Height of drain
should not exceed height of disposer dis-
charge opening.
MODEL A 6 C 0
KWC-ZOO 6 3/8- a 114” 14” 5 3/16-
Typical “P” Trap Connection
Connection WithStraight-away Drain Spout
WARNING
This disposer must be properly grounded
before operating, by connecting the chassis
ground terminal to a suitable ground, com-
plying with the National Electric Code and/or
local electrical codes.
KitchenAid Division
Troy, Ohio 45374
Form 12664A (4-78) Printed in U.S.A.