Kiwi TLG8402V1 User manual

1
Kiwi Temperature Box
Quick Start Guide
Ver.2.1
LoRa Temperature Sensors & Gateway Package
Kiwi IOT Solution Ready
Cold Rooms | Chillers | Dry Storage | Warehouse | Refrigerated Transport | Pharmaceutical

2
INDEX
1) Introduction……..………….……….………………………………………………….…………………………………3
2) Packing List……………………………………………………………………………………………………….…………3
3) System Requirements………….………………………………………………………..………………………….…4
4) Network Topology Requirements ………………………………………………………………………….……4
5) Hardware Introduction ……………………………………….………………………………………………………4
6) Guideline before Your Installation ……………………….………………………………………………………4
7) Hardware Installation (by Ethernet) …………………….………………………………………………………5
8) Hardware Installation (by LTE network) ………………….……………………………………………………8
9) Sensor Position Suggestion…..……….……………………….……………….…………………………………10
10) Troubleshooting / Q&A …………….…………………………………….….………………………….…………11
11) Contacts for support ……………………………………….…………….….….…………………………….…… 12
12) Warranty Period and Scope……………….………………………………………………………………………13

3
Quick-Start-Guide (QSG) for KiwiBox Cloud services
Thank you for purchasing the KiwiBox- Temperature gateway / sensors package, this Quick Start Guide will show you
the basics of installing the KiwiBox devices at your application environment.
1) Packing List:
◼TLG8402V1 Gateway x 1 (or optional TLG3901V2 x 1)
◼USB Cable x 1
◼LoRa Antenna * 1
◼Power adaptor 100 ~ 240 Vac, 5 Volts / 2.5 Amps x 1
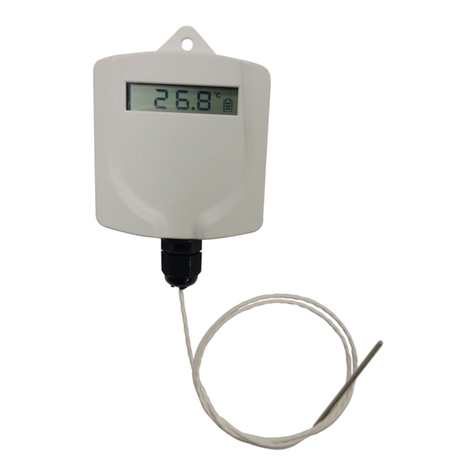
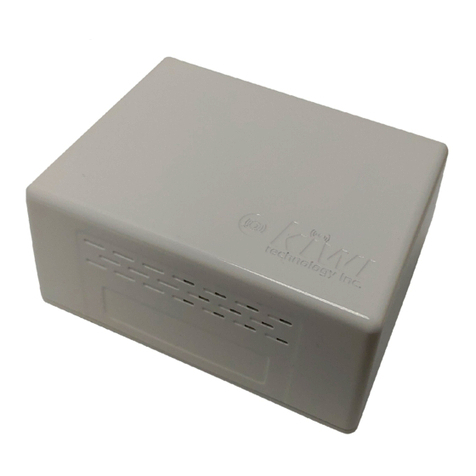
◼603 temperature sensor (with 2 screws) x 10 (default package, quantity 10~20 by option)
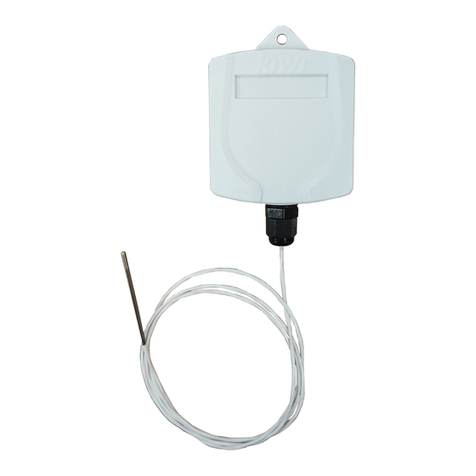
◼604V2 temperature sensor (optional item)
8402V1 Gateway
USB charging cable * 1
LoRa Antenna * 1
Power adaptor
[optional] 603 temperature sensor
(with 2 screws)
[optional]604V2 temperature
sensor
[optional accessory] LAS-603 fixed
iron plates

4
2) System Requirements
◼Microsoft Windows 10, Mac OS X, or Linux or smartphone
◼Web Browser: Google Chrome
◼Smartphone: iOS: 10.0 or later; Android OS: 4.3
3) Network Topology Requirements
◼Network cable which can link to internet. (DHCP-enabled
network)
◼SMART-Phone can access to 3G/4G network. (Optional)
◼If Gateway equipped “LTE module”, you also can install
gateway through 3G/4G network connecting to
internet to finish gateway’s configuration.
4) Hardware Introduction
◼TLG8402V1 Gateway - TLG8402V1 is an 1CH LoRa gateway that adopt LoRaWAN® network
solution for receiving data on specified frequency and SF. LoRaWAN® is a standard protocol , a
Low Power Wide Area Network (LPWAN), it uses ISM band and Internet of Things (IoT)
applications.
◼LAS-603 temperature sensor - LAS- 603 temperature sensor is designed for refrigerator
wireless temperature monitoring. We may use this device to track ambient changes in
temperature. With LoRaWAN wireless module, this temperature sensor status will be sent to
the network server via gateway.
◼LAS-604V2 temperature sensor - LAS-604V2 is a temperature sensor that utilizes LoRaWAN to
periodically report temperature. The temperature measurement is through PT100 probe.
5) Guideline before Your Installation
Before installing the KiwiBox, please make sure how your gateway access to network? We provide two
options to set-up your gateway:
A. Connect via Network cable (Ethernet cable to WAN) _ If you have network cable can link to
internet, please follows chapter -6 to install gateway & sensors step-by-step.
B. Connect via SIM card’s 3G/4G network (LTE mode)- If you have smartphone and SIM card can use
in Gateway to link to internet, please follows chapter -7 to install gateway & sensors step-by-step.
MyBox Network Diagram

5
6) Hardware Installation (by Ethernet)
Getting Start
Graphic illustration
Step-1,
Deploy
Gateway
1.1 Before starting to use gateway,
the power and Ethernet (RJ45 to
network) and antenna need to
be connected well.
1.2 USB cable connect to power
adapter and plug the adapter in
the wall outlet. (power light
should turn green)
1.1
1.2
Step-2
Deploy
603/
604V2
sensors
(optional) Turn on temperature
sensors – “LAS-603”.
2.1 Remove the bottom cover, and
turn on the power.
2.1
2.2 Cover back the bottom cover.
Lock two screws.
2.2
2.3 Methods to fix LAS-603.
1) By backside 3 magnets of
LAS-603 mounting on
magnetic surface.
2) By hook (remove 3 magnets)
3) Use accessory – fixed iron
plate for non-magnetic
surface.
2.2
(optional) Turn on temperature
sensors – “LAS-604V2”.
2.3 Open LAS-604V2’s cover, holding
and pressing two places in red circle.
2.3

6
2.4 Open the bottom cover.
2.4
2.5 Plug-in battery connector into
slot with correct direction.
(connector rib needs to align joint
groove)
* attention: DO NOT use metal tool to
contact the connector.
2.5
2.6 Cover back the bottom cover.
2.6
2.7 Methods to fix LAS-604V2
➢Use double-side tape or hook
to fix LAS-604V2 and its cable,
put the temperature probe
near the monitoring position.
2.7 Place the sensor at temperature-
monitoring position as you need or
refer to Kiwi’s suggestion on chapter-
9)Sensor position suggestion.
*Attention: Please DO NOT put LAS-
604V2 device inside the Refrigerator
& Freezer.
2.7
3.1 Open the google browser-
Chrome on computer and login to
KiwiBox Cloud Server-
https://myBox.kiwi-tec.com/.
➢Please input default username
& password= Kiwibox serial
number which showed on label
of KiwiBox packing box.
➢For example, if your KiwiBox
S/N is 92015DA00001, please
3.1

7
input 92015DA00001
/92015DA00001. (you can
change your password after
log-in server)
Step-3
Start to
monitor
3.2 Start to monitor.
➢Click “Temp. Management”,
then click “Temperature
Record”, you can enter the
monitor screen.
* The default setting: the temperature
data will be transmitted to cloud server
at a top of the hour, like 1:00 p.m.),
please wait to next top of the hour.
3.2

8
7) Hardware Installation (by LTE network)
Getting Start
Graphic illustration
Step-1,
Deploy
Gateway
& login
[Method-2] Setting by LTE module.
1.1 Insert nano-sim card to sim card
slot at back side of TLG8402
gateway.
1.2 the power and antenna need to
be connected well.
1.3 USB cable connect to power
adapter and plug the adapter in
the wall outlet. (power light
should turn green)
* attention: please follow the SIM card
direction icon to insert SIM card.
1.1
1.4 On your smartphone, turn-on the
WiFi to connect to Gateway WiFi
spot.
➢Search SSID with TLGxxxx
(model name) – prefix ; the
model name is also printed on
with back side label.
➢Link to the SSID and input
password.
◼If Gateway is TLG8402V1,
the default password is
"tlg8402ap".
◼If Gateway is TLG3901V2,
the default password is
"tlg3901b".
1.2
1.5 On your smartphone, to open the
google browser- Chrome, then login
to Kiwi KiwiBox setting website:
http://10.42.43.1/ (in computer
display mode).
➢Input default login
name/password
(admin/admin)
➢Select “System”, then enter
“Cellular Network” setting
screen.
1.5

9
1.6 Setup Cellular Network
➢Input APN, Dial Number,
Username and Password
according to operator’s
setting.
➢If SIM is protected by PIN,
also input PIN Code.
1.6
Step-2
Deploy
603/
604V2
sensors
8) Same with step-2 of chapter-
6)Hardware Installation (by
Ethernet) to deploy sensors.
2.1
Step-3
Start to
monitor
Same with step-3 of chapter-
6)Hardware Installation (by
Ethernet).
3.1 Open the google browser-
Chrome on computer and login to
Kiwi KiwiBox Cloud Server-
https://KiwiBox.kiwi-tec.com/.
➢Please input default username
& password= KiwiBox S/N
which showed on label of
KiwiBox packing box.
➢For example, if your KiwiBox
S/N is 92015DA00001, please
input 92015DA00001
/92015DA00001.
3

10
8) Sensor position suggestion
Getting Start
Graphic illustration
A). Refrigerator / Open multideck chiller
◼Suggested installation positions:
1. Air outlet / vents
2. The center of Refrigerator
3. Fix sensor-604V2’s temperature probe
on the monitoring position. Mounting
sensor body on the wall next to the door
of Refrigerator.
◼Mount options:
1. Use hook fixation or paste 3M double-
side type on the rear-side of LAS-604
series sensor.
2. Through the Magnets of LAS-603 to fix.
◼Example: To put sensor on best position
near air outlet. (Not inlet)
A.1
A.2
B). Freezer
-Suggested installation positions:
1. Air outlet / vents
B.1
C). Pharmaceutical shelves
-Suggested installation position:
1. The center of shelves
C.1

11
9) Troubleshooting / Q&A
No
Question / Problem
Self-Diagnosis
Solutions
1
After KiwiBox
installation, why
there is no sensors
in KiwiBox server?
1. Check if Gateway
powered-on?
2. Check if the Ethernet
cable is loose and
disconnected from the
network?
3. Check if sensor’
battery has been
installed-well and
turned-on?
1. Re-Install all sensors and gateway again.
2. Contact your sales representative, or Kiwi's
customer service center for technical support if you
need additional assistance.
3. Please have following information ready before you
call / leave message:
I. Product name and serial number.
II. A complete description of the problem.
2
Sensor threshold
(Temperature Limit)
setting
N/A
After log-in Kiwi KiwiBox server, you can easily set-up
basic functions setting (store/area/product/sensor
temperature threshold) on the cloud server.
3
How far can sensors
transmit data to
gateway?
N/A
Generally, LoRa sensors can transmit 50~100m without
metal barrier between gateway and sensor.
In most circumstances, one gateway can cover a large
floor of a building.
4
How long do the
sensors’ batteries
last?
N/A
Batteries are low power and can last for 5 years.
(depends on use case)
5
If my gateway off-
line for a short time,
the sensors’
temperature data
will be lost?
N/A
The sensor temperature data can be kept in sensor for
10days, once gateway links to internet, the data will be
transmitted and saved to Kiwi IOT cloud server.
6
How is the data
protected?
N/A
AES 128 encryption.
7
What types of alerts
are available?
N/A
There are both email and app messages that can be
delivered to recipients based on configured temperature
thresholds.
8
What’s included in
the solution?
N/A
1. Temperature and humidity sensor – additional
sensors available for purchase.
2. Cellular or Ethernet Gateway
3. KiwiBox cloud server service and mobile application

12
9
"If I forgot my
gateway WiFi
password or setting
website's password
(http://10.42.43.1/)?
How to enter
gateway's setting
website?"
N/A
Please press the reset button on the backside of
gateway device. The password will be reset back to
original default values.
10) Contacts: For more information please contact~
If the package is not complete, please contact KIWI Sales or Support Team at [email protected], or return the
package to the vendor or dealer where you purchased the product.

13
11) Warranty Period and Scope:
This product model has undergone a complete overhaul. Its proper functioning is guaranteed for One (1) years
from the date of shipment.
◼Contact Life for Server Service:
1. 5 years contract to use Kiwi SaaS platform.
(first month for trial, and then next month start the service period calculation, same as AEON business
case)
2. Store sensor data period, 5 years during contract ONLY.
◼Warranty Exclusions:
1. All failure or defects that result from factors not attributable to the product (such as an unstable
power source, inappropriate voltage) or by force majeure (such as a natural disaster)
2. Any repair or modification by a third party non-authorized by Kiwitec or modification by adding
or substituting components and accessories that are not manufactured by Kiwitec.
3. Any damage or deterioration due to accident or mishandling.
4. The software program, data or removable storage has been damaged or lost.
5. Any liquid damage due to but not limited to any repair or modification or open chassis by a third
party non-authorized by Kiwitec.
6. Any damage to third-party software or brought about by a virus, or the damage or loss of
software or data occurring during repair or replacement.
7. In no circumstances shall the Seller be liable for any loss of profit, business, contracts, revenues,
or for any special indirect or consequential damage of any nature whatsoever. (such as facilities
or foods damaged)
8. Obvious appearance damage by workmanship.
◼Attentions:
1. Kiwitec is not responsible for the custody or protection of the returned product or any data
store in the product.
2. Kiwitec is only responsible for the repair of the hardware. The customer is responsible for
backing up their data and shall take measures to protect the data before returning to the
product for repair.
3. DO NOT slide LAS-603 on any material surface to avoid peeling off of coating of magnet while
doing installation. (this item only for LAS-603 sensor model)
Table of contents
Other Kiwi Temperature Controllers manuals
Popular Temperature Controllers manuals by other brands

Sauter Components
Sauter Components RDT 300 F001 user manual

Viega
Viega ProRadiant SYSTEMS Basic Digital Setpoint Control... Product instructions

Magnum
Magnum M9-RTS3 quick start guide

AURATON
AURATON 200 RT owner's manual

Redsun
Redsun E200 User and installation guide

BREWHA Equipment
BREWHA Equipment ETC Faqs