Kiyo ProPark XT User manual

KIYO ProPark XT
Parking Assistant
Installation and Operation Manual


1
The KIYO ProPark XT Parking Assistant is a useful accessory for any
vehicle. Unlike the everyday Reverse Backup Radars, which usually
warn about objects farther than 30-50 cm, the ProPark XT is able
to accurately detect objects from a 25 cm distance. Additionally,
the transponders of the device can be built into the indentations
of the bumper or into the grille of the vehicle, therefore it is un-
necessary to drill deep holes into the bumper itself. The product
became worthily famous for its small, 2.5 cm sized sensors and for
its outstanding price. The KIYO ProPark XT is available in packages
with 2 or 3 tran-sponders.
1. PURPOSE OF THE DEVICE
The purpose of the KIYO ProPark XT Parking Assist is to make the
maneuvering and parking of the vehicle easier. Unlike the everyday
reverse backup radars, the KIYO ProPark XT can detect objects in a
25-cm-close vicinity, which is especially useful when parking in a
garage or in a narrow parking lot. Attention! Do not rely on the de-
vice alone and always park your vehicle with caution.
2. OPERATION OF THE DEVICE
The KIYO ProPark XT Parking Assist uses an infrared light to measure
the distance of different objects to the vehicle. Upon closing on an
object (a building, another vehicle, a railing or a pedestrian), the
device continuously measures its distance to the vehicle and when it
is dangerously close, the Parking Assist warns the driver with sound-
and light-signals.
3. USE OF THE DEVICE

2
Always keep the transponders of the device clean, especially in rainy
or snowy weather, otherwise the efficiency of the device might sig-
nificantly decrease. In some situations, the device may signal late
or not at all due to external circumstances. This is not caused by
the malfunction of the device, but by the laws of physics and other
ex-ternal factors (solar radiation, refraction, rainy weather, snow,
dirty transponders, etc.).
The device is [e7] certificated. The KIYO ProPark XT Parking Assist
is device designed to facilitate safe parking, but it does not replace
the prudent driving by any means. The device uses the open 904 Nm
wavelength, therefore it may cause disturbance in devices using the
same wavelength, for example, some police LIDARs. For this reason,
the manufacturer and the distributer warns the user not to use the
device in countries where such equipment is against the law. It is
also advised to turn the device off when driving above 15 km/h. The
manufacturer and the distributer is not liable for any fine caused by
the use or the incorrect installation of the device, for other damages
and for accidents that were caused by the driver’s negligence.
4. INDOOR UNIT (INTERFACE)
Transponder socketsDC 12V Power
Supply socket
MUTE
button
LED status
indicator
Volume control
switch
Speaker:

3
The device gives sound signals through the speaker upon activation
or upon detecting a closing object.
Volume control switch (VOL and OFF):
The device can be turned on or off with the volume control switch,
also the volume of the speaker can be adjusted with this. (When
using an auxiliary switch, it is not necessary to activate the device
with the volume control switch.)
PWR LED status indicator:
When the PWR LED status indicator is green, the device is activated.
FRONT LED status indicator:
The FRONT status indicator is green when the transponders are cor-
rectly connected into the two FRONT sockets on the backside of the
interface. If this indicator does not light up, the connection might be
incorrect or the transponders might be defective. When one of the
transponders are detecting a closing object, the device warns the
driver, furthermore, the LED indicator turns red and starts flashing.
AUX LED status indicator:
The AUX status indicator is green when the transponder is correctly
connected into the AUX socket on the backside of the interface. If
this indicator does not light up, the connection might be incorrect
or the transponder defective. When the transponder connected to
the AUX socket is detecting a closing object, the device warns the
driver, furthermore the LED indicator turns red and starts flashing.
The third transponder goes into the AUX socket.
MUTE button:
When receiving information about a closing object, the sound alarm
can be muted with this button.
DC 12V Power Supply socket:

4
The power cable of the device must be connected into this socket.
FRONT and AUX transponder sockets:
The transponders must be connected to these sockets.
5. INSTALLATION OF THE KIYO PROPARK XT PARKING
ASSISTANT
The most important factor in the efficiency of the KIYO ProPark XT
Parking Assistant is the number of transponders and their correct
installation. The structure and the size of the car determines the
number of transponders required for achieving maximal efficiency.
Before the installation, decide whether you want a front or a front-
and-rear Parking Assist. Ask the opinion of an expert about the requi-
red number of transponders and their placing locations.
Ask the opinion of our customer service or ask the location and
con-tact information of the nearest workshop. We are always ready
to help!
The most important part of the installation is the correct placement
of the transponders. The transponders must be placed parallel to
the geometric centerline of the vehicle and they must face forward.
If they are following the arc of the bumper or its grille, the placing
is not correct!
Another important rule is that the transponders must be alig-
ned parallel to the road, they cannot face too much up or down.

5
Maximum 5% of difference is allowed. With the help of the special
ad-justment screw, the correct alignment can be easily achieved.
Transponder
Bracket
Special adjustment screw
It is also very important that there cannot be any object before the
transponders (windscreen, bumper, grille, etc.). The device mea-
sures the distance between the objects and the vehicle by emit-
ting infra-red light and detecting the reflecting light, therefore, the
transpond-ers must “see” the road. If you could only install the
transponders in a place, where the vertical grille of the bumper
is before them, the device will still work, but with less efficiency.
6. FRONT PARKING ASSIST FOR CARS
Recommendations for the installation (Using 1 KIYO ProPark XT
device with 3 transponders in a set and with 2 transponders in a
set)

6
Sensor Power cable Indoor unit Sensor
After following the previous instructions and successfully deter-
min-ing locations and the number of transponders, the next step
is to find a suitable location for the brackets. (If necessary, remove
the bump-er or the grille of the bumper.) The brackets can be fixed
with the help of the packaged screws or with the Velcro tapes (in the
latter case, the drilling of the bumper is not necessary).
Place the transponders into the bracket and with the special adjust-
ment screws align them according to the rules mentioned before.
NEVER drill the transponders!
Lead the cables of the transponders through the car into the cabin.
The cables must not touch any rotating, moving or hot part of the car
(radiator, fan, engine block)! The cables must not strain, but cannot
be loose either! They can be fastened with the packaged cable ties.
Never knot or break the cables! Damaged cables may result in the
malfunction of the transponder and the interface, which might result
in losing the warranty.
With the help of the double-sided adhesive, place the indoor unit
(interface) of the KIYO ProPark XT Parking Assistant in the cabin of
the car. It can be placed above or below the dashboard; you decide
which spot is more suitable for you. By using an auxiliary switch, the
interface can be installed hidden behind the dashboard, but in this
case, only the sound signal warns the driver to the dangers. In case
of a stealth installation, the Parking Assist can be turned on or off
with this auxiliary switch.

7
After installing the interface, connect the JACK connectors of the
transponders into the FRONT and AUX sockets. Plug the connector
of the Power Cable into the DC12V socket, then connect the positive
cable (+) to the vehicle’s positive terminal and the negative cable (-)
to the vehicle’s negative terminal or to the chassis. The color and the
labels of the cable help in the correct wiring.
When using more than one set of KIYO ProPark XT devices, it is
rec-ommended to use an auxiliary switch or a wireless unit.
More regarding information can be found in the following pages.
7. FRONT AND REAR PARKING ASSIST FOR CARS
Recommendations for the installation
(Using 2 KIYO ProPark device with 3 transponders in a set and
using 1 KIYO ProPark device with 2 transponders in a set)
After following the previous instructions
and successfully determin-ing locations
and thed number of transponders, the
next step is to find a suitable location for
the brackets. (If necessary, remove the
bump-er or the grille of the bumper.) The
brackets can be fixed with the help of the packaged screws or with
the Velcro tapes (in the latter case, the drilling of the bumper is
not necessary).
Sensor Power cable Indoor unit Sensor
Sensor

8
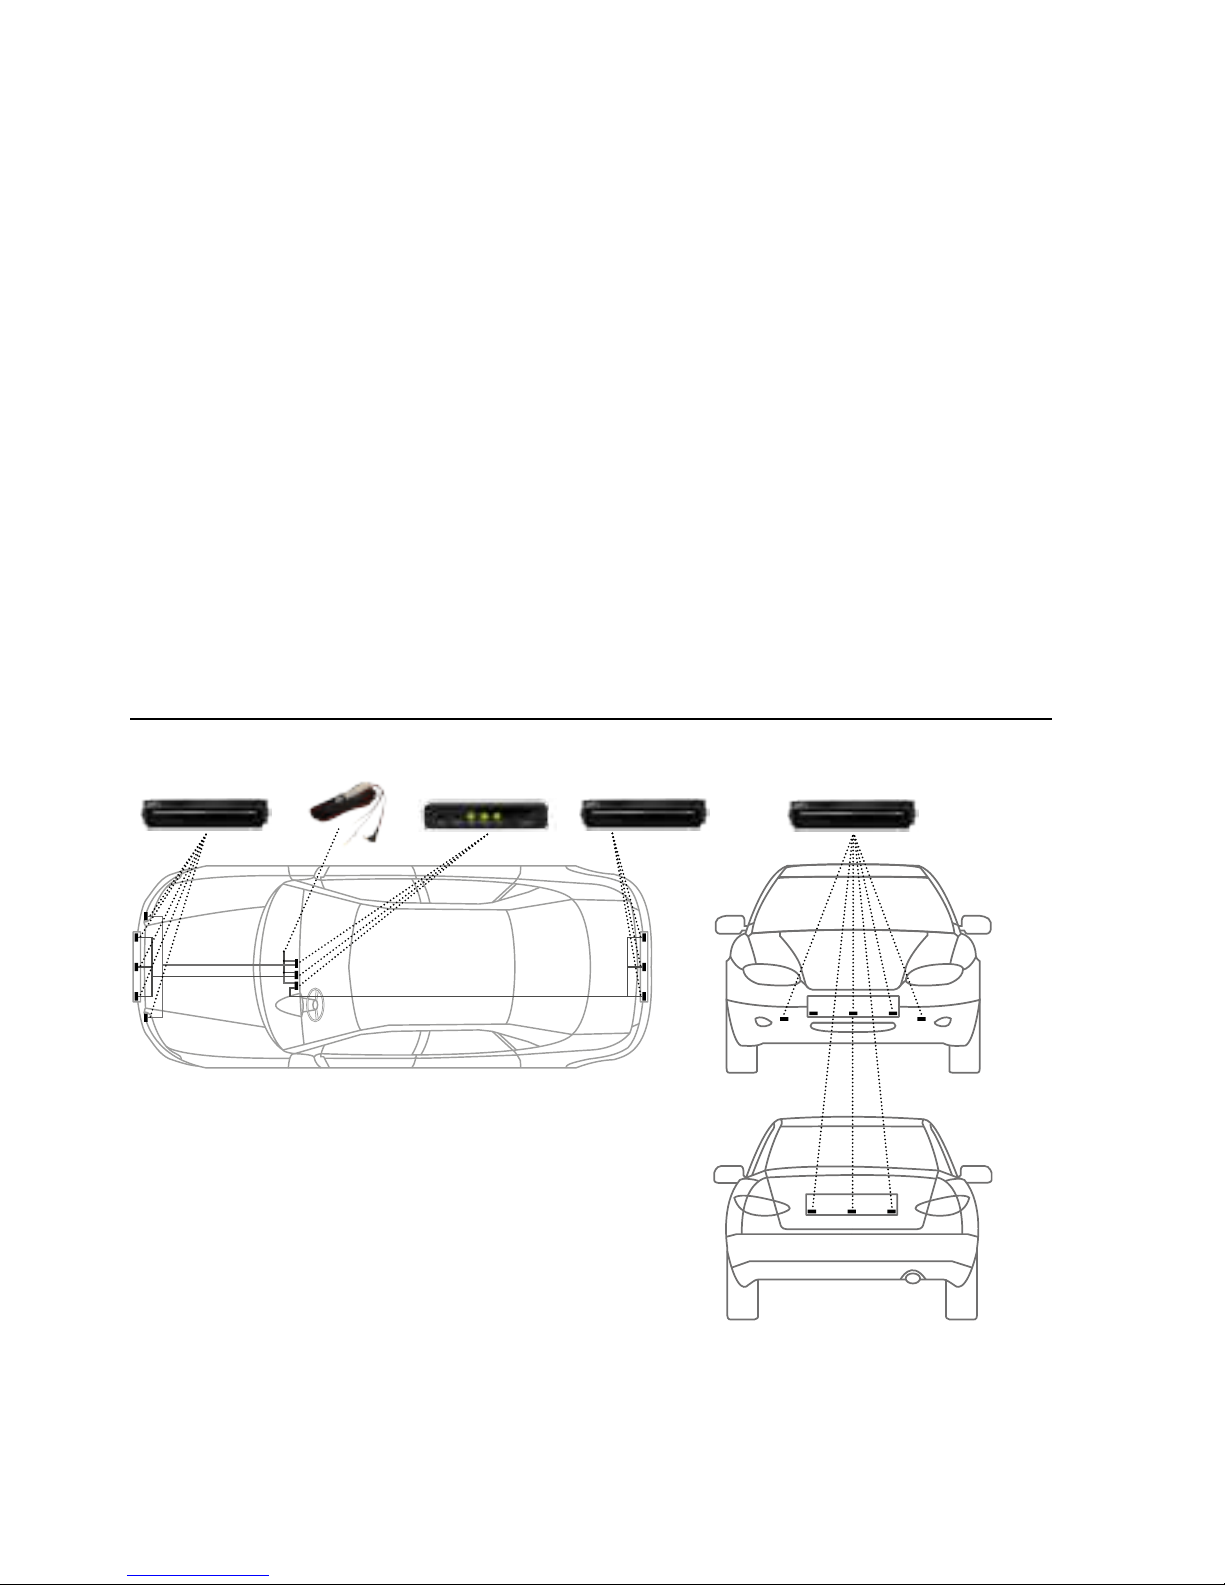
Unpack one of the devices that has 3 transponders and the one
that contains 2 transponders. Install these 5 sensors into the front
bump-er of the vehicle. The 3 left-out transponders of the other
device will go to the rear of the vehicle, next to the license plate
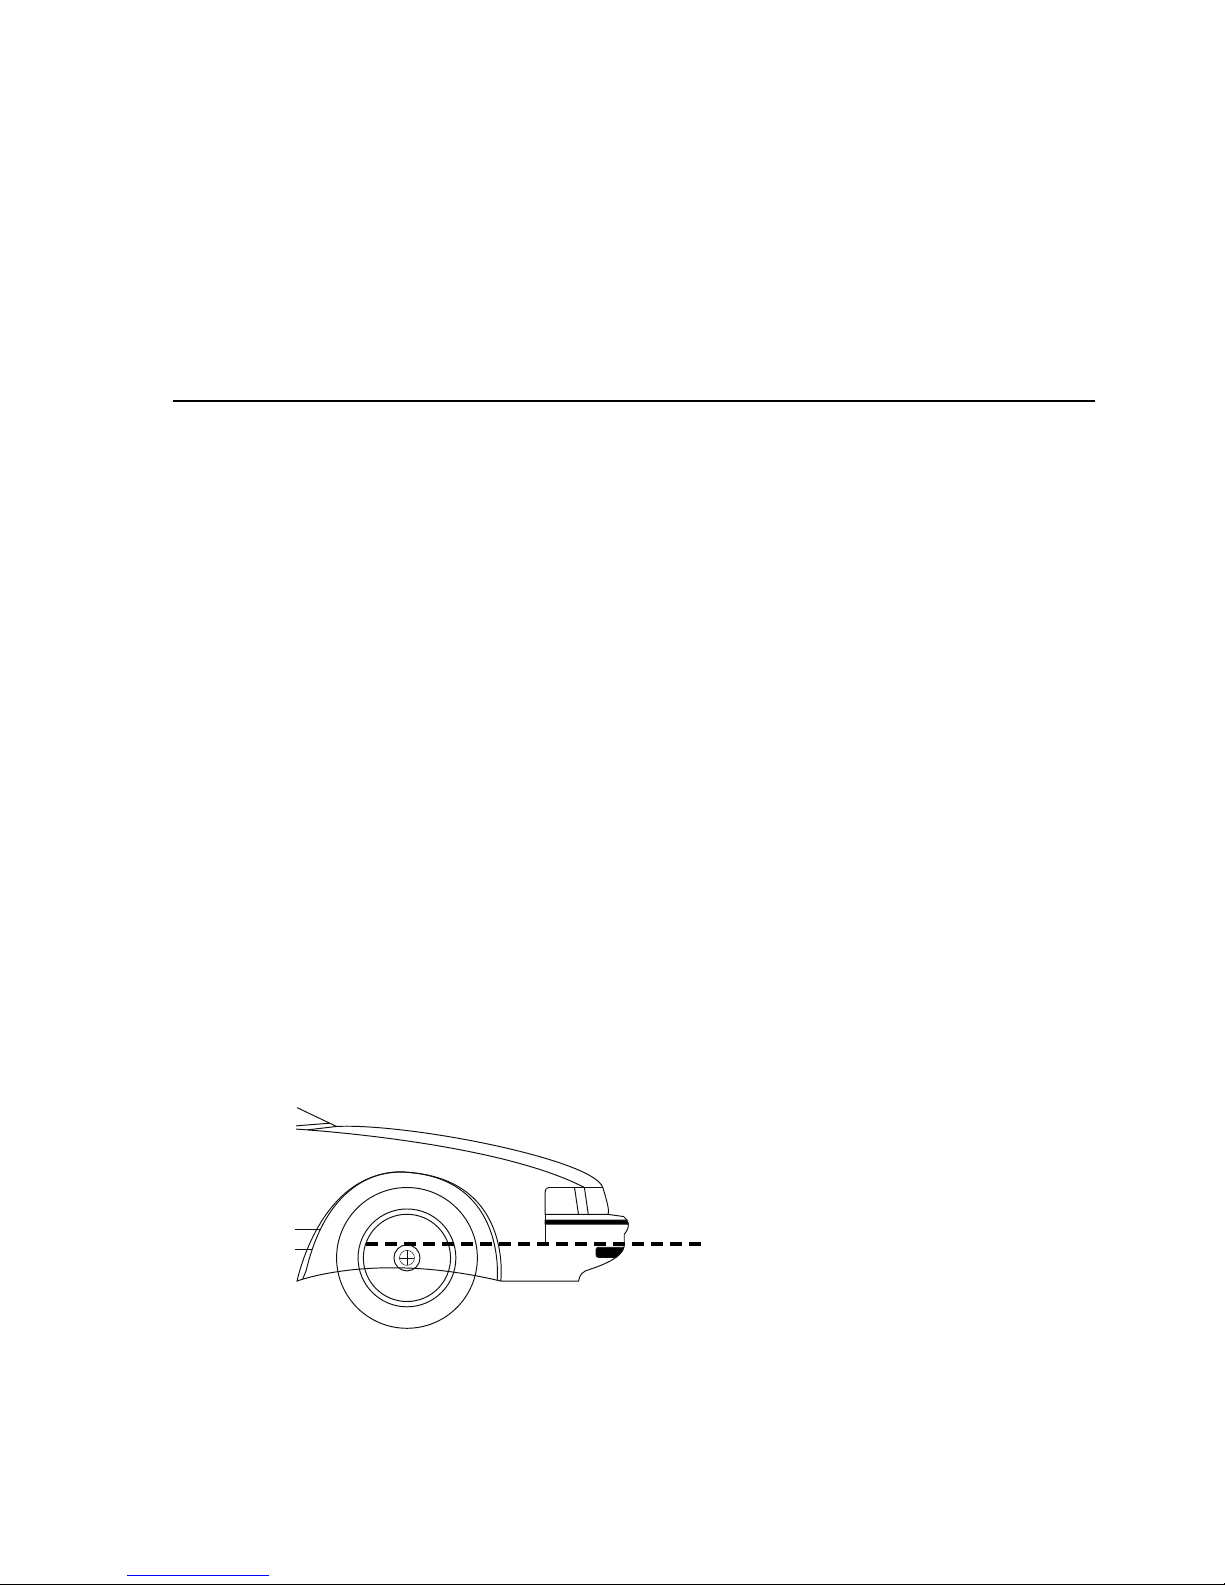
lights. Place the transponders into the bracket and with the special
adjustment screws align them according to the rules mentioned
before. NEVER drill the transponders!
Lead the cables of the transponders through the car into the cabin.
The cables must not touch any rotating, moving or hot part of the car
(radiator, fan, engine block)! The cables must not strain, but cannot
be loose either! They can be fastened with the packaged cable ties.
Never knot or break the cables! Damaged cables may result in the
malfunction of the transponder and the interface, which might result
in losing the warranty.
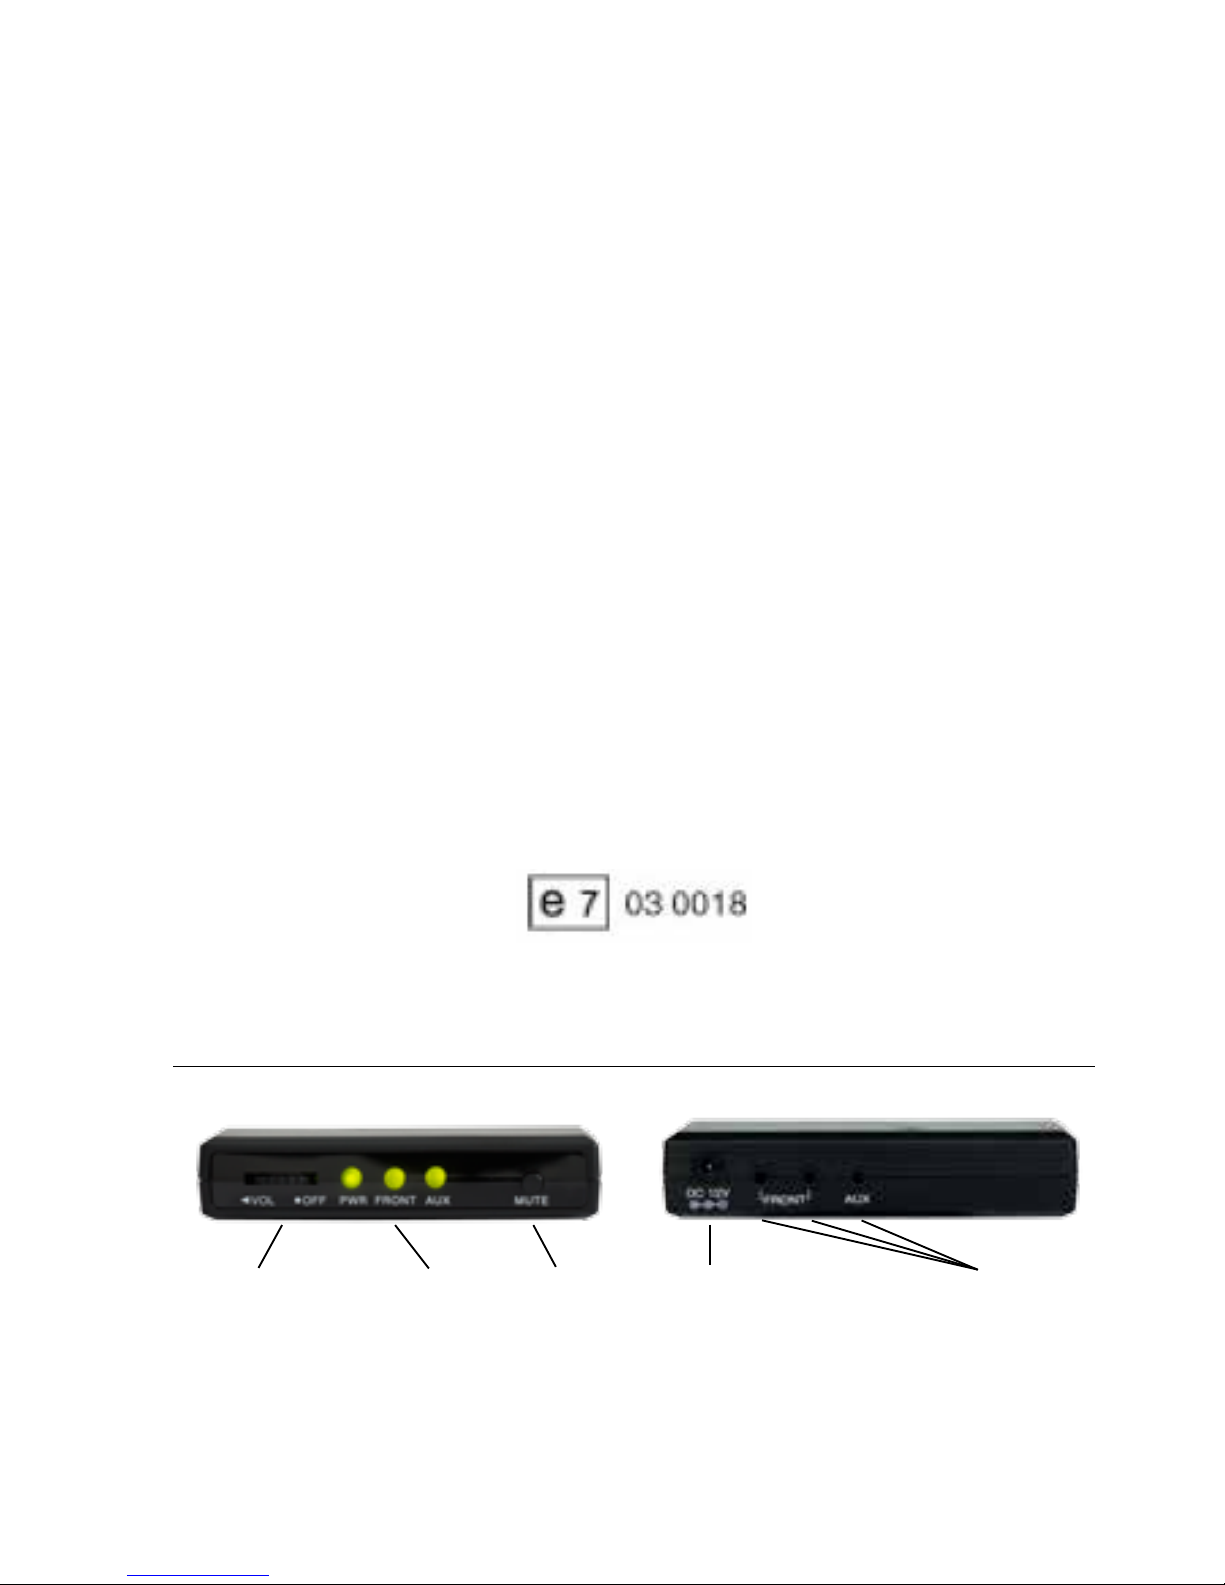
The next step is to place the indoor unit (interface) of the KIYO Pro-
Park XT inside the cabin of the car. One interface can only operate 3
transponders, therefore, in the case of a front- and rear parking assist
system, you have to install 3 interfaces for the 8 transponders (2 KIYO
ProPark XT device with 3 transponders in a set and 1 KIYO ProPark
device with 2 transponders in a set). By using an auxiliary switch,
the interface can be installed hidden behind the dashboard, but in
this case, only the sound signal warns the driver to the dan-gers. In
case of a stealth installation, all 3 of the Parking Assist de-vices can
be turned on or off with this auxiliary switch.
After installing the interfaces, connect the JACK connectors of the
transponders into the FRONT and AUX sockets. Plug the connector
of the Power Cable into the DC12V socket, then connect the positive
cable (+) to the vehicle’s positive terminal and the negative cable (-)
to the vehicle’s negative terminal or to the chassis. The colors and
the labels of the cables help in the correct wiring.
In case of using more than one KIYO ProPark XT devices, it is recom-
mended to install an auxiliary switch as well.

9
More regarding information can be found in the following pages.
8. INSTALLING THE AUXILIARY SWITCH
(For turning all of the KIYO ProPark XT devices on or off at the
same tume.)
If you wish to use an auxiliary switch for the Park Assist devices, ASK
THE HELP OF AN EXPERT OR CALL OUR CUSTOMER SERVICE! With-
out proper expertise, you may cause malfunction in both the Parking
Assist and in your car! THE MANUFACTURER AND THE DISTRIBUTER IS
NOT LIABLE FOR ANY DAMAGES IN THE VEHICLE OR THE DEVICE THAT
WAS CAUSED BY INCORRECT INSTALLATION! The following installation
guide has only informative purposes, do not rely on the guide only!
You can order the auxiliary switch set from our distributors or from
our central customer service. The set contains an auxiliary switch, a
3-wire cable and a proper connector.
Switch Fuse
Vehicle Chassis
+
-
+-
+
-
Wiring in case of more than one set of KIYO ProPark XT devices:
Switch Fuse
Vehicle Chassis
+
-
+-
+
-
When using more than one set of KIYO ProPark XT devices, it is
rec-ommended to use an auxiliary switch to easily turn the devices
on or off at the same time.

10
TROUBLESHOOTING, WARRANTY
If you become uncertain at any point of the installation or any ques-
tions arise regarding the installation or the use of the device, please
contact one of our workshops or our customer service.
QUICK SOLUTIONS TO SOME PROBLEMS
The device does not turn on:
1. Ignite the engine of the vehicle and turn the device on with the
volume control switch!
2.
If the device will not turn on, make sure that all the connectors are
plugged in correctly and that the cables are undamaged.
3.
If the device still not turning on, check the fuses of the vehicle,
by following the User’s Manual of the car. If necessary, replace
the fuse.
4. If the device still not turning on, check the glass fuse of the de-vi-
ce’s power cable. Replace the glass fuse if necessary.
5. If the problem persists, contact our customer service!
The Parking Assist does not indicate closing objects:
1. Make sure that the device is turned on.
2. Follow the steps of the previous “The device does not turn on”
point.
3. If all the parts are undamaged, check the FRONT and AUX status
indicators, if they are not green than check the connection of
the transponders again.
4. If they are connected properly, but the LED indicators do not
light up, please contact our customer service!
The transponder cables are not long enough:

11
In this case, you may buy additional cables to extend the length of
the transponder cables, please contact our distributers or customer
service!
The device is E7 certificated. The KIYO ProPark XT Parking Assist is
device designed to facilitate safe parking, but it does not replace the
prudent driving by any means. The device uses the open 904 Nm
wavelength, therefore it may cause disturbance in devices using the
same wavelength, for example, some police LIDARs. For this reason,
the manufacturer and the distributer warns the user not to use the
device in countries where such equipment is against the law. It is
also advised to turn the device off when driving above 15 km/h. The
manufacturer and the distributer is not liable for any fine caused by
the use or the incorrect installation of the device, for other damages
and for accidents that were caused by the driver’s negligence.

12

13

Table of contents
Popular Automobile Electronic manuals by other brands

Murphy
Murphy PowerView PV1000 Hardware installation manual

Audiovox
Audiovox CNP2000UC - XM Direct 2 Main installation guide

Nav TV
Nav TV SRX VIM installation manual

Parkmate
Parkmate RVM-043DVR user manual

Sensys Networks
Sensys Networks VDS240 installation guide

Alcatel
Alcatel Voyager installation instructions