Kleenmaid LEK33AW-4350 User manual

D310IE3B
Use and Care Guide and Warranty
Automatic Dryer
Full Five Year Warranty
Parts & Labour
LEK33AW-4350
LGK33AW-3058
KEEP THESE INSTRUCTIONS FOR FUTURE REFERENCE. (If the dryer changes ownership, be sure this manual
accompanies the dryer.)
Part No. 504057R4
March 1999

504057
Table of
Contents
Important Safety Instructions..............................................................3
Before Drying.........................................................................................5
Energy Saving Tips...........................................................................5
Helps and Hints ................................................................................5
Sort ...................................................................................................6
Load..................................................................................................6
Operating Instructions ........................................................................7
Drying Special Items.............................................................................9
User-Maintenance...............................................................................12
Care Of Your Dryer ........................................................................12
Motor Overload Protector..................................................................12
Lint Filter.............................................................................................13
Before You Call For Service...............................................................14
If Service Is Required .........................................................................15
Automatic Dryer Warranty...................................... Inside Back Cover
Information For Handy Reference..................................... Back Cover
FOR YOUR SAFETY, the information in this manual must be
followed to minimize the risk of fire or explosion or to prevent
property damage, personal injury or death. W033
• Do not store or use gasoline or other flammable vapors and
liquids in the vicinity of this or any other appliance.
• WHAT TO DO IF YOU SMELL GAS:
– Do not try to light any appliance.
– Do not touch any electrical switch; do not use any phone in
your building.
– Clear the room, building or area of all occupants.
– Immediately call your gas supplier from a neighbor’s
phone. Follow the gas supplier’s instructions.
– If you cannot reach your gas supplier, call the fire
department.
• Installation and service must be performed by a qualified
installer, service agency or the gas supplier. W052
WARNING
©Copyright 1999, Alliance Laundry Systems LLC
All rights reserved. No part of the contents of this book may be reproduced or transmitted in any form or by any means
without the expressed written consent of the publisher.

504057 3
IMPORTANT SAFETY INSTRUCTIONS
(Save These Instructions)
1. Read all instructions before using the dryer.
2. Refer to the EARTHING INSTRUCTIONS in the
INSTALLATION manual for the proper earthing of
the dryer.
3. Do not dry articles that have been previously cleaned
in, soaked in, washed in, or spotted with gasoline,
dry-cleaning solvents, other flammable or explosive
substances as they give off vapors that could ignite or
explode.
4. Do notallow children toplayon or in the dryer. Close
supervisionof childrenisnecessarywhenthedryer is
used near children. This is a safety rule for all
appliances.
5. Before the dryer is removed from service or
discarded, remove the door to the drying
compartment.
6. Do not reach into the dryer if the cylinder is
revolving.
7. Do not install or store the dryer where it will be
exposed to the water and/or weather.
8. Do not tamper with the controls.
9. Do not repair or replace any part of the dryer, or
attempt any servicing unless specifically
recommended in the User-Maintenance Instructions
or in published user-repair instructions that you
understand and have the skills to carry out.
10. Do not use fabric softeners or products to eliminate
static unless recommended by the manufacturer of
the fabric softener or product.
11. To reduce the risk of fire, DO NOT DRY plastics or
articles containing foam rubber or similarly textured
rubberlike materials.
12. Always clean the lint filter after every load. A layer
of lint in the filter reduces drying efficiency and
prolongs drying time.
13. Keep area around the exhaust opening and adjacent
surrounding area free from the accumulation of lint,
dust and dirt.
14. The interior of the dryer and the exhaust duct should
be cleaned periodically by qualified service
personnel.
15. This gas appliance contains or produces a chemical
or chemicals which can cause death or serious illness
and which are known to the State of California to
cause cancer, birth defects, or other reproductive
harm. To reduce the risk from substances in the fuel
or from fuel combustion, make sure this appliance is
installed, operated, and maintained according to the
manufacturer’s instructions.
16. Dryer will not operate with the loading door open.
DO NOT by-pass the door safety switch by
permitting the dryer to operate with the door open.
The dryer will stop tumbling when the door is
opened. Do not use the dryer if it does not stop
tumbling when the door is opened or starts tumbling
without pressing or turning the START mechanism.
Remove the dryer from use and call the serviceman.
17. Do not put articles soiled with vegetable or cooking
oil in the dryer, as these oils may not be removed
during washing. Due to the remaining oil, the fabric
may catch on fire by itself.
To reduce the risk of fire, electric shock,
serious injury or death to persons when
using your dryer, follow these basic
precautions: W130
WARNING

4504057
18. To reduce the risk of fire,DO NOT put clotheswhich
have traces of any flammable substances such as
machine oil, flammable chemicals, thinner, etc. or
anything containing wax or chemicals such as in
mops and cleaning cloths, or anything dry- cleanedat
home with dry-cleaning solvent in the dryer.
19. Use the dryer only for its intended purpose, drying
clothes.
20. Always disconnect the electrical power to the dryer
beforeattemptingservice.Disconnectthepowercord
by grasping the plug, not the cord.
21. If the supply cord is damaged, it must be replaced by
a special cord or assembly available from the
manufacturer or its service agent.
22. Install this dryer according to the INSTALLATION
INSTRUCTIONS. All connections for electrical
power, earthing and gas supply must comply with
local codes and be made by licensedpersonnelwhen
required. Do not do it yourself unless you know how!
23. Remove laundry immediately after the dryer stops.
24. Always read and follow manufacturer’s instructions
on packages of laundry and cleaning aids. Heed all
warnings or precautions. To reduce the risk of
poisoning or chemical burns, keep them outofreach
of children at all times (preferably in a locked
cabinet).
25. Do not tumble fibreglass curtains and draperies
unless the label says it can be done. If theyare dried,
wipe out the cylinder with a damp cloth to remove
particles of fibreglass.
26. ALWAYSfollowthefabriccareinstructions supplied
by the garment manufacturer.
27. Never operate the dryer with any guards and/or
panels removed.
28. DO NOT operate the dryer with missing or broken
parts.
29. DO NOT by-pass any safety devices.
30. Failure to install, maintain, and/or operate this
machine accordingtothemanufacturer’s instructions
may result in conditions which can produce bodily
injury and/or property damage.
NOTE: The WARNING AND IMPORTANT
SAFETY INSTRUCTIONS appearingin this manual
are not meant to cover all possible conditions and
situations that may occur. Common sense, caution
and care must be exercised when installing,
maintaining, or operating the dryer.
Always contact your dealer, distributor, service agent or
the manufacturer about any problems or conditions you
do not understand.

504057 5
Before Drying . . .
Energy Saving Tips
• Make sure the lint filter is always clean.
• Do not overload the dryer.
• Do not overdry items.
• Remove items to be ironed while still damp.
• Large loads of similar fabrics dry the most efficiently.
However, dry permanent press in smaller loads to
prevent wrinkling.
• Use the correct cycle for the type of fabric being dried.
• Locate your dryer so the exhaust duct is as short and
straight as possible.
• Do not open the door during the drying cycle.
• Plan to do your laundry on low humidity days; your
clothes will dry faster.
• Dry multiple loads of clothes one right after another so
dryer interior does not have to be reheated for each
load.
Helps and Hints
• The necessary suggestions and directions for
installation and proper exhausting are given in
the INSTALLATION INSTRUCTIONS which are
included with the dryer.
• Static electricity may cause garments of synthetic
fibres (as in lingerie) to cling together, especially if
they are overdried. The use of a liquid fabric softener
in the rinse water of the washer, or a fabric softener
sheet in the dryer, will soften clothes and reduce static
electricity.
• Do not wash or dry clothes that shed lint in the same
load with permanent press or knit garments.
• Remove permanent press loads immediately after
dryer stops.
• Follow the CARE LABELS on FLAME
RETARDANT, SCOTCH- GUARD™, etc., garments
for the proper washing and drying.
• If loads should be damp for ironing, turn timer knob to
the ENERGY SAVER setting, marked with a dot (•),
in Automatic or Time Dry cycles.
To reduce the risk of fire, explosion,
serious injury or death, clothes which have
traces of any flammable substances such
as cooking oil, machine oil, flammable
chemicals, thinner, etc. must not be put
into the dryer. W131
WARNING

6504057
Sort
If you have correctly sorted the items for washing, they
should be properly sorted for drying too.
Towels, flannels, chenille, cottons, rugs, etc., shed lint.
Corduroys, knits (including socks), permanent press, and
synthetics attract lint.
In any kind of drying, lightweight fabrics will dry faster
than heavyweight fabrics. If mixed loads are dried
together (such as sheets and towels), remove the lighter
weight fabrics when they are dry to prevent overdrying
and wrinkling. The best method is to dry clothes which
require the same time and temperature in the same load.
Load
Do not overload your dryer. Bulk, not weight, determines
the load size. If the dryer is overloaded, it could cause
discoloration or permanent heat damage to the load.
There should be space in the dryer for the clothes to
tumble freely. This helps to reduce wrinkles. Large and
small pieces together make up loads which will tumble
well. Permanent press loads should be smaller to provide
room for tumbling. Proper tumbling allows for fewer
wrinkles. The following illustrationsshow the ideal loads
sizes for fabrics. The average load will fill the cylinder
one third to half full when wet.
A load can be too small. Just a few small pieces will not
tumble properly. They will take longer to dry and they
may be wrinkled. For small loads, add a couple of large
towels or non lint shedding items to aid in tumbling.
Separate: Lights
Darks
Separate: Lint Shedding
Fabric
Lint Receiving
Fabric
Separate: No Heat Items
Low Heat Items
High Heat Items
D322IE1A
Cylinder with wet
cottons and linens
D323IE1C
Cylinder with wet
permanent press

504057 7
Operating Instructions . . .
Available Drying Cycles
NOTE: Use the automatic cycles for drying items that
canbedriedwithheat.Thesecyclesautomaticallydry
loads to the dryness level selected.
MORE DRY will dry very small loads and some heavy
items, such as blue jeans, but will overdry lightweight
items, such as sheets and shirts. Overdrying can cause
wrinkling, shrinking, excessive lint conditions, and will
use more energy than necessary.
LESS DRY, which uses the least energy, will dry large
loads and lightweight items, such as sheets and shirts, but
might leave other items, such as denim and heavy bath
towels, more damp.
To increase energy savings and to make sure loads are
dried without overdrying, set your loads on LESS DRY. If
itemsare damp atthe end ofa cycle, the timer knob needs
to be set closer to the MORE DRY setting the next time
these loads are dried. If items are overdry at the end of a
cycle, the timer knob should be set closer to DELICATE
or COOL TUMBLE when these loads are dried again.
Remember the settings that work best to get ideal drying
results.
DELICATE, available only in the AUTOMATIC
REGULAR/DELICATE cycle, will dry sheer items and
very lightweight cottons, but will leave heavier items
damp. If items are damp at the end of the cycle, set the
timer knob closer to the LESS DRY setting the next time
these loads are dried. If items are overdry at the end of the
cycle, the timer knob should be set closer to COOL
DOWN.
The COOL DOWN and COOL TUMBLE period at the
end of each cycle provides items a chance to tumble with
no heat and cool down to room temperature. This
prevents wrinkles from setting if items cannot be cared
for immediately.
NOTE: The timer knob will not advance as quickly in
the AUTOMATIC cycles as it does in the TIME DRY
cycle. The time it takes for the timer to advance
depends on the type and size of the load being dried.
Automatic Regular/Delicate Cycle
Useforsturdyitemslike playor work clothesand also for
delicate items. The type of heat is determined by
choosing the proper Fabric Selector option. There are
three settings in the AUTOMATIC REGULAR/
DELICATE cycle— MORE DRY, LESS DRY, and
DELICATE.
Time Dry Cycle
This cycle will operate dryer for up to 80 minutes.
Cottons and heavyweight items dry best between 50 and
70 minutes, and lightweight items dry best between 20
and 40 minutes.
Automatic Permanent Press/Knits Cycle
Useforpermanentpressitemsandsynthetics. The typeof
heat is determined by selecting the proper Fabric
Selector option (see following page). There are two
settings in the AUTOMATIC PERMANENT PRESS/
KNITS cycle—MORE DRY, and LESS DRY.
To Dry Clothes
IMPORTANT: See the INSTALLATION
INSTRUCTIONS before using dryer.
IMPORTANT: Before using dryer for the first time,
use an all purpose cleaner, or a detergent and water
solution, and a damp cloth to remove shipping dust
from inside dryer drum.
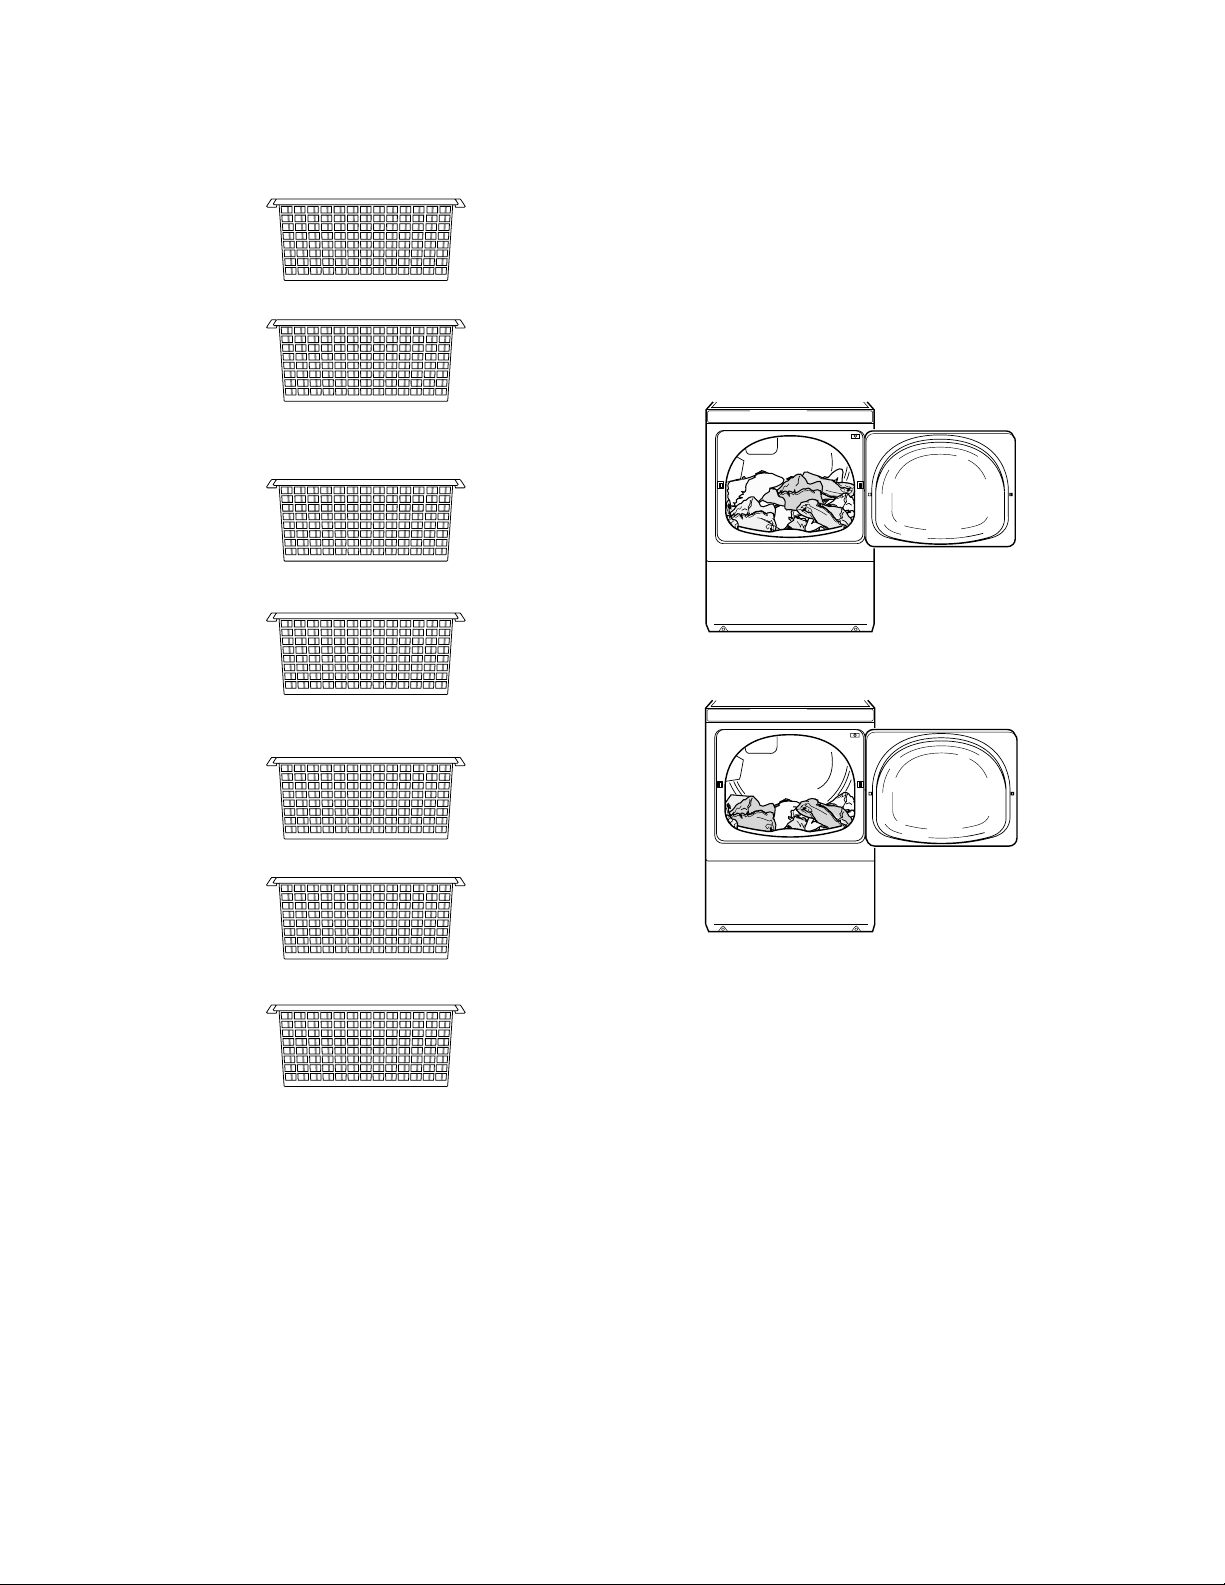
1. Sort items into separate loads.
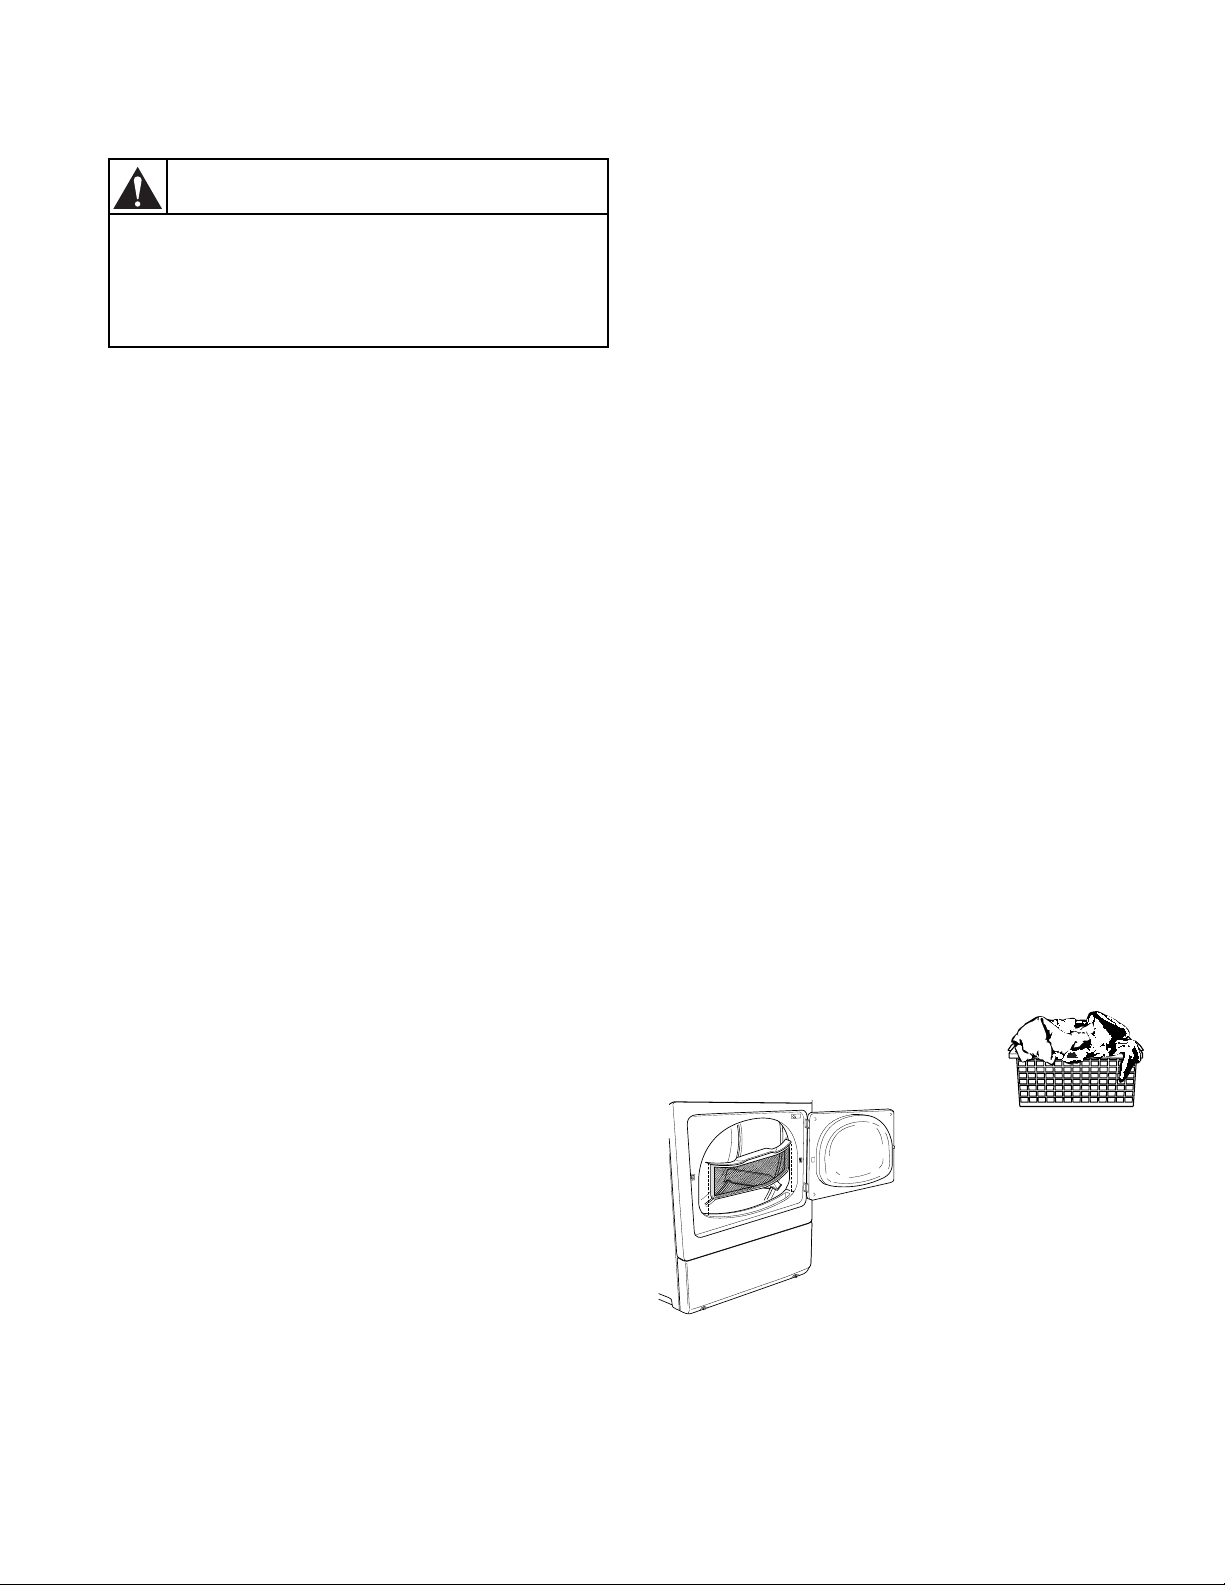
2. Clean lint filter before
each use.
To reduce the risk of fire, electric shock,
serious injury or death to persons, read the
IMPORTANT SAFETY INSTRUCTIONS on
pages 4–5 before operating the dryer. W128-2
WARNING
D305IE1A
D321IE1A

8504057
D323IE1B
D326IE1A
FABRIC SELECTOR
DELICATE REGULAR
PERM PRESS
AIR FLUFF
NO HEAT
CPD111
SIGNAL
OFF LOUD
CPD111A
D325IE1B
3. Add clothes loosely
into dryer drum. Add
fabric softener sheet,
if desired.
4. Close loading door. Dryer
will not operate with the
door open.
5. Select FABRIC SELECTOR. Follow garment
manufacturer’s care labels for recommended
temperature settings.
6. Select timer setting in cycle desired: AUTOMATIC
REGULAR/DELICATE, TIME DRY, and
AUTOMATIC PERMANENT PRESS/KNITS.
These cycles control the drying time.
7. Push timer knob in to start dryer.
NOTE: To stop dryer at any time, open the door or
turntimer knobtoanOFF position. Torestart dryer,
close door, reset timer if necessary, and push in the
timer knob.
End of Cycle Signal
The volume of the signal tone may be set on OFF, LOUD
or between the two selections. If a volume level is
selected, the signal will let you know when the cycle is
done. The signal will stop when the door is opened, or
when the timer is advanced to an OFF position.
Drying Rack
The drying rack is useful for items that require no-tumble
drying, such as tennis shoes, sweaters, stuffed toys or
other delicate items.
The rackcan be installed by placing the rack pegs intothe
indents in the back of the dryer and placing the front of
the rack onto the inner door frame. See the illustration
below.

504057 9
Drying Special Items . . .
Type of Load Special Instructions
Bedspreads Choose heat for fabric. Dry one double or two single spreads. Chenille and
tufted spreads will shed lint and should be dried by themselves. New spreads
especially, will contain loose lint. Tumble on NO HEAT setting before washing
to remove loose lint. These spreads may be dried completely.
Blankets
Electric
Synthetic Fibres
Thermal Cotton
Wool
DELICATE or NO HEAT cycles. If drying items in dryer is recommended by
the manufacturer, dry as for wool. Do not stretch the blanket because of the
wiring. Some electric blankets may have an insulation on the the thermostats or
on the wiring which will not withstand dryer heat. Do not dryer dry unless the
blanket manufacturer says it can be done.
DELICATE or NO HEAT cycles. Some of these blankets arefluffy and will shed
lint. Tumble on NO HEAT setting before washing to remove loose lint. Use a
gentle wash method, then dry in dryer until just dry. The lint filter may need to
be cleaned during the drying.
AUTOMATIC REGULAR cycle.
Agitation and tumbling contribute to the shrinkage and felting of wool. We
cannot guarantee that wool will not shrink. However, if care is taken and the
blanket manufacturer’s instructions are followed, satisfactory results should be
obtained. Wash by the soak method with as little agitation as possible. After
washing, stretch blanket gently in both directions. Use approximately five dry
bath towels and place them between folds in blanket. This will “cushion” it to
lessen the tumbling. Set dryer for 20 minutes on the TIME DRY cycle. Use
REGULAR heat setting, if it is available on your dryer. Check blanket when
timer reaches 10. Wool blankets must be removed from the dryer when damp.
Stretch gently to shape and finish drying over two clothes lines or in a flat
position.
Curtains
Cotton
Fibreglass
Synthetic Fibres
AUTOMATIC REGULAR or TIME DRY cycles. Remove damp items for
ironing or dry completely, then steam iron.
DO NOT DRY IN THE DRYER unless recommended by the manufacturer.
Fibreglass may shred. Particles may remain in the dryer and rub off on the next
load. This could irritate the skin. “Beta” fibreglass may be dryer dried if
recommended by the manufacturer.
DELICATE or NO HEAT cycles. Allow room fortumbling toprevent wrinkling.
Delicate or sheer curtains must be dried by themselves so they will not be
snagged by hooks or crushed by other clothes in the load. Some sheer curtains
are heat sensitive. Dry 10 minutes only, plus thecooldown period.Remove from
dryer immediately and hang. If the dryer has been heated from a previous load,
NO HEAT setting may be sufficient.
Denim, Corduroy AUTOMATIC REGULAR cycle. Dry completely and remove from dryer when
seams are slightly wet to minimize shrinkage.

10 504057
Draperies Remove hooks and weights before washing. Choose heat for fabric and allow
space in the dryer for tumbling. Some draperies may be removed when slightly
damp and hung immediately. Lined draperies should be dry-cleaned because
they have a tendency to pucker.
Knit Articles
Cottons
Synthetic Fibres
Wool
Knit fabrics are usually manufactured under tension (stretching). Cotton knits
especially may relax or draw together if every bit of moisture is removed from
them. It is best to take them out of the dryer with a trace of moisture remaining,
then stretch to shape. If they do shrink from overdrying, rewet them and dry
properly.
AUTOMATIC REGULAR or TIME DRY cycle. Remove slightly damp to
minimize ironing. Reshape, smooth seams and pockets, etc.
AUTOMATIC REGULAR or AUTOMATIC PERMANENT PRESS cycle.
Turn inside out to prevent “pilling” (the rolling up of the fibre ends from
friction). Dry sweaters only with similar things because they tend to attract lint.
Make sure the load is large enough for tumbling. Dry completely and remove
from dryer immediately to minimize wrinkling.
DELICATE or NO HEAT cycle. For wool labeled “machine washable”, follow
manufacturer’s directions. For other wool, use wool blanket method. Do not
dryer dry loosely knit wool or hand knits. Dry these flat and stretch to shape
from a pattern drawn before washing.
Lingerie
Cotton
Elastic
Foam Rubber
Spandex
Stretch Fabrics
Synthetic Fibres
AUTOMATIC REGULAR cycle.
Body oils can cause elastic to deteriorate. Wash garments containing elastic
frequently. Elastic in such things as shorts may be dried as for fabric, but avoid
overdrying.
Bras, bathing suits, sun suits, etc. DO NOT DRY THESE ITEMS IN THE
DRYER WITH HEAT, FIRE MAY RESULT. NO HEAT setting may be used.
Most girdles (control briefs or shapers) today are made from Spandex. Use
DELICATE or NO HEAT cycles. Do not overdry.
Choose heat for the most delicate fibre. These may be dried completely as they
will stretch into shape. Avoid drying with lint-shedding fabrics.
TIME DRY cycle. Use a DELICATE or LOW HEAT setting, if it is available.
Some sheer fabrics, especially sheer knits, can be heat sensitive. Dry these until
they are just dry (about 10 minutes) and remove from dryer immediately. Sheer
fabrics should not be washed and dried with garments containing hooks or
zippers. Man-made fabrics will create static electricity if overdried. To prevent
this, use fabric softener and avoid overdrying.
Mattress Pads The materials in mattress pads is made of either cotton or synthetic fibres. Read
the fibre content label, found on your mattress pad, to determine what type of
fibre was used to manufacture the pad. READ AND CAREFULLY FOLLOW
the fabric care instructions supplied by the mattress pad manufacturer. Some
pads made of synthetic fibres are very heat sensitive. These pads can be
flammable if over-heated or over-dried. TO AVOID A FIRE HAZARD, DO
NOT OVER-DRY mattress pads. Remove pads from the dryer while they are
still damp.
Type of Load Special Instructions

504057 11
Pillows
Feather and Down-Filled
Fibre-Filled (polyester)
Foam Rubber
Ticking must be strong and seams secure. If in doubt, sew pillow into a case or
use a zippered pillowcase to prevent feathers from coming out. After washing,
shake pillow to fluff feathers. Dry one large or two smaller pillows. Use TIME
DRY cycle. Use LOW or MEDIUM heat setting if it is available on your dryer.
Shake and reposition pillows several times during drying. Pillows must be dry
in the center to prevent mildew. Drying may take two hours or longer. Reset
dryer timer if necessary. The odor of wet feathers is not pleasant. However, the
odor will disappear once the pillows dry.
Follow manufacturer’s directions.
Do not dry in the dryer.
Quilts Choose heat and cycle for fabric. Filling and cover must be completely
washable. Old quilts may be too fragile to machine wash or dry. Quilts filled
withcottonmay becomelumpy. Quiltingshouldbeclosetogether.Remove from
dryer slightly damp and stretch gently to shape. Quilted articles may shrink if
overdried.
Rugs
Cotton With Cotton Backing
Rubber-backed
Synthetic Fibres
AUTOMATIC REGULAR or TIME DRY cycles. Dry one large or several small
rugs. For one small rug only, add towels for buffers.
Hot water and heat tend to deteriorate many types of rubber. Some types of
rubber-like materials are flammable under certain conditions. DO NOT DRY
FOAM RUBBER AND RUBBER-LIKE MATERIALS WITH HEAT.
DELICATE or NO HEAT cycles. Follow manufacturer’s suggestions. Some of
these rugs are heat sensitive and should be removed from the dryer when damp,
or dried with no heat.
Slip Covers Choose heat for fabric. Close zippers. Dry one couch cover, two chair covers or
five or six pillow covers at one time. Remove from dryer when slightly damp.
Press pleats if necessary and replace on furniture immediately. Stretch fabrics
and knits should be dried completely so they will fit snug when replaced on
furniture.
Stuffed Animals and Toys Make sure the filling and covering are washable and can be dryer dried. Cotton
filling may become lumpy. Protect glass eyes by covering with a stocking or tie
toy into a pillowcase. Choose heat for most sensitive fibre. Dry enough clothes
in the load for good tumbling. DO NOT DRY TOYS STUFFED WITH FOAM
RUBBER OR KAPOK IN THE DRYER WITH HEAT.
Tennis Shoes DELICATE or NO HEAT cycle. Use a drying rack or tumble with at least four
old bath towels.
Type of Load Special Instructions

12 504057
User-Maintenance . . .
Care Of Your Dryer
Dryer Interior
Unstable dyes used in many denim blue jeans or brightly
coloured cotton garments may cause somediscolouration
of the interior surfaces. This slight colour change will do
no harm to other clothes.
Should you wish to return the interior surfaces to their
original whiteness follow the directions below.
The dryer may be cleaned by one of the following
methods:
• Wipe the surfaces using asoft cloth anda non-abrasive
paste of powdered laundry detergent and hot water
followed by a short heat cycle with a load of rags, or
• Apply a liquid spray household cleaner to a soft cloth,
wipe the discoloured area and follow with a short heat
cycle with a load of rags.
To remove crayon or ball point ink offthe dryer drum,put
the heat on high and use old rags in the dryer to absorb
the crayon or ink. If unsuccessful, contact the appliance
dealer. DO NOT use any chemicals in the dryer.
IMPORTANT: The use of chlorine bleach for
removing any discolourations should be avoided
because bleach could damage the finish.
Cabinet
Wipe dryer cabinet as needed. If detergent, bleach or
other washing products have been spilled on the dryer
top, wipe immediately. Some products will cause
permanent damage if spilled on the cabinet.
Do not lay sharp or rough objects on or against the dryer.
The finish could be damaged.
Control Panel
Use only a damp or sudsy cloth for cleaning the control
panel. Some spray prewash products may harm thefinish
on the control panel.
Exhaust System
• Keep dryer area clear and free from combustible
materials, gasoline, and other flammable vapours and
liquids. Do not obstruct the flow of ventilation air.
• The exhaust duct should be inspected after one year of
use and cleaned if necessary. Inspect and clean
exhaust duct every one to two years as required
thereafter.
• Vent hood should be checked and cleaned regularly to
assure that it is working properly.
NOTE: Verify proper operation after servicing.
Motor Overload Protector . . .
The dryer’s motor overload protector stops the motor
automatically in the event of an overload. After cooling,
the overload protector will reset itself. Dryer can be
restarted by pushing the timer knob in. If overload
protectorcyclesagain,removethedryerfromuseandcall
the service person to correct the problem.
To reduce the risk of an electric shock,
serious injury or death, disconnect the
electrical service to the dryer before cleaning
the interior. W132
WARNING

504057 13
Lint Filter . . .
The lint filter is located at the front of the dryer in the
lower part of the door opening.
CLEAN THE LINT FILTER BEFORE DRYING EACH
LOAD.
A clean lint filter ensures efficient drying and that clothes
remain lint-free when unloading dryer. Slide lint filter up
and out of door opening. Filter may be washed if any
residue is noticed on it.
TO REPLACE LINT FILTER: Place filter in door recess
and push in firmly. Be sure to replace the filter with the
words facing the front of the dryer.
IMPORTANT: The lint filter must be in place in the
door opening when using dryer or loading and
unloading dryer. If the filter is not in place, clothing
could fall into the front air duct and get into the
exhaust system, causing damage to the motor.
D321IE2A

14 504057
Before You Call For Service . . .
(You may save time and money by checking the following:)
If Your Dryer:
Won’t Start Won’t Heat Doesn’t Dry
Clothes
Satisfactorily Possible Reason — Do This To Correct
•Be sure the power cord is plugged all the way into the electrical
outlet.
•Close the loading door.
•Be sure timer is not in COOL DOWN setting or NO HEAT cycle.
•Push timer knob in to start dryer.
•• Has the laundry room fuse(s) blown or become loosened, or are
circuit breakers open? The dryer itself does not have an electrical
fuse. An electric dryer has an electrical circuit with two fuses.
•Has the motor overload protector cycled? Wait10 minutes and try
again.
•Is the timer in a heat setting?
•Gas Dryer Only — Check to see if equipment and main gas line
valve is turned on.
••
Check exhaust duct to outside to see if it is kinked, blocked or
needs cleaning.
••
Check weather hood to make sure flapper moves freely, has not
been pushed in or has not been blocked.
•Automatic Cycle — Adjust to more or less dry setting.
•Timed Cycle — Allow more or less time.
•Clean the lint filter.
•Is the load too small? Small loads may not tumble properly or dry
evenly.

504057 15
D324IE1A
If Service Is Required . . .
If service is required, contact Kleenmaid Customer Care
Centre on FREECALL 1-800-072-144.
Kleenmaid
P.O. Box 5560
Maroochydore South QLD 4558
or Phone FREECALL
1-800-072-144
When calling or writing about your dryer, PLEASE
GIVE THE MODEL AND SERIAL NUMBERS. The
model and serial numbers are located in one of the four
corners of the door well. The door well is the shaded area
shown.
Please include a copy of your bill of sale and any service
receipts you have.
To reduce the risk of serious injury or death,
DO NOT repair or replace any part of the
dryer or attempt any servicing unless
specifically recommended in the user-
maintenance instructions or in published
user-repair instructions that you understand
and have the skills to carry out. W133
WARNING

16 504057

504057 17

18 504057

504057
Automatic Dryer Warranty . . .
Domestic Warranty
Full Five Year Warranty
In addition to all statutory rights which you, the
Consumer, have under all the relevant laws in respect of
thisappliance, during your firstfiveyearsofownershipas
the original purchaser of the Kleenmaid dryer, we
guarantee that any fault caused by faulty material or
workmanship,becomingapparentwillberectified freeof
charge for parts or labour provided that all service is
performedduringnormalworking hoursbyKleenmaidor
their designated Agent. Where the dryer is installed
outside the normal servicing area of the above, the
Purchaser must pay the cost of transporting the appliance
to and from the Agent or the Agentís travelling cost to
and from the Purchaserís home.
Commercial Warranty
Full One Year Warranty
In addition to all statutory rights which you, the
Consumer, have under all the relevant laws in respect of
this appliance, during your first one year of ownership as
the purchaser of the Kleenmaid dryer, we guarantee that
any fault caused by faulty material or workmanship
becoming apparent will be rectified free of charge for
parts or labour provided that all service is performed
during normal working hours by Kleenmaid or their
designatedAgent.Wherethe dryerisinstalledoutsidethe
normal servicing area of the above, the Purchaser must
pay the cost of transporting the applianceto and from the
Agent or the Agentís travelling cost to and from the
Purchaserís home.
What These Warranties Do Not Cover
We are not responsible for any damage or malfunction
unless caused by a defect in material or workmanship.
This includes, but is not limited to, abuse, misuse,
improper installation, and transportation damage. We are
not responsible for any consequential damages resulting
from any malfunction.

504057
Information For Handy Reference . . .
Kleenmaid
P.O. Box 5560
Maroochydore South QLD 4558
Date Purchased
Model Number Serial Number
Store Name
Store Address Phone Number
Service Agency
Service Agency Address Phone Number
NOTE: Record this information and keep your sales slip. Model and serial numbers are located
on the nameplate.
Customer Care Centre and
Information Freecall:
1-800-072-144
This manual suits for next models
1
Table of contents
Other Kleenmaid Dryer manuals

Kleenmaid
Kleenmaid LEK37A User manual

Kleenmaid
Kleenmaid LDVF70 User manual

Kleenmaid
Kleenmaid KED2000 User manual

Kleenmaid
Kleenmaid KED602 User manual

Kleenmaid
Kleenmaid KED600 User manual

Kleenmaid
Kleenmaid KED300-Compact User manual

Kleenmaid
Kleenmaid KED500 User manual

Kleenmaid
Kleenmaid LEK37AWF4350 User manual

Kleenmaid
Kleenmaid LEK33A-4350 Series User manual

Kleenmaid
Kleenmaid KCDV60 Installation guide