manuals.online logo
Brands
  1. Home
  2. •
  3. Brands
  4. •
  5. KloKick
  6. •
  7. Baby Swing
  8. •
  9. KloKick DR0544G User manual

KloKick DR0544G User manual

Popular Baby Swing manuals by other brands

Hudora Comfort INSTRUCTIONS ON ASSEMBLY AND USE

Hudora

Hudora Comfort INSTRUCTIONS ON ASSEMBLY AND USE

Fisher-Price M5585 manual

Fisher-Price

Fisher-Price M5585 manual

stilum patis2 Mounting instructions

stilum

stilum patis2 Mounting instructions

Fisher-Price K7192 manual

Fisher-Price

Fisher-Price K7192 manual

Fisher-Price 79739 instructions

Fisher-Price

Fisher-Price 79739 instructions

Fisher-Price G5914 manual

Fisher-Price

Fisher-Price G5914 manual

highwood Lehigh Porch Swing Assembly guide

highwood

highwood Lehigh Porch Swing Assembly guide

Graco OASIS owner's manual

Graco

Graco OASIS owner's manual

stilum seta Maintenance instructions

stilum

stilum seta Maintenance instructions

stilum simius2 Maintenance instructions

stilum

stilum simius2 Maintenance instructions

Central Park 5629033 manual

Central Park

Central Park 5629033 manual

Canvas BAFFIN 088-2292-4 Assembly instructions

Canvas

Canvas BAFFIN 088-2292-4 Assembly instructions

ABC Design Kiddie Ride On Instructions for use

ABC Design

ABC Design Kiddie Ride On Instructions for use

TP Pirate Boat TP903 Instructions for assembly, maintenance and safe use

TP

TP Pirate Boat TP903 Instructions for assembly, maintenance and safe use

Fisher-Price FLG84 manual

Fisher-Price

Fisher-Price FLG84 manual

Clas Ohlson 31-5722 quick start guide

Clas Ohlson

Clas Ohlson 31-5722 quick start guide

AOODOR 800-052 Assembly & instruction manual

AOODOR

AOODOR 800-052 Assembly & instruction manual

Sunjoy L-GZ330PCO-1 manual

Sunjoy

Sunjoy L-GZ330PCO-1 manual

manuals.online logo
manuals.online logoBrands
  • About & Mission
  • Contact us
  • Privacy Policy
  • Terms and Conditions

Copyright 2025 Manuals.Online. All Rights Reserved.

Assembly requires at least two adults.
Read the instruction manual carefully before assembling or using the swing set.
Make sure all parts are complete, and identify and separate all parts first.
Keep this manual for future reference.
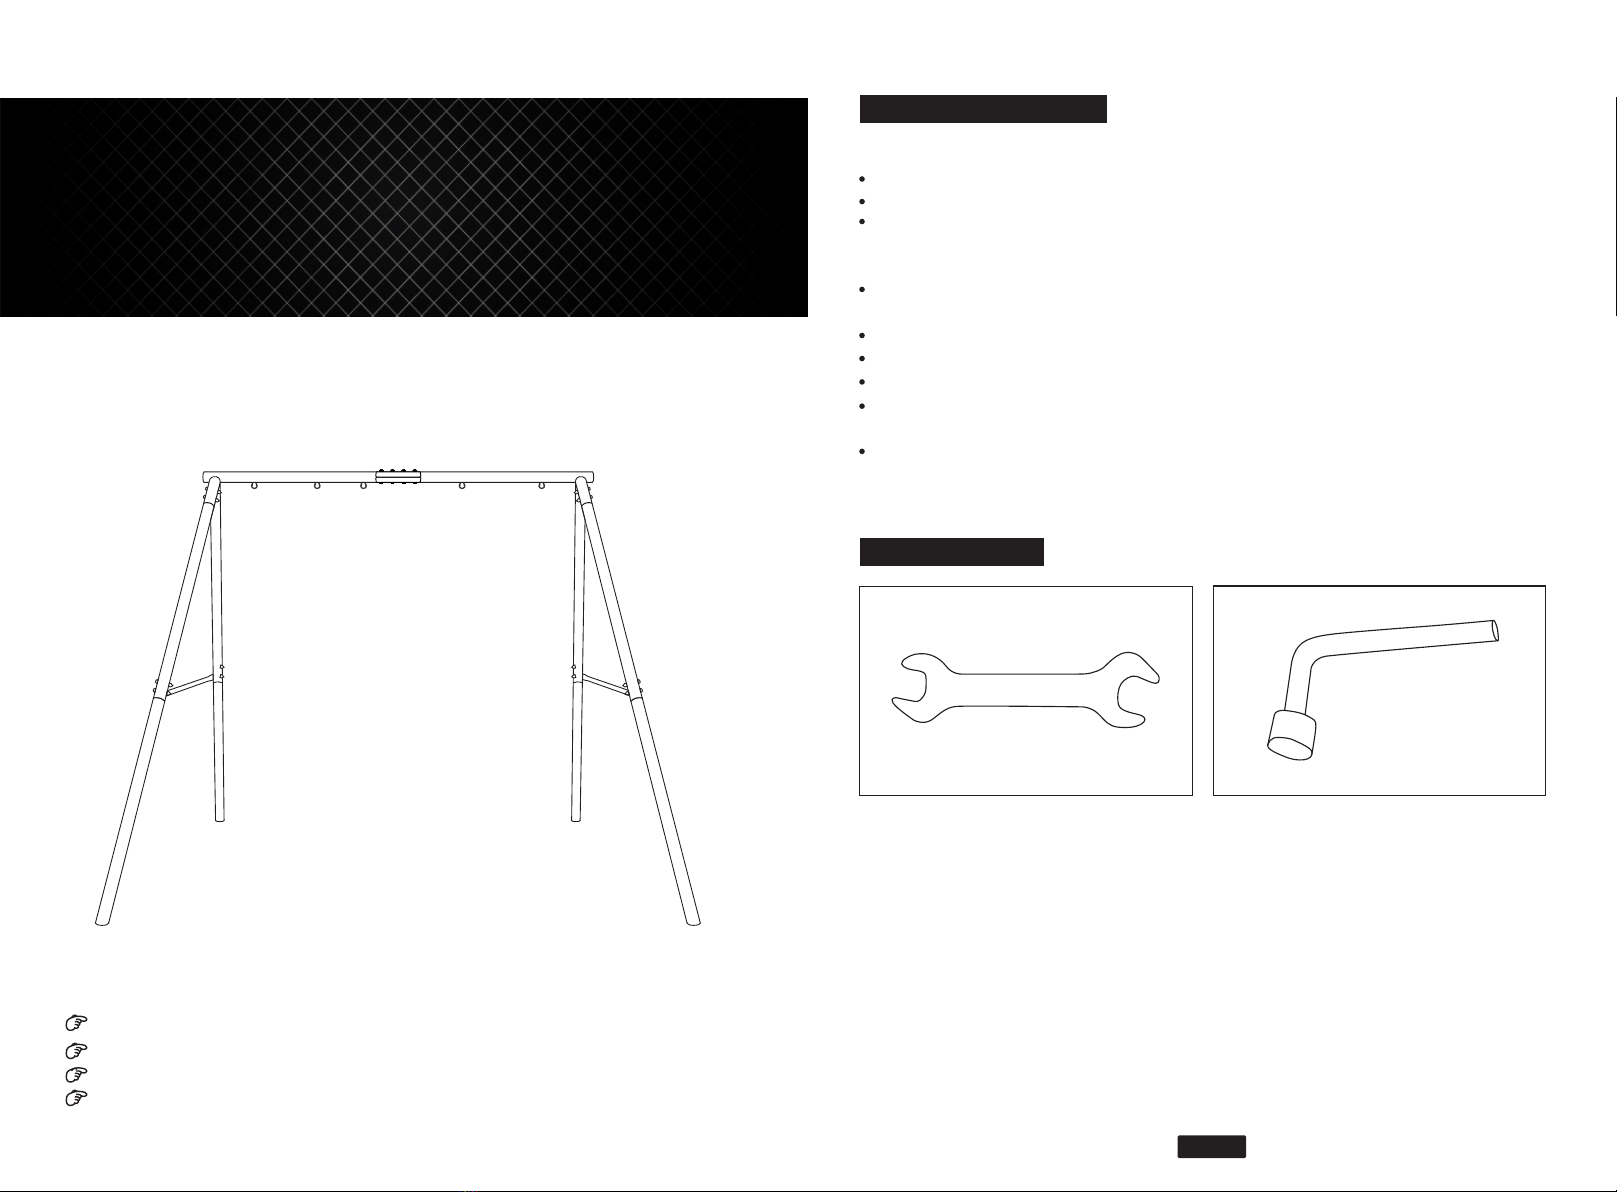
AssemblyInstructions
SwingFrame
SAFETY INSTRUCTION
The safety of your children is our primary concern!
The swing frame is ONLY for domestic use, not for public use.
Do not use this swing frame on hard-packed soil, concrete, or any kind of hard surface.
The swing frame should be set on a flat surface and maintain a distance of at least 2
meters from other structures or obstacles, such as fences, garages, houses, projecting
branches, clotheslines or electric cables, etc.
People who participate in the assembly process should wear safety glasses throughout
the assembly.
Children MUST NOT use this swing frame until the installation is complete.
Choking hazard! Small parts should be kept away from children.
Children under 3 years old are not suitable for playing this product.
Children must be under supervision when they contact or use the product to prevent
the risk of falling or the strangulation of long ropes.
Periodically check and maintain the swing frame, and ensure that all hardware is in
good condition.
TOOLS NEEDED
Spanner( included)Spanner(included)
Tools may required (not included): Tape Measure, Hammer, Flathead and Phillips Head
Screwdriver.
- 01 -
PARTS LIST
Quantity Item Picture Item Name
1
1
TOP BAR-LEFT
TOP BAR-RIGHT
ASSEMBLYANDINSTALLATIONINSTRUCTIONS
Step 1: Assemble the top bar frame of the swing frame
Connect the A1 tube and A2 tube and secure with reinforcing plate B and accessories G,
H and I, as shown below.
NOTE: For easier assembly, do not tighten the bolts all the way initially to allow room for
adjustment. You must go back and fully tighten all bolts after the entire swing set
is assembled.
Step 2: Assemble the support legs of swing frame
Install the C top leg and tighten the screws with a spanner
(Attention: all the bolts on the leg tubes need to face outwards.)
- 02 - - 03 -
B
A1 A2
B
H
I
C
G
C
4C TOP LEG
4
2
C
D
E
F
4
1
D BOTTOM LEG
SIDE BAR
ANCHOR
IRON BAR FOR ANCHOR
INSTALLATION
G
H
I
J
K
L
M
20
20
44
4
4
4
LONG BOLT(M8*65mm)
NUT
WASHER
CARABINER
M8 EYE BOLT
BIG WASHER
M8 NONSLIP NUT
4
A2
A1
I
REINFORCING PLATE
2
B
IH B
BG


- 04 -
Step 3: Side Leg Assembly
Install the D bottom leg.
Step 4: E side bar Installation
1) Hold the other leg tube and pull it outwards until the bar hole align to the LOWER
tube hole.
1) Install one side of the E side bar to the LOWER hole on one leg tube, and screw
it tightly.
Tips: Do not install the bars directly without pulling the leg tube outwards. Otherwise,
you will find the side bars too long.
3)Insert the nuts and screw it tightly.
- 05 -
D
C
I
G
E
HE
I
D
E
E
Step 5: Ground Stakes Assembly
Place the ground stakes near the swing frame's lower legs, screw them into the ground,
then secure the stakes to the legs using K, I, F, L and M as shown below.
Congratulations!
You have now completed installing the equipment. Please make sure to go back and
check all hardware and ensure all bolts and nuts are securely tightened before using
the playground equipment.
Do not let children use the playground equipment until it is properly assembled and
anchored. Constant adult supervision is required during use. Please make sure all
supervisors have read and understand the warnings and use instructions contained in
this manual. Do not allow access by children if any parts are missing or damaged.
Call our customer service for assistance if any replacement parts are needed.
Only our original parts should be used. Use of non-authorized parts shall void the
warranty on the product.
- 06 - - 07 -
KL
IM
F