Knight Foam Clean 25-95 User manual

0901154 Rev: A (04/10) Page 1 of 12
Foam Clean 25-95
Instruction Manual

Page 2 of 12 0901154 Rev: A (04/10)
CAUTION: Wear protective clothing and eyewear when dispensing chemicals or
other materials. Observe safety handling instructions (MSDS) of chemical mfrs.
CAUTION: When installing any equipment, ensure that all national and local
safety, electrical, and plumbing codes are met.
TABLE OF CONTENTS
Introduction........................................................................................................... 3
Applications .......................................................................................................... 3
Requirements ....................................................................................................... 3
Specifications ....................................................................................................... 3
Safety Precautions ............................................................................................... 4
After Use .............................................................................................................. 4
Maintenance ......................................................................................................... 4
Operation.............................................................................................................. 5
Troubleshooting.................................................................................................... 6
Mobil Cart Parts Diagram ..................................................................................... 8
Pump & Plumbing Parts Diagram ......................................................................... 9
European Parts Diagram .................................................................................... 10
Replacement Parts List ...................................................................................... 11
Warranty Information .......................................................................................... 12
Knight Locations ................................................................................................. 12

0901154 Rev: A (04/10) Page 3 of 12
INTRODUCTION
Foam cleaning is recognized as an effective method for removing oil and heavy soils from all types of surfaces. It is
used for cleaning throughout the food processing, dairy, transportation, industrial and agricultural industry. Due to it’s
characteristics, cleaning with foam is safe and cost effective. Foam can adhere to irregular surfaces and provide
better coverage than liquid cleaning chemicals. Foam stays in place longer to actively lift dirt and oil from surfaces
until it is rinsed off.
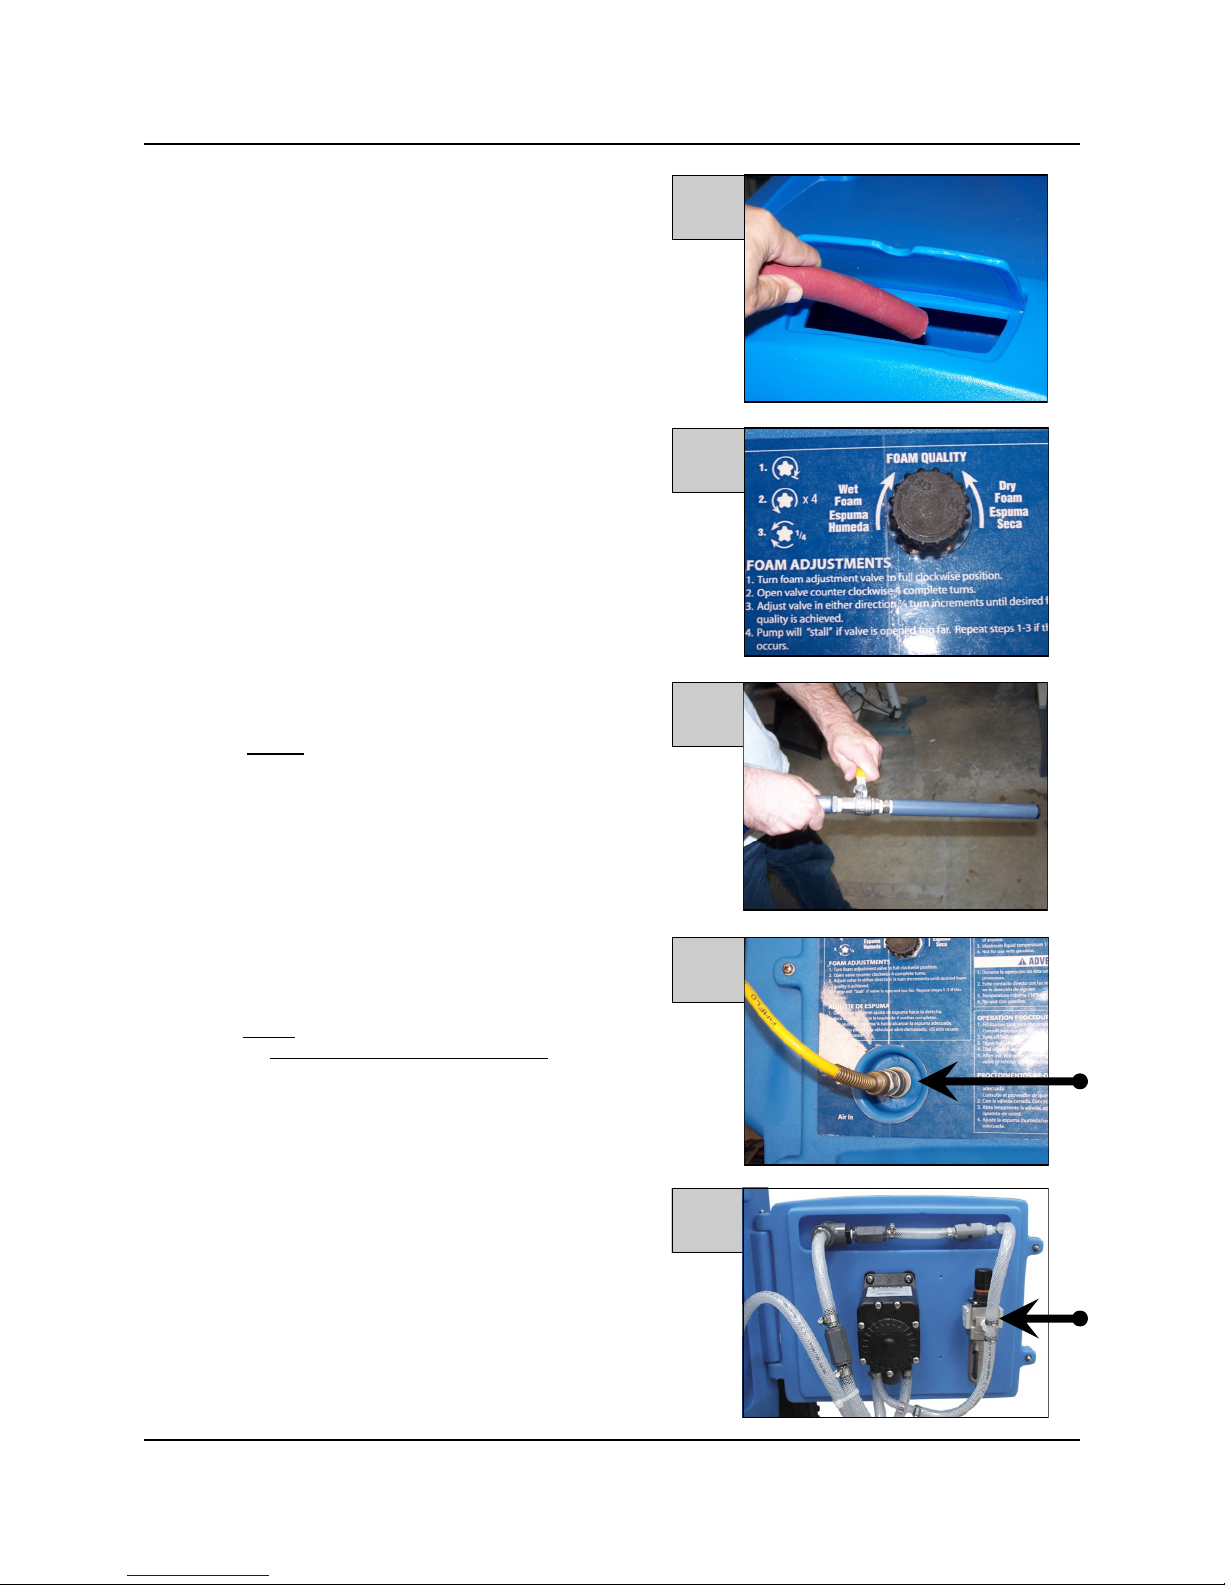
Knight’s Foam Clean system dispenses a rich lather of foam up to 65 GPM with a distance of up to 30 feet. With a
built-in 4 GPM (15 ltr/min) air operated pump, you’ll get consistent foaming quality for clean results. Simply turn a
knob and you can adjust the dryness or wetness of the foam for different cleaning applications.
APPLICATIONS
Food Processing Plants: Process Food, Beverage, Dairy, Baking, Poultry, Smoke Houses, Seafood.
Transportation: Trucking, Aviation, Transit, Automotive, Military, Ships, Construction Equipment.
Industrial: General Cleaning, Machinery Degreasing, Paint Manufacturers, Paper Mills.
Agricultural: Dairy, Poultry, Farm Equipment, Hog.
REQUIREMENTS
Minimum 60 PSI clean, dry air at 5 –10 CFM during operation of the foamer.
Chemical requirement: Most foam cleaning dilution rates operate at 3 to 5 oz/gal (24 to 39 ml/ltr) —consult your
chemical supplier for the proper foaming product and mixing ratio to use.
SPECIFICATIONS
Foam Output 65 gal/min (246 ltr/min)
Foaming Distance 25—30 feet (7.5—9 meters)
Chemical Compatibility Santoprene: All acids, corrosives, and petroleum products
Viton: Alkalines, soaps, mild acids, sodium hypochlorite
Air Operated Pump Materials Polypropylene Body w/ Santoprene Seals and Diaphragm
Polypropylene Body w/ Viton Seals and Diaphragm
Air Consumption 60-80 psi, 5-10 scfm
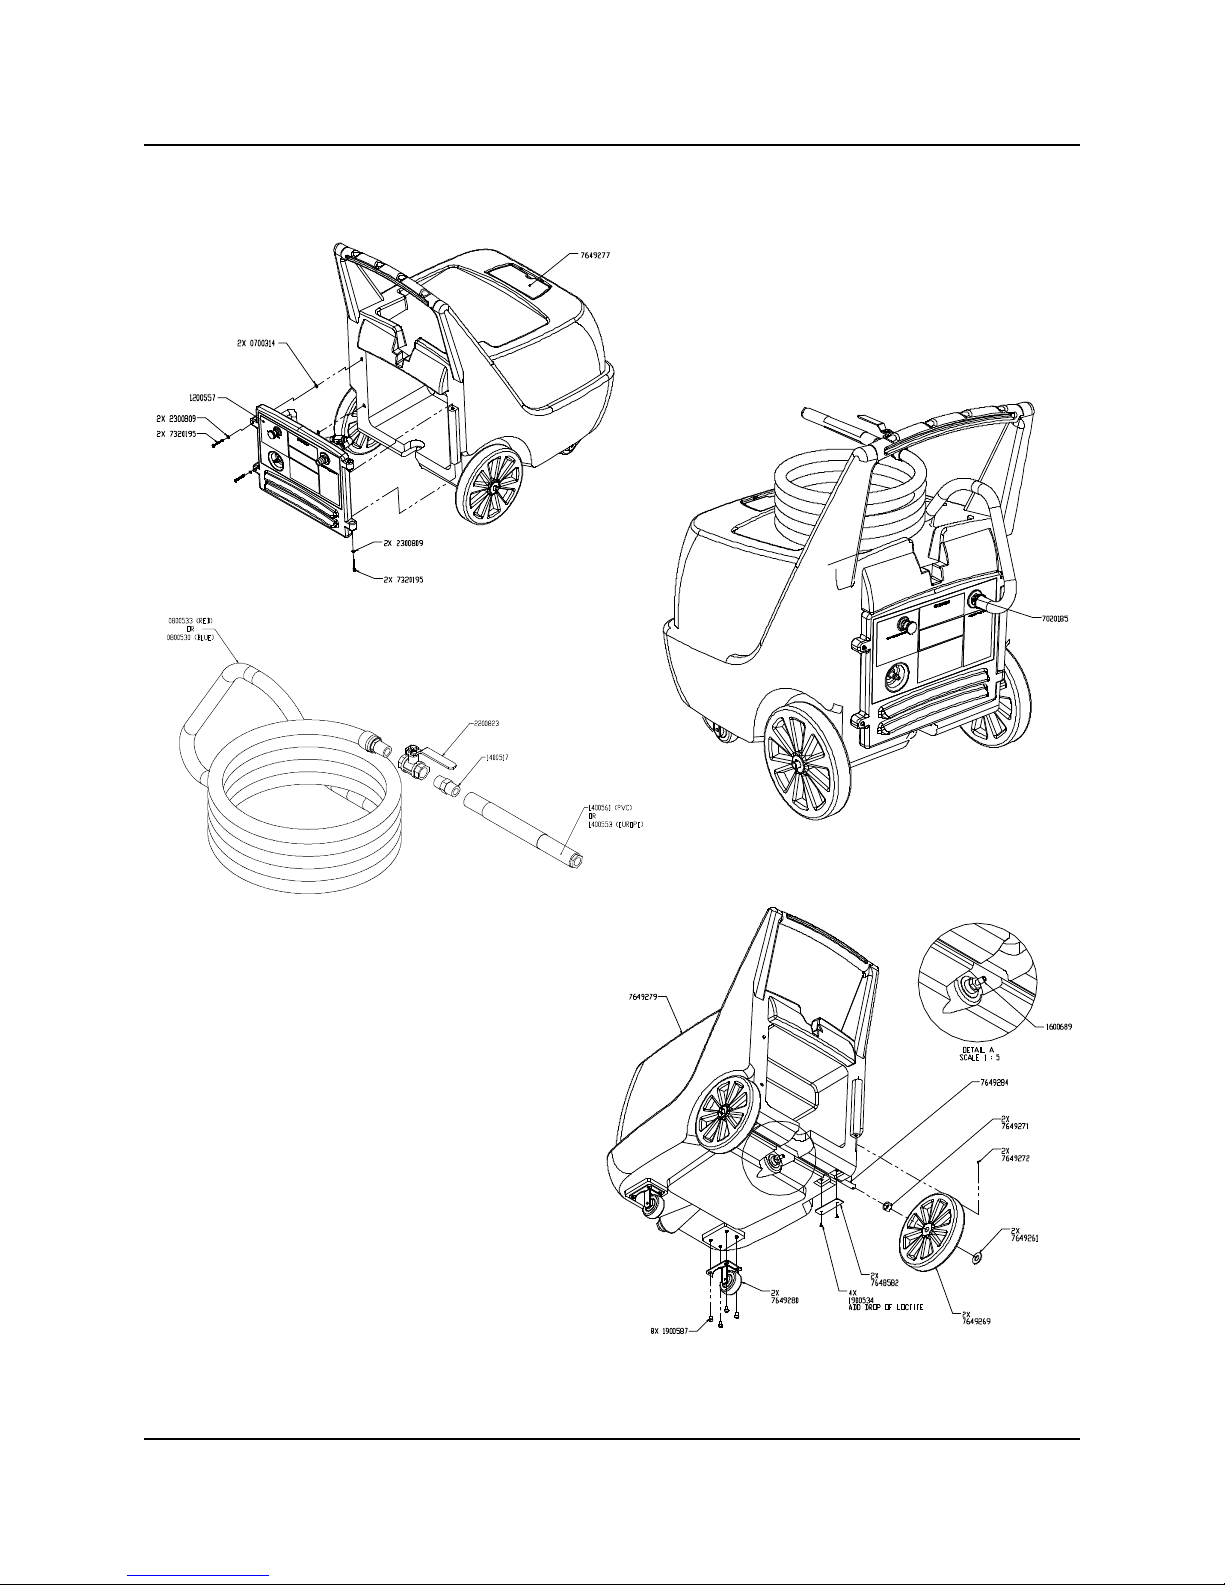
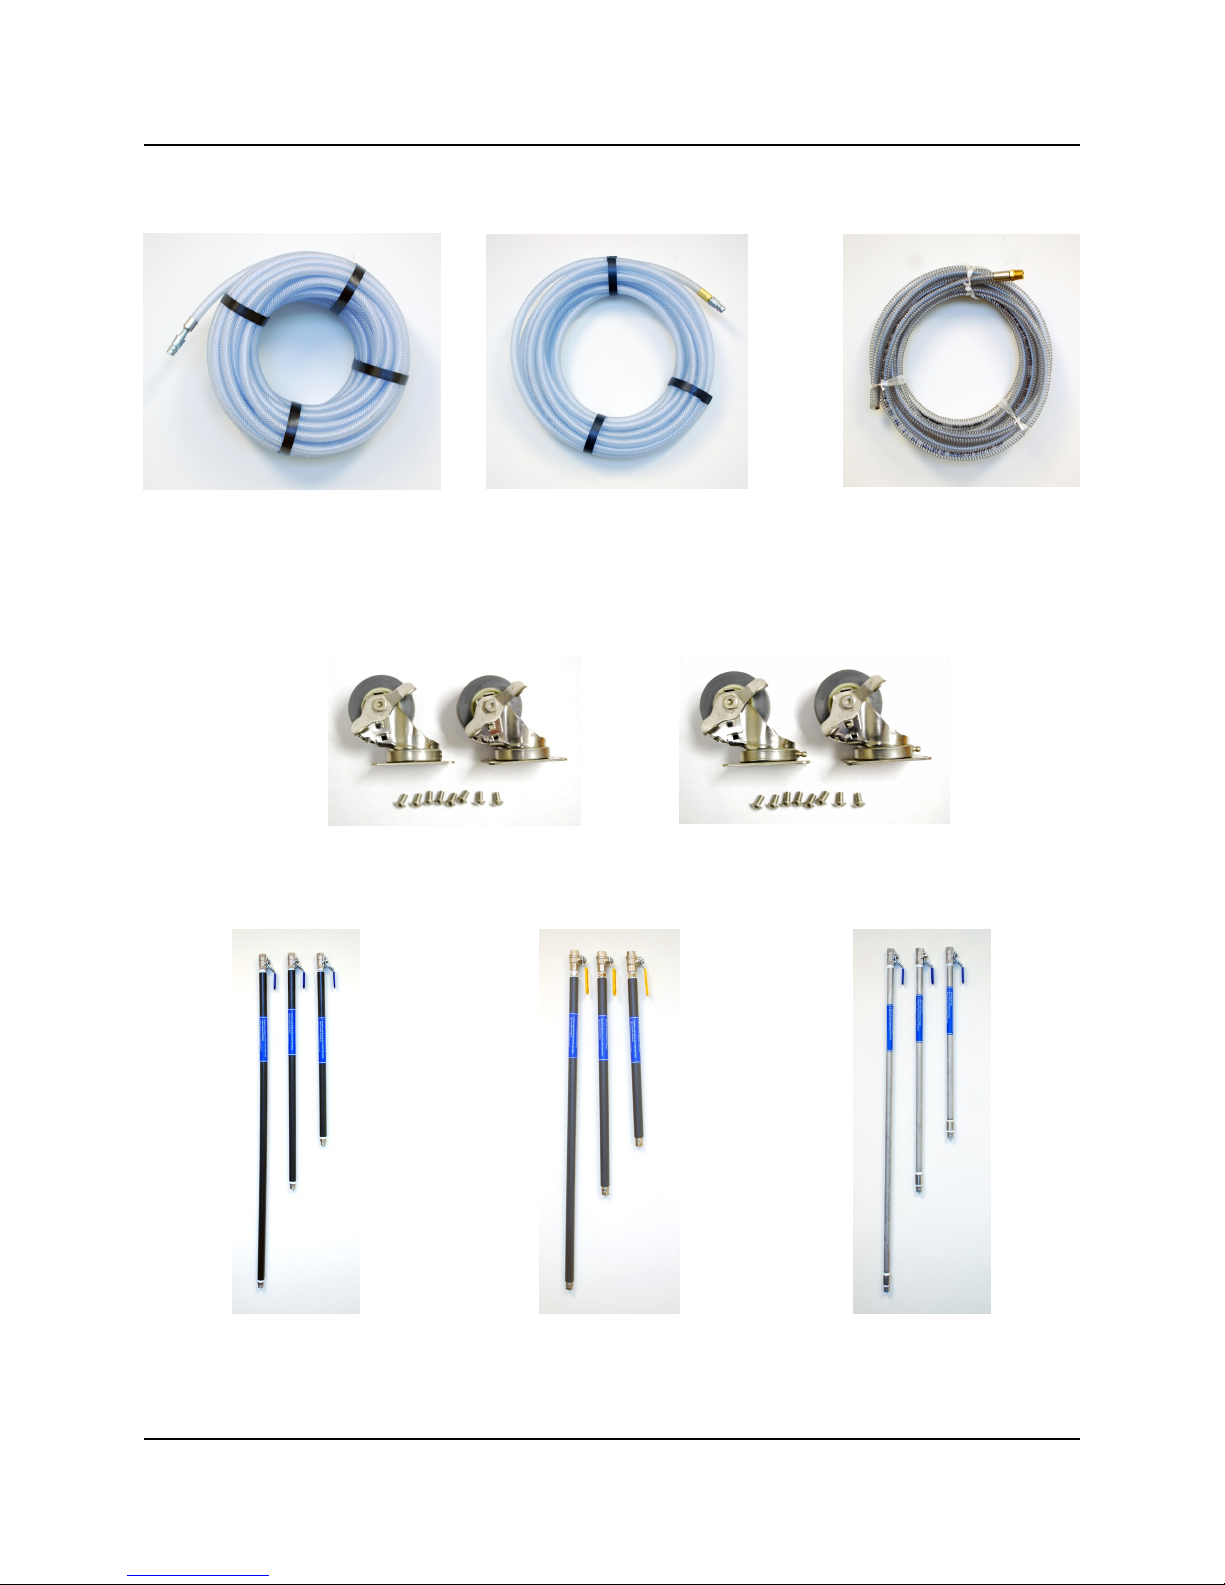
Hose Portable: 25 feet (7.6 meters) reinforced hose, 3/4‖ ID with wand

Page 4 of 12 0901154 Rev: A (04/10)
SAFETY PRECAUTIONS
Read and understand the MSDS sheets for the cleaning chemicals that will be used —consult your chemical
supplier if you have any questions.
Always wear safety goggles and protective gloves while operating the foam unit.
Avoid contact of cleaning agents with skin and eyes. If contact occurs, rinse affected area with water for 15
minutes, and seek medical attention, if needed.
Drain fluid contents of unit and flush out tank if using different types of chemicals from operation to operation.
Never point the Discharge Foam Wand at anyone.
Be sure to flush unit with fresh water when switching from alkaline to acid, or acid to alkaline product.
Never leave unit unattended while discharge hose is under pressure.
Never foam directly into an uncovered electrical outlet or electrical panel.
Stand far enough away from surface being foamed to prevent foam from splashing on you.
AFTER-USE
(1) Fill the tank with fresh water and rinse thoroughly. With discharge valve ―open‖, allow pump to run until all
chemical has been pumped through discharge hose, and air has been purged.
(2) Close the Air Inlet Valve and relieve all remaining pressure on the unit by opening the valve on the discharge
hose and leave in the ―open‖ position.
(3) Open the drain plug on the bottom of the tank to remove any remaining liquid from the tank. The drain plug is 1‖
NPT with a 1.375‖ hex head.
MAINTENANCE
Periodically check the air pump for leaks or evidence of wear/breakdown.
Periodically replace filter media in filter/dryer.
Periodically check the pickup tube for blockage, and flush to clean.

0901154 Rev: A (04/10) Page 5 of 12
Figure
E
Figure
C
Figure
D
Figure
B
Figure
A
OPERATION
(1) [Fig. A] Fill the foamer tank with a combination of
water and foaming chemical —consult your chemical
supplier for proper dilutions. Do not overfill tank.
(2) [Fig. B] Close Wet Foam/Dry Foam Valve completely
—turn clockwise until it stops.
(3) [Fig. C] Make sure the ball valve on the discharge
hose is closed!
(4) [Fig. D] Connect a clean, dry, air supply to the
5/16” quick connect fitting on the unit. Note: Unit
will operate when air supply is on.
(5) [Fig. C] Slowly open the ball valve on the discharge
hose while holding foam wand away from you.
Closing the ball valve will turn pump off.
(5) [Fig. E] Adjust air pressure regulator to achieve
desired pump flow rate (between 60—80 PSI for
optimum results).
(6) [Fig. B] Open Wet Foam/Dry Foam Valve in the
counter-clockwise direction four complete turns.
(7) [Fig. B] Continue to open the Wet Foam-Dry Foam
Valve in ¼ turn increments, allowing a few seconds
between adjustments, until the proper consistency
(dryness) of foam is achieved.

Page 6 of 12 0901154 Rev: A (04/10)
TROUBLESHOOTING
PROBLEM SOLUTION
(1) Unit will not operate. Check for proper air pressure (60 PSI or more into
unit). 60 PSI on Air Gauge.
Check Air Regulator Filter for obstruction such as
water, oil, or debris.
Check for plugged strainer and replace Air
Regulator Filter Assembly, if necessary.
(2) Unit will not make foam. Make sure the correct foaming chemicals and
concentrations are being used.
Checkvalve is installed backwards.
Packing is contaminated or degraded. See item #8
for details on how to service the packing.
(3) Wet Foam-Dry Foam Valve is opened too far
pump will not cycle properly due to lack of air
pressure.
If this occurs, close valve and follow the instruction
in Steps 5—7 under ―Operation‖ (page 3).
(4) Air passes through the pump without cycling. Repair or replace the pump.
(5) Foam Solution backs up into the air filter. Checkvalve needs replacing.
(6) Pump cycles but no liquid is discharged. Check to see if pump is primed.
Check footvalve/strainer orientation. Arrow must
point toward pump suction port.
Suction line leak.
Pump fittings loose or broken.
Suction line not submerged down into liquid.
If all of the above check out okay. Repair or replace the pump.

0901154 Rev: A (04/10) Page 7 of 12
PROBLEM SOLUTION
(7) Foam comes out wet regardless of where the Wet
Foam-Dry Foam is set.
Checkvalve may be plugged and needs replacing.
Ball valve may not be open all the way on foam
wand. This may happen if the operator is standing
too close to a wall and closing the ball valve slightly
to reduce splash of foam.
(8) Unit foams at reduced pressure. Check the air supply into the unit. If air pressure is
low, turn unit off until air supply can bring pressure
back up.
If you know the air supply is 60 PSI or higher, check
the internal air gauge which should read near 60 PSI
or higher. Adjust Pressure Regulator to required
minimum 60 PSI.
If both of the above check out okay, the S.S.
packing could be plugged. Remove and clean it
per the instructions to the right:
(i) Be sure to turn off air to unit and open the cut-off
valve on the discharge hose to remove back-
pressure on the unit.
(ii) Remove the hose barb from the Discharge Tee.
(iii) Remove the screen retainer and packing from inside
the tee.
(iv) Clean any particles from the packing and the screen
retainer.
(v) Replace the packing and screen retainer into the tee
and replace the hose barb fitting. Use a pipe thread
sealant to prevent leaks.
(9) Pump does not stop with ball valve (wand) turned
off.
Chemical lines not primed and/or air leaks in the
pump tubing.

Page 8 of 12 0901154 Rev: A (04/10)
MOBILE CART & DISCHARGE HOSE

0901154 Rev: A (04/10) Page 9 of 12
PUMP & PLUMBING

Page 10 of 12 0901154 Rev: A (04/10)
EUROPEAN PARTS
0800537
Air Supply Hose
50 ft (15.2m) European Plug
0800538
Air Supply Hose
25 ft (7.6m) European Plug
0800539
Foam Clean Hose
3/8 ID x 25 ft (7.6m)
0800545
3/8 ID x 40 ft (12m)
7649288-1
Front Wheel Kit
Steel with Brakes
7649288-2
Front Wheel Kit
Stainless Steel with Brakes
PVC Wand Assembly, 1/2‖ FPT
1400554-1 18in (46cm)
1400554-2 24in (61cm)
1400554-3 36in (91cm)
PVC Wand Assembly, 3/8‖ NPT
1400556-1 18in (46cm)
1400556-2 24in (61cm)
1400556-3 36in (91cm)
SST Wand Assembly, 3/8‖ NPT
1400557-1 18in (46cm)
1400557-2 24in (61cm)
1400557-3 36in (91cm)

0901154 Rev: A (04/10) Page 11 of 12
REPLACEMENT PARTS LIST
Part Number Description
0800533 Hose, Reinforced Red 3/4 Id X 1 Od X 30 Ft
0800530 Hose Reinforced Blue 3/4 ID X 1 OD X 10 Meters
2200823 Valve, Ball 1/2 Fnpt Brass/Nickel
1400517 Nipple, 1/2 Npt Hex Brass/Nickel
1400561 Wand, Pvc Foam Clean
1400553 Assembly, Foam Wand Europe
1600342 Fitting, ELL, Kynar 1/4 NPT X 3/8 Barb
0200248 Valve, Needle 1/4 Fnpt X 3/8 Barb
0200262 Fitting, Brass/NI 1/4 FNPT X 1/4 MNPT
7407096 Air Regulator, Auto Drain & Filter, 7-125PSI, 1/4 NPT
7901247 Check Valve, Viton 3/8 Barb X 3/8 Barb
7901245 Check Valve, Viton, Gray PVC 3/8 Barb (in) x 1/4 Mnpt (out)
1600956 Pump, Flojet AOP 3/8 Inch, Santoprene
7649269 Wheel Foam Clean, Mobile
7649269-1 Wheel, Foam Clean, Mobile Rubber, Black, Soft
1600639 Fitting, Brass Ni Pl 1/2 Npt X 3/4 Barb
0600435 Air Fitting 1/4 In Npt Male
7649278 Door, Foam Clean 25-95
1600689 Fitting, Kynar 1/2 MNPT X 3/8 Barb
1900427 Packing, S.S. Shaving Foam Clean
2000648 Fitting, Tee, Pvc 1/2 T, Sch 80
1900862 S.S. Wire Cloth,.75Dia 18 X 18 Mesh
0200209 Bushing, Reducer, Poly 1/2Mnpt X 1/4Fnpt
1600303 Fitting Adapter 1/4 Barb X 3/8 Barb
7020144 Clamp,Hose,S.S., 7/16 X 11/16

Page 12 of 12 0901154 Rev: A (04/10)
DISCLAIMER
Knight LLC does not accept responsibility for the mishandling, misuse, or non-performance of the described items
when used for purposes other than those specified in the instructions. For hazardous materials information consult
label, MSDS, or Knight LLC. Knight products are not for use in potentially explosive environments. Any use of our
equipment in such an environment is at the risk of the user, Knight does not accept any liability in such
circumstances.
WARRANTY
All Knight controls and pump systems are warranted against defects in material and workmanship for a period of
ONE year. All electronic control boards have a TWO year warranty. Foam Clean 25-95 Air Pump warranty is two
years for defects in material and workmanship. Warranty applies only to the replacement or repair of such parts when
returned to factory with a Knight Return Authorization (KRA) number, freight prepaid, and found to be defective upon
factory authorized inspection. Bearings and pump seals or rubber and synthetic rubber parts such as ―O‖ rings,
diaphragms, squeeze tubing, and gaskets are considered expendable and are not covered under warranty. Warranty
does not cover liability resulting from performance of this equipment nor the labor to replace this equipment. Product
abuse or misuse voids warranty.
FOOTNOTE
The information and specifications included in this publication were in effect at the time of approval for printing.
Knight LLC reserves the right, however, to discontinue or change specifications or design at any time without notice
and without incurring any obligation whatsoever.
Knight Headquarters
Tel: 949.595.4800
Fax: 949.595.4801
USA Toll Free
Tel: 800.854.3764
Fax: 800.752.9518
Knight Canada
Tel: 905.542.2333
Fax: 905.542.1536
Knight Europe
Tel: 44.1293.615.570
Fax: 44.1293.615.585
Knight Australia
Tel: 61.2.9725.2588
Fax: 61.2.9725.2025
Knight N. Asia
Tel: 82.2.3481.6683
Fax: 82.2.3482.5742
Knight S. Asia
Tel: 65.6763.6633
Fax: 65.6764.4020
KNIGHT LLC,
A Unit of IDEX Corporation (www.knightequip.com)
Table of contents
Popular Ultrasonic Jewelry Cleaner manuals by other brands

Innovative Cleaning Equipment
Innovative Cleaning Equipment FI-10N-SM user manual

Sorceressita
Sorceressita Food Ingredient Cleaner operation instruction

James
James 9050 Touch user manual

Nilfisk-Advance
Nilfisk-Advance MX 103 C quick start guide

PPC
PPC PPC-N29TP Operator's manual

Makita
Makita DCL181F instruction manual