Knox Video QF-045 User manual

KNOX VIDEO
TECHNOLOGIES
8547 Grovemont Circle
Gaithersburg, MD 20877
TEL 301•840•5805
FAX 301•840•2946
www.knoxvideo.com
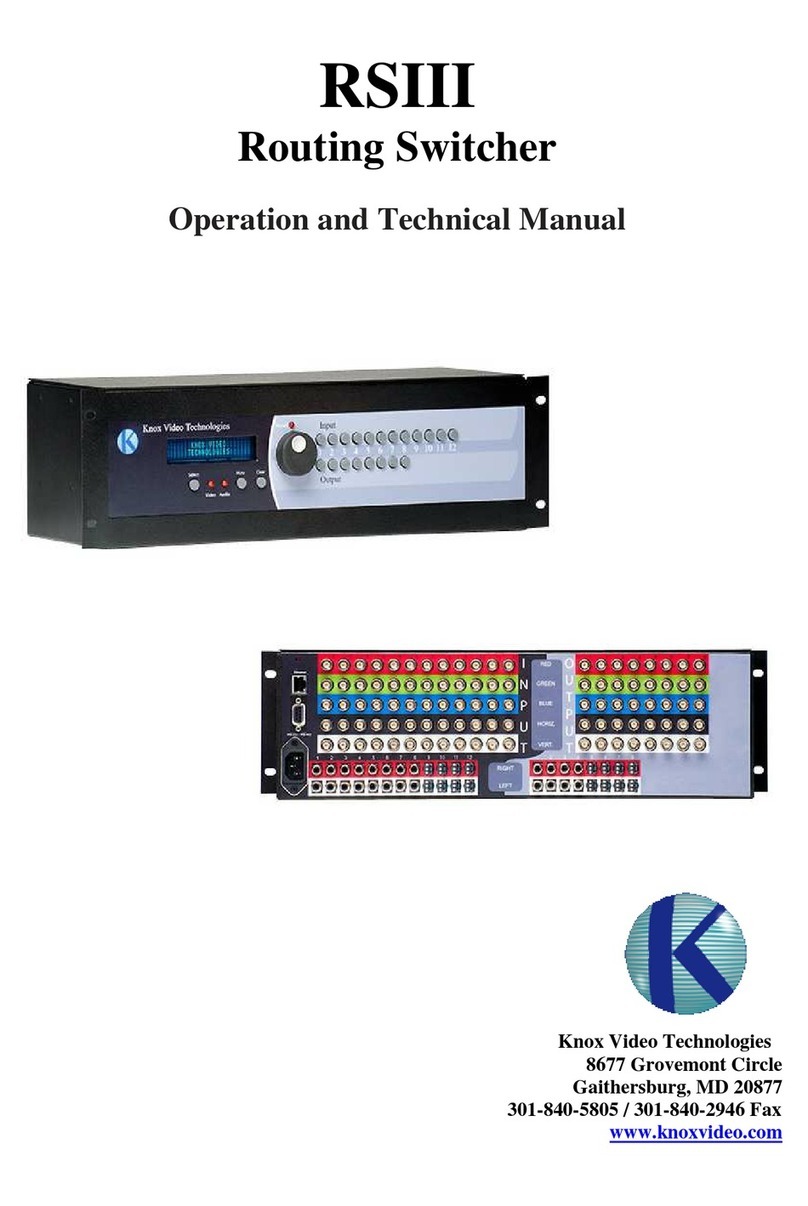
RSII
Routing Switcher System
Operation and Technical Manual
QF-045
RSII Series Manual
Rev. 04/01/2007

KNOX VIDEO
TECHNOLOGIES
8547 Grovemont Circle
Gaithersburg, MD 20877
TEL 301•840•5805
FAX 301•840•2946
www.knoxvideo.com
April, 2007
Operation and Technical Manual
RSII
Routing Switcher System
3.5 Control via the Serial RS232/RS422 Port
or Ethernet Port . . . . . . . . . . . . . . . . . . . . . . . . . . . . . . . . . . . . . . 10
3.5.1 Using an RS232/RS422
or Ethernet Terminal Device . . . . . . . . . . . . . . . . . . . . . . . 10
3.5.2 Routing Audio and Video . . . . . . . . . . . . . . . . . . . . . . . . . 11
3.5.3 Using the Salvo Mode . . . . . . . . . . . . . . . . . . . . . . . . . . . . 12
3.5.4 Using the Queue Mode . . . . . . . . . . . . . . . . . . . . . . . . . . . 12
3.5.5 How to Store and Recall Crosspoint Patterns . . . . . . . . . 13
3.5.6 Controlling the Sound . . . . . . . . . . . . . . . . . . . . . . . . . . . . 13
3.5.7 Setting Zone Groups for Universal VTB Control . . . . . . 14
3.5.8 Additional Sound Control Commands . . . . . . . . . . . . . . . 15
3.5.9 Command Summary . . . . . . . . . . . . . . . . . . . . . . . . . . . . . . 16
Section 4. MAINTENANCE
4.1 Introduction . . . . . . . . . . . . . . . . . . . . . . . . . . . . . . . . . . . . . . . . . 17
4.2 Switch/Jumper Options . . . . . . . . . . . . . . . . . . . . . . . . . . . . . . . . 17
4.3 Clearing the Memory . . . . . . . . . . . . . . . . . . . . . . . . . . . . . . . . . . 17
Warranty Information . . . . . . . . . . . . . . . . . . . . . . . . . . . . . . . . . . . . . . 18
KNOX VIDEO
RSII Routing Switcher System
Page ii

Warnings, Cautions and Others
Mises en garde, precautions et indications diverses
RISK OF ELECTRIC SHOCK
DO NOT OPEN
CAUTION: TO REDUCE THE RISK OF ELECTRIC SHOCK,
DO NOT REMOVE COVER (OR BACK)
NO USER SERVICEABLE PARTS INSIDE
REFER SERVICING TO QUALIFIED SERVICE PERSONNEL
The lightning flash with arrowhead symbol, within an
equilateral triangle, is intended to alert the user to the
presence of uninsulated “dangerous voltage” within the
product’s enclosure that may be of sufficient magnitude
to constitute a risk of electric shock to persons.
The exclamation point, within an equilateral triangle, is
intended to alert the user to the presence of important
operating and maintenance (servicing) instructions in the
literature accompanying the appliance.
WARNING: TO REDUCE THE RISK OF FIRE OR ELECTRIC SHOCK, DO
NOT EXPOSE THIS APPLIANCE TO RAIN OR MOISTURE.
CAUTION
To reduce the risk of electrical shocks, fire, etc.:
1. Do not remove screws, covers or cabinet.
2. Do not expose this appliance to rain or moisture.
ATTENTION
Afin d’éviter tout risque d’électrocution, d’incendie, etc.:
1. Ne pas enlever es vis ni es panneaux et ne pas ouvrir le coff ret de
l’appareil.
2. Ne pas exposer l’appareil a la pluie ni a l’humidité.
Caution — STANDBY/ON switch!
Disconnect the mains plug to shut the power off completely. The STANDBY/ON
switch in any position does not disconnect the mains line. The power cannot be
remote controlled.
Attention — Commutateur STANDBY/ON!
Déconnecter la fiche de secteur pour couper complètement le courant. Le
commutateur STANDBY/ON ne coupe jamais complètement la ligne de secteur,
quelle que soit sa position. Le courant ne peut être télécommandé.
CAUTION
NOTES

For U.S.A.
This equipment has been tested and found to comply with the limits for a Class B digital
device, pursuant to part 15 of the FCC Rules. These limits are designed to provide reasonable
protection against harmful interference in a residential installation.
This equipment generates, uses and can radiate radio frequency energy and, if not installed and
used in accordance with the instructions, may cause harmful interference to radio
communications. However, there is no guarantee that interference will not occur in a particular
installation. If this equipment does cause harmful interference to radio or television reception,
which can be determined by turning the equipment off and on, the user is encouraged to try to
correct the interference by one or more of the following measures:
Reorient or relocate the receiving antenna.
Increase the separation between the equipment and receiver.
Connect the equipment into an outlet on a circuit different from that to which the receiver is
connected.
Consult the dealer or an experienced radio/TV technician for help.
For Canada/pour le Canada
CAUTION: TO PREVENT ELECTRIC SHOCK, MATCH WIDE BLADE OF PLUG TO
WIDE SLOT, FULLY INSERT.
ATTENTION: POUR EVITER LES CHOCS ELECTRIQUES, INTRODUIRE LA LAME LA
PLUS LARGE DE LA FICHE DANS LA BORNE CORRESPONDANTE DE LA PRISE ET
POUSSER JUSQUAU FOND.
For Canada/pour le Canada
THIS DIGITAL APPARATUS DOES NOT EXCEED THE CLASS B LIMITS FOR RADIO
NOISE EMISSIONS FROM DIGITAL APPARATUS AS SET OUT IN THE INTERFERENCE-
CAUSING EQUIPMENT STANDARD ENTITLED “DIGITAL APPARATUS,” ICES-003
OF THE DEPARTMENT OF COMMUNICATIONS.
CETAPPAREIL NUMERIQUE RESPECTE LES LIMITES DE BRUITS RADIOELEC-
TRIQUES APPLICABLES AUX APPAREILS NUMERIQUES DE CLASSE B PRESCRITES
DANS LA NORME SUR LE MATERIEL BROUILLEUR: “APPAREILS NUMERIQUES,”
NMB-003 EDICTEE PAR LE MINISTRE DES COMMUNICATIONS.
CAUTION:
• Do not block the ventilation openings or holes.
(If the ventilation openings or holes are blocked by a newspaper or cloth, etc., the heat may not be
able to get out.)
• Do not place any naked flame sources, such as lighted candles, on the apparatus.
• When discarding batteries, environmental problems must be considered and local rules or laws
governing the disposal of these batteries must be followed strictly.
• Do not use this apparatus in a bathroom or places with water. Also do not place any containers filled
with water or liquids (such as cosmetics or medicines, flower vases, potted plants, cups, etc.) on top
of this apparatus.
ATTENTION:
• Ne bloquez pas es orifices ou es trous de ventilation.
(Si es orifices ou es trous de ventilation sont bloqués par un journal un tissu, etc., la chaleur peut ne
pas être évacuée correctement de l’appareil)
• Ne placez aucune source de flamme nue, telle qu’une bougie, sur l’appareil.
• Lors de la mise au rebut des piles, veuillez prendre en considération es problèmes de l’environnement
et suivre strictement les règles et les lois locales sur la mise au rebut des piles.
• N’utilisez pas cet appareil dans une salle de bain ou un autre endroit avec de l’eau.
• Ne placez aucune récipient contenant de l’ear (tel que des cosmétiques ou des médicaments, un vase de
fleurs, un pot de fleurs, une tasse, uec.) sur cet appareil.
Limited Warranty
Unless otherwise stated in the product specific documentation received
with this product, Knox Video Technologies provides a five-year limited
warranty for this product. The above warranty period shall begin on the
date of shipment by Knox to purchaser or, if purchaser is an authorized
reseller of such Knox products, from the date of shipment by the reseller to
the reseller’s original customer.
The warranty set forth above shall not apply to failure or deficiency
which has been caused by misuse, abnormal or unusually heavy use, neglect,
alteration, improper installation, unauthorized repair or modification, improper
testing, accidental or causes external to the product such as but not limited
to excessive heat or humidity, power failure, or improper installation.
IF SERVICE IS REQUIRED:
If the product does not perform as warranted, call Knox Video Technologies
at 301-840-5805 for available service options.
If it is necessary to return an item to Knox, the defective product should be
securely packaged in original boxes and insured for shipment. Owner agrees
to insure and accept all liability for loss of or damage to this product.
YOU MUST CALL TECHNICAL SUPPORT AT 301-840-5805 FOR
A RETURN AUTHORIZATION NUMBER (RA) AND “SHIP-TO”
ADDRESS BEFORE SHIPPING ANY PRODUCT TO KNOX.
This warranty gives you specific legal rights, and you may also have other
rights, which vary from state to state.
Knox Video Technologies
8547 Grovemont Circle
Gaithersburg, MD 20877
301-840-5805 / 301-840-2946 Fax
www.knoxvideo.com

Section 1. GENERAL INFORMATION
1.1 Introduction . . . . . . . . . . . . . . . . . . . . . . . . . . . . . . . . . . . . . . . . . 1
1.2 Technical Description . . . . . . . . . . . . . . . . . . . . . . . . . . . . . . . . . 1
1.3 Detail Specifications . . . . . . . . . . . . . . . . . . . . . . . . . . . . . . . . . . 1
Section 2. INSTALLATION
2.1 Introduction . . . . . . . . . . . . . . . . . . . . . . . . . . . . . . . . . . . . . . . . . 3
2.2 Unpacking and Inspection . . . . . . . . . . . . . . . . . . . . . . . . . . . . . . 3
2.3 Installation . . . . . . . . . . . . . . . . . . . . . . . . . . . . . . . . . . . . . . . . . . 3
2.4 Video Connections . . . . . . . . . . . . . . . . . . . . . . . . . . . . . . . . . . . . 4
2.5 Audio Connections . . . . . . . . . . . . . . . . . . . . . . . . . . . . . . . . . . . 4
2.6 RS232 Connections . . . . . . . . . . . . . . . . . . . . . . . . . . . . . . . . . . . 5
2.7 RS422 Connections . . . . . . . . . . . . . . . . . . . . . . . . . . . . . . . . . . . 5
2.8 Ethernet Connections . . . . . . . . . . . . . . . . . . . . . . . . . . . . . . . . . . 6
2.9 Setting Up Hyperterminal as a Serial Controller . . . . . . . . . . . . . 6
2.10 Detachable Front Panel Controller (DFPC) . . . . . . . . . . . . . . . . 6
Section 3. OPERATION
3.1 Introduction . . . . . . . . . . . . . . . . . . . . . . . . . . . . . . . . . . . . . . . . . 7
3.2 Connections . . . . . . . . . . . . . . . . . . . . . . . . . . . . . . . . . . . . . . . . . 7
3.3 Control via the Simple Front Panel Controller . . . . . . . . . . . . . . 7
3.3.1 Displaying the Crosspoint Connections . . . . . . . . . . . . . . 7
3.3.2 Changing a Crosspoint Connection . . . . . . . . . . . . . . . . . . 8
3.4 Control via the remotable front panel controller . . . . . . . . . . . . . 8
3.4.1 Displaying the Crosspoint Connections
and VTB values . . . . . . . . . . . . . . . . . . . . . . . . . . . . . . . . . 8
3.4.2 Changing a Crosspoint Connection . . . . . . . . . . . . . . . . . . 9
3.4.3 Using the Mute Button . . . . . . . . . . . . . . . . . . . . . . . . . . . . 9
3.4.4 Adjusting VTB with the Rotary Switch . . . . . . . . . . . . . . . 9
Page i
KNOX VIDEO
RSII Routing Switcher System
TABLE OF CONTENTS
Page 19
KNOX VIDEO
RSII Routing Switcher System
SECTION 4. MAINTENANCE
CAUTION! Disconnect from power before removing top cover. Do not operate
unit with top cover removed.
4.1 INTRODUCTION
The RSII uses passive air flow (convection) to keep its power supply within a
comfortable operating temperature range. No maintenance of the cooling system
is required.
No other routine maintenance is required in the RSII.
4.2 SWITCH/JUMPER OPTIONS
There are no internal switch/jumper options in the RSII. Jumper J1 on the rear
panel for RS422 operation of the rear panel DB9 serial conncector.
4.3 CLEARING THE MEMORY
Under certain circumstances the RSII memory may become corrupted.
To clear the main memory, send the letter command c followed by Enter. To
clear all volume, tone, and balance adjustments and set them to their default values,
send $c followed by Enter. To clear all input trim values and set them to zero, send
$ci followed by Enter.

SECTION 1. GENERAL INFORMATION
1.1 INTRODUCTION
The KNOX RSII AUDIO/VIDEO ROUTING SWITCHER is a family of de-
vices, which accepts up to sixteen video sources and sixteen stereo audio sources.
The RSII connects any one of the sixteen inputs to one or more of the sixteen
outputs. The video signals may be switched independently or with the audio
signals.
The RSII family of switches consists of five basic models; Composite, Y/C,
YPbPr, RGB, SD SDI and HD SDI any of which can containbalanced, unbalanced
or no audio. Optional features include volume and tone control for the audio as
well as an Ethernet interface.
1.2 TECHNICAL DESCRIPTION
The RSII uses a single chip microprocessor with flash memory to drive a set
of monolithic digital latching crosspoint decoders.
Cross-point information is collected by the microprocessor from the optional
front panel controller (DFPC), from the RS232/RS422 inputs on the front or rear
panel, and from the optional ethernet I/O and distributed to the crosspoint decoders.
Audio and video may be routed together or separately.
The audio volume, tone, and balance may be adjusted if the VT option is
installed.
1.3 DETAIL SPECIFICATIONS
Video Channels:
Composite and Y/C :- NTSC, PAL or SECAM standards
Levels: 1v p-p
Frequency Response: DC to 30MHz
@ 1v <3dB down at 30MHz
Input Impedance: 75 ohms for YC, high impedence looping for
Composite
KNOX VIDEO
RSII Routing Switcher System
Page 1
KNOX VIDEO
RSII Routing Switcher System
Page 18
$M0, 1 Mute off/on
$L0, 1 Loudness off/on
$Ixx Set input trim level
$Z$C Clear the Zone Group array
$Z$D Display the Zone Group array
$Za[aa,bb,cc,...,pp] Set Zone Group x output list
$Za$Vxxvv Set absolute zone volume level to vv
$Za$Vxx+ Increase zone volume level
$Za$Vxx- Decrease zone volume level

Output Impedance: 75 ohms
Crosstalk: less than -70dB@5MHz
Connectors: 75ohm female BNC for Composite, 4 pin DIN for
YC
Vertical interval switching with video on External Sync BNC
Maximum DC input: +/-0.5V
RGB/Y, Pb, Pr: - NTSC, PAL or SECAM standards
Levels: 1v p-p
Frequency Response: DC to 130MHz
@ 1v <3dB down at 130MHz
Input Impedance: 75 ohms
Output Impedance: 75 ohms
Crosstalk: less than -70dB@5MHz
Connectors: 75ohm female BNC
Vertical interval switching with video on External Sync BNC
Maximum DC input: +/-0.5V
SD SDI:
Input and Output specifications comply with SMPTE 259M standards
Automatic Equalization and Reclocking on all chanels
Supported rates of 143 MB/s, 177 MB/s, 270 MB/s, and 360 MB/s
Equalization 270MB/s up to 350 Meters of Belden 1694A cable
Connectors: 75 ohm female BNC
Vertical interval switching with composite analog video on External Sync
BNC
HD SDI:
Input and Output specifications comply with SMPTE 259M and 292M
standards
Automatic Equalization and Reclocking on all chanels
Supported rates of 143 MB/s, 177 MB/s, 270 MB/s, 360 MB/s, 540MB/s,
1.485/1.001 GB/s
Equalization at 1.485 GB/s up to 140 Meters of Belden 1694A cable
Connectors: 75 ohm female BNC
Vertical interval switching with composite analog video on External Sync
BNC
Page 2
KNOX VIDEO
RSII Routing Switcher System
Page 17
KNOX VIDEO
RSII Routing Switcher System
3.4.9 COMMAND SUMMARY
Bxyz/Bxxyyzz Both
Vxy/Vxxyy Video
Axy/Axxyy Audio
Exy/Exxyy Queue - both
Fxy/Fxxyy Queue - video
Gxy/Gxxyy Queue - audio
Xxyz/Xxxyyzz Salvo - both
Yxyz/Yxxyyzz Salvo - video
Zxyz/Zxxyyzz Salvo - audio
S Store powerup pattern
R Recall powerup pattern
Sxx Store numbered pattern
Rxx Recall numbered pattern
D Dump
C Clear
Cm Clear pattern memories
W Send signon message
$C Clear VTB to default values
$Ci Clear input trims
$Dxx Report VTB status
$Di Report input trim status
$Vxxvv Change volume level
$Vxx+ Increase volume level
$Vxx- Decrease volume level
$Bxxvv Change bass level
$Bxx+ Increase bass level
$Bxx- Decrease bass level
$Txxvv Change treble level
$Txx+ Increase trble level
$Txx- Decrease treble level
$Sxx Change input trim level

Audio Channels:
Levels:
Unbalanced audio: 3v p-p unbalanced audio
Balanced audio: up 16dBu
Frequency Response: 20Hz through 30KHz
Control:
RS232/RS422: 2 DB9 female (front and rear--front panel DB9 is
RS232 only)
Ethernet: RJ45(default IP 192.168.168.48 port 3001)
Control Panel: 1 DB25 male (behind removable front cover)
Power Consumption:
Composite Y/C: nominal 15v, 2A from external switching power
supply
Input Voltage: 100-240VAC, 50/60 Hz, .5A, 40 watts maximum
Dimensions: 19” wide by 3.5” high by 10” deep, 2RU
Shipping Weight: 12 pounds
RGB/Y,Pb,Pr: nominal 15v, 2A from external switching power
supply
Input Voltage: 100-240VAC, 50/60 Hz, .5A, 40 watts maximum
Dimensions: 19” wide by 5.25” high by 10” deep, 3RU
Shipping Weight: 12 pounds
SDI: Internal switching power supply
Input Voltage: 90-264VAC, 47/63 Hz, 100 watts maximum, internally
fused
Dimensions: 19” wide by 3.5” high by 10” deep, 2RU
Shipping Weight: 13 pounds
Page 3
Page 16
KNOX VIDEO
RSII Routing Switcher System
KNOX VIDEO
RSII Routing Switcher System
3.4.8 ADDITIONAL SOUND CONTROL COMMANDS
$ci clears all input trims
$cxxi clears input trim for input xx
$c sets all VTB for all outputs to default* values
$cxx sets all VTB for output xx to default* values
$cvxx sets all volumes to value xx, where xx is 00-63 (00=+4dB)
$dxx dumps VTB values for output xx to the console
$di dumps table of all input trim values to the console
Syntax notes:
Any command which allows a + or - also allows a number in front of the + or
- to indicate multiple steps; so $vxx+ increases volume by one step; $vxx3+ increases
it by three steps
Volume, bass and treble allow an absolute number to be entered, but balance
and trim allow only steps to be specified)
*Default values are volume at its lowest point, bass, treble, and balance at
mid-point

Page 4
Page 15
KNOX VIDEO
RSII Routing Switcher System
KNOX VIDEO
RSII Routing Switcher System
SECTION 2. INSTALLATION
2.1 INTRODUCTION
This section provides the information required for installation of the RSII into
its operating environment.
CAUTION!
The RSII is designed to work in standard video and audio systems. Operation
in other environments may harm the RSII or associated equipment.
2.2 UNPACKINGAND INSPECTION
Unpack the RSII carefully and verify that the serial number matches the number
quoted on the packing list. Before installing it into a system, check the outside of
the unit carefully for signs of damage and check that none of the fasteners have
come loose.
2.3 INSTALLATION
The RSII will be connecting a number of SOURCE devices to a number of
destination ZONE devices. Choose a space which is convenient for all the cables
to converge. Mount the RSII in a standard 19" rack panel; it requires two standard
rack units (2U) for clearance. Connect theAC power cord to a properly grounded
AC power mains outlet of the correct voltage and frequency. There is no power
switch on the RSII; it is intended to be on at all times.
THE MAINS OUTLET THAT IS UTILIZED TO POWER THE
EQUIPMENT MUST BE WITHIN 3 METERS OF THE DEVICEAND
SHALLBE EASILYACCESSIBLE. THERE SHALL BE NO SWITCHES
OR DISCONNECT DEVICES INTHE EARTH CONDUCTOR.
To control balance between the left and right channels send a command of
the form: $Sxx+, $Sxx-, or $Sxx0, where 0 resets balance to equal (+ decreases left
channel; - decreases right) The range of the balance is from -32 to +32; 0 is the
default value.
To mute the sound output send the command $mxx1 for mute on, $mxx0 for
mute off (default is off).To select loudness on or off: $Lxx1 is loudness on;
$Lxx0 is loudness off (default is off).
To make a fade from the current value to zero or from zero back to the
preselected full volume send the command $Fxxyy0 to fade down to 0; $Fxxyy1
to fade up to previous volume (xx is output number, yy is time to fade from 01-99,
where 99 is the longest fade).
To trim inputs send a command of the form: $ixx+, $ixx-, or $ixx0, where xx is
the input number, 0 is no trim; the range is from -3 to +3, default trim is 0.
3.4.7 SETTING ZONE GROUPS FOR UNIVERSAL VTB CONTROL
It is possible to set up to 8 Zone Groups for applying universal VTB
commands to a number of outputs at one time. To set up a group send a command
of the form: $Zx[aa,bb,cc,dd...], where x is the letter A to H corresponding to
Zone Group A-H, and aa,bb, etc are a list of two-digit output numbers in square
brackets, separated by commas (no spaces) for that zone group. The list can
include any number of outputs from 1-16. Any output may be included in any
Zone Group. To see a list of the outputs assigned to any group, send the
command $Zx$D, where x=Ato H. To clear all the Zone Groups send the command
$Z$C.
Once a Zone Group has been established, VTB commands may be sent in
common to all the outputs in the group. To send a Zone Group VTB command,
send $Z followed by the command stripped of its output number. For example, a
three-step volume increment command would normally be $Vxx3+, where xx is
the output number. To send the command to all the outputs in Zone Group A,
omit the output number and precede the command with a $ZA. So the full command
for the above example is $ZA$V3+.

2.4 VIDEO CONNECTIONS
Connect up to sixteen video SOURCES (cameras, VCRs, DVD players, satel-
lite receivers, RF demodulators, etc) to the video input connectors. For NTSC/
PAL units a second BNC input connector is provided for looping through to
another device or termination.
It is not necessary to terminate unused inputs. Y/C inputs are terminated
automatically.
Connect up to sixteen ZONE destination devices (TV monitors, VCRs, LCD
projectors, RF modulators, etc) to the NTSC/PAL or Y/C video output connectors.
Be sure that all destination devices are terminated in 75 ohms. It is not necessary
to terminate unused outputs.
Do not connect a SOURCE of video to any of the video OUTPUT connectors.
2.5 AUDIO CONNECTIONS
Connect up to sixteen balanced or unbalanced audio SOURCES (CD players,
tape players, VCRs, microphones, RF demodulators, etc) to the left and right
channel input connectors. For balanced audio units, the common is at the center
and the + and – are as shown on the panel. Inputs are high impedance (15K).
Note: an unbalanced source may be connected to a balanced input by connect-
ing the signal lead of the audio source to the + input and connecting the shield to
both the center and – inputs.
Connect up to sixteen audio destination ZONE devices (amplifiers, VCRs,
tape/CD recorders, RF modulators, etc) to the left and right channel output
connectors.
Do not connect a SOURCE of audio to any of the audio OUTPUT connectors.
Page 5 Page 14
KNOX VIDEO
RSII Routing Switcher System
KNOX VIDEO
RSII Routing Switcher System
AN NTSC/PAL INPUT MUST BE LOOPED THROUGH TO A
TERMINATED DEVICE OR A 75 OHM TERMINATOR MUST BE
CONNECTEDAT THE LOOPING CONNECTOR.
3.4.5 HOW TO STORE AND RECALL CROSSPOINT PATERNS
The RSII has 17 stored routing patterns. Sixteen patterns for typical use and
one for power on restore. The power-up pattern is the pattern that is loaded when
the RSII is power cycled. These stored configurations are non-volatile and are
thus maintained during power interruptions.
To STORE the current crosspoint pattern to one of the sixteen pattern storage
areas, send a command in the form Sxx [ENTER], where xx is 01-16. To store the
current crosspoint pattern to the power-up pattern type the command S [ENTER].
To RECALL and load one of the sixteen stored crosspoint patterns send a
command in the form Rxx [ENTER], where xx is 01-16. To recall the power-up
pattern, send the command R [ENTER].
3.4.6 CONTROLLING THE SOUND
If the optional VT board is installed, volume, tone, balance (VTB), and input
trim can be controlled via the serial control inputs. All VTB commands are preceded
by a $; xx = an output number from 01-16 (or for trim, an input number from 01-16).
All VTB commands end with an [ENTER].
To control volume send a command of the form: $vxx+, $vxx-, or $vxxyy where
xx is an output number and yy is a number from 00-63; 04 is the default value for a
1:1 ratio of audio in to audio out.
To control bass send a command of the form: $bxx+, $bxx-, or $bxxyy, as
above, but yy ranges from -7 to +7 (cut or boost); 0 is the default (neutral) value.
To control treble send a command of the form: $txx+, $txx-, or $txxyy, but yy
ranges from -7 to +7, as above; 0 is the default (neutral) value.

Page 13 Page 6
2.6 RS232 CONNECTIONS
The RSII can be controlled by external RS232 drivers connected to either or
both of the front or rear panels (on units with the optional Detachable Front Panel
Controller, the front panel RS232 connector will not be accessible). Connect a
computer terminal or other RS232 control device to the female DB9 connector on
the right side of the rear panel or the left side of the front panel (behind the blank
front cover). The RSII is wired as a data terminal; that is, data out of the RSII is on
pin 2, data in is on pin 3, and pin 5 is common (ground). When connecting to the
rear panel DB9, do not connect anything to pins 6, 7, 8, or 9.
A direct pin-for-pin connection from a PC compatible COM port should be set
up as follows: select 9600 baud, 8 bits, no parity, and one or two stop bits. Set the
Flow Control to NONE.
2.7 RS422 CONNECTIONS
The RSII can also be controlled by an external RS422 driver connected to the
rear panel DB9 connector. Before attempting to use an RS422 controller, be sure
that J1 on the rear panel is jumpered (two pads just below the input Power connec-
tor). RS422 control is available on the real panel DB9 connector only. Connect
transmit data (from the RSII) to pins 6 (+) and 7 (-), and receive data (to the RSII) to
pins 8 (+) and 9 (-). Common is pin 5. Do not connect anything to pins 2 or 3.
KNOX VIDEO
RSII Routing Switcher System
KNOX VIDEO
RSII Routing Switcher System
3.4.3 USING THE SALVO MODE
It is possible to send the same input to a number of sequential outputs by a
single eight-byte command of the form:
Xmmnnoo(ENTER)
where mm is the first output number, nn is the last output number, and oo is
the input number.
Using X as the first byte sends both video and audio to the range of outputs,
using Y sends video only, and using Z sends audio only.
For example, Y010408 sends the audio from input 8 to outputs 1 through 4.
3.4.4 USING THE QUEUE MODE
In the Queue mode it is possible to send a set of commands to the routing
switcher that will be held until the final command is received, then all the commands
are executed at the same time. For all but the final command in the set use the form:
Emmnn[ENTER], where mm is the output number, and nn is the input number.
Begin the command with an E for both audio and video, F for video only, and
G for audio only.
The final command must start with the letter B, V orAinstead of E, F, or G - or
send the command EE to TAKE the string.
For example, the following consecutive commands sent over some period of
time E010l[ENTER], E0202[ENTER], E0303[ENTER], B0404[ENTER] will result in
connecting input 1 to output 1, 2 to 2, 3 to 3, and 4 to 4 when the last [ENTER] is
received.

2.8 ETHERNET CONNECTIONS
If the Ethernet option is installed the RSII can be controlled on an Ethernet
network by connecting a network cable to the Ethernet port on the rear of the unit.
The RSII must be assigned an unique IP address, and the device controlling the
RSII must use that IP address and the correct port.
To configure the Ethernet network adaptor connect the RSII into the network
and run commands on a computer connected to the same subnet.
1) Start the Latronix software (device installer) program. Once it has been
started the Latronix device should be displayed to the right of the software
window including the MAC address and the IP address.
2) To assign a new IP address, highlight the Latronix device (on the right
side) by clicking on it. The software will walk you through the rest of the
process.
i) Click Assign IP icon on the tool bar then click NEXT.
ii) Check radio button “Assign a specific IP address” then click NEXT.
iii) Enter the IP address and Subnet Mask then click NEXT.
NOTE: The default IP address by Knox Video is 192.168.168.48
with a subnet mask of 255.255.255.0
iv) Click Assign.
3) The operating system must know the MAC address of the Lantronix
device that is associated with the IP address in order to function properly.
To insure this you must first open a DOS window. At the DOS prompt
type the following:
i) ARP-S IP address MACaddress<CR>
ARP, (space), -S, (space), Your IP address, (space), The associated
MAC address, (ENTER)
ii) Telnet IPaddress 1<CR>
Telnet, (space), The IP address, (space), 1, (space), (ENTER)
At this time an error will occur. Ignore the error and type the following
iii) Telnet IPaddress 9999<CR><CR>
Telnet, (space), The IP address, (space), 9999, (space), (ENTER),
(ENTER)
KNOX VIDEO
RSII Routing Switcher System
KNOX VIDEO
RSII Routing Switcher System
Page 12Page 7
3.4.2 ROUTINGAUDIOAND VIDEO
To route both audio and video from the same source, send a four-byte or six-
byte command in the form:
Bxy(ENTER) or Bxxyy(ENTER)To route both audio and video from different
sources, send a six-byte command in the form:
Bxyz(ENTER) or Bxxyyzz(ENTER),
where x specifies the zone to be routed to, 01-16, where y specifies the source
of video, 00-16, and where z specifies the source of audio, 00-16 (use 0’s for video
or audio OFF)
To route video only, send a four-byte command in the form:
Vxy(ENTER) or Vxxyy(ENTER),
where x specifies the zone to be routed to, 01-16, and where y specifies the
source of video, 00-16 (use 0’s for video OFF)To route audio only, send a four-
byte command in the form:
Axy(ENTER) or Axxyy(ENTER),
where x specifies the zone to be routed to, 01-16, and where y specifies the
source of audio, 00-16 (use 0’s for audio OFF)

Page 8
KNOX VIDEO
RSII Routing Switcher System
Page 11
KNOX VIDEO
RSII Routing Switcher System
iv) Pressing the ENTER key navigates you through the selections. Press
1 (ENTER) then check the following:
(a) Baud Rate = 9600
(b) Port = 3001 (Knox Video default port assignment)
Once you have reached the last selection on the menu, the menu
listing will display every time you press the ENTER key. To save your
settings you must select 9(Save and Exit) from the menu.
4) At this point you can open Hyper Terminal and verify the Knox Video
switch functionality.
5) If the Lantronix module is not working after this procedure the module
may need to be reset to the factory default settings. To do this, follow the
procedure above to step 3-ii. However, enter 7 and (ENTER) “Defaults”
instead of 1(ENTER) “Channel 1”. Then restart the procedure from step
3-iii.
2.9 SETTING UP HYPERTERMINAL··
··
·AS A SERIAL CONTROLLER
In a Windows environment, Hyperterminal·may be set up to control the RSII
via RS232, RS422, or an Ethernet. Bring up Hyperterminal·and choose File,
Properties, and choose the direct connection from a COM port or TCP/IP. Under
Configure, for a COM port set the baud rate to 9600, 8 bits, no parity, 1 stop bit, and
no flow control; for a TCP/IP connection enter the IP address of the RSII and enter
port 3001. Click OK and you should be connected. If the connect fails, consult
your network administrator.
2.10 DETACHABLE FRONT PANEL CONTROLLER
To add the optional detachable Front Panel Controller, remove power from the
RSII. Remove any RS232 control device connected to the front panel DB9 connec-
tor, or remove the blank front cover by unscrewing the two knurled screws—put the
blank cover aside. Install the DFPC by carefully aligning the DB9 and DB25 connec-
tors and then pushing the DFPC in until it rests against the face of the RSII. Be sure
to engage and finger-tighten the two knurled screws t
o hold the DFPC
firmly in place.
3.4 CONTROL VIA THE SERIAL RS232/RS422 PORT OR ETHERNET PORT
The RS232/RS422 serial data ports on the front and rear panels allow complete
control of the RSII from a computer terminal or other software-driven control
device through a simple alphanumeric protocol. The rear panel DB9 serial connector
will accept RS232 or RS422 serial data depending on jumper J1. The front panel
DB9 serial connector will accept RS232 serial data only.A simpleASCII protocol
allows all crosspoint and setup commands to be sent serially through the RSII’s
RS232/RS422 or Ethernet ports. These ports will accept commands from a terminal,
computer, or other software-driven control device. Set the driver for 9600 baud, 8
bits, no parity, and one or two stop bits, flow control NONE. If in RS232 mode the
COM port of a PC-compatible device may be connected to the front or rear DB9
connector with a standard pin-for-pin serial cable. If the device is set up for RS422
operation use only the rear DB9 connector. An Ethernet driven controller must be
configured for IP address and port selection. See section 2.8 for setup and wiring
details.
3.4.1 USINGAN RS232/RS422 OR ETHERNETTERMINALDEVICE
There are two general types of commands: letter commands, such as B, V,
and A generally crosspoint commands, and $ commands, generally volume and
tone commands, which start with the dollar sign. Certain other commands may be
used only for setup.The RSII will echo all ASCII characters and acknowledge
completed valid letter commands with the word DONE. Invalid commands will
result in the message ERROR.
The designation (ENTER) in the commands below means Carriage Return, or
hex 0D. Do not send a Line Feed (0A) with the Carriage Return.
where x specifies the output zone to be routed to, 01-16 and where y specifies
the input source of video and audio, 00-16 (use 0 or 00 for video and audio OFF)

Page 9
KNOX VIDEO
RSII Routing Switcher System
Page 10
KNOX VIDEO
RSII Routing Switcher System
SECTION 3. OPERATION
3.1 INTRODUCTION
This section explains in detail the operation of the RSII using either the De-
tachable Front Panel Controller, the RS232/RS422 serial ports, or the Ethernet I/O
port.
3.2 CONNECTIONS
Connect audio and video sources and destinations as described in section 2.
There is no requirement that all inputs or outputs be used or terminated, but be
sure that all outputs which are used are properly terminated.
Outputs should not be looped back to unused inputs.
3.3 CONTROLVIATHE REMOTEABLE FRONTPANELCONTROLLER
The optional detachable Remotable Front Panel Controller (RFPC) displays
information about the condition of the RSII crosspoints and the settings of the
optional volume, tone and balance (VTB)for each output. The display consists of
an LCD with a rotary switch to select and the output number and to adjust VTB
parameters. In addition, an array of 32 switches allows for the selection of
crosspoints and storage/recall of stored crosspoint patterns.
3.3.1
DISPLAYING THE CROSSPOINT CONNECTIONS AND VTB VALUES
In idle mode, line 1 of the RFPC display shows an output number (always
Zone 1 at powerup), a Video input number, and an Audio input number. Line 2
shows the current VTB settings for that output number: Volume, Bass, Treble, and
Balance. To stop the crawling motion push the Cancel button or turn the rotary
(the display will resume crawling after a few seconds). To view the crosspoint and
VTB data for another output, turn the rotary untilthe desired output number shows
on line 1 of the display.
3.3.2 CHANGINGA CROSSPOINT CONNECTION
You can make crosspoint changes with the 16 input buttons and 16 output
buttons on the right. You may start with an input number or with an output
number, then push the connection you want to make. Changes may be made to
the video
crosspoint, the audio crosspoint, or both. Two indicators under the
display show whether Video, Audio, or both will be affected. To change this
selection, before starting a crosspoint change, push the Select button one or more
times until the correct combination of lights is shown.
When making a crosspoint change, pushing one of the 16 input or output
buttons will cause the Armed LED to light indicating a change is pending. Make
the desired output or input connection, or push Cancel to start over. If no
crosspoint selection is made, the Armed light will go off after five seconds.
3.3.3 USING THE MUTE BUTTON
The Mute button under the display can be used to Mute any output. Turn
the Rotary until the output you wish to Mute shows on the display. Then push
the Mute button; you will be prompted to verify the output number and push
Mute again, or push cancel.
3.3.4 ADJUSTING VTB WITH THE ROTARY SWITCH
The VTB parameters of any output may be changed from the front panel.
Turn the rotary until the display is showing the output you wish to make changes
to, then click the rotary (push the knob in, then release it) until the desired param-
eter is displayed on the LCD.
Table of contents
Other Knox Video Switch manuals
Popular Switch manuals by other brands

GAPOSA
GAPOSA SPLIT SQ 140 E Series quick start guide

Cisco
Cisco Catalyst 4500 E Supervisor Engine 6-E Series Installation and configuration note

Rocktron
Rocktron PatchMate LOOP 8 user manual

iPuray
iPuray BRT-320 manual

AMX
AMX Enova DGX 100 Series quick start guide

Belkin
Belkin OmniView F1DG102P user guide

ANTAIRA
ANTAIRA LNP-1204G-SFP Series user manual

Travel Vision
Travel Vision Dish Diversity Switch Instruction and user's manual

Broadcast Pix
Broadcast Pix BPswitch Operator's manual

Soho
Soho FSD-8080 user manual

Camozzi
Camozzi CSD Series Use and maintenance instructions

Brocade Communications Systems
Brocade Communications Systems FCX Series Step-by-step guide