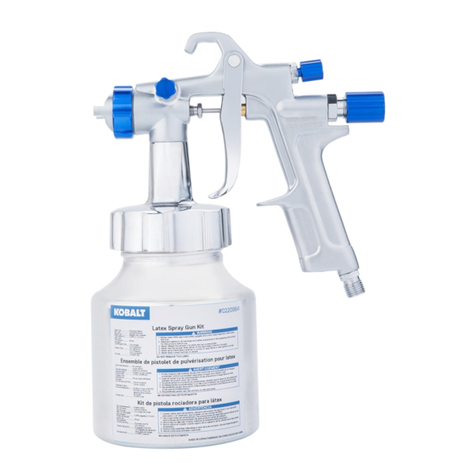
Kobalt SGY-AIR70TZ User manual

ITEM #0220964
MODEL #SGY-AIR70TZ
1
Français p. 15
Español p. 30
KOBALT® and the K & Design® are registered
trademarks of LF, LLC.All rights reserved.
LATEX SPRAY GUN KIT
ATTACH YOUR RECEIPT HERE
Serial Number Purchase Date
Questions, problems, missing parts? Before returning to your retailer, call
our customer service department at 1-888-3KOBALT, 8:00 a.m.-8:00 p.m.,
EST, Monday-Friday.

TABLEOF CONTENTS
2
Safety Information ............................................................................................... 3
Package Contents ............................................................................................... 4
Preparation .......................................................................................................... 6
Assembly Instructions .......................................................................................... 7
Operating Instructions ........................................................................................ 7
Care and Maintenance ....................................................................................... 10
Troubleshooting .................................................................................................. 12
Warranty ............................................................................................................. 13
Replacement Parts List ...................................................................................... 14

3
SAFETY INFORMATION
Please read and understand this entire manual before attempting to assemble, operate
or install the product. If you have any questions regarding the product, please call
customer service at 1-888-3KOBALT, 8:00 a.m.-8:00 p.m., EST, Monday-Friday.
Follow all local electrical and safety codes as well as the United States National
Electrical Codes (NEC) and Occupational Safety and Health Act (OSHA).
When spraying and cleaning, always follow the manual and safety precautions
provided by the material manufacturer (Refer to Material Safety Data Sheets --- MSDS).
Do not use this product with other people, children or pets in the working area.
Always work in a clean environment. To avoid any injury or damage to workpiece,
do not aim the spray gun at any dust or debris.
Always use a pressure regulator on the air supply to the spray gun.
WARNING
No not operate tool if damaged during shipping, handling or use. Damage could
result in bursting and cause injury and/or property damage.
Use a face mask/respirator and proctective clothing when spraying. Always spray in
a well ventilated area to prevent health and fire hazards. Refer to Material Safety
Data Sheets (MSDS) of spray material for details.
Never spray flammable materials in vicinity of open flame or near ignition sources.
Never store flammable liquids or gases near air compressor.
Do not spray acids, corrosive materials, toxic chemicals, fertilizers or pesticides.
Using these materials could result in death or serious injury.
Never aim or spray at yourself or anyone else, which could result in serious injury.
If eyes or face come into direct contact with sprayed material, contact your local
doctor and or emergency room for immediate help.
Do not use pressure exceeding the operating pressure of any of the parts (hoses,
fittings, etc.) in the painting system.
Keep proper footing at all times, do not overreach, as slipping, tripping, and or falling
can be a major cause of serious injury and or death. Be aware of excess hose left in
the working area or work surface. Do not abuse hoses or connectors. Never carry the
tool by hose or yank it to disconnect it from power supply. Keep hoses away from
heat, oil, and sharp edgess. Check hoses for weak or worn connections before each
use and make certain that all connections are secure.
Certain materials that can be used with this device if coming in direct contact with
skin may cause skin irritation. Read the label or materials sagety data sheet for the
materials you intent to find out which materials may cause skin irritation.
YOUR RISK FROM THESE EXPOSURES VARIES, DEPENDING ON HOW OFTEN
YOU DO THIS TYPE OR WORK. TO REDUCE YOUR EXPOSURE TO THESE
CHEMICALS, WORK IN A WELL VENTILATED AREA, AND WORK WITH
APPROVED SAFETY EQUIPMENTS, SUCH AS THOSE DUST MASKS THAT ARE
SPECIALLY DESIGNED TO FILTER OUT MICROSCOPIC PARTICLES.
DANGER
Never spray closer than 25 feet to the
air compressor. If possible, place
compressor in separate room.
CAUTION
Keep hose away from sharp objects.
Bursting air hose could result in personal
injury. Examine air hoses regularly and
replace them if damaged or broken.
SPECIFICATIONS
PRESSURE/SIPHON
INTERNAL/EXTERNAL
BLEEDER/NON-BLEEDER
0.055 IN. (1.4 MM)
50 PSI
3.5 AVERAGE/8.6 CONTINUOUS
8 IN. @ 50 PSI/8 IN. DISTANCE FROM WORKPIECE
1/4 IN. NPS (M)
3/8 IN. NPS (M)
COMPONENT
FEED TYPE
MIX TYPE
BLEED TYPE
FLUID NOZZLE I.D.
MAX. WORKING PRESSURE
40 TO 50 PSI
WORKING PRESSURE
AIR REQ'D (SCFM @ 50 PSI)
PATTERN SIZE
AIR INLET
FLUID INLET
PRODUCT SPECIFICATIONS
4
NOTE
This latex spray gun is designed for home, farm and commercial use. It handles
all kinds of latex paints. It can be easily and quickly converted from non-bleeder
to bleeder, pressure to siphon feed and internal or external mix air caps. It also
features pattern size control. It can also be converted for use with a separate
pressure paint tank.
The pressure for atomization is controlled by the regulator on the air source. The
amount of fluid is adjusted by the fluid control knob, the paint viscosity, and the
air pressure.
Failure to install appropriate water/oil removal equipment could result in damage
to product or workpiece.
SAFETY INFORMATION
PACKAGECONTENTS
DESCRIPTION
Latex Spray Gun
Spray Gun Cleaning Kit
Spray Gun Filter
Masking Tape
Air cap (external mix)
Pattern Control Knob
Fluid Control Knob
Side Knob
Air Inlet
Air Cap Ring
Trigger
Canister
QUANTITY
1
1
1
1
1
1
1
1
1
1
1
1
PART
A
B
C
D
E
F
G
H
I
J
K
LAir cap (internal mix) 1
M
B
C
D
A
E
F
G
H
I
J
K
L
M

5
SPRAY GUNTERMS
Internal Mix
Process where the air and paint are mixed inside the air cap just before being
sprayed. This method is best for heavy bodied, slow drying paints and can only be
used with the pressure feed method. Do not use fast drying latex paints with internal
mix. The paint will dry inside and quickly clog the air cap.
External Mix
Process where the air and paint are mixed just after leaving the nozzle. This type of
mix should be used for fast drying latex paint and when a high quality finish is needed.
Pressure Feed
Method of material feed where a canister or paint tank is pressurized to force material
to the gun. Either internal or external mix air caps are used with this method. Pressure
feed is generally used for heavy bodied latex paints or for larger size projects.
Siphon Feed
Method of material feed where atmospheric pressure creates a partial vacuum to
siphon material to the gun. Only external mix air caps are used with this method.
Siphon feed is used with light bodied latex paints.
Bleeder
In this mode, air passes continuously through the gun whether spraying or not. This
mode is generally used when the air is supplied by a continuously running air
compressor without tank.
Non-Bleeder
In this mode, air flows only when the trigger is pulled. This type of operation is
used with an air compressor equipped with a tank or with a large factory air system.
Do not use with a continuously running air compressor that does not have a tank.
Use of Air Caps
Internal Mix - Generally used with slow drying, heavy bodied latex
paints and for faster material application. NOT to be used with fast
drying latex paints which will clog the opening in the air cap. Internal
mix caps must be used with pressure feed operation.
External Mix - Used for quick drying, light bodied latex paints. Better
for fine finish work. These caps can be used with either siphon or
pressure feed.
SPRAY GUN SET-UP
Internal mix air cap
external mix air cap

Air Valve Spring
Pattern Control
Knob Fluid
Control
Knob
Fluid Needle
Spring
Change of Feed Method
This latex spray gun is capable of pressure or
siphon feed. The feed method can be easily
changed by fully turning the side knob. You should
be sure before using the desired feed method.
(See Figure 1)
SPRAY GUNSET-UP
P: Pressure feed
S: Siphon feed
P
S
1
2
Non-Bleeder to Bleeder Conversion
(See Figure 2)
1. Remove spray gun from air supply.
2. Remove fluid control knob and the fluid needle
spring.
3. Remove air valve spring and store it in a safe
place so it can be replaced when necessary to
convert back to a non-bleeder type arrangement.
4. Insert fluid needle spring and replace fluid
control knob.
Before beginning assembly ofproduct, make sure allparts are present. Compare
parts with package contents list. Ifany part is missing ordamaged,do notattemptto
assemble the product. Contactcustomerservice forreplacementparts.
EstimatedAssembly Time:5-10 minutes
Tools Required forAssembly (notincluded):Adjustable wrench
PREPARATION
6

ASSEMBLY INSTRUCTIONS
7
2
1
1. Mount the spray gun filter (C) with hand onto
the air inlet (I) of spray gun by connecting the
female threads of filter (C) with the male
threads of air inlet (I). Use thread sealant tape
(not provided) for airtight connection.
(See Figure 1)
2. Connect air hose with the male threads of the
filter (C). Use thread sealant tape (not
provided) for airtight connection. (See Figure 2)
NOTE The working pressure refers to the air line
pressure when the spray gun trigger (K) is pulled
fully under working conditions.
3. Set the working pressure to 30-50 psi
depending on the amount of fluid flow and
atomization as required. Do not exceed spray
gun maximum pressure.
Do not overtighten when connecting the filter
(C) with spray gun air inlet (I) and with air hose.
WARNING
OPERATING INSTRUCTIONS
NOTE
Before using desired paint in thespray gun, spray a compatible thinneror solvent
through the gun to remove any contaminantsand residues.
Thin latex paints properly in accordancewith the paint manufacturer's instructions
before spraying. If paint can notbe thinned, the paint should notbe used in
the sprayer.
Before adding paint, make sure all thinner or solvents are removed from the
spray canister.
that if any paint spills you can easily collect the paint to properly discard.
Its recommended to place drop cloth or other collection device under canister so
Fill the canister (L) about 3/4full and start the air compressor.
Set up a piece of cardboard orother scrap material to use as asa target and
adjust for best spray pattern.
Test the consistency of the paint bymaking a few strokes on a cardboardtarget. If
paint still appears too thick, adda small amount of thinner. Do not exceed paint
manufacturer's thinning recommendations.

Air Cap
Air Cap Ring
Horizontal Fan
Vertical Fan
1
2
3
1. Adjust the direction of fan to be either horizontal
or vertical as required by loosening the air cap
ring (J) 90 degrees. Hand tighten the air cap
ring (J) after adjustment. (See Figure 1)
OPERATING INSTRUCTIONS
2. Set pattern size for desired shape. For full
pattern, open pattern control knob (F) by turning
counterclockwise. For a round pattern, turn
pattern control knob (F) clockwise.
(See Figure 2)
3. Turn the fluid control knob (G) fully clockwise
until closed. (See Figure 3)
8
The paint sprayer will not properly spray unless
the fan direction is either horizontal or vertical.
WARNING

Paint too fine
Correct
Paint too coarse
Pattern Consistency (Atomization)
6-9 in.
Thin coat Heavy coat Thin coat
4
5
6
4. With gun 6-9 in. away from workpiece, spray a
short burst while turning the fluid knob
counterclockwise. Observe the spray pattern on
the workpiece and adjust the fluid control knob (G)
until desired pattern/atomization is obtained. If the
spray is too fine, which is caused by too much air
from the amount of paint being sprayed, reduce
the air pressure or open the fluid control knob (G)
to spray more paint. If the spray is too coarse/
spitting blobs, reduce the amount of paint with
the fluid control knob (G) or thin the paint more.
(See Figure 4)
OPERATING INSTRUCTIONS
5. Keep the gun at the right angle as shown while
spraying. (See Figure 5)
NOTE The fluid control knob (G) can be adjusted
either clockwise or counterclockwise to finely
adjust pattern consistency. Before spraying on
workpiece, practice a few minutes on a cardboard
target to ensure that the pattern size and
consistency are set correctly.
NOTE Always keep the gun in motion while
spraying. Stopping gun movement in mid-stroke
will cause a build-up of paint and will result in runs.
Do not fan the gun from side to side while painting.
This will cause a build-up of paint in the center of
stroke and an insufficient coating at each end.
(See Figure 6)
9

6-9 in.
Pull
Trigger
Start Stroke
Release
Trigger
End Stroke
7
8
6. Trigger the gun properly. Start the gun moving
at the beginning of the stroke before squeezing
the trigger (K) and release the trigger (K) before
stopping gun movement at the end of the stroke.
This procedure will feather/blend each stroke
with the next without showing overlap or
unevenness. (See Figure 7)
OPERATING INSTRUCTIONS
7. Overlap strokes just enough to obtain an even
coat. (See Figure 8)
8. Use a piece of cardboard as a shield to catch
overspray at the edges of workpiece to protect
other surfaces. Use masking tape (D) to cover
other areas if needed.
NOTE The amount of paint being applied can be
varied by the speed of stroke, distance from
workpiece and adjustment of the fluid control knob
(G). If speed of stroke is too slow, paint will be wet
on workpiece and may run. If speed of stroke is too
fast, paint will be dry and uneven on workpiece.
NOTE Two thin coats of paint will yield better
spraying results and have less chance of runs than
one heavy layer.
10
CARE ANDMAINTENANCE
Local codes may require specific cleaning methods and equipment. Follow local
codes and manufacturer's recommendations for the use and disposal of spray paints
and solvent.
Daily Clean-Up
NOTE Clean spray gun immediately after use. Paint and other materials dry quickly in
the small passages rendering gun useless due to the difficulty of removing hardened
paint from the passages inside the gun.
1. Remove and empty the canister; then rinse with a solvent recommended for
the paint.
2. Refill canister with clean solvent and attach to the gun. Spray solvent through the
gun while shaking the gun vigorously. Wipe the gun exterior with a solvent-soaked
rag. Repeat until the gun is clean.

CARE ANDMAINTENANCE
3. Remove the air cap and soak in solvent until clean. Use a small brush for stubborn
stains if necessary. Toothpicks or small brushes may be used to clean air passages.
Never use metal objects to clean precisely drilled passages.
Damaged passages will cause improper spraying.
4. Clean gaskets with a solvent soaked rag.
Never immerse gaskets or spray gun body in solvents to prevent
equipment damage.
5. After using water to clean out spray gun, spray mineral spirits through the gun to
prevent corrosion.
6. Clean and flush gun thoroughly to neutralize any contaminants corrosive to the
spray gun.
7. Use a non-silicone oil on all moving parts when reassembling. Use Vaseline® or
light grease on all threaded connections prior to storage.
WARNING
WARNING
Periodic Clean-Up
Due to improper cleaning and paint it may be necessary to inspect and clean the
internal parts and the gun body.
1. Examine openings in air cap and fluid tip. If clogged, remove any o-rings and soak
the air cap or fluid tip in solvent.
2. Abrush, toothpick or something similar may be used to dislodge the dried paint
from holes and passages.
Never use metal objects to clean precisely drilled passages.
Damaged passages will cause improper spraying.
3. Remove and check fluid needle for excessive wear at the tip and straightness.
IMPORTANT: If the needle tip is worn more on one side than the other, either the
needle is bent or the gun body has been dropped or knocked out-of-line. There are
no adjustments that can be made to a bent gun body. Test the needle by rolling on
a flat surface. Replace if necessary.
4. Check and replace any damaged o-rings and seals. O-rings and seals can be
wiped clean but not be soaked in solvent.
5. Unscrew packing nuts and replace the packing only if a leak will not stop when the
nut is tightened. Do not overtighten a packing nut because this will restrict
movement of the needle.
6. Re-assemble in reverse order of above and use a non-silicone oil on moving parts.
Apply Vaseline® or light grease on threaded joints and hose connections.
WARNING
Storing
1. When not using spray gun, turn the fluid adjustment knob counterclockwise to open
which will reduce spring tension on needle fluid tip.
2. Spray gun must be well cleaned and lightly lubricated.
3. Store spray gun in a dry and safe place out of reach of children.
11

12
PROBLEM
TROUBLESHOOTING
CORRECTIVE ACTIONPOSSIBLE CAUSE
Right or left
heavy spray
pattern
Top or bottom
heavy spray
pattern
Split spray
pattern
Center
heavy spray
pattern
Sputtering
spray
Fluid leaking from
packing nut
Air leaking from air cap
without pulling trigger
Excessive overspray
Will not spray
1. Holes in left or right side of
the air cap are plugged
2. Dirt on left or right side of
fluid tip
1. Dried material at top or
bottom of fluid tip
2. Loose air cap or dirty seat
3. Air cap plugged
1. Fan pattern open too far
2. Fluid adjustment turned in
too far
3. Atomization air too high
1. Fan adjustment partially
closed
2. Material too thick
3. Atomization pressure too low
1. Material level too low
2. Container tipped too far
3. Loose fluid inlet connection
4. Loose or damaged fluid
tip/seat
5. Dry or loose fluid needle
packing nut
6. Air vent clogged
1. Packing nut loose
2. Packing worn or dry
1. Sticking air valve stem
2. Contaminate on air valve
or seat
3. Worn or damaged air valve
or seat
4. Broken air valve spring
5. Bent valve stem
1. Too high atomization
pressure
2. Too far from work surface
3. Improper stroking (arcing,
gun motion too fast)
1. No pressure in gun
2. Fluid control not open
enough
3. Fluid too heavy
1. Clean using only a non-metallic pick
2. Clean
1. Clean
2. Clean and tighten
3. Clean using only a non-metallic pick
1. Partially close the pattern adjustment
2. Open fluid adjustment
3. Reduce atomization air pressure
1. Open fan pattern adjustment
2. Thin to proper viscosity
3. Increase atomization pressure
1. Refill
2. Hold more upright
3. Tighten
4. Adjust or replace
5. Lubricate and or tighten
6. Clear vent hole
1. Tighten, but do not restrict, needle
2. Replace or lubricate (non-silicone oil)
1. Lubricate
2. Clean
3. Replace
4. Replace
5. Replace
1. Reduce pressure
2. Adjust to proper distance
3. Move at moderate pace, parallel to
surface
1. Check air lines
2. Open fluid control
3. Thin fluid or change to pressure feed
system

THREE-YEAR LIMITEDWARRANTY
13
This tool is warranted by the manufacturer to the original purchaser from the original
purchase date for three (3) years subject to the warranty coverage described herein.
This tool is warranted to the original user to be free from defect in material and
workmanship. If you believe that a tool is defective, return the tool, with proper proof
of purchase to the point of purchase. If it is determined that the tool is defective and
covered by this warranty, the distributor will replace the tool or refund the
purchase price.
This warranty is void if: defects in materials or workmanship or damages result from
repairs or alterations which have been made or attempted by others or the
unauthorized use of nonconforming parts; the damage is due to normal wear,
damage is due to abuse (including overloading of the tool beyond capacity), improper
maintenance, neglect or accident; or the damage is due to the use of the tool after
partial failure or use with improper accessories or unauthorized repair or alteration.
This warranty gives you specific legal rights, and you may also have other rights that
vary from state to state.
For warranty questions, call our customer service department at 1-888-3KOBALT,
8:00 a.m.-8:00 p.m. EST, Monday-Friday.

REPLACEMENT PARTS LIST
Printed in China
14
For replacement parts, call our customer service department at 1-888-3KOBALT,
8:00 a.m.-8:00 p.m., EST, Monday-Friday.
23
24
25
26
27
28
29
30
31
G
I
34
35
36
37
38
A
40
41
42
Air cap (external mix)
Air cap (internal mix)
Air cap seal
Air cup ring
Air separating ring
Fluid nozzle
Gun body
Phillips Screw
Side knob
Air adjusting valve
Air adjusting seat
Snap Retainer
Trigger pin
Trigger
Washer
Snap retaining ring (E-ring)
Pattern control needle
Retaining ring
Pattern control spring
O-ring 2.5 × 2.1
Pattern control seat
Pattern control screw
O-ring 4.5 × 1.8
O-ring 5.2 × 1.9
Fluid needle seat
Air valve spring
Fluid needle
O-ring 10 × 1.8
Fluid needle adjusting seat
Fluid needle spring
Fluid control knob
Air inlet
Seal nut
Packing nut
Sealing washer
Washer
O-ring 19 × 1.8
Canister top
Canister gasket
Retaining nut
Material tube
E
M
3
J
5
6
7
8
H
10
12
11
13
K
15
16
17
18
19
20
21
1
1
1
1
1
1
1
2
2
1
1
1
1
1
1
1
1
2
1
1
1
O-ring 9 × 1.8
22 1
1
2
1
1
1
1
1
1
1
1
1
1
1
1
1
1
1
1
1
1
L
Canister
1
Part No.
Description Qty.
Part No.
Description Qty.
E
M
3 J 5
88
HH
10 11 12
13 K 15 16
17 18 19
24 24 27
29 30 31 G
I
34
L
353637
38
40
41
42
A
28
25 26
18202122 23
6 7

ARTICLE #0220964
MODÈLE #SGY-AIR70TZ
JOIGNEZ VOTRE REÇU ICI
Numéro de série Date d'achat
15
KOBALT® et le motif de K® sont des marques
de commerce déposées de LF, LLC.Tous droits
réservés.
Des questions, des problèmes, des pièces manquantes? Avant de
retourner l'article au détaillant, communiquez avec notre service à la
clientèle au 1 888 3KOBALT, entre 8 h et 20 h (HNE), du lundi au vendredi.
ENSEMBLE DE
PISTOLET DE
PULVÉRISATION
POUR LATEX

TABLEDES MATIÈRES
16
Consignes de sécurité ....................................................................................... 17
Contenu de l'emballage ..................................................................................... 19
Préparation ........................................................................................................ 21
Instructions pour l'assemblage .......................................................................... 21
Mode d'emploi ................................................................................................... 22
Entretien ........................................................................................................... 25
Dépannage ....................................................................................................... 27
Garantie ............................................................................................................ 28
Liste des pièces de rechange ........................................................................... 29

17
CONSIGNES DESÉCURITÉ
Assurez-vous de lire et de comprendre l'intégralité de ce manuel avant de tenter
d'assembler, d'utiliser ou d'installer le produit. Si vous avez des questions concernant ce
produit, veuillez appeler notre service à la clientèle au 1 888 3KOBALT, entre 8 h et 20 h
(HNE), du lundi au vendredi.
Veuillez suivre tous les codes d'électricité et de sécurité de votre région ainsi que le
Code canadien de l'électricité et la Loi sur la santé et la sécurité du travail.
Au moment de la pulvérisation et du nettoyage, suivez les directives du manuel et
respectez les mesures de sécurité du fabricant. (Reportez-vous à la fiche signalétique
du produit [FS].)
N'utilisez pas ce produit si d'autres personnes (notamment des enfants) ou des
animaux se trouvent dans l'aire de travail.
Travaillez toujours dans un endroit propre. Pour éviter tout risque de blessure et de
dommage à la pièce, ne pulvérisez jamais sur une surface poussiéreuse ou
encombrée de débris.
Utilisez toujours un régulateur de pression pour l'alimentation en air du pistolet de
pulvérisation.
AVERTISSEMENT
N'utilisez jamais le produit s'il a été endommagé pendant la manutention, le transport
ou l'utilisation. Un produit endommagé pourrait éclater et, par conséquent, causer des
blessures et des dommages matériels.
Portez un masque facial ou un masque anti-vapeurs ainsi que des vêtements de
protection pendant la pulvérisation. Utilisez toujours le pistolet de pulvérisation dans
un endroit bien aéré afin de prévenir les risques d'incendie et les dangers pour la santé.
Pour de plus amples renseignements, consultez la fiche signalétique (FS) du pistolet.
Ne pulvérisez jamais de matières inflammables à proximité d'une flamme nue ou d'une
source d'inflammation. N'entreposez jamais de liquides ou de gaz inflammables à
proximité du compresseur.
Ne pulvérisez pas de l'acide, des matières corrosives, des produits chimiques toxiques,
des fertilisants ou des pesticides.
L'utilisation de ces matières peut causer de graves blessures, voire entraîner la mort.
Si vos yeux ou toute autre partie de votre visage entre en contact direct avec la matière
pulvérisée, communiquez avec un médecin ou une salle d’urgence pour obtenir de
l’aide immédiate.
N’excédez pas la pression de fonctionnement des pièces (p. ex., tuyaux et raccords)
de l’outil de peinture.
Conservez un bon équilibre en tout temps. Ne vous étirez pas pour étendre votre
portée, ce qui pourrait vous faire glisser, basculer ou tomber et causer des blessures
graves, voire mortelles. Prenez garde à l’excédent de tuyau laissé dans l’aire de travail
ou sur la surface de travail. Ne faites pas un usage abusif des tuyaux ou des raccords.
Ne transportez jamais l’outil par son tuyau et ne tirez jamais sur le tuyau pour le
débrancher de la source d’alimentation. Tenez les tuyaux éloignés des sources de
chaleur, de l’huile et des objets coupants. Vérifiez l’état des tuyaux avant chaque
utilisation et assurez-vous que tous les raccords sont solides.
Certaines matières pouvant être utilisées avec l’outil risquent de causer des irritations
cutanées si elles entrent en contact direct avec la peau. Lisez l’étiquette ou la fiche
signalétique des matières que vous prévoyez utiliser afin de savoir si elles peuvent
provoquer de telles irritations.

REMARQUE
Ce pistolet de pulvérisation est conçu pourla maison, la ferme et les commerces.
Il peut contenir tout type de peintureau latex. Il peut facilement et rapidement
être converti de non purgeur àpurgeur, d'unpistolet à pression à un pistoletà
siphon et d'un pistolet à mélange interneà un pistolet à mélange externe, etvice
versa. Il comprend également une commande deréglage du jet. Il peut aussi
être utilisé avec un autre réservoirsous pression.
La pression de pulvérisation est déterminée parle régulateur de la source
d'alimentation en air.Le bouton de réglage du fluide, laviscosité de la peinture
et la pression d'air permettent de réglerla quantité de fluide pulvérisée.
Si vous ne nettoyez pas adéquatement la pièce après chaque utilisation, vous
risquez d’endommager le produit.
CONSIGNES DESÉCURITÉ
CARACTÉRISTIQUES
À PRESSION/À SIPHON
INTERNE/EXTERNE
PURGEUR/NON PURGEUR
1,4 MM (0,055 PO)
2
2
50 LB/PO
3,5 EN MOYENNE/8,6 EN CONTINU
2
21,66 CM (8 PO) À 50 LB/PO /À 21,66 CM
(8 PO) DE LA PIÈCE
1/4 PO NPS (M)
3/8 PO NPS (M)
COMPOSANT
TYPE D'ALIMENTATION
TYPE DE MÉLANGE
TYPE DE PURGE
DIAMÈTRE INTÉRIEUR DE
LA BUSE À PEINTURE
PRESSION DE SERVICE MAXIMALE
40 À 50 LB/PO
PRESSION DE SERVICE
AIR REQUIS (PI /MIN À 50 LB/PO )
2
3
LARGEUR DU JET
ENTRÉE D'AIR
ENTRÉE DE FLUIDE
CARACTÉRISTIQUES DUPRODUIT
18
AVERTISSEMENT
LES RISQUES LIÉS À L’EXPOSITION À CES PRODUITS VARIENT SELON LE
NOMBRE DE FOIS OÙ VOUS PRATIQUEZ CES ACTIVITÉS. AFIN DE LIMITER
VOTRE EXPOSITION À CES PRODUITS CHIMIQUES, TRAVAILLEZ DANS UN
ENDROIT BIEN VENTILÉ ET UTILISEZ DE L’ÉQUIPEMENT DE SÉCURITÉ
APPROUVÉ, TEL QU’UN MASQUE ANTIPOUSSIÈRE CONÇU SPÉCIALEMENT
POUR FILTRER LES PARTICULES MICROSCOPIQUES.
DANGER
Ne pulvérisez jamais de peinture à
moins de 8 m du compresseur. Si c'est
possible, placez le compresseur dans
une autre pièce.
MISEENGARDE
Gardez le tuyau loin des objets
tranchants. Vous risquez de subir de
graves blessures si vous percez le tuyau
à air. Examinez le tuyau à air
régulièrement et remplacez-le s'il est
endommagé ou rompu.

CONTENU DEL'EMBALLAGE
DESCRIPTION
Pistolet de pulvérisation
pour latex
Trousse pour le nettoyage
du pistolet de pulvérisation
Filtre pour pistolet de
pulvérisation
Ruban-cache
Obturateur d’air
(mélange externe)
Bouton de réglage du jet
Bouton de réglage du fluide
Bouton latéral
Entrée d'air
Anneau de l'obturateur d'air
Gâchette
Réservoir
QUANTITÉ
1
1
1
1
1
1
1
1
1
1
1
1
PIÈCE
A
B
C
D
E
F
G
H
I
J
K
LObturateur d’air
(mélange interne) 1
M
TERMES RELATIFSAU PISTOLETDE PULVÉRISATION
Mélange interne
Procédé au cours duquel l'air et la peinture sont mélangés dans l'obturateur d'air,
juste avant que le fluide soit pulvérisé. Ce procédé convient aux peintures épaisses à
séchage lent et ne peut être utilisé qu'en mode d'alimentation sous pression. Ne
l'utilisez pas pour une peinture au latex à séchage rapide, car celle-ci sécherait à
l'intérieur et bloquerait rapidement l'obturateur d'air.
Mélange externe
Procédé au cours duquel l'air et la peinture sont mélangés dès qu'ils sont expulsés de
la buse. Ce procédé s'utilise pour les peintures à séchage rapide. Il doit également
être employé lorsqu'il est nécessaire d'obtenir une finition de qualité supérieure.
Alimentation sous pression
Procédé d'alimentation au cours duquel le réservoir de peinture est mis sous pression
de manière à pousser le fluide jusqu'au pistolet. Ce procédé peut être utilisé avec un
obturateur d'air pour mélange interne et mélange externe. On s'en sert généralement
pour les peintures au latex épaisses ou dans des projets à grande échelle.
19
B
A
E
F
G
H
I
J
K
L
C
D
M

TERMES RELATIFSAU PISTOLETDE PULVÉRISATION
Utilisation d'un obturateur d'air
Mélange interne - Généralement utilisé pour les peintures au latex
épaisses à séchage lent ou pour une application rapide. N'UTILISEZ
PAS ce type de mélange avec une peinture au latex à séchage
rapide, car elle bloquerait l'ouverture de l'obturateur d'air. Le mode
d'alimentation sous pression doit être utilisé avec les obturateurs
d'air pour mélange interne.
Mélange externe - Utilisé pour les peintures au latex fluides à
séchage rapide. Idéal pour les travaux de finition de qualité. Le
mode d'alimentation sous pression ou à siphon peut être utilisé avec
les obturateurs d'air pour mélange externe.
ASSEMBLAGE DUPISTOLET DEPULVÉRISATION
Obturateur d'air pour
mélange interne
Obturateur d'air pour
mélange externe
Alimentation à siphon
Procédé d'alimentation au cours duquel la pression atmosphérique crée un vide partiel
qui permet de siphonner le fluide jusqu'au pistolet. Ce procédé ne peut être utilisé
qu'avec un obturateur d'air pour mélange externe. L'alimentation à siphon est
employée avec les peintures en latex fluides.
Purgeur
Dans ce mode, l'air passe continuellement dans le pistolet, que vous pulvérisiez ou
non de la peinture. Il est généralement utilisé lorsque l'air provient d'un compresseur
d'air sans réservoir qui fonctionne continuellement.
Non purgeur
Dans ce mode, l'air passe seulement lorsqu'on tire la gâchette. Ce procédé est utilisé
avec un compresseur d'air muni d'un réservoir ou un gros système de production d'air.
Ne l'utilisez pas avec un compresseur d'air sans réservoir qui fonctionne
continuellement.
Changement du mode d'alimentation
Le mode d'alimentation du pistolet de pulvérisation
pour latex peut être sous pression ou à siphon.
Vous pouvez facilement changer le mode
d'alimentation en tournant complètement le bouton
latéral. Soyez certain du mode choisi avant
l'utilisation. (Consultez la figure 1.)
P
S
P : Alimentation
sous pression
S : Alimentation à
siphon
1
20
Table of contents
Languages:
Other Kobalt Paint Sprayer manuals

Kobalt
Kobalt SGY-AIR294 User manual

Kobalt
Kobalt SGY-AIR86TZ User manual

Kobalt
Kobalt KC-599CS User manual

Kobalt
Kobalt KBSP 1040B-03 User manual

Kobalt
Kobalt SGY-AIR87TZ User manual

Kobalt
Kobalt SGY-AIR160NB User manual

Kobalt
Kobalt KSP 1024B-03 User manual

Kobalt
Kobalt SGY-AIR70NB User manual

Kobalt
Kobalt SGY-AIR293 User manual

Kobalt
Kobalt SGY-AIR176NB User manual