Kogan KALCD423DXA User manual

<>ϰϮϯy
USER MANUAL

ThescreenandcabinetgetwarmwhentheTV
isinuse.Thisisnotamalfunction.Incaseof
smoke,strangenoiseorstrangesmellfromthe
unit:
Turnoffthepowerswitchimmediately;
Disconnectthepowerplugfromthepower
outlet;
Contactyourdealerorservicecentre.Neverattempttomakerepairs
yourselfbecausethiscouldbedangerous.
HighVoltage
Donotopen
Riskofelectronicshock,donotopen.
Donotattempttoservicethisproductyourself
asopeningorremovingcoversmayexpose
youtodangerousvoltageorotherhazards.
Referallservicingtoqualifiedservicepersonnel.
CAUTION
ImportantSafetyInstructions
ImportantSafetyInstructionsandMaintenance
Neverpushobjectsofanykindintotheset
throughthecabinetslotsastheymaytouch
dangerousvoltagepointsorshort-circuitpartsthat
couldresultinafireorelectricshock.Neverspill
liquidofanykindontheset.Usespecialcaution
inhouseholdswherechildrenarepresent.Theapparatusisnotsuitableforchildren
under3-yeartooperate.
Toreducetheriskoffireorelectricshock,donot
exposethisproducttorainormoisture.
Theapparatusshallnotbeexposedtodripping
orsplashingandnoobjectsfilledwithliquids,
suchasvases,shallbeplacedontheapparatus.
1
Ifthefollowingproblemsoccur:
TurnofftheTVsetandunplugtheACpowercord
immediatelyifanyofthefollowingproblemsoccur.
Askyourdealerorservicecentretohaveitchecked
byqualifiedservicepersonnel
When:
-ACpowercordisdamaged.
-PoorfittingofACpoweroutlet.
-TVsetisdamagedbybeingdropped,hitorhavingsomethingthrownatit.
-Anyliquidorsolidobjectfallsthroughopeningsinthecabinet.
Donotoverloadwalloutlets,extensioncordsor
adaptorsbeyondtheircapacity,thiscanresultin
fireorelectricalshock.
Power-supplycordsshouldberoutedsothatthey
arenotlikelytobewalkedonorpinchedbyitems
placeduponoragainstthem,payingparticularattentiontocordsatplugend,adaptors
andthepointwheretheyexitfromtheappliance.Themainsplugisusedasthe
disconnectdevice.Itshallremainreadilyaccessibleandshouldnotbeobstructed
duringintendeduse.Makesuretoplugthepowercordinuntilitisfirmlyinserted.
Whenremovingthepowercord,makesuretoholdthepowerplugwhenpullingthe
plugfromtheoutlet,donotpulltheplugoutbythewire.NEVERtouchtheplugor
powercordwithwethands.Todisconnecttheapparatusfromthemainspower,the
plugmustbepulledoutfromthemainssocket,thereforemakesurethemainsplug
isalwayseasilyaccessible.

ImportantSafetyInstructionsandMaintenance
ImportantSafetyInstructions
Whennotinuse
IfyouwillnotbeusingtheTVsetforseveraldays,the
TVsetshouldbedisconnectedfromtheACmainsfor
environmentalandsafetyreasons.AstheTVsetisnot
disconnectedfromtheACpowerwhentheTVisturned
offatthestandbyswitch,pulltheplugfromtheACpower
outlettodisconnecttheTVcompletely.However,some
TVsetsmayhavefeaturesthatrequiretheTVsettobe
leftinstandbytofunctioncorrectly.Inthecaseoflightning,
unplugtheTVsetfromtheoutletimmediately.Never
touchtheantennawireduringlightning.
Anoutsideantennasystemshouldnotbelocatedin
thevicinityofoverheadpowerlinesorotherelectric
lightorpowercircuits,orwhereitcanfallintosuch
powerlinesorcircuits.Wheninstallinganoutside
antennasystem,extremecareshouldbetakentokeep
fromtouchingsuchpowerlinesorcircuitsascontact
withthemmightbefatalEnsuringthetelevisionisnot
overhangingtheedgeofthesupportingfurniture.
.
Installation
Theventilationshouldnotbeimpededbycoveringthe
ventilationopeningwithitems,suchasnewspapers,
tablecloths,curtains,etc.
Atleast10cmspaceshouldbeleftaroundthe
apparatusforsufficientventilation.
Theproductshouldbesituatedawayfromheat
sourcessuchasradiators,heatregisters,stoves,or
otherproducts(includingamplifiers)thatproduceheat.
Placetheapparatusinsuchapositionthatthescreen
isnotexposedtodirectsunlight.Itisbesttohavesoft
indirectlightingwhilewatchingandavoid
andreflectionfromthescreenas
thesemaycauseeyefatigue.
KeeptheTVsetawayfromanyequipmentemitting
electromagneticradiation.
completely
darkenvironments
Donotpulltheplugoutbythewire;
Nevertouchtheplugwithwethands.
Excessivefromearphonesandheadphones
cancausehearingloss.
volume
2
Toavoidthefire,nonakedflamesource,
suchaslightedcandles,shouldbeplacedonthe
apparatus.
Donotpushorscratchthefrontfilter,orplaceanyobjectsontopoftheTVset.The
imagemaybeunevenorthescreenmaybedamaged.

ImportantSafetyInstructionsandMaintenance
Installation
Donotplacethisapparatusnearwater,forexample,
nearabathtub,washbowl,kitchensink,orlaundry
tub;inawetbasement;oraswimmingpool;and
thelike;
WhentheTVbeingmovedinfromcoldplace,itneeds
somerighttimefordewinsideunitevaporatingfully
beforeturnontheunit;
Cleaningandhandlingthescreen
surfaceandcabinet.Disconnect
theunitfromtheACoutletbefore
cleaning.Toremovedust,wipe
gentlywithasoft,lintfreecloth.If
requireduseaslightlydampcloth.
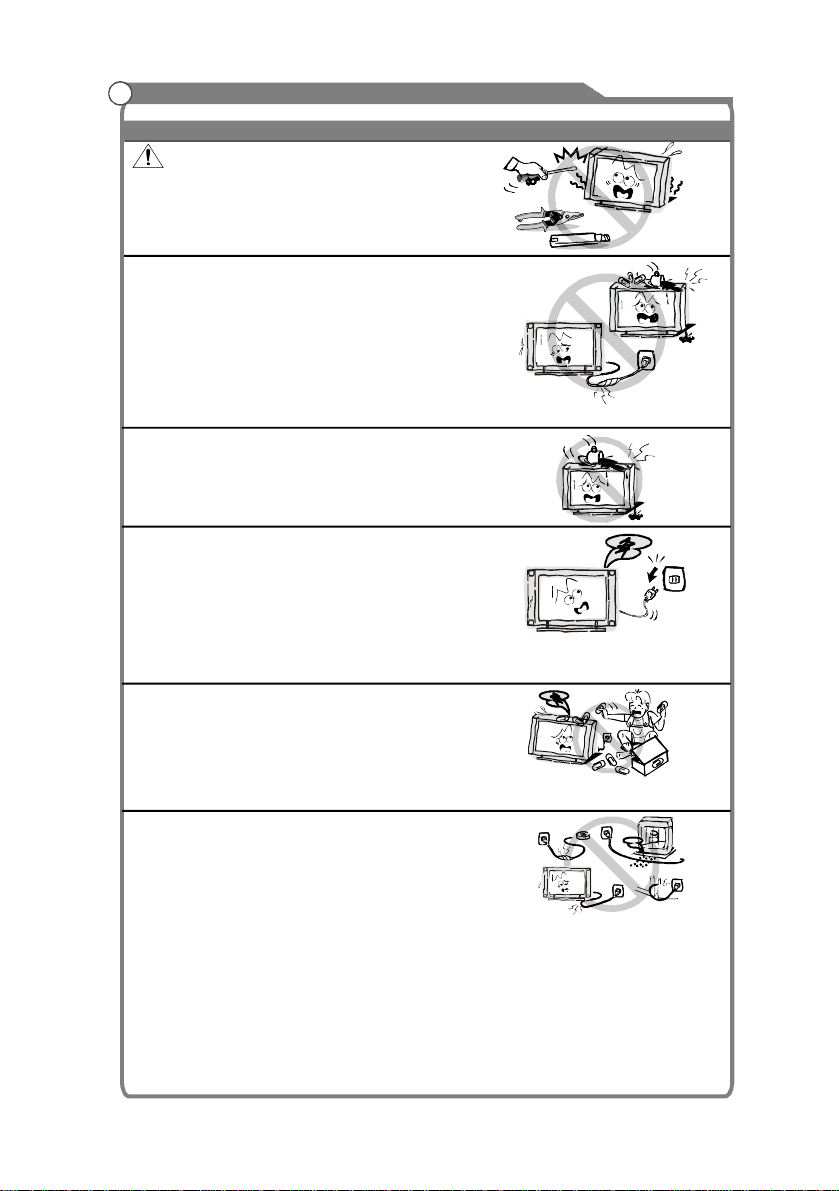
Donotplacethesetonanunstablecart,stand,table
orshelf.Thesetmayfall,causingseriouspersonal
injuryaswellasdamagetotheproduct.Useonlywith
thecart,stand,tripod,bracket,ortablespecifiedby
themanufacturer,orsoldwiththeapparatus.An
applianceandcartcombinationshouldbemovedwith
care.Quickstops,excessiveforce,anduneven
surfacesmaycausetheapplianceandcart
combinationtooverturn.
Topreventinjury,thisapparatusmustbesecurely
attachedtothefloor/wallinaccordancewiththe
installationinstructions.
3
Cleaning
Move
LCDScreen
AlthoughtheLCDscreenismadewithhighprecisiontechnologyand99.99%or
moreofthepixelsareeffective,blackdotsmayappearorbrightpointsoflight(red,
blueorgreen)mayappearconstantlyontheLCDscreen.Thisisastructuralproperty
oftheLCDscreenandisnotamalfunction.
IfthesurfaceoftheLCDpanelcracks,donottouchituntilyouhaveunpluggedthe
ACpowercord.Otherwiseelectricshockmayresult.
DonotthrowanythingattheTVset.TheLCDpanelmaybreakfromtheimpactand
causeseriousinjury.
PrecautionsWhenDisplayingaStillImage
AstillimagemaycausepermanentdamagetotheTVscreen.
DonotdisplaystillimagesandpartiallystillimagesontheLCDpanelformore
than2hoursasitcancausescreenimageretention.Thisimageretentionis
alsoknownas"screenburn".Toavoidsuchimageretention,reducethe
degreeofbrightnessandcontrastofthescreenwhendisplayingastillimage.
WatchingtheLCDTVin4:3formatforalongperiodoftimemayleavetraces
ofbordersdisplayedontheleft,rightandcentreofthescreencausedbythe
differenceoflightemissiononthescreen.PlayingaDVDoragameconsole
maycauseasimilareffecttothescreen.Damagescausedbytheaboveeffect
arenotcoveredbytheWarranty.
DisplayingstillimagesfromVideogamesandPCforlongerthanacertain
periodoftimemayproducepartialafter-images.Topreventthiseffect,reduce
the'brightness'and'contrast'whendisplayingstillimages.
MAINSPLUG
Wipethemainsplugwith
adryclothatregular
intervals.Moistureand
dustmayleadtofireor
electricalshock.
UsecarenottosubjecttheTV'ssurfacestodetergent.
(AliquidinsidetheTVcouldleadtoproductfailure,fireor
electricalshock.)
Usecarenottosubjectsurfacestobugrepellent,solvent,
thinner,orothervolatilesubstancesasthismaydeterioratethe
surfaceandfinishofthecabinet.
solvent thinner

TableofContents
ImportantInformation
4
Accessories
Introduction
Basicoperation
-----------------------------------------------------------------------------------------------5
-----------------------------------------------------------------------------------------------6
Features----------------------------------------------------------------------------------------------------6
Specifications----------------------------------------------------------------------------------------------7
-------------------------------------------------8
--------------------------------------------------------------------------------10
Overviewofbackpanel-------------------------------------------------------------------------------10
Overviewoffrontpanel--------------------------------------------------------------------------------11
Overviewofremotecontrol---------------------------------------------------------------------------12
Teletext----------------------------------------------------------------------------------------------------14
InstallingBatteriesintheRemoteControl--------------------------------------------------------16
--------------------------------------------------------------------------------------16
Antennaconnection------------------------------------------------------------------------------------16
ConnectingVCR---------------------------------------------------------------------------------------17
ConnectingaCamcorder-----------------------------------------------------------------------------18
ConnectingaDVDPlayer/Set-TopBox----------------------------------------------------------19
ConnectingaDVDPlayer/Set-TopBoxviaDVI------------------------------------------------20
ConnectingDVDPlayer/Set-TopBoxviaHDMI------------------------------------------------21
ConnectingDigitalAudioSystem-------------------------------------------------------------------22
ConnectingPC-----------------------------------------------------------------------------------------23
----------------------------------------------------------------------------------------23
----------------------------------------------------------------------------------------24
TurningtheTVonandoff----------------------------------------------------------------------------24
Menuoperation-----------------------------------------------------------------------------------------25
--------------------------------------------------------------------------------27
Picture-----------------------------------------------------------------------------------------------------27
Sound------------------------------------------------------------------------------------------------------29
Channel----------------------------------------------------------------------------------------------------31
Time--------------------------------------------------------------------------------------------------------33
Option------------------------------------------------------------------------------------------------------34
Function---------------------------------------------------------------------------------------------------35
PVR---------------------------------------------------------------------------------------------------------37
---------------------------------------------------------------------------------------40
------------------------------------------------------------------------------------------------40
-------------------------------------------------------------------------41
--------------------------------------------------------------------------------
--------------------------------------------------------------------------------------------------------41
--------------------------------------------------------------------------------------------------------43
--------------------------------------------------------------------------------------------------------44
----------------------------------------------------------------------------------------------------------47
MyDisk-----------------------------------------------------------------------------------------------------48
-------------------------------------------------------------------------------------------50
------------------------------------------------------------------------52
Standandwall-mountinginstructions(optional)
ExternalConnection
Supportingsignals
Menusysteminstruction
DigitalMediaPlayer
Troubleshooting
Picturedefectsandthereason
GeneralDescription
Introduction
DeviceandFileManagement
USBSupportCharacter41
Photo
Music
Movie
Text
Keepsmallaccessoriesoutofreachofchildrensotheyarenotmistakenlyswallowed.

PleasemakesurethefollowingitemsareincludedwithyourLCDTV.Ifanyitemsare
missing,contactyourdealer.
Accessories
5
RemoteControl
Owners
Instructions

Features
Introduction
Inputterminalsusedforexternalequipmentconnection
1xAVoutput
1xANTENNAjack3xHDMIinputs
1xcomputerinput2xUSBinputs
2xCOMPONENTinput
PC-RGB
2xAVinputs1xSPDIFoutput
1xHeadphoneoutput
l
l
l
l
l
l
l
l
l
l
l
PC-RGB
HDMI1.4input
16:9widescreen
Widerangevoltageinput
Programmablesleeptimer
Autotuningandfinetuning
No-signalautomaticpoweroff
TVadopts42”TFTdisplayscreen
ConnecttocomputerdirectlytorealizeTV/monitorcombo.
ComponentCompatible(480i;480P;576i;576P;720P;1080i;1080P)
ZeroXradiationcompliestogreenenvironmentprotectionrequirement
LCD
6

Note:
-Designandspecificationsaresubjecttochangewithoutnotice.
-WeightandDimensionshownareapproximate.
-Itissuggestedtowatch3Dprogramundertheoperationtemperatureabove10Cto
obtainthebest3Deffect.
o
Introduction
Specifications
7
Analog:
Digital:5-12,21-69
Antenna:
46.25MHz-855.25MHz
PAL/NTSC/SECAM
≥5X2W
180W
0C-40C
oo
<1W
~110-240V,50/60Hz
75ohms,unbalanced
42”Diagonalmax.)
(
Displaysize
LCDpanelresolution
Powersupply
TVreceivesystem
Frequencyrange
Videoin
AntennaInput
Speakeroutputpower
Powerconsumption
Standbyconsumption
WorkTemperature
Model
Controllerpower DC3V
(TwoAAAsizebatteries)
1920X1080
1025X115X667mm
17.5Kg
1025X285X712mm
19.5Kg
KALCD423DXAA
Digital:DVB-T
Analog:PAL:BG,DK,
SECAM:BG,D/K
I,

Figure3
Standandwall-mountinginstructions(optional)
-Beforeattaching/detachingthestand,makesuretoturnofftheTV.
-Beforeperformingwork,spreadcushioningoverthebaseareatolaytheLCDTVon.
Thiswillpreventitfrombeingdamaged.
1)DetachtheTransitionBoardfirst.
2)FixthePlasticWasherandMetalWasheronthestandwithscrews.(Figure2)
3)Fixthestandandtheunittogetherwithscrews.(Figure3)
-TodisconnectthestandfromtheTV,performtheabovestepsinreverseorder.
Caution:Pulling,pushing,orclimbingontheTVmaycausetheTVtofall.Inparticular,
ensureyourchildrendonothangoverordestabilizetheTV;doingsomaycausetheTV
totipover,causingseriousinjuriesordeath.Followallsafetyprecautions
Foraddedstability,installtheanti-falldeviceforsafetypurposes,
asfollows.
ALTERNATIVELY
TosecuretheTVtothewall:
1-Putthescrewsintotheclampsandfirmlyfastenthemontothewall.Confirmthatthe
screwshavebeenfirmlyinstalledontothewall.
-Youmayneedadditionalmaterialsuchasananchordependingonthetypeofwall.
-Sincethenecessaryclamps,screws,andstringarenotsupplied,pleasepurchasethem
separately.
2-RemovethescrewsfromthecenterbackoftheTV,putthescrewsintotheclamps,
andthenfastenthescrewsontotheTVagain.
-Screwsmaynotbesuppliedwiththeproduct.Inthiscase,pleasepurchasethescrews
ofthefollowingspecifications.
Howtoassemblethestand
SecuringtheTVStand
Assemblinginstruction:
Ifyouneedtoremoveorassemblethestandpleasereadthefollowinginstructions.
atthestartof
thismanual.
8

3-ConnecttheclampsfixedontotheTVandtheclampsfixedontothewallwithastrong
cable.
-InstalltheTVneartothewallsothatitdoesnotfallbackwards.
-Itissafetoconnectthestringsothattheclampsfixedonthewallareequaltoor
lowerthantheclampsfixedontheTV.
-RemovethecablebeforemovingtheTV.
4-Verifyallconnectionsareproperlysecured.Periodicallycheckconnectionsforany
signoffatigueforfailure.Ifyouhaveanydoubtaboutthesecurityofyourconnections,
contactaprofessionalinstaller.
YourLCDTVisabletoaccommodatewallmountingwiththeuseofawallmountbracket
(notsuppliedwithLCDTV,pleasecontactyourlocalhardwarestore)andthemounting
holesonthebackoftheunit.
WerecommendremovingtheTVstandpriortowallmountingtheTV.Please
1.DetachthestandfromtheLCDTV,fasten4screwsintofournutsontherearcover;
(Refertofigure1)
2.Fasten2brachetswithscrewsonthewallasfigure2shown;(Refertofigure2)
3.CarefullycheckforthestrengthbeforereleasingtheLCDTV.
Wall-mountedillustrationspleaseseefollowing.
Note:
DuetoTVmaybeusedwithdifferentpanel,bracketholesonrearcoveraredifferent,
pleaseinstallyourTVonthewallaccordingtoactualbrackethole.
(optional)
HowtomounttheLCDTVonthewall
Wallmountinginstructions
seeprevious
pageforinstructionsonremovingthestand.
9
Standandwall-mountinginstructions(optional)
Wall

GeneralDescription
10
HDMI1/2/3
VGA/PCIN
PCAUDIOIN
COMPONENT1/2&VIDEO1
VIDEOOUT
ConnecttotheHDMIjackofadevice
withanHDMIoutput.
Connecttothevideooutputjackon
yourPC.
Audioinputforexternaldevices.
ConnectComponentvideo/audio.
AV1'svideoandaudioaremultiplex
withComponent1'sorComponent2’s.
Connecttothevideooutputjacks
onyouramplifier/hometheater.
Thevideooutputcanoutputsignal
forAV,TV.
ConnecttoaDigitalAudiodevices.
Connecttotheaudiooutputjacks
onyouramplifier/hometheater.
ConnecttoanantennaorcableTV
system.
AUDIOOUT
SPDIF
RF
AV1
COMPONENT2IN
COMPONENT1IN
AVOUT
IN
HDMI1HDMI2 VGAHDMI3
OUT
RF
Overviewofbackpanel

GeneralDescription
Overviewoffrontpanel
11
Thebuttonsonthelower-rightpanelcontrolyourTV’sbasicfeatures,includingthe
on-screenmenu.Tousethemoreadvancedfeatures,youmustusetheremotecontrol.
USB
AUDIO(L&R)
Audioinputsockets(L&R)forconnectingaudioinputfroman
externaldevice.
HEADPHONE
Audiosocketforconnectingapairofheadphone.
InputsocketforconnectinganexternalUSB.
VIDEO
Videoinputsocketforconnectinganexternalinputdevice.
~
}
~
}

12
OverviewofRemoteControl
GeneralDescription
1.Thisbuttonisusedtoswitchamong
differentsources:ATV,AV1,AV2,
Component1,PC-RGB,HDMI1,
HDMI2,HDMI3,USB.
SelectasourceandpressOKbuttontoconfirm.
2.Pressthisbuttontoswitchtostandby
mode,andpressitagaintoturnTVon.
3.Toselectchannelwith
digitalbuttons.
4.
6.
INPUT:
POWER:
Digitalbuttons(0~9):
SLEEP:
DTV,
Component2,
Thisbuttonisusedtostartthe"Current
ServiceBanner"applicationthatprovides
informationaboutthecurrentservice.
5.Switchtothepreviousprogram.
:Pressthisbuttontofreezetheimage.
7.
8.TVwillbeswitchedoffautomaticallyat
presetsleeptimeifyouhavesetsleeptimer.Use
yourremotecontroltosetthesleeptimer.
PressSLEEPbuttonontheremotecontrol,then
pressthisbuttonagaintosetsleeptime:off,10,
20,30,60,90,120,180,240min.PressMENU
buttontoexitwhenyouhavesetthesleeptimer.
Afteryouhavesetsleeptimer,pressSLEEPbutton
again,youwillseetheRemainingtime.
Notes:Thesleeptimeryouhavesetwillbe
CancelledwhentheTVturnsofforifapower
failureoccurs.
9.Pressittoshowchannellistonscreen.
10.Pressittodisplayfavoritelist.
11.
12.
InDTVsource,thisbuttonisusedto
starttheEPGapplication.
14.
:SwitchtoDTVmode.
16.:Swichto3D(2D)modedirectly.
Presstwicetoswichto2D(3D)mode.
INFO:
RECALL:
FREEZE
CH.LIST:
FAV:
GUIDE:
DTV
3D/2D
MENU:
Arrowbuttons:
OK/RECLIST:
Exit:
Pressthisbuttontodisplaymainmenuor
exitthemenu.Whenyouareinthesubmenu,you
canpressittoreturnthemainmenu.
Pressthesebuttonstomove
cursorup/down/left/rightformenu.
Pressthisbuttontodisplayalist
ofrecordedprograms.Inmainmenuandsubmenu
itisavalidationbutton.
13.
Exitthemenu.
15.
Note:Itissuggestedtowatch3Dprogramunder
theoperationtemperatureabove10Cto
obtainthebest3Deffect.

13
OverviewofRemoteControl
GeneralDescription
17.:SwitchtoUSBmodedirectlyorcallthe
controlmenuinUSBmode.Pleaseseethe
detailsin “DigitalMediaPlayer”on
Pressthisbuttontoswitchthescreen
mode.
19.
source
source
play/pause,stop,previousfile,nextfile,backward,
forward,pageup,pagedown,isusedtocontrolin
USBmode.
Pleaserefertoinstructionsinthesection
ofmultimediaplayer.
26.Thisbuttonisusedtoselectthesound
mode.
27.Thisbuttonisusedtoadjustuser
picturemode,pressthisbuttonrepeatedlyand
selectoneoffoursettings.
28.Teletextbuttonsformixfunction,please
refertopage15.Itisalsousedforrecordingfunction
whenTVisonDTVmode,pleaserefertopage39.
USB
:
Digitalmediaplayercontrolbutton:
SOUND:
PICTURE:
MIX():
22. Button/AudioLang:
Page41
-Page49.
18.
Pressthesebuttonsto
adjustTVvolume.
20.Pressthesebuttonsto
changechannelupwardordownward.
Intheteletext,thesebuttonsareusedto
displaythenextpageandpreviouspage.
21.Pressthisbuttontoshutoffsoundofthe
TV,pressagaintorestoreTVsound.
Thesefour
buttonsareusedtorequestlinkedbuttonswiththe
currentmenu/page.
24.Detailoperationpleasereferto
"Teletext “inthenextpage.
25.Including
relevant
ASPECT
VOLandVOL:
PROGandPROG:
MUTE:
Red/Green/Yellow/BlueCommand:
Teletextbuttons:
rs
rs
InATV,thebutton
isusedtosetNICAMsoundsystem.
InDTV,thebuttonisusedtosettheaudio
language.
23.
UserStandardNewsMovieSports
DanceClassicPopRockJazzSoft
""""
""""""
StandardMildBrightUserSports""""

14
Teletext
GeneralDescription
Teletextisaninformationsystembroadcastby
channelswhichbeconsultedlikea
Italsoofferstosubtitlesforviewers
problemsorwhoarenotfamiliar
language.
Youcanpressthesebuttonstooperatethe
PressTEXTbuttontoenterorexitteletextmode.
PressHOLDbuttontotoggleHoldfunctiononor
off.WhenHoldisswitchedon,thepage
isstopped.WhenHoldisswitched
acquisitionisstarted.
PressINDEXbutton,thenindexpagedisplays.
certain
newspaper.
withhearing
withthetransmission
teletext:
acquisition
off,thepage
Text
Hold
Size
Red/Green/Yellow/BlueCommand
Index
Reveal
PressSIZEbuttononetimetodisplaytheupper
halfofthescreenindoubleheight,presstheSIZE
buttontwotimestodisplaythelowerhalfofthe
screenindoubleheight,pressthreetimesto
displaythefullscreeninnormalsize.
Thesefourbuttonsareusedforquickaccessto
differentpagesasnumberedatthebottomofthe
screen.
Pressingthisbuttonwillrevealanyhiddendata
(answerstoquizzesforexample).PresstheREVEAL
buttonagaintoreturntonormalscreen.
13

15
Teletext
GeneralDescription
Cancel
Subtitle
Subcode
Time
Digitalbuttons(0~9)
PROG/PROG
Mix
TurningtheTeletextsubtitlesonoroff.
Subtitlesisaseparatemodewithonlyafew
buttonsavailable.TherewillbenoOSDvisible
otherthantheTeletextSubtitles.
Subcodemodegivesthepossibilitytoselect
certainsubcodepagesofaTeletextpage.
Entryofdigitswithintherange0...9forcurrent
subcodeentry.Ifthedigitcompletestheentry,
apagerequestisstarted.
PressPAGE+/PAGE-buttonstochangethe
subcodepages.
Thisbuttonisusedtoshowthetimeofthe
Teletext.
Youcanpressthemtoenterthenumberofthe
Pagerequired.
Youcanpressthemtochangepageupwardor
downward.
PressMIXbotton,theteletextpagechanges
transparent,TVcontentandteletextpage
contentwilldisplayatthesametime.
PressMIXbuttonagaintoexitMIXmode.
TheCANCELbuttonwillexitfromanyTeletexton
thedisplay.PressCANCELbuttonagaintoexit
TeletextandreturntoliveTVbroadcast.
rs
13
13

InstallingBatteriesintheRemoteControl
GeneralDescription
Antennaconnection
Antennainputimpedanceofthisunitis75ohm.VHF/UHF75ohmcoaxialcablecanbe
connectedtotheantennajackdirectly,iftheantennacableis300ohmparallelflatfeeder
cable,youneedtousethe300ohm/75ohmconvertertoconnecttheantennacabletothe
antennajack.FordetailsPleaserefertothefollowingdrawing.
Usea75ohm-300ohmconverter
300ohmcoaxialcable
Antennafeeder
ANTIN
75ohmcoaxialcable
Antennacable
Antennaswith300flattwinsLeads
W
Antennaswith75RoundLeads
W
ExternalConnection
Pointtheremotetowardstheremote
controlsensoroftheTVanduseit
within8meters.
Puttheusedbatteriesintotherecyc-
lingbinsincetheycannegatively
affecttheenvironment.
Thebatteries(batterypackorbatteriesinstalled)shallnotbeexposedto
excessiveheatsuchassunshine,fireorthelike.
16
1Openthebatterycompartment
coveronthebackside.
2
Inserttwo1.5VAAAsizebatteries
incorrectpolarity.Don´tmixoldor
usedbatterieswithnewones.
3Closedthecover.

ExternalConnection
17
ConnectingVCR
TheseinstructionsassumethatyouhavealreadyconnectedyourTVtoanantennaora
cableTVsystem.Skipstep1ifyouhavenotyetconnectedtoanantennaoracable
system.
VCRRearPanel
FollowtheinstructionsinViewingaVCRorCamcorderTapetoviewyourVCRtape.
EachVCRhasadifferentbackpanelconfiguration.
WhenconnectingaVCR,matchthecoloroftheconnectionterminaltothecable.
1.UnplugthecableorantennafromthebackoftheTV.
2.ConnectthecableorantennatotheANTINterminalonthebackoftheVCR.
3.ConnectanRFCablebetweentheANTOUTterminalontheVCRandtheANTIN
terminalontheTV.
4.
jackontheTV.
5.ConnectAudioCablesbetweentheAUDIOOUTjacksontheVCRandtheAUDIO
LandAUDIORjacksontheTV.
Note:1.WheneveryouconnectanexternaldevicetoyourTV,makesurethatpoweron
theunitisturnedoff.
2.Whenconnectinganexternaldevice,matchthecoloroftheconnectionterminal
tothecable.
ConnectaComponentCablebetweentheCOMPONENT[Y,Pb,Pr]jacksontheVCR
andYPbPr
AUDIOOUT
VIDEOOUT
2
1
3AudioCable(Notsupplied)
YPbPrcable(Notsupplied)
RFCable(Notsupplied)
ANTANTOUTS-VIDEO
123
AV1
COMPONENT2IN
COMPONENT1IN
AVOUT
IN
HDMI1HDMI2 VGAHDMI3
OUT
RF
TVRearPanel

ExternalConnection
ConnectingCamcorder
a
TherearpaneljacksonyourTVmakeiteasytoconnectacamcordertoyourTV.They
allowyoutoviewthecamcordertapeswithoutusingaVCR.
18
EachCamcorderhasadifferentbackpanelconfiguration.
WhenconnectingaCamcorder,matchthecoloroftheconnectionterminalto
thecable.
1.ConnectaVideoCablebetweentheAV1VIDEOjacksontheTV
andtheVIDEOOUTjackonthecamcorder.
2.ConnectAudioCablesbetweentheAUDIOLandAUDIORjackson
theTVandtheAUDIOOUTjacksonthecamcorder.
Note:
1.WheneveryouconnectanexternaldevicetoyourTV,makesurethat
powerontheunitisturnedoff.
2.Whenconnectinganexternaldevice,matchthecoloroftheconnection
terminaltothecable.
VideoCable(Notsupplied)1
AudioCable(Notsupplied)
2
Camcorder
White
Red
AV1
COMPONENT2IN
COMPONENT1IN
AVOUT
IN
HDMI1HDMI2 VGAHDMI3
OUT
RF
TVRearPanel

ExternalConnection
ConnectingaDVDPlayer/Set-TopBox
ComponentvideoseparatesthevideointoY(Luminance(brightness)),Pb(Blue)andPr
(Red)forenhancedvideoquality.
Besuretomatchthecomponentvideoandaudioconnections.
Forexample,ifconnectingthevideocabletoCOMPONENTIN,connecttheaudiocableto
COMPONENTINalso.
EachDVDplayer/STBhasadifferentbackpanelconfiguration.
WhenconnectingaDVDplayer/STB,matchthecolorofthe
connectionterminaltothecable.
1.ConnectaComponentCablebetweentheCOMPONENT
[Y,Pb,Pr]jacksontheDVDplayer.Andthe
2.ConnectAudioCablesbetweentheCOMPONENTIN[R-AUDIO-L]
jacksontheTVandtheAUDIOOUTjacksontheDVDplayer.
Note:1.WheneveryouconnectanexternaldevicetoyourTV,make
surethatpowerontheunitisturnedoff.
2.Whenconnectinganexternaldevice,matchthecolorofthe
connectionterminaltothecable.
TherearpaneljacksonyourTVmakeiteasytoconnectaDVDtoyourTV.
jack
ontheTV.
YPbPr
19
YPbPrcable(Notsupplied)
VIDEOOUT
Audiocable(Notsupplied)
DVDPlayer/Set-TopBox
AV1
COMPONENT2IN
COMPONENT1IN
AVOUT
IN
HDMI1HDMI2 VGAHDMI3
OUT
RF
TVRearPanel
Table of contents
Other Kogan LCD TV manuals

Kogan
Kogan KGN1080P-PRO22VAA User manual

Kogan
Kogan KGN1080P37VAA User manual

Kogan
Kogan KGN1080P32VD User manual

Kogan
Kogan KALED55UHDZE User manual

Kogan
Kogan KGN1080P42VBA User manual

Kogan
Kogan KGNPRO26VAA User manual

Kogan
Kogan HDMI HD26 User manual

Kogan
Kogan KALED463D1ZA User manual

Kogan
Kogan HDMI HD19 User manual

Kogan
Kogan KGN1080PPRO32VD User manual

Kogan
Kogan PRO19 User manual

Kogan
Kogan KALED24XXXYA User manual

Kogan
Kogan KGN1080PPRO22VDA User manual

Kogan
Kogan KGN1080P40VAC User manual

Kogan
Kogan KALED32SMTWB User manual

Kogan
Kogan HDMI PRO22 User manual

Kogan
Kogan KGN1080P24 User manual

Kogan
Kogan KGN1080P40VAB User manual

Kogan
Kogan KALED423DSMTZA User manual

Kogan
Kogan KGNPRO26VAA User manual