All information is based on the latest product
information available at the time of publication.
Kohler Co. reserves the right to make changes in
product characteristics, packaging, or availability at
any time without notice.
Please leave these instructions for the consumer.
They contain important information.
NOTES:
1. Flush the water supply pipes thoroughly to remove
debris.
2. Observe local plumbing codes. Inspect the supply
tubing for damage. Replace as necessary.
3. The minimum inlet water pressure for the diverter is
0.05MPa(0.5bar).
4. The highest working pressure for handspray is
0.5MPa(5bar). If it exceeds 0.5MPa(5bar), a pressure
reducer is needed. The highest water and
environment temperature is 60ºC. Please keep
handspray, showerhead and the shower arm away
from heater, or it may become damaged and cause
injury to the user.
ขอสังเกต:
836799-X2-D 1
836799-X2-D 4
การรับประกันสินคา LIMITED WARRANTY
Kohler (Thailand) Public Company Limited warrants to the original
products, which are purchased from authorized distributors and dealers
within Kingdom of Thailand only, to be free of defects in material and
workmanship.
Within the below mentioned periods from the date of purchase,
Kohler(Thailand) Public Company Limited will at its election, repair,
replace or make appropriate adjustment where company’s inspection
disclose any such defect occurring in normal usage and maintenance
but is not responsible for labor charges, removal charges, installation,
or other incidental or consequential costs. In no event shall the liability of
Kohler(Thailand) Public Company Limited exceed the purchase
price of the product. This warranty applies only to Kohler Faucets
installed in Thailand.
• Ceramic Valve(leak/drip)
- Lifetime Limited Warranty* for residential use
- and Five (5) Years for commercial use
• Finish Five(5) Years
• Fitting Five(5) Years
• Automatic faucet One(1) Year
• Hygiene spray(leak/drip Five(5) Years for selected models
from hygiene spray body) only
• Shower Five(5) Years
• Bathroom accessories Five(5) Years
This limited warranty DOES NOT COVER the defect or damage caused
by accident, natural disasters such as fire, flood, or earthquake, misuse
or abuse of products. Improper care and cleaning will avoid the warranty.
Consumers are responsible for the cost of service parts and service
fee for such cases.
To ensure continuous product quality and performance, as well as
product durability and lifetime, without any damage to the product,
consumers should purchase and use only genuine service parts and
after-sales services from Kohler (Thailand) Public Company Limited
or company’s authorized service centers, distributors, or dealers only.
*KOHLER® Faucet Lifetime Limited Warranty
Kohler (Thailand) warrants its faucets manufactured after January 1,
1997, to be leak and drip free during normal residential use for as long as
the original consumer purchaser owns his or her home. If the faucet
should leak or drip during normal use, Kohler (Thailand) will, free of
charge; replace
the new cartridge necessary to put the faucet in good
working condition.
Kohler (Thailand) also warrants all other aspects of the faucet or
accessories (“Faucet”)**to be free of defects in material and workman-
ship during normal residential use for as long as the original consumer
purchaser owns his or her home. If a defect is found in normal residential
use, Kohler (Thailand) will, at its election, repair, provide a replacement
part or product, or make appropriate adjustment. Damage to a product
caused by accident, misuse, or abuse is not covered by this warranty.
Improper care and cleaning will also void the warranty.
Proof of purchase (original sales receipt) must be provided to
Kohler(Thailand) with all warranty claims. Kohler (Thailand) is not
responsible for labor charges, installation, or other incidental or
consequential costs. In no event shall the liability of Kohler (Thailand)
exceed the purchase price of the Faucet.
Important: Never use cleaners containing abrasive cleansers,
ammonia, bleach, acids, waxes, alcohol, solvents or other
products not recommended for chrome. This will void the warranty.
To obtain warranty service, please contact your dealers or contact the
KOHLER (Thailand) Call Center, together with proof of purchase at;
Call Center
KOHLER (Thailand) Public Company Limited
16th Floor, Jasmine City Building
2 Soi Sukhumvit 23, Sukhumvit Road,
Wattana, Bangkok 10110
Tel: 02204-6222 Fax: 0-2204-6224
COPYRIGHT ©2016 BY KOHLER (THAILAND) PUBLIC COMPANY
LIMITED
INSTALLATION INSTRUCTIONS
ขอแนะนําการติดตั้ง
AVE
กอกผสมลงอางอาบน้ำและยืนอาบแบบติดผนัง
พรอมฝกบัวสายออน
รุน เวฟ
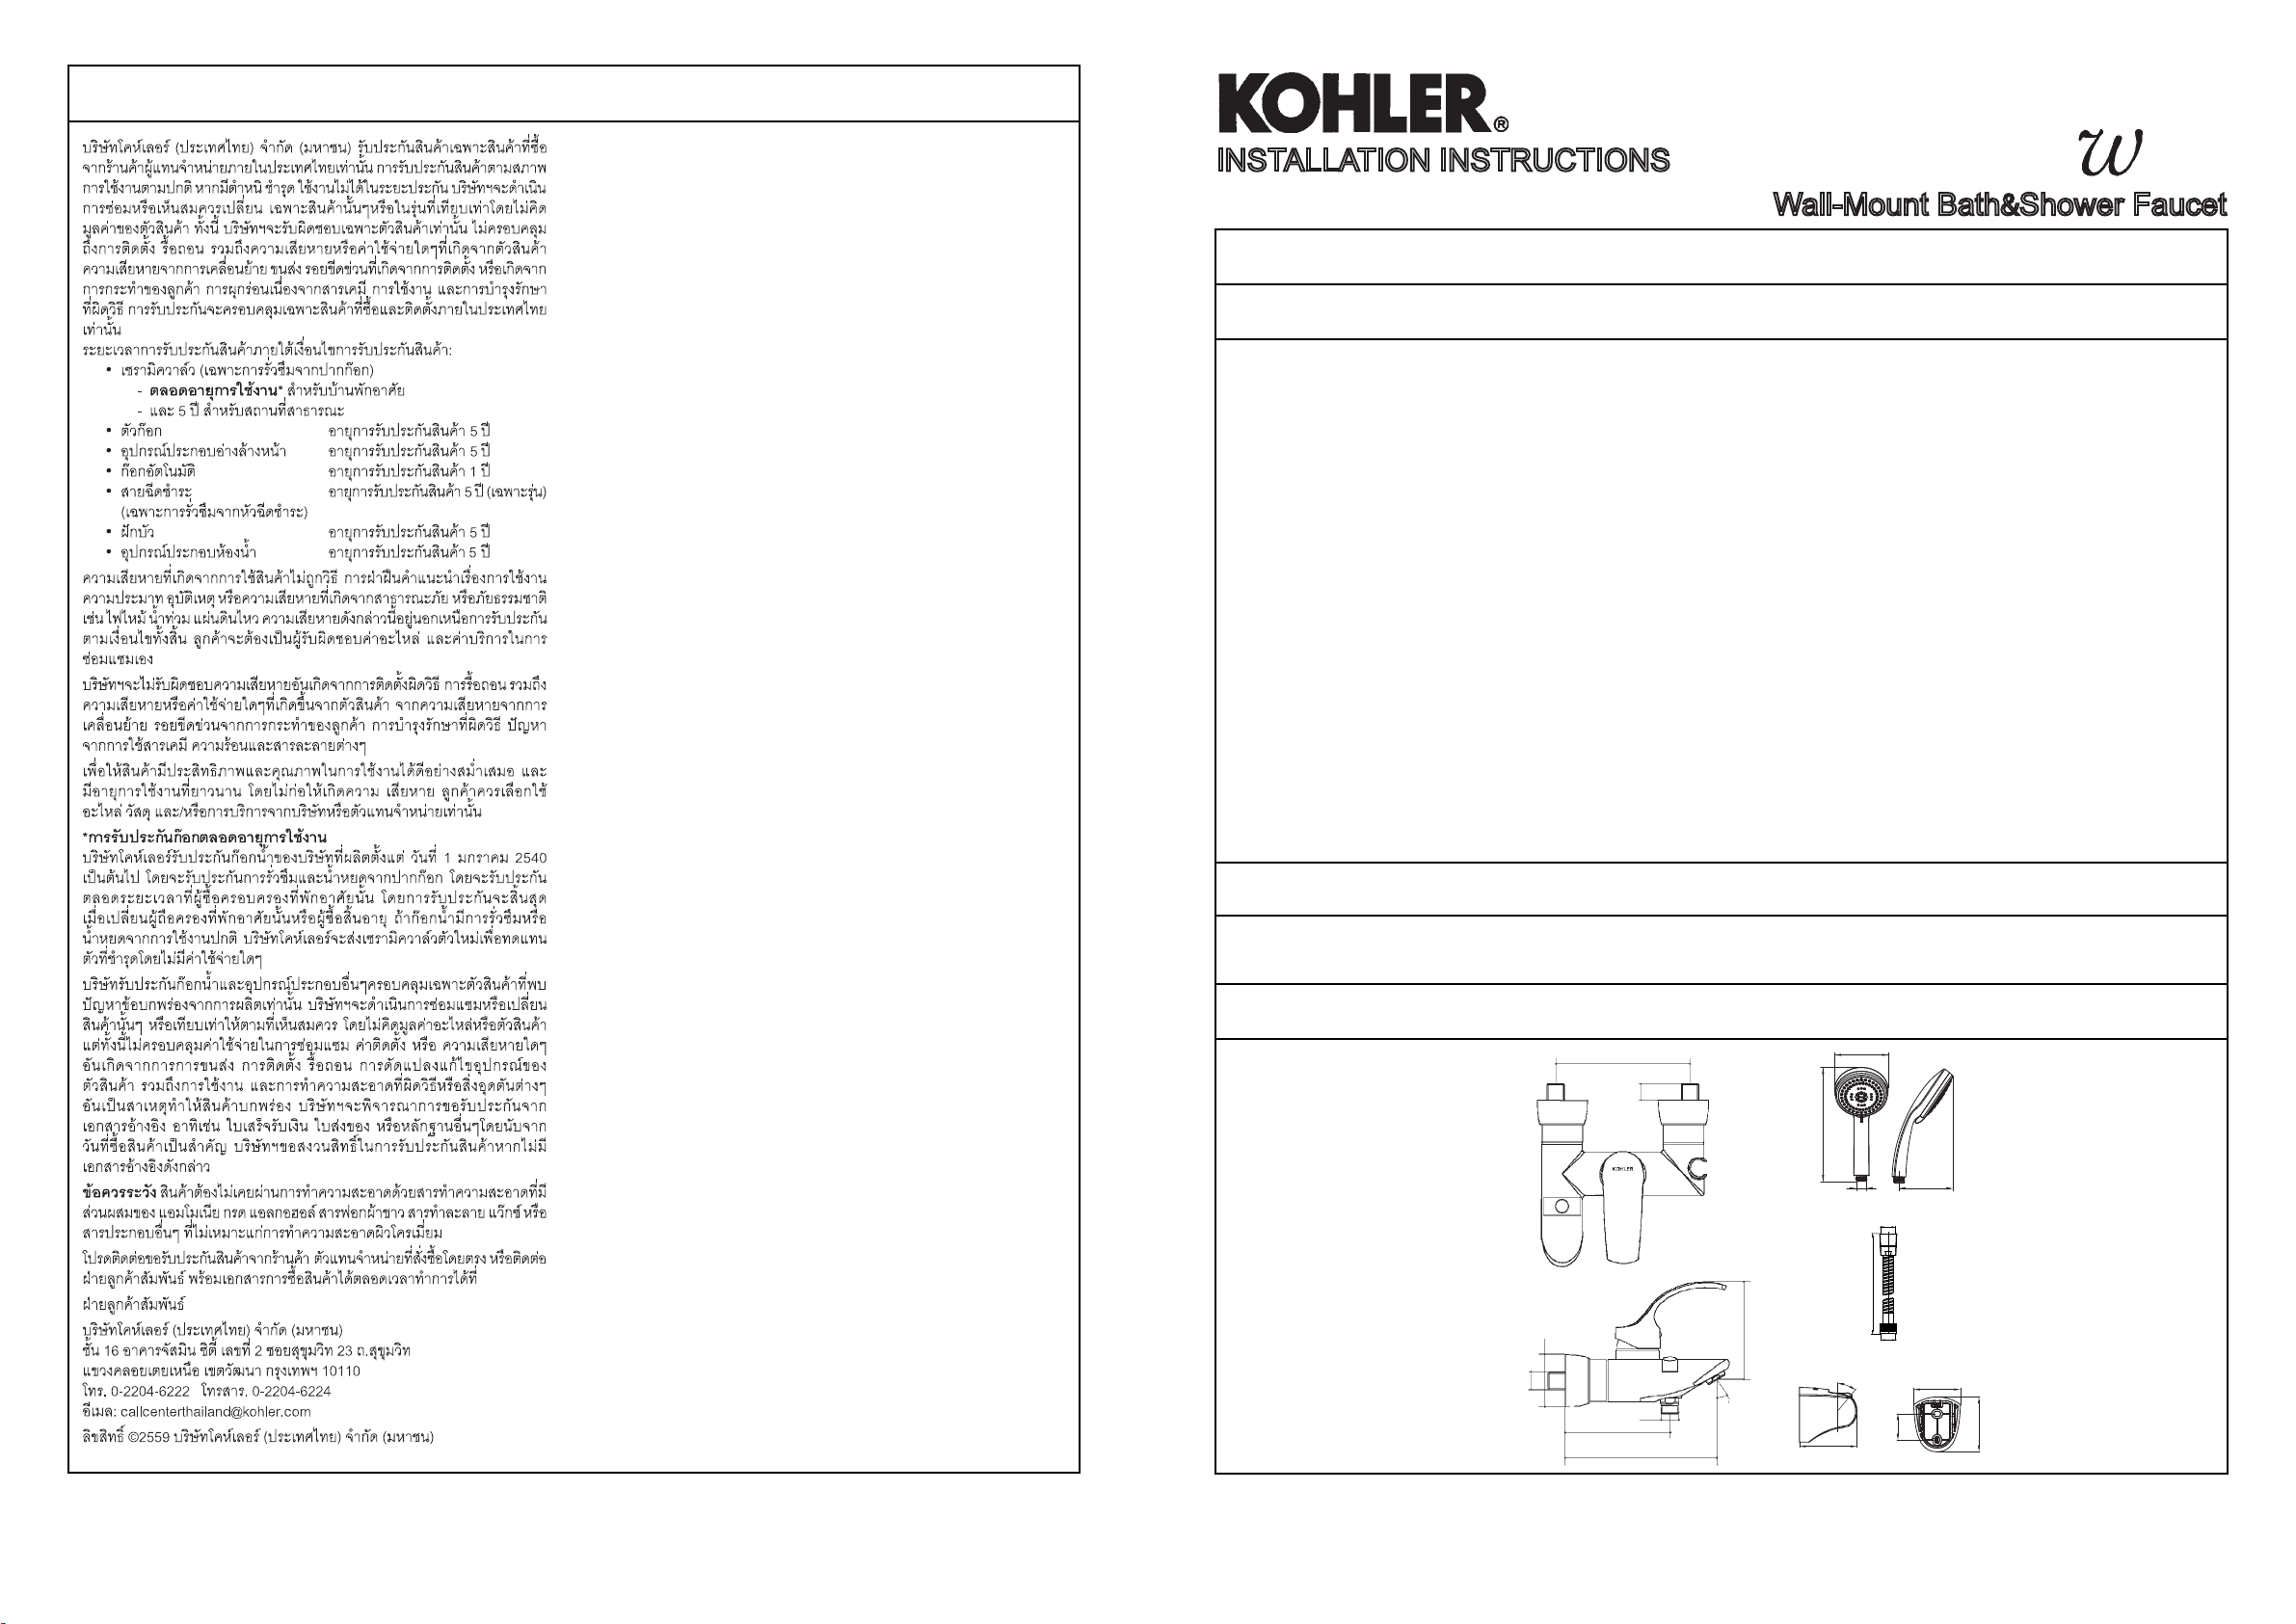
Wall-Mount Bath&Shower Faucet
72687X-4 กอกผสมลงอางอาบน้ำและยืนอาบแบบติดผนังพรอมฝกบัวสายออน
BEFORE YOU BEGIN
กอนเริ่มการติดตั้ง
*Dimensions are approximate.
*
*Unit: mm
*
150±15
124
G1/2˝
Ø62
G1/2˝
177
118
MAX.20
31º
49
40º
27
60
58
G1/2˝
G1/2˝
1500
102
219
G1/2˝
Ø102
ROUGH-IN DIMENSIONS
STANDARD APPLICABLE
Special model meets or exceeds the following at date
of manufacture: TIS
มาตรฐานผลิตภัณฑ
ระยะการติดตั้ง


