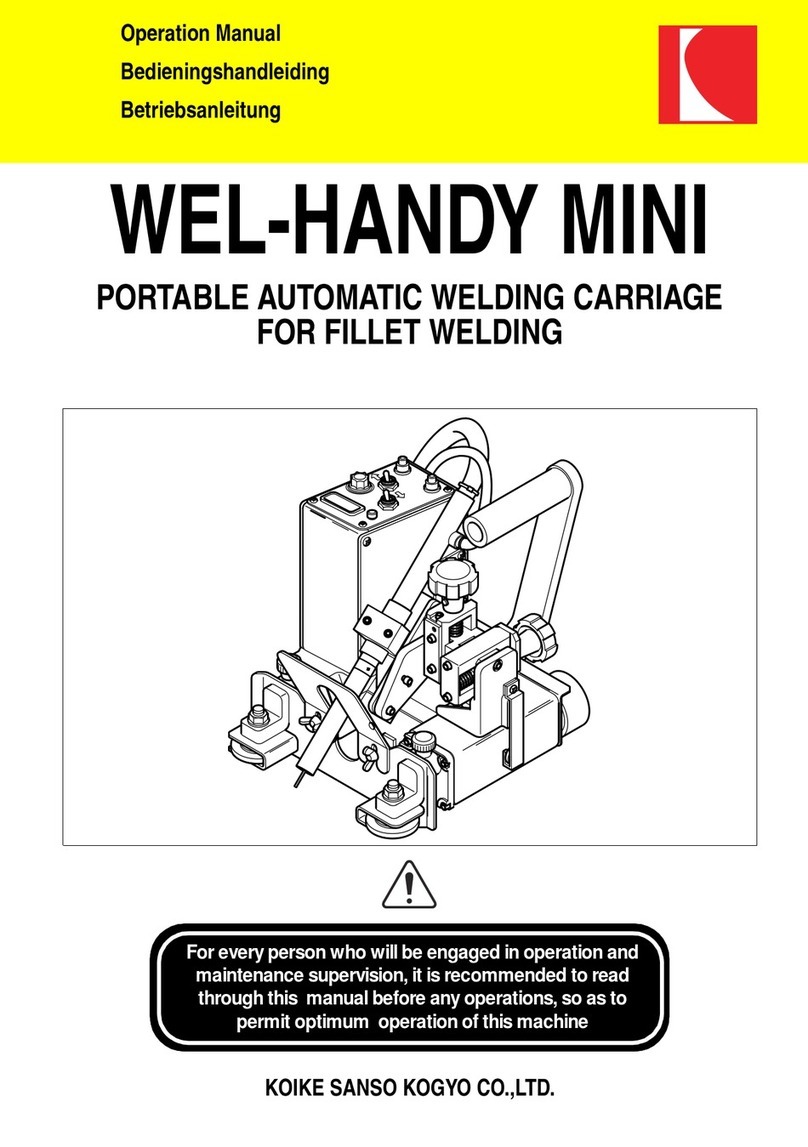
Koike Sanso Kogyo WEL-HANDY COMPACT User manual

Portable Automatic Welding Carriage for fillet welding
BUV00B00
WEL-HANDY
COMPACT
OPERATION MANUAL
KOIKE SANSO KOGYO CO.,LTD.
For every person who will be engaged in
operation and maintenance supervision, It is
recommended to read through this manual
before any operations, so as to permit
optimum operation of this machine.


WEL-HANDY COMPACT
INTRODUCTION
Thank you very much for purchasing this product. Read this instruction
manual thoroughly to ensure correct, safe and effective use of the machine.
Read the manual first to understand how to operate and maintain the machine.
Cooperation between colleagues in the workplace is essential for safe,
smooth operation.
Make sure you read, understand and take all the necessary safety
precautions.
SAFETY PRECAUTIONS
This product is designed to be safe, but it can cause serious accidents if not operated
correctly. Those who operate and repair this machine must read this manual
thoroughly before operating, inspecting and maintaining the machine. Keep the
manual near the machine so that anyone who operates the machine can refer to it if
necessary.
■Do not use the machine carelessly without following the instructions in the manual.
■Do not use the machine until you have thoroughly understood the explanations in the manual.
■For safety, leave the installation, maintenance, inspection, and repair of the machine to a trained
person who has thorough knowledge about welding machines or to a qualified operator.
■For safety, leave the operation of the machine to a person with complete knowledge of the instruction
manual and sufficient skill.
■For safety education, make use of respective lecture meetings sponsored by the Welding Society and
Welding Association, as well as by headquarters and branches of related scientific societies and
associations. Make use of qualification tests for welding engineers and welding technicians as well.
■After reading the manual, keep It together with the warranty within reach of people concerned. Read
the manual again as necessary.
■Contact our dealers or our branch office, sales office, or local office for any obscure points.
■When this manual is lost or damaged, place an order promptly with our dealer for another copy.
■When transferring the machine, be sure to attach the instruction manual to the machine to transfer it
to the nest owner.
QUALIFICATIONS FOR MACHINE OPERATOR
Operators and repair staff of this machine must completely understand the contents
of the instruction manual and they must be qualified and educated to handle this
equipment.

WEL-HANDY COMPACT
Symbol
Title
Meaning
General
General caution, warning, and danger.
Be careful not to get your
fingers caught.
Possible injury to fingers if caught in the insertion
part.
Caution: Electric shock!
Possible electric shock under special conditions.
Ground this equipment.
Operators must ground the equipment using the
safety grounding terminal.
Pull out the power plug
from the outlet.
Operators must unplug the power plug from the
outlet when a failure occurs or when there is a
danger of lightning.
Caution against bursting
Possible bursting under certain conditions.
General
General warning.
Caution: Hot!
Possible injury due to high temperature under
certain conditions.
Caution: Ignition!
Possible ignition under certain conditions.
Caution: Magnet
Generating a magnetic field and magnetic waves.
Wear light shielding
goggles.
Be sure to wear light shielding goggle when
looking at welding arcs.
Wear dust/gas mask.
Wear a mask when dust, smoke, or gas is to be
generated during work.
Do not lift.
Lifting the carriage is prohibited to prevent an
accident due to falling.

WEL-HANDY COMPACT
1. Safety information------------------------------------------------------------------------------------------ 1
2. Safety precautions----------------------------------------------------------------------------------------- 2
3. Location of Safety labels --------------------------------------------------------------------------------- 7
4. Features and specifications ----------------------------------------------------------------------------- 8
4.1 Features ----------------------------------------------------------------------------------------------8
4.2 Configuration ----------------------------------------------------------------------------------------8
4.3 Specification -----------------------------------------------------------------------------------------9
5. Method of operation------------------------------------------------------------------------------------- 10
5.1 Name of each part---------------------------------------------------------------------------------11
5.1.1 Main unit of welding carriage -----------------------------------------------------------11
5.1.2 Operation panel--------------------------------------------------------------------------- 16
5.2 Preparation and procedure for welding------------------------------------------------------ 18
5.3 System connection diagram-------------------------------------------------------------------- 19
5.4 Applicable welding machine and signal adaptor ------------------------------------------ 19
5.5 Operational precautions ----------------------------------------------------------------------- 19
6. Maintenance ---------------------------------------------------------------------------------------------- 20
6.1 Maintenance and inspection ------------------------------------------------------------------- 20
6.1.1 Daily inspection--------------------------------------------------------------------------- 20
6.1.2 Monthly inspection ----------------------------------------------------------------------- 21
6.2 Recommended spare parts -------------------------------------------------------------------- 21
6.3 Trouble shooting---------------------------------------------------------------------------------- 21
6.4 Warranty-------------------------------------------------------------------------------------------- 23
7. Wiring diagram-------------------------------------------------------------------------------------------- 24
7.1 Electrical diagram--------------------------------------------------------------------------------- 24
7.2 Assembly drawing of circuit board ------------------------------------------------------------ 25
8. Assembly drawing of WEL-HANDY COMPACT -------------------------------------------------- 26
9. Parts list---------------------------------------------------------------------------------------------------- 27
9.1 Main body and inside parts--------------------------------------------------------------------- 27
9.2 Holder relationship ------------------------------------------------------------------------------- 29
9.3 Arm relationship----------------------------------------------------------------------------------- 31
9.4 Electrical parts(1) -------------------------------------------------------------------------------------
33
9.5 Electrical parts(1) --------------------------------------------------------------------------------- 35
10.About the use of commercial torches-------------------------------------------------------------- 36
CONTENTS

WEL-HANDY COMPACT
- 1 -
11 Safety information
Most accidents are caused by negligence of basic safety regulations during operation, inspection,
and maintenance. Carefully read, understand, and master the safety precautions and preventive
measures written in this manual or on the machine before operation, inspection, and maintenance
of the machine.
■Carefully read thin manual before use.
■Conduct installation of motive power source on the primary side, select the location of installation,
store high-pressure gas. install pipes, store products after welding, and dispose of waste in
conformity with laws and your in-house regulations.
■Precautions are provided In this manual for safe operation of the machine and prevention of injury
to you or other people or other damage.
■Improper handling of the machine will cause injury or damage at various levels. The levels are
classified into three categories, which are represented by respective caution symbols and signal
terms to call people's attention. These symbols and terms are used in the same way on the
warning labels stuck to the machine.
Caution symbol
Signal
terms
Definition of terms
DANGER
Improper handling Is very likely to cause death or serious
injury.
WARNING
Improper handling can cause death or serious injury.
CAUTION
Improper handling can cause injury or physical damage.
It is also used to point out dangerous habitual action.
Notice sign
The notice sign notifies machine operators and maintenance
men of precautions as to parts of the machine or peripheral
equipment that will lead to breakdown.
The serious injury mentioned above refers to loss of eyesight, injury, burns (high/medium
temperature), electric shock, bone fracture, poisoning which leave an aftereffect or require
hospitalization or regular treatment at a hospital far an extended period of time. The injury refers to
a wound, burn, or electric shock which do not need hospitalization or regular treatment at a hospital
for an extended period of time. The physical damage refers to damage to assets and extensive loss
due to damage to the machine.

WEL-HANDY COMPACT
- 2 -
12 Safety precautions
WARNING
Strictly observe the following to prevent accidents resulting in serious injury or death.
■This welding machine is designed and manufactured by taking safety into
consideration. However, never fail to observe the warning and precautions
described in this instruction manual, otherwise accidents leading to serious injuly
or death can result.
■Keep people out of the space around the welding machine and working area.
■The welding machine generates a magnetic field around itself. Such a magnetic
field affects certain types of sensors and clocks. For the same reason, any
person who have a pacemaker in his heart shall not approach the welding
machine in operation or the welding space unless he has obtained doctor's
permission.
■For safety, leave the installation, maintenance, inspection, and repair of the
machine to a person who has thorough knowledge about welding machines or
to a quafified operator.
■For safety, leave the operation of the machine to a person with complete
knowledge of the instruction manual end sufficient skill.
■Do not use this machine for any purpose other than arc welding described in the
instruction manual.
■Do not remodel the machine.
■Check the safety around the machine before operation to prevent accidents.
■Be sure to hold the handle when carrying the machine.
■Wear leather gauntlets when touching the machine during welding or right after
operation.
Do not touch the welded surface antil it has cooled.
WARNING
Strictly observe the following to prevent electric shock.
■Do not touch the charged section; otherwise fatal electric shock or burns can
result. When the power on the input side is turned on, the Input circuit and the
inside of the welding machine are charged. Even if the input power is turned off,
the capacitor may have been charged. When the welding power is output, the
electrode and base metal, as well as the metal portion in contact with these, are
charged.
■Never touch charged sections.
■The welding power supply case and base metal, as well as jigs electrically
connected to them, shall be grounded in conformity with the law (Technical
Standard for Electric Equipment) by a qualified electric engineer.
■Turn off all power supplies on the input side by means of switches in the switch
boxes before installation, maintenance, and inspection. The capacitor will not
discharge completely right after the input power is turned off. Check that no
vohage is remaining before maintenance or inspection.
■Periodically conduct maintenance and inspection. Repair damaged parts before

WEL-HANDY COMPACT
- 3 -
resuming operation.
■Do not use cables with Insufflcient capacity or damaged cables whose conductors
are exposed.
■firmly tighten and insulate cable connections.
■Firmly connect the welding cable on the base metal side at a location as close as
possible to the base metal.
■Do not use the machine with the welding machine case or coser removed.
■Be sure to cover the input and output terminals before use.
■Do not use broken or wet gauntlets.
■Never fail to use a life-line when working in high places.
■Turn oft power switches of all devices and input-side power supply when the
machine is not used.
■Do not wear wet clothes.
■Do not stand on or touch the wet floor.
■Do not use the machine outdoors when it is raining.
■Do not leave the machine outdoors after use.
■Be sure to install a fuse or breaker on the input power supply side.
■Check the supply voltage of the machine before use.
The tolerance for the input supply voltage is plus or minus 10% of the rating. Use
of the machine out of the folerance is prohibited.
■The metal receptacle (plug) on the tough-rubber sheath cable is threaded.
Tighten it firmly.
■Be sure to ground the tough-rubber sheath cable of the machine.
■Turn off the power and stop operation in the following cases, and ask an engineer
with special knowledge of electricity to repair.
*Broken or worn-out cables
*Damage due to water leakage or other liquid
*Malfunction of the machine inspire of operation in conformity with the instruction
manual.
*Breakdown of the machine.
*Abnormal performance of the machine which requires tune-up.
■Ask an engineer with expertise to maintain, inspect, or repair the machire.
■Please make sure that any foreign material does not attach to the connector of
the machine nor to the plug of the power cable when the plug of the power cable
is connected to the machine.
Foreign materials can cause short-circuits or melt the connector.
CAUTION
Use protective gear to protect you and others from arc light, scattered spatters/slugs,
and noise.
■The arc light includes harmful ultraviolet rays and infrared rays, causing
Inflammation of eyes or burns.
■Scattered spatters and slugs can damage your eyes and cause burns.
■Noise can cause hearing difficulties.
■Wear light-shielding goggles or hand shield, which blocks light sufficiently, for
welding operation or monitoring welding.
■Wear protective goggles to protect your eyes from spatters and slugs.
■Install a protective curtain around the welding site so that arc light will not reach
the eyes of people around the site.
■Wear protective gear such as leather gauntlets. clothes with long-sleeves, leg
cover, leather apron, helmet, and safety shoes.
■When the noise level is high, wear a noise-proofing protector.

WEL-HANDY COMPACT
- 4 -
CAUTION
Use protective gear to protect you and others from fumes and gas generated by
welding.
■Welding generates fumes and gas. Inhalation of such fumes and gas can damage
your health.
■Welding operation in a smell space causes deficiency of oxygen, which is very
likely to cause suffocation.
■To prevent gas poisoning and suffocation, use the local waste disposal facilities
stipulated by the law (lndustriat Safety and Health Law snd Regulations to
Prevent Damage due to Dust) or use an effective inhaler.
■When the welding space is small, ventilate the space sufficiently or wear an
inhaler. Have a trained watchman monitor welding.
■Welding operafion near places where degreasing, washing, or opraying is
conducted may lead to generation of harmful gas. Do not conduct welding near
such places.
■Welding zinc plated steel sheets or other coated steel sheets will generate
harmful fumes. Remove the coating before welding, or wear an inhaler before
operation.
CAUTION
Strictly observe the following to prevent gas cylinders from falling or bursting.
■Gas cylinders, when they fall, can cause accidents leading to death or injury.
■High-pressure gas is contained in gas cylinders. Improper handling of gas
cylinders can cause a burst or emission of high-pressure gas, causing accidents
that lead to death or injury.
■Handle gas cylinders in conformity with the law (High Pressure Gas Control Law).
■Do not expose gas cylinders to high temperatures.
■Set gas cylinders in a special cylinder stands to prevent the gas cylinders from
falling.
■Never generate arcs on gas cylinders. Do not hook the welding torch on gas
cylinders, or do not allow electrode to touch gas cylinders.
■Do not bring your head close to the discharge port when opening the valve on the
gas cylinder.
■Attach a protective cap to gas cylinders when they are kept unused.
■Use a gas flow rate controller made or recommended by a welding machine
manufacture.
■Read the instruction manual for the gas flow rate controller before use, and strictry
observe the precautions.
■Never use a gas cylinder from which gas is leaking or a broken gas cylinder.
■Use gas cylinders only for specified purposes.
■DO not apply oil or grease to the valve on gas cylinders.
■When the valve on gas cylinders is hard to open, contact the dealer.

WEL-HANDY COMPACT
- 5 -
CAUTION
Strictly observe the following to prevent injury due to rotary section.
■Do not bring your hands, hair, or clothes close to the cooling fan of the welding
power supply or the feeder roller of the wire feeder; otherwise you can be caught
in them.
■Do not bring your head near the end of the welding torch during wire inching;
otherwise the wire may stick in your eyes.
■When the spool of wire is released, you can get hurt.
■Do not use the welding machine with its case or cover removed.
■Ask a trained person who has thorough knowledge of welding machines or a
qualified person to remove the case for maintenance, inspection, or repair. Install
a protective fence around the welding machine to prevent people from getting
near carelessly.
■DO not bring your hand, fingers, hair, or clothes close to the rotating cooling fan
or the roller of the feeder.
■Do not bring your head near the end of the welding torch during wire inching.
■Secure the end of the wire with the wire stopper on the spool when storing or
moving the spool of wire or when setting it in the wire feeder.
■When inserting the spool of wire into the wire guide on the wire feeder, firmly hold
the wire so that it will not be released.
CAUTION
Strictly observe the following to prevent fire, explosion, or burst.
■Spatters and hot base metal right after welding can cause tire.
■Imperfect connection of cables or imperfect contact on the route of the electric
current on the steel bar and other base metal can cause fire because of heating
due to resistance.
■Arcs generated on the container of gasoline or other inflammables can cause
explosion.
■welding of sealed tanks or pipes can cause bursts.
■Do not do welding in a place where scattered spatters will be in contact with
inflammables.
■Do not do welding in a place near inflammable gas.
■Do not bring hot base metal right after welding close to inflammables.
■Welding on ceilings, floors, an walls may cause fire on the hidden side. Remove
inflammables from the hidden side.
■Firmly tighten cable connections, and firmly connect the welding cable on the
base metal side at a location as close as possible to the base metal.
■Do not weld gas pipes filled with gas.
■Do not weld sealed tanks or pipes.
■Provide a fire extinguisher near the welding place to prepare for the worst.
■Do not weld a container that has inflammables inside.
■Do not have a lighter, matches, or other inflammables with you during welding.

WEL-HANDY COMPACT
- 6 -
About the transport of the machine
1. Be sure to hold the handle when carrying the machine.
2. Do not pull the carriage up with a crane, lift, etc. hanging on its Handle for transferring or storing. There
is risk of falling off carriage while holding carriage by handle, if there is shockimpact at carriage or if
mounting screw of handle is loose.
Machine noise
1. Volume of at the time of driving the machine is less than 70dB.
About external environment
1. Never use the machine outdoors when the weather is wet. This will cause failure of the machine and could
cause a fatal accident by electric shock.
2. Please avoid high temperature and humidity.
3. Please use in an environment where the internal temperature is 5 ~ 65 ℃.
4. Please use in an environment with internal humidity of 30 to 80% RH.

WEL-HANDY COMPACT
- 7 -
3 Location of Safety labels
Safety labels and labels for correct operations are stuck to the machine.
■Carefully read labels before operation and follow the instructions decried on them.
■Never peel off the labels. Keep them clean and legible at all times.
1-1
1-1
1-2
1-2
1-3
1-3

WEL-HANDY COMPACT
- 8 -
4 Features and specifications
4.1 Features
The WEL-HANDY COMPACT has been developed to allow even unskilled operators to
successfully do horizontal fillet welding (bottom steel plate traveling type) in a simple manner.
Major features are as follows:
1. Compact, Light weight, Durable and Low gravity.
2. The powerful magnet has dramatically enhanced the tracing reliability and tractive force,
thereby ensuring stable traveling.
3. It is able to operate plural machine by improved tracing reliability and automatic stopping
function.
4. The direction changeover switch permits rightward/leftward traveling.
5. can change the position of the roller arm without tools.
6. The height of the guide rollers can be widely adjusted.
The above features are expected to exhibit their effects in terms of "welding efficiency" and
"operation by unskilled workers."
4.2 Configuration
1. Main unit 1set
2. Accessories
Hexagon wrench (M6/M5) 1pc each
Hexagon bolt M6×60 1pc
Instruction manual 1pc

WEL-HANDY COMPACT
- 9 -
4.3 Specifications
Item
Specifications
Model
WEL-HANDY COMPACT
Driving method
Rubber roller 4 wheeler driving (permanent magnet absorption type)
(Lower plate traveling system, traveling surface is steel plate)
Traveling speed
100~550mm/min / 3.9~21.7inch/min
Torch adjustable range
(When the distance from
the torch holder to the
welding position is 141
mm)
Swept forward angle/sweep back angle:5°/4°
Horizontal angle:45°
Up:21mm / 0.8inch Dawn:23mm / 0.9inch
Froth:20mm / 0.8inch Back:25mm / 1.0inch
Horizontal angle:35°
Up:40mm / 1.6inch Dawn:4mm / 0.2inch
Froth:40mm / 1.6inch Back:5mm / 0.2inch
Horizontal angle:55°
Up:3mm / 0.1inch(※) Dawn:41mm / 1.6inch
Froth:5mm / 0.2inch Back:40mm / 1.6inch
※Change the mounting position +10mm
The above stroke is the stroke when the distance from the torch
holder to the tip of the wire is 141 mm(5.6inch).
Welding reserve
Total start and end : About200mm / 7.9inch
Applied position
Horizontal position (It is a machine dedicated to horizontal fillet.
Upward welding of vertical walls is not possible.)
Profiling method
Stand plate press method
Control source
AC100~240V±10% max 0.7A 50-60Hz
Electric power supply and
interlock
Torch switch signal (connected to wire supply device)
(A contact output of Self-holding type Relay)
Operation switch
(operation panel)
Travelling direction changing over switch, travelling speed adjustment
switch, START/STOP button
Arc mode changing over switch (MANUAL, ARC ON, ARC OFF)
Weight of carriage main
body
5.2kg / 11.5Ib
Traction force
11kg / 24.3Ib
Magnet attraction
25kg (option 30kg) / 55.1Ib(option 66.1Ib)
Dimension
L200xW255xH230mm / L7.87×W10.0×H9.1inch
Operating environment
Temperature:5℃~+65℃
Humidity:30%~80%(No freezing, no condensation)
Storage environment
Temperature:-10℃~+65℃
Humidity:10%~80%(No freezing, no condensation)

WEL-HANDY COMPACT
- 10 -
5 Method of operation
WARNING
Kindly take care about following things to avoid getting an electric shock.
⚫Kindly remove input plug from outlet while checking, dis-assembling or
repairing and turn OFF the control source while leaving. If it is necessary to
carry out checking in the energized state, professional engineer having
enough knowledge and skill about electric handling should go since there
is risk of short circuit, getting electric shock.
⚫Do not use welding equipment without case or cover.
⚫Kindly use input voltage in the range of AC100~240V(±10%)
There is risk of short circuit due to failure of printed board on operation panel.
⚫In case of crack in insulation cover of power cable and torch cable, do not expose it to high
temperature. There is risk of short circuit due to tearing of insulation covering.
⚫Kindly weld below the rated current and usage rate of torch to prevent dielectric breakdown due
to overheating.
⚫Kindly place power cable and torch cable in proper manner so that they are not stretched or
pulled. There is possibility of breakage of insulation by damaging holding part and connector
part due to pulling.
⚫Do not throw or drop main body of carriage. There is risk of damaging insulation by breaking.
⚫While connecting to power cable plug to main body, kindly connect after verifying that foreign
object is not touching to connector of main body, power cable plug .There is risk of connector
erosion due to short circuit by foreign object.
WARNING
Strictly observe the following to prevent burns.
■Never directly touch the torch nozzle, tip, orifice, insulation cylinder, and the
surface of the carriage which are very hot right after welding.
WARNING
Kindly take care about following things to avoid falling off of carriage
⚫Do not lift the carriage by holding its Handle and grip handle. There is risk
of falling off carriage while holding carriage by handle and grip handle, if
there is shock impact at carriage or if mounting screw of handle and grip
handle is loose.

WEL-HANDY COMPACT
- 11 -
CAUTION
Set the welding power switch in the "No Self-Holding (or No Crater Treatment)"
position.
■When the switch ot the welding power supply, which is to be connected to the welding machine,
is set in the “Self.Holding (or Crater Treatment)” position, the welding arc will not stop even if
the welding operation is stopped.
5.1 Name of each part
5.1.1 Main unit of welding carriage
Fig.1 Name of each part

WEL-HANDY COMPACT
- 12 -
①Slide unit assembly
The arc point can be adjusted toward UP/DOWN or FRONT/REAR.
②Torch holder
Insert the exclusive use torch mounting section into the torch holder to secure it.
WARNING
Secure the insulated section of the torch when mounting it.
■There is a risk of electric leakage or electric shock if it is fixed in a part other than
the insulated part.
③Guide roller and arm
Press them against the vertical plate for welding by tracing.
Kindly fit doorway of Guide Roller Arm as shown in Figure 2.
It is able to switch manually. It is able to switch by pushing the arm where the mark is visible.
Fig.2 doorway of Guide Roller Arm
Traveling direction
Traveling direction
Mark

WEL-HANDY COMPACT
- 13 -
The height of the guide rollers can be adjusted by changing the attaching method.
The height can be adjusted in the range of 5mm(0.197inch) ~ 19mm(0.748inch) and
90mm(3.543inch) ~ 105mm(4.134inch) from the contact patch of a tire.
Fig.3 Height of guide roller
④Limit switch
These are provided on both sides of the carriage, serving as (welding) stop button.
CAUTION
Do not apply impact to the limit switch.
■When impact is applied to the limit switch, it can be broken. When the limit switch
is broken, the automatic stopping function will not work, and arcs and the
traneling carriage will not stop.
⑤Operation panel
The detail is shown below.
⑥Receptacle
Kindly connect power cable to this receptacle
WARNING
Never fail to ground the clip.
■ The grounded clip prevents short circuits or electtic shock which results from a
short circuit in the carriage, etc.
5mm =0.197inch
19mm =0.748inch
90mm =3.543inch
105mm =4.134inch

WEL-HANDY COMPACT
- 14 -
⑦Driving wheel (Rubber roller)
Rubber wheels for driving.
⑧Torch angle adjusting bolt
Used to set the torch angle. Loosen the bolt and swing the torch for setting within the range of
35-55 degrees.
⑨Grip handle
A grip handle for carrying the carriage. The grip handle is attached by connecting two parts. The
grip handle can be shortened by connecting one part. If you want to shorten the grip handle,
use the attached hexagon bolt M6×60.
WARNING
Be sure to tighten the grip handle.
■ Be sure to tighten the handle. If the tightening is weak, there is a risk that the
grip handle will come off when the carriage is impacted or the screws are loose.
WARNING
Be sure to hold the grip part of the handle with your hand when carrying it.
Do not lift the grip part of the grip handle with a crane or the like.
■ Make sure that the tightening torque of the grip handle is 5.2 N・m.There is a
risk that the grip handle will come off and fall if an impact is applied when it is
lifted or if the mounting screw of the grip handle is loose.
accessories
hexagon bolt M6×60
Hexagon nut M6
When there is one grip handle
hexagon bolt M6×60
Hexagon nut M6
When there is two grip handle

WEL-HANDY COMPACT
- 15 -
The handle is attached for the purpose of lifting and transporting the carriage.
Do not use more force than necessary, lean on it, or use it for anything other than its
intended purpose.
⑩Heat insulator plate
It protect the drive roller and fuselage from heat and sputter.
⑪Operation indicator LED
It turns on and off depending on the operation mode of the carriage.
・Welding mode indicator LED(Orange)
When the arc mode selector switch described later is in ARC ON mode, it lights up when the
carriage is stopped. Blinks when the carriage is moving.
When the arc mode selector switch is in ARC OFF mode, it goes out. It goes off even when the
carriage is moving.
・Driving mode indicator LED (green)
Lights up after the power is turned on.
When the carriage is stopped, the traveling direction switch keeps lighting when left traveling is
WARNING
Please use the grip handle with caution. (Be careful not to drop it.)
■ It is possible to change the length of the handle from 2 to 1, but if it is 1, the part
to hold will be shorter, making it difficult to hold.
When using one, please use it after fully understanding the condition.
Driving mode indicator LED (green)
Welding mode indicator LED(Orange)
Table of contents
Other Koike Sanso Kogyo Welding System manuals

Koike Sanso Kogyo
Koike Sanso Kogyo IK-54D User manual

Koike Sanso Kogyo
Koike Sanso Kogyo IK-72T User manual

Koike Sanso Kogyo
Koike Sanso Kogyo IK-82 M-300 User manual

Koike Sanso Kogyo
Koike Sanso Kogyo WEL-HANDY MULTI NEXT User manual

Koike Sanso Kogyo
Koike Sanso Kogyo WEL-HANDY MINI STRONG User manual

Koike Sanso Kogyo
Koike Sanso Kogyo WEL-HANDY MINI User manual
Popular Welding System manuals by other brands

DINSEO
DINSEO DIX TIG GO 1806.M AC/DC Operation manual

Thermal Dynamics
Thermal Dynamics A40 operating manual

Campbell Hausfeld
Campbell Hausfeld WG2020 Operating instructions and parts manual

GYS
GYS MULTIPEARL 210-2 manual

Miller
Miller Dialarc 250 AC/DC owner's manual

Trafimet
Trafimet EXPRESCUT Operating and maintenance manual