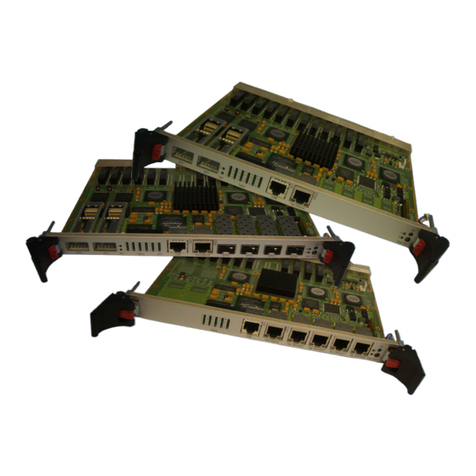
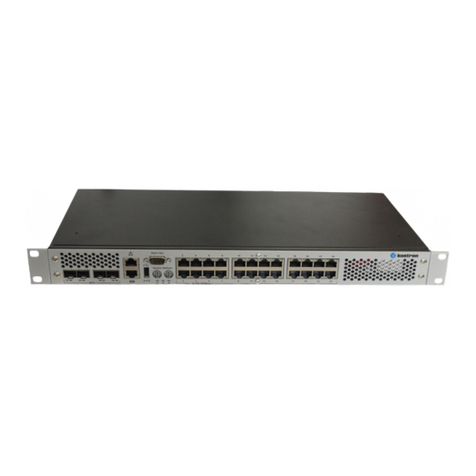
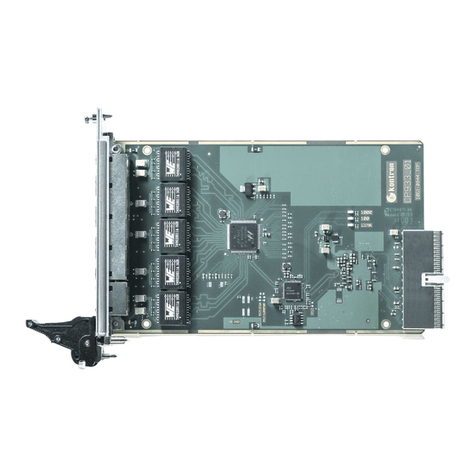
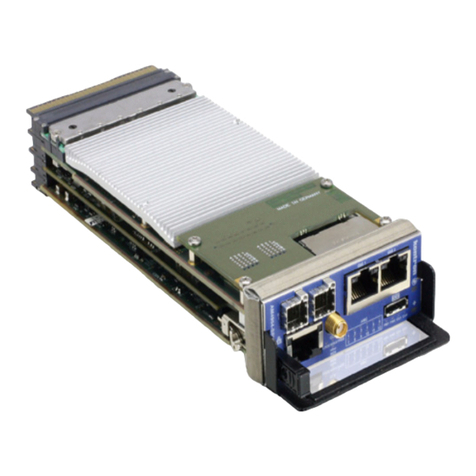
Kontron MS1300 Series Installation and operating instructions

APPLICATION
NOTE
www.symkloud.com // 1
MS1300 Getting Started | VLAN-segregated
Management and Payload Networks
AN18008 Doc. Rev. 1.0

MS1300 Getting Started | VLAN-segregated Management and Payload Networks
www.symkloud.com // 2
Table of Contents
Table of Contents...............................................................................................................................................................................................2
List of Tables........................................................................................................................................................................................................2
List of Figures......................................................................................................................................................................................................2
1/ Introduction............................................................................................................................................................................................3
1.1. Platform Architecture................................................................................................................................................................................ 4
2/ Introduction and Planning................................................................................................................................................................ 8
3/ Initial Platform Connections............................................................................................................................................................11
3.1. Introduction..................................................................................................................................................................................................11
3.2. Power Supply Connection.......................................................................................................................................................................11
3.3. Serial Console ConnectionandConfiguration .................................................................................................................................11
4/ Step-by-Step MSH8900 Switch Configuration ........................................................................................................................13
4.1. Log In to the Switch CLI...........................................................................................................................................................................13
4.2. Configure the MSH8900 Switch (Static IP Source).......................................................................................................................14
4.3. Configure the MSH8900 Switch (DHCP IP Source)........................................................................................................................14
4.4. Verify MSH8900 Switch Management IP Details and VLANs....................................................................................................15
4.5. Connect the MS1300 Platform to the Network (Management Uplink)..................................................................................15
4.6. Confirm Proper Networking Configuration (Management Network).....................................................................................16
4.7. Connect the MS1300 Platform to the Network (Payload/Data Network).............................................................................16
4.8. Confirm Proper NetworkingConfiguration (Spanning-Tree)....................................................................................................16
4.9. Confirm Proper Networking Configuration (Payload/Data Network)....................................................................................17
5/ Management Configuration............................................................................................................................................................18
5.1. Set Up Access to the ShMC ....................................................................................................................................................................18
5.2. Configure the MSH8900 ShMC and the BMC/FRU0 on Each MSP Node (Static IP Source).............................................19
5.3. Configure the MSH8900 ShMC and the BMC/FRU0 on Each MSP Node (DHCP IP Source) .............................................19
5.4. Confirm Configurations.........................................................................................................................................................................20
List of Tables
Table 1: Faceplate connectors and LEDs....................................................................................................................................................6
Table 2: User infrastructure equivalent form example using an MS1300 platform with 3 MSP8050 nodes..................9
List of Figures
Figure 1: Platform architecture..................................................................................................................................................................... 4
Figure 2: MS1300 management interconnections...................................................................................................................................5
Figure 3: Rack architecture equivalence.....................................................................................................................................................5
Figure 4: Faceplate connectors and LEDs..................................................................................................................................................6
Figure 5: Factory default IP addresses........................................................................................................................................................7
Figure 6: Interface paths with a serial console connection...............................................................................................................13

MS1300 Getting Started | VLAN-segregated Management and Payload Networks
www.symkloud.com // 3
1/ Introduction
The factory default network configuration of the MS1300 platform assigns the management traffic to VLAN 4093 and the
payload data traffic to VLAN 1. Both traffic flows are received and sent untagged (without 802.1Q VLAN tags) on the
corresponding external ports (the management port and the uplink port of the hub).
The switch with shelf management controller (ShMC) is referred to as a hub in this document.
This use case describes the network integration steps to get started with the MS1300 platform where the traffic
(management and payload data) passes over two different network links that are segregated either by VLAN from
a single switch or from two different switches that are physically interconnected. The target configuration is
rather similar to the default configuration but is different in that it requires mandatory spanning-tree configurations
in order to guarantee a loop-free topology. Additionally, in order to be closer to real cases, the payload data traffic is
changed to a different VLAN. The ports corresponding to the management link and the payload data uplink are both
configured as 802.1Q trunk interfaces.
The steps described in this use case assume that the MS1300 has default configurations loaded in all its elements
(factory default).
Kontron created other use cases related to the MS1300 network configuration. You may refer to them if you want to:
Create a common network for management and payload traffic
This use case describes the network integration steps to get started with the MS1300 platform when the factory
default networksettings needtobe changed tohave all traffic (management andpayload data) passingover the same
network uplink.
Create physically isolated management and payload networks
This use case describes the network integration steps to get started with the MS1300 platform where the traffic
(management and payload data) passes over two network links from two different switches that are physically
isolated. This is similar to thedefault configuration of the MS1300 when the payload data traffic is kept onVLAN 1. For
this use case, in order to be closer to real cases, the payload data traffic is changed to a different VLAN and the
corresponding uplink is configured as 802.1Q trunk interface. The traffic on the management link is kept untagged.

MS1300 Getting Started | VLAN-segregated Management and Payload Networks
www.symkloud.com // 4
Note that each MS1300 platform like most rack-mounted deployments contains a switch. It is therefore recommended
that you identify the appropriate upstream topology with the help of the IT/network personnel managing the upstream
network hardware and configuration. This will facilitate the process down the road.
Each section in this application note contains an introduction with general information, followed by steps to perform
platform configuration. The sections covered are shown in black on the flow diagram below.
1.1. Platform Architecture
The architecture and components of an MS1300 platform are similar to those of a rack in a data center. The platform
contains the equivalent of 1 top-of-rack (ToR) switch and up to 6 servers internally interconnected within the platform, all
in a 1U chassis.
Figure 1: Platform architecture
Unboxing the
platform Initial system
connections Switch
configuration Management
configuration Payload
access OS
installation Performance
assessment

MS1300 Getting Started | VLAN-segregated Management and Payload Networks
www.symkloud.com // 5
Each individual modular server processing node (MSP node) has network connections to the switch.
Figure 2: MS1300 management interconnections
Figure 3: Rack architecture equivalence

MS1300 Getting Started | VLAN-segregated Management and Payload Networks
www.symkloud.com // 6
Figure 4: Faceplate connectors and LEDs
Table 1: Faceplate connectors and LEDs
Label
Description
Faceplate marking
1
Management 1GbE RJ45 port
MNGT
2
Serial console RJ45 port
1010
3-4
10GbE SFP+ uplink port
1,2
5
Quad GbE RJ45 uplink ports
3,4,5,6
6
ID LED (Blue):
Payload power removed = On
Identify command in progress = Blinking
Payload power is on = Off
None
7
Power LED (Green):
Payload power is on =On
Hub hosts the active ShMC = On
Payload power removed = Off
None
8
Status LED (Amber):
Hub transitioning when power button pressed
(clean shutdown request) = Blinking
Hub operating under normal conditions = Off
None

MS1300 Getting Started | VLAN-segregated Management and Payload Networks
www.symkloud.com // 7
Figure 5: Factory default IP addresses

MS1300 Getting Started | VLAN-segregated Management and Payload Networks
www.symkloud.com // 8
2/Introduction and Planning
Kontron strongly recommends working with facility IT/Network personnel because this
platform contains a switch.
As with any switching appliance, undesired behaviors may occur within the network as a
result of incomplete or inadequate configurations.
Note about Spanning Tree
The Spanning Tree Protocol is a network protocol that builds loop-free logical
topologies for Ethernet networks. While not mandatory in some simple topologies where
logical (VLAN) or physical (Ethernet segments) segregations do not introduce loops (i.e.
point-to-point connections), it is often essential to scale up networks with complete
multi-link redundant architecture.
The MS1300 platform does not support PVST (Per-VLAN Spanning Tree). If the network
infrastructure you are connecting the MS1300 to is running PVST, a proper
interoperability between PVST and MSTP (or STP/RSTP) will require the configuration of
a common Spanning Tree instance across the network infrastructure. On Cisco, or other
vendors that have implemented PVST, this common Spanning Tree will be built from the
untagged VLAN 1. It is therefore mandatory to configure VLAN 1 as the native VLAN for
the PVST based ToR switches on the interfaces that will interconnect to the MS1300.
By completing the steps described in this section, you will configure your switch in order to be ready to connect the
MS1300 platform to your network infrastructure. Once the network cable is connected to the platform, you will have the
ability to access the switch management interface.
Prior to performing the steps described in Section 4/, speak with the IT/network personnel responsible for the hardware
and configuration of the network into which the MS1300 platform will be deployed and share the following details:
1. Multiple Spanning Tree Protocol (MSTP) is enabled.
2. STP and RSTP (Spanning Tree and Rapid Spanning Tree Protocols) are also available.
3. Management and payload networks are segregated by VLAN.
This use case will implement Spanning Tree best practices on bothsides of the interconnection.
It is important to complete the switch configuration before plugging in the network
cables. The physical connection of the network is described starting at Section 4.5.
Follow the steps in the order in which they are presented for proper network
configuration.
The VLANs, subnets and IPs used in this document are the default Kontron values. A valid equivalent must be determined
for all the values shown in bold orange based on your infrastructure. Refer to Table 2 for a form that includes the
Kontron defaults and space to enter the network infrastructure equivalences.

MS1300 Getting Started | VLAN-segregated Management and Payload Networks
www.symkloud.com // 9
Table 2: User infrastructure equivalent form example using an MS1300 platform with 3 MSP8050 nodes
Elements to plan per network
Kontron default or
value used for
example purposes
by Kontron
User value
Comment
Internal Management VLAN
4094
Not exposed
Not exposed outside the platform.
Used exclusively by the platform
management for internal
communication. This VLAN cannot
be changed.
INTERNAL_IPMI_VLAN
4093*
4093*
Used through the platform to access
the different management devices:
system monitor, MSP node BMCs,
and switch Web GUI and CLI. The
Management port is configured to
access this VLAN by default.
INTERNAL_DATA_VLAN
10
Used to segregate data/payload
traffic inside the MS1300 platform.
This VLAN is not present by default
on the platform. It isused for
example purposes in the
configuration shown for this use
case.
ShMC IP
Switch IP
MSP node 1 BMC IP (FRU0)
MSP node 2 BMC IP (FRU0)
MSP node 3 BMC IP (FRU0)
192.168.101.1/24
192.168.101.10/24
192.168.101.11/24
192.168.101.12/24
192.168.101.13/24
Hub management IP / System
monitor Web GUI
Switch IP
MSP node BMC IP
Management ToR switch IP
192.168.101.254/2
4
This IP is used for example purposes
in the configuration shown for this
use case. It represents the IP of your
Management ToR switch.
Management ToR switch VLAN
4093
This VLAN is used for example
purposes in the configuration
shown for this use case. It
represents the VLAN of your
Management ToR switch.
Payload/Data ToR switch IP
192.168.10.254/24
This IP is used for example purposes
in the configuration shown for this
use case. It represents the IP of your
Payload/Data ToR switch.
Payload/Data ToR switch VLAN
10
This VLAN is used for example
purposes in the configuration
shown for this use case. It
represents the VLAN of your
Payload/Data ToR switch.
*Management VLAN 4093 can be changed. However, this application note does not cover
all the steps to perform this change. There are multiple modifications to be done in the
switch configuration and the BMC configuration (ShMC and MSP node BMCs).

MS1300 Getting Started | VLAN-segregated Management and Payload Networks
www.symkloud.com // 10
Here is an example of a configuration that might be required on your ToR switch prior to connecting the MS1300 platform.
The example is for a Cisco C3560X-24T-S switch. VLAN 10 and IP address 192.168.10.254 are used by the Payload/Data
ToR switch and VLAN 4093 and IP address 192.168.101.254 are used by the Management ToR switch.
Command
Purpose
switch#
switch# configure terminal
switch(config)# spanning-tree mode pvst
switch(config)# spanning-tree extend system-id
switch(config)# vlan 1
switch(config-vlan)# exit
switch(config)# vlan 10
switch(config-vlan)# exit
switch(config)# vlan 4093
switch(config-vlan)# exit
switch(config)# interface vlan 10
switch(config-if)# ip address 192.168.10.254
255.255.255.0
switch(config-if)# exit
switch(config)# interface vlan 4093
switch(config-if)# ip address 192.168.101.254
255.255.255.0
switch(config-if)# exit
switch(config)# interface gigabitEthernet 0/1
switch(config-if)# switchport trunk
encapsulation dot1q
switch(config-if)# switchport mode trunk
switch(config-if)# switchport trunk native
vlan 1
switch(config-if)# switchport trunk allowed
vlan add 1,10
switch(config-if)# speed 1000
switch(config-if)# duplex full
switch(config-if)# exit
switch(config)# interface gigabitEthernet 0/2
switch(config-if)# switchport trunk
encapsulation dot1q
switch(config-if)# switchport mode trunk
switch(config-if)# switchport trunk native
vlan 1
switch(config-if)# switchport trunk allowed
vlan add 1,4093
switch(config-if)# speed 1000
switch(config-if)# duplex full
switch(config-if)# end
switch#
From privileged EXEC mode, enter global
configuration mode.
Configure spanning-tree mode to PVST.
Enable extend system-id.
Enter VLAN 1 in the database.
Exit VLAN database.
Enter VLAN 10 in the database.
Exit VLAN database.
Enter VLAN 4093 in the database.
Exit VLAN database.
Enter interface VLAN 10 configuration mode.
Define VLAN 10 IP address and subnet.
Exit interface configuration mode.
Enter interface VLAN 4093 configuration mode.
Define VLAN 4093 IP address and subnet.
Exit interface configuration mode.
Enter interface 0/1 configuration mode.
Configure dot1q encapsulation (IEEE 802.1Q is a
standard protocol for interconnecting multiple
switches and routers and for defining VLAN
topologies).
Configure interface mode to trunking layer 2 VLAN
port.
Define the native VLAN 1 for a trunk interface.
Add VLAN 1 and 10 to the allowed VLAN list.
Configure the speed of a given Ethernet interface
to 1Gbps.
Force full-duplex operation.
Exit interface configuration mode.
Enter interface 0/2 configuration mode.
Configure dot1q encapsulation (IEEE 802.1Q is a
standard protocol for interconnecting multiple
switches and routers and for defining VLAN
topologies).
Configure interface mode to trunking layer 2 VLAN
port.
Define the native VLAN 1 for a trunk interface.
Add VLAN 1 and 4093 to the allowed VLAN list.
Configure the speed of a given Ethernet interface
to 1Gbps.
Force full-duplex operation.
Return to privileged EXEC mode.
The components used in the sample setup described in this application note are:
Cisco C3560X-24T-S
Kontron MS1300 platform (including an MSH8900 hub and 3 MSP8050 modular server processing nodes running
factory default configurations)
The instructions included above are provided as a reference for demonstration purposes
only. Instructions may need to be adapted based on the network configuration and/or
the hardware used.

MS1300 Getting Started | VLAN-segregated Management and Payload Networks
www.symkloud.com // 11
3/Initial Platform Connections
3.1. Introduction
By completing the steps described in this section, you will have access to:
The platform serial console used to access and configure management and payload components.
3.2. Power Supply Connection
Connect appropriately rated cables from an
external power source to each power supply on
the rear of the unit. The unit will power on as
soon as external power is applied.
3.3. Serial Console Connection and Configuration
Use the RJ45 to DB9 adapter provided with the platform
to connect a (non-crossover) Ethernet cable to
establish a serial connection between
PC and the RJ45 console port of the hub (faceplate
marking "1010"; see label 2 in Figure 4) of the MS1300.
Configure a serial console tool (e.g.: PuTTY) with the
correct COM-port for your system using the following
parameters:
Speed (Baud) = 115200
Data bits = 8
Stop bits = 1
Parity = none
Flow Control = none
Unboxing the
platform Initial system
connections Switch
configuration Management
configuration Payload
access OS
installation Performance
assessment

MS1300 Getting Started | VLAN-segregated Management and Payload Networks
www.symkloud.com // 12
You have now completed section Initial System Connections.
You should now have access to:
The platform serial console used to access and configure management and payload components.
You can now proceed to section Switch Configuration.
Unboxing the
platform Initial system
connections Switch
configuration Management
configuration Payload
access OS
installation Performance
assessment

MS1300 Getting Started | VLAN-segregated Management and Payload Networks
www.symkloud.com // 13
4/Step-by-Step MSH8900 Switch Configuration
4.1. Log In to the Switch CLI
To access the switch CLI using the Ctrl+g - command:
1. Simultaneously press and hold the
2. Release both keys
3. minus
4. Press the Enter key and release it
Hint: It is preferable to use the Ctrl key located on the left of the keyboard.
- - -
twice in a row.
Log in using the default credentials user: admin and password: admin.
Command
Purpose
MSH8900 Login: Ctrl+g -
Username: admin
Password: admin
#
Use HOTKEY to redirect serial console multiplexer to
the switch CLI.
The # prompt means the switch was reached.
The serial interface of the hub includes a multiplexing functionality that can establish a serial console link with each
component of the platform through a series of hotkeys (Figure 6).
Figure 6: Interface paths with a serial console connection
Unboxing the
platform Initial system
connections Switch
configuration Management
configuration Payload
access OS
installation Performance
assessment

MS1300 Getting Started | VLAN-segregated Management and Payload Networks
www.symkloud.com // 14
4.2. Configure the MSH8900 Switch (Static IP Source)
If the copy running-config startup-config step is skipped or forgotten, the configuration
will be lost at the next switch reboot and/or power cycle! Make sure you perform this
step each time you change the configuration.
If the network infrastructure you are connectingthe MS1300 to is configured with PVST, it is recommended that the root
of the CST (Common Spanning Tree built between the MSTP and the PVST regions) be the MS1300 itself in order to have
all ports of the MS1300 forwarding traffic. If the root of the CST is located in the PVST region, there is a high chance that
the traffic on some ports of the MS1300 will be discarded because of the spanning-tree blocking mechanism, hence
impacting VLAN-segregated traffic when VLANs are assigned to different physical ports. Configure the MST 0 instance
with the lowest spanning-tree root priority.
Copy this command list afterhaving adapted it based on the values selected in Table 2.
Command
Purpose
# configure terminal
vlan 10
name DATA
exit
interface vlan 4093
ip address 192.168.101.10 255.255.255.0
exit
interface Ethernet 1/3
switchport hybrid allowed vlan add 10
exit
interface Ethernet 1/7-24
switchport hybrid allowed vlan add 10
switchport hybrid native vlan 10
exit
interface Ethernet 1/25
switchport hybrid allowed vlan add 4093
no switchport hybrid native vlan 4093
exit
spanning-tree mst name SYMKLOUD revision 0
spanning-tree mst 1 vlan 10
spanning-tree mst 2 vlan 4093
spanning-tree mst 0 priority 0
end
copy running-config startup-config
Enter configuration mode.
Create VLAN 10 in the VLAN database.
Enter a name for VLAN 10.
Exit VLAN mode.
Enter VLAN 4093 interface configuration mode.
Configure VLAN 4093 IP address and subnet.
Exit Interface configuration mode.
Enter 1/3 uplink interface configuration mode.
Add VLAN 10 to the allowed hybrid mode VLAN list.
Exit the interface configuration mode.
Enter 1/7-24 interfaces (MSP nodes) configuration mode.
Add VLAN 10 to the allowed hybrid mode VLAN list.
Configure VLAN 10 as the native VLAN for 1/7-24
interfaces (optional / the payload data flow can also
be sent with a VLAN tag value of 10. In this case, the
OS of the MSP nodes’s OS needs to be configured
accordingly and this command line is not necessary).
Exit interface configuration mode.
Enter 1/25 management interface configuration mode.
Add VLAN 4093 to the allowed hybrid mode VLAN list.
Deconfigure VLAN 4093 as being the native VLAN.
Exit the interface configuration mode.
Enter the region name and revision.
Create MSTP instance 1 and assign VLAN 10 to it.
Create MSTP instance 2 and assign VLAN 4093 to it.
Configure mst 0 with priority 0.
Exit configuration mode.
Save the running-config to startup-config.
4.3. Configure the MSH8900 Switch (DHCP IP Source)
If the copy running-config startup-config step is skipped or forgotten, the configuration
will be lost at the next switch reboot and/or power cycle! Make sure you perform this
step each time you change the configuration.
If the network infrastructure you are connecting the MS1300 to is configured with PVST, it is recommended that theroot
of the CST (Common Spanning Tree built between the MSTP and the PVST regions) be the MS1300 itself in order to have
all ports of the MS1300 forwarding traffic. If the root of the CST is located in the PVST region, there is a high chance that
the traffic on some ports of the MS1300 will be discarded because of the spanning-tree blocking mechanism, hence
impacting VLAN-segregated traffic when VLANs are assigned to different physical ports. Configure the MST 0 instance
with the lowest spanning-tree root priority.

MS1300 Getting Started | VLAN-segregated Management and Payload Networks
www.symkloud.com // 15
Copy this command list afterhaving adapted it based on the values selected in Table 2.
Command
Purpose
# configure terminal
vlan 10
name DATA
exit
interface vlan 4093
ip address ip address dhcp
exit
interface Ethernet 1/3
switchport hybrid allowed vlan add 10
exit
interface Ethernet 1/7-24
switchport hybrid allowed vlan add 10
switchport hybrid native vlan 10
exit
interface Ethernet 1/25
switchport hybrid allowed vlan add 4093
no switchport hybrid native vlan 4093
exit
spanning-tree mst name SYMKLOUD revision 0
spanning-tree mst 1 vlan 10
spanning-tree mst 2 vlan 4093
spanning-tree mst 0 priority 0
end
copy running-config startup-config
Enter configuration mode.
Create VLAN 10 in the VLAN database.
Enter a name for VLAN 10.
Exit VLAN mode.
Enter VLAN 4093 interface configuration mode.
Configure VLAN 4093 IP to use DHCP.
Exit Interface configuration mode.
Enter 1/3 uplink interface configuration mode.
Add VLAN 10 to the allowed hybrid mode VLAN list.
Exit the interface configuration mode.
Enter 1/7-24 interfaces (MSP nodes) configuration mode.
Add VLAN 10 to the allowed hybrid mode VLAN list.
Configure VLAN 10 as the native VLAN for 1/7-24
interfaces (optional / the payload data flow can also
be sent with a VLAN tag value of 10. In this case, the
OS of the MSP nodes’s OS needs to be configured
accordingly and this command line is not necessary).
Exit interface configuration mode.
Enter 1/25 management interface configuration mode.
Add VLAN 4093 to the allowed hybrid mode VLAN list.
Deconfigure VLAN 4093 as being the native VLAN.
Exit the interface configuration mode.
Enter the region name and revision.
Create MSTP instance 1 and assign VLAN 10 to it.
Create MSTP instance 2 and assign VLAN 4093 to it.
Configure mst 0 with priority 0.
Exit configuration mode.
Save the running-config to startup-config.
4.4. Verify MSH8900 Switch Management IP Details and VLANs
Note that it may take several seconds to obtain an IP from your DHCP server.
Command
Purpose
# show interface vlan 4093
VLAN1
LINK: 00-a0-a5-a6-8c-fa Mtu:1500 <UP BROADCAST RUNNING
MULTICAST>
IPv6: fe80::2a0:a5ff:fea6:8cfa/64 <ANYCAST TENTATIVE
AUTOCONF>
IPv4: 192.168.101.10/24 192.168.101.255
Display configuration settings
associated with the switch's network
interface.
4.5. Connect the MS1300 Platform to the Network (Management Uplink)
The ShMC and BMCs are preconfigured with addresses within the 192.168.101.xxx range.
If your network uses that specific range, plugging in the system could cause some IP
address conflicts with undesired side effects. If this is the case, complete the steps in
Section 5/ Management Configuration before plugging in the cable as described in
Sections 4.5 and 4.7 and performing the verification steps in Sections 4.6, 4.8 and 4.9.
Connect your management network to the
management 1GbE RJ45 port (see label 1 on
Figure 4).

MS1300 Getting Started | VLAN-segregated Management and Payload Networks
www.symkloud.com // 16
4.6. Confirm Proper Networking Configuration (Management Network)
Confirm the validity of the networking configuration by testing network connectivity to the external network via the
management IP of the ToR switch.
Command
Purpose
# ping ip 192.168.101.254
PING server 192.168.101.254, 56 bytes of data.
64 bytes from 192.168.101.254: icmp_seq=0, time=0ms
64 bytes from 192.168.101.254: icmp_seq=1, time=0ms
64 bytes from 192.168.101.254: icmp_seq=2, time=0ms
64 bytes from 192.168.101.254: icmp_seq=3, time=0ms
64 bytes from 192.168.101.254: icmp_seq=4, time=0ms
Sent 5 packets, received 5 OK, 0 bad
Ping external management network
using the management IP of the ToR
switch.
4.7. Connect the MS1300 Platform to the Network (Payload/Data Network)
Connect your payload/data network to uplink 3
(see label 5 on Figure 4).
4.8. Confirm Proper Networking Configuration (Spanning-Tree)
Confirm that the spanning-tree configuration works properly by looking at the forwarding states of the uplinks connected
to your networks: Ethernet 1/3 (payload/data network) and Ethernet 1/25 (management network). Both interfaces should
be in forwarding state on MST instance 0. You should also look at the forwarding states of the interfaces on the ToR
-
Command
Purpose
# sh spanning-tree mst 0
CIST Bridge STP Status
Bridge ID : 32768.00-A0-A5-80-52-9C
Root ID : 32768.00-A0-A5-80-52-9C
Root Port : -
Root PathCost: 0
Regional Root: 32768.00-A0-A5-80-52-9C
Int. PathCost: 0
Max Hops : 20
TC Flag : Steady
TC Count : 148
TC Last : 0d 00:02:59
Mst Port Port Role State Pri PathCost Edge P2P Uptime
----- --------- -------------- ---------- ----------- ---- --- -------------
CIST Eth 1/3 DesignatedPort Forwarding 128 20000 No Yes 0d 00:26:02
CIST Eth 1/7 DesignatedPort Forwarding 128 20000 Yes Yes 0d 00:26:20
CIST Eth 1/8 DesignatedPort Forwarding 128 20000 Yes Yes 0d 00:26:20
====== [truncated] =====
CIST Eth 1/25 DesignatedPort Forwarding 128 20000 No Yes 0d 00:26:27
====== [truncated] =====
Display
spanning-
tree mst
0 status.

MS1300 Getting Started | VLAN-segregated Management and Payload Networks
www.symkloud.com // 17
4.9. Confirm Proper Networking Configuration (Payload/Data Network)
Confirm the validity of the networking configuration by retesting the connectivity on the management network, and by
testing network connectivity to an external payload/data network. To do so, we will temporarily enable VLAN routing on
VLAN 10 and define an IP for it.
Command
Purpose
# ping ip 192.168.101.254
PING server 192.168.101.254, 56 bytes of data.
64 bytes from 192.168.101.254: icmp_seq=0, time=0ms
64 bytes from 192.168.101.254: icmp_seq=1, time=0ms
64 bytes from 192.168.101.254: icmp_seq=2, time=0ms
64 bytes from 192.168.101.254: icmp_seq=3, time=0ms
64 bytes from 192.168.101.254: icmp_seq=4, time=0ms
Sent 5 packets, received 5 OK, 0 bad
#
# configure terminal
(config)# interface vlan 10
(config-if-vlan)# ip address 192.168.10.10 255.255.255.0
(config-if-vlan)# end
#
# ping ip 192.168.10.254
PING server 192.168.10.254, 56 bytes of data.
64 bytes from 192.168.10.254: icmp_seq=0, time=0ms
64 bytes from 192.168.10.254: icmp_seq=1, time=0ms
64 bytes from 192.168.10.254: icmp_seq=2, time=0ms
64 bytes from 192.168.10.254: icmp_seq=3, time=0ms
64 bytes from 192.168.10.254: icmp_seq=4, time=0ms
Sent 5 packets, received 5 OK, 0 bad
Ping external management network
using the management IP of the ToR
switch.
Enter configuration mode.
Enter VLAN 10 interface configuration
mode.
Define an IP address and netmask for
VLAN 10.
Exit interface configuration mode.
Ping external payload/data network
using the IP configured on the ToR
switch.
You have now completed section Switch Configuration.
You should now have configured your switch and should have access to the switch management web interface of the
MS1300 platform switch using the defined switch IP.
You can now proceed to section Management Configuration.
Unboxing the
platform Initial system
connections Switch
configuration Management
configuration Payload
access OS
installation Performance
assessment

MS1300 Getting Started | VLAN-segregated Management and Payload Networks
www.symkloud.com // 18
5/ Management Configuration
By completing the steps described in this section, you will set up the management IP address, i.e. the address required to
access the platform management features.
After completing this stage, you will be able to access the following interfaces:
1. System Manager RESTFUL API interface
2. System Manager web interface
3. ShMC and BMC IPMI Over LAN (IOL) and Serial Over LAN (SOL) interfaces
These interfaces (or any combination thereof) can be used to manage the MS1300 platform, perform firmware upgrades,
monitor system health and configure the platform more in depth.
5.1. Set Up Access to the ShMC
To access the ShMC CLI using the Ctrl+g 0 command:
1.
2. Release both keys
3. 0
4. Press the Enter key and release it
Hint: It is preferable to use the Ctrl key located on the left of the keyboard.
Log in the ShMC CLI using the default credentials user: admin and password: admin.
Command
Purpose
Ctrl+g 0
MSH8900 Login: admin
Password: admin
ipmitool>
Use HOTKEY to redirect serial console
multiplexer to the ShMC CLI.
The ipmitool> prompt means the ShMC was
reached.
Unboxing the
platform Initial system
connections Switch
configuration Management
configuration Payload
access OS
installation Performance
assessment

MS1300 Getting Started | VLAN-segregated Management and Payload Networks
www.symkloud.com // 19
5.2. Configure the MSH8900 ShMC and the BMC/FRU0 on Each MSP Node (Static IP
Source)
The configuration of the gateway is optional for a static IP. Copy this command list after having adapted it based on the
values selected in Table 2.
The command list must be adapted based on the number of MSP nodes installed in the
platform as well as their location (slot 1, 2 or 3). See Figure 5 for the addresses of the BMCs
of the MSP nodes 0x82 for the BMC of MSP node 1, 0x84 for the BMC of MSP node 2, 0x86
for the BMC of MSP node 3.
Command
Purpose
ipmitool> set targetaddr 0x20
lan set 1 ipsrc static
lan set 1 ipaddr 192.168.101.1
lan set 1 netmask 255.255.255.0
lan set 1 defgw ipaddr 192.168.101.254
set targetaddr 0x82
lan set 1 ipsrc static
lan set 1 ipaddr 192.168.101.11
lan set 1 netmask 255.255.255.0
lan set 1 defgw ipaddr 192.168.101.254
set targetaddr 0x84
lan set 1 ipsrc static
lan set 1 ipaddr 192.168.101.12
lan set 1 netmask 255.255.255.0
lan set 1 defgw ipaddr 192.168.101.254
set targetaddr 0x86
lan set 1 ipsrc static
lan set 1 ipaddr 192.168.101.13
lan set 1 netmask 255.255.255.0
lan set 1 defgw ipaddr 192.168.101.254
set targetaddr 0x20
Target ShMC IPMI address.
Configure IP source to static.
Define static IP address.
Define netmask.
Define default gateway IP address.
Target BMC/FRU0 of MSP node 1.
Configure IP source to static.
Define static IP address.
Define netmask.
Define default gateway IP address.
Target BMC/FRU0 of MSP node 2.
Configure IP source to static.
Define static IP address.
Define netmask.
Define default gateway IP address.
Target BMC/FRU0 of MSP node 3.
Configure IP source to static.
Define static IP address.
Define netmask.
Define default gateway IP address.
Target ShMC IPMI address.
5.3. Configure the MSH8900 ShMC and the BMC/FRU0 on Each MSP Node (DHCP IP Source)
Note that it may take several seconds to gather an IP from the DHCP server. Copy this command list after having adapted
it based on the values selected in Table 2.
The command list must be adapted based on the number of MSP nodes installed in the
platform as well as their location (slot 1, 2 or 3). See Figure 5 for the addresses of the BMCs
of the MSP nodes 0x82 for the BMC of MSP node 1, 0x84 for the BMC of MSP node 2, 0x86
for the BMC of MSP node 3.
Command
Purpose
ipmitool> set targetaddr 0x20
lan set 1 ipsrc dhcp
set targetaddr 0x82
lan set 1 ipsrc dhcp
set targetaddr 0x84
lan set 1 ipsrc dhcp
set targetaddr 0x86
lan set 1 ipsrc dhcp
set targetaddr 0x20
Target ShMC IPMI address.
Configure IP source to DHCP.
Target BMC/FRU0 of MSP node 1.
Configure IP source to DHCP.
Target BMC/FRU0 of MSP node 2.
Configure IP source to DHCP.
Target BMC/FRU0 of MSP node 3.
Configure IP source to DHCP.
Target ShMC IPMI address.

MS1300 Getting Started | VLAN-segregated Management and Payload Networks
www.symkloud.com // 20
5.4. Confirm Configurations
Check the following configurations: IP address source (Static or DHCP), IP address, subnet mask, default gateway IP and
802.1q VLAN ID. Copy this command list after having adapted it based on the valuesselected in Table 2.
The command list must be adapted based on the number of MSP nodes installed in the
platform as well as their location (slot 1, 2 or 3). See Figure 5 for the addresses of the BMCs
of the MSP nodes 0x82 for the BMC of MSP node 1, 0x84 for the BMC of MSP node 2, 0x86
for the BMC of MSP node 3.
Command
Purpose
ipmitool> set targetaddr 0x20
lan print
set targetaddr 0x82
lan print
set targetaddr 0x84
lan print
set targetaddr 0x86
lan print
set targetaddr 0x20
Redirect bridging to the ShMC.
Confirm configuration of the the ShMC.
Redirect bridging to the BMC of MSP node 1.
Confirm configuration of the BMC of MSP node 1.
Redirect bridging to the BMC of MSP node 2.
Confirm configuration of the BMC of MSP node 2.
Redirect bridging to the BMC of MSP node 3.
Confirm configuration of the BMC of MSP node 3.
Redirect bridging to the ShMC.
If you have not physically connected the MS1300 platform to the network as described in
Sections 4.5 and 4.7 because of possible IP address conflicts, do so now. Also perform
the switch configuration verification steps that were omitted (Sections 4.6, 4.8 and 4.9).
You have now completed section Management Configuration.
You should now be able to start managing your platform and have access to the System Monitor web interface using the
IP configured for the ShMC.
To properly and fully complete the configuration, please refer to the platform documentation at symkloud.com.
Unboxing the
platform Initial system
connections Switch
configuration Management
configuration Payload
access OS
installation Performance
assessment
Table of contents
Other Kontron Switch manuals

Kontron
Kontron CP930 User manual

Kontron
Kontron CP6924 User manual

Kontron
Kontron CP6924-RA-A User manual

Kontron
Kontron CP933 User manual

Kontron
Kontron MicroTCA AM5901 User manual

Kontron
Kontron CP3923 Series User manual

Kontron
Kontron MSH8900 User manual

Kontron
Kontron AM4904 User manual

Kontron
Kontron ETX CD User manual

Kontron
Kontron CP6923 User manual

Kontron
Kontron VX3910 User manual

Kontron
Kontron CP6930-1 User manual

Kontron
Kontron CP932 User manual

Kontron
Kontron RMVS KVM Series User manual

Kontron
Kontron RES2404-PTP-PoE User manual

Kontron
Kontron MSH8900 User manual

Kontron
Kontron CP6940 User manual

Kontron
Kontron CP6930-RM User manual

Kontron
Kontron CP6924-1 User manual