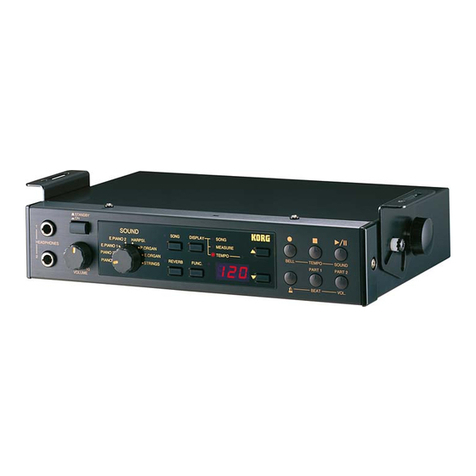
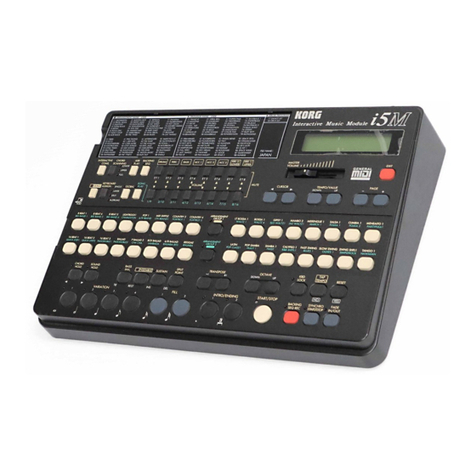
Korg i40M User manual

AI2 Synthesis System
i40M
Interactive Music Module
User’s
Guide

IMPORTANT SAFETY INSTRUCTIONS
WARNING —When using electrical products, basic precautions should be followed, including the following:
SAVETHESE INSTRUCTIONS
GROUNDING INSTRUCTIONS
This product must be grounded (earthed). If it should malfunction or breakdown, grounding
provides a path of least resistance for electric current to reduce the risk of electric shock.
This product is equipped with a cord having an equipment-grounding conductor and a
grounding plug.The plug must be plugged into an appropriate outlet that is properly installed
and grounded in accordance with the local codes and ordinances.
DANGER – Improper connection of the equipment-grounding conductor can result in a risk
of electric shock. Check with a qualified electrician or serviceman if you are in doubt as to
whether the product is properly grounded.Do not modify the plug provided with the product
– if it will not fit the outlet, have a proper outlet installed by a qualified electrician.
1. Read all the instructions before using the
product.
2. Do not use this product near water — for
example, neara bathtub,washbowl, kitchen sink,
in a wet basement, or near a swimming pool, or
the like.
3. This product should be used only with the cart or
stand that is recommended by the manufacturer.
4. This product, either alone or in combination with
an amplifier and headphones or speakers, may
be capable of producing sound levels that could
cause permanent hearing loss. Do not operate
for a long period of time at a high volume level or
at a level that is uncomfortable.If you experience
any hearing loss or ringing in the ears, you
should consult an audiologist.
5. The product should be located so that its location
or position does not interfere with its proper
ventilation.
6. The product should be located away from heat
sources such as radiators, heat registers, or
other products that produce heat.
7. The product should be connected to a power
supply of the type described in the operating
instructions or as marked on the product.
8. The power-supply cord of the product should be
unplugged from the outlet when left unused for a
long period of time.
9. Care should be taken so that objects do not fall
and liquids are not spilled into the enclosure
through openings.
10.The product should be serviced by qualified
personnel when:
A.The power-supply cord or the plug has been
damaged; or
B.Objects have fallen, or liquid has been spilled
into the product; or
C.The product has been exposed to rain; or
D.The product does not appear to operate
normally or exhibits a marked change in
performance; or
E.The product has been dropped, or the
enclosure damaged.
11.Do not attempt to service the product beyond
that described in the user-maintenance
instructions. All other servicing should be
referred to qualified service personnel.
CAUTION: TO REDUCE THE RISK OF
ELECTRIC SHOCK, DO NOT REMOVE
COVER (OR BACK). NO USER-SERVICEABLE
PARTS INSIDE. REFER SERVICING TO
QUALIFIED SERVICE PERSONNEL.
CAUTION
RISK OF ELECTRIC SHOCK
DO NOT OPEN
The lightning flash with the arrowhead symbol
within an equilateral triangle, is intended to alert
the user to the presence of uninsulated
“dangerous voltage”within the product’s
enclosure that may be of sufficient magnitude to
constitute a risk of electric shock to persons.
The exclamation point within an equilateral
triangle is intended to alert the user to the
presence of important operating and
maintenance (servicing) instructions in the
literature accompanying the product.

Data Handling
Data in memory may sometimes be lost due to incorrect user action. Be sure to save important
data to floppy disk. Korg will not be responsible for damages caused by data loss.
LCD Display
Some pages of the manuals show LCD screens along with an explanation of functions and
operations. All sound names, parameter names, and values are merely examples and may not
always match the actual display you are working on.
Trademarks
Macintosh is a registered trademark ofApple Computer, Inc. MS-DOS and Windows are
registered trademarks of Microsoft Corporation.All trademarks or registered trademarks are the
property of their respective holders.
THE FCC REGULATION WARNING (FORTHE U.S.A. AND CANADA ONLY)
This equipment has been tested and found to comply with the limits for a Class B digital device,
pursuant to Part 15 of the FCC Rules. These limits are designed to provide reasonable protection
against harmful interference in a residential installation. This equipment generates, uses, and can
radiate radio frequency energy and, if not installed and used in accordance with the instructions, may
cause harmful interference to radio communications. However, there is no guarantee that interference
will not occur in a particular installation. If this equipment does cause harmful interference to radio or
television reception, which can be determined by turning the equipment off and on, the user is
encouraged to try to correct the interference by one or more of the following measures:
•Reorient or relocate the receiving antenna.
•Increase the separation between the equipment and receiver.
•Connect the equipment into an outlet on a circuit different from that to which the receiver is connected.
•Consult the dealer or an experienced radio/TV technician for help.
CANADA
THIS APPARATUS DOES NOT EXCEED THE “CLASS B”LIMITS FOR RADIO NOISE EMISSIONS
FROM DIGITAL APPARATUS SET OUT IN THE RADIO INTERFERENCE REGULATION OF THE
CANADIAN DEPARTMENT OF COMMUNICATIONS.
LE PRESENT APPAREIL NUMERIQUE N’EMET PAS DE BRUITS RADIOELECTRIQUES
DEPASSANT LES LIMITES APPLICABLES AUX APPAREILS NUMERIQUES DE LA “CLASSE B”
PRESCRITESDANS LE REGLEMENTSURLE BROUILLAGE RADIOELECTRIQUE EDICTE PAR LE
CE mark for European Harmonized Standards
CE mark which is attached to our company’s products of AC mains operated apparatus until December
31, 1996 means it conforms to EMC Directive (89/336/EEC) and CE mark Directive (93/68/EEC).
And, CE mark which is attached after January 1, 1997 means it conforms to EMC Directive
(89/336/EEC), CE mark Directive (93/68/EEC) and LowVoltage Directive (73/23/EEC).
Also, CE mark which is attached to our company’s products of Battery operated apparatus means it
conforms to EMC Directive (89/336/EEC) and CE mark Directive (93/68/EEC).
IMPORTANT NOTICE FOR THE UNITED KINGDOM
Warning-THIS APPARATUS MUST BE EARTHED
As the colours of the wires in the mains lead of this apparatus may not correspond with the coloured
markings identifying the terminals in your plug,proceed as follows:
•the wire which is coloured green and yellow must be connected to the terminal in the plug which is marked with
the letter E or by the earth symbol ,or coloured green or green and yellow.
•the wire which is coloured blue must be connected to the terminal which is marked with the letter N or coloured
black.
•the wire which is coloured brown must be connected to the terminal which is marked with the letter L or coloured
red.

Disclaimer
The information contained in this manual has been carefully revised and checked through. Due to
our constant efforts to improve our products, the specifications might differ to those in the manual.
Korg is not responsible for any eventual differences found between the specifications and the
contents of the instruction manual - the specifications being subject to change without prior notice
Liability
KORG products are manufactured under strict specifications and voltages required by each
country.These products are warranted by the KORG distributor only in each country.Any KORG
product not sold with a warranty card or carrying a serial number disqualifies the product sold
from the manufacturer's/distributor's warranty and liability. This requirement is for your own
protection and safety.
Service and User’s Assistance
For service, please contact your nearestAuthorized KORG Service Center. For more information
on KORG products, and to find software and accessories for your piano, please contact your local
Authorized KORG distributor.
Web servers
•Home page Korg Italy: “http://www.korg.it”
•Home page Korg.net: “http://www.korg.net”
•Home page Korg USA.: “http://www.korg.com”
•Home page Korg Inc.: “http://www.korg.co.jp”
Copyright © 1999 Korg Italy Spa. Printed in Italy.

How to…
v
How to...
Demo
Listening ☞P. 20
MIDI
Connecting a master keyb. ☞P. 47
Connecting a sequencer ☞P. 53
Connecting a digital piano ☞P. 48
Connecting an accordion ☞P. 49
Connecting a MIDI guitar ☞P. 52
Connecting other instrum. ☞P. 54
MIDI channel programming ☞P. 109, ☞P. 137
Arrangements and automatic
accompaniments
Selecting ☞P. 25
Starting & stopping ☞P. 26
Fill, intro, ending ☞P. 27
Changing the volume ☞P. 3
Loading from disk ☞P. 129
Creating new arrangements ☞P. 56
Programs (single sounds)
Selecting ☞P. 30
Assigning to the keyboard ☞P. 29
Editing (Perf. Edit) ☞P. 42, ☞P. 154
Standard MIDI Files (SMF, Songs)
Loading ☞P. 22
Saving ☞P. 35, ☞P. 124
Listening ☞P. 22
Erasing from memory ☞P. 120
Disk
Loading files ☞P. 128
Saving files ☞P. 131
Formatting a disk ☞P. 133

Summary
vi
Summary
Introduction . . . . . . . . . . . . . . . . . . .2
User’s guide. . . . . . . . . . . . . . . . . . . . . . . . . . . . . . . . . . . . . . . . . . . .2
Safety Instructions. . . . . . . . . . . . . . . . . . . . . . . . . . . . . . . . . . . . . . . .2
Before you begin.... . . . . . . . . . . . . . . . . . . . . . . . . . . . . . . . . . 2
Accessories . . . . . . . . . . . . . . . . . . . . . . . . . . . . . . . . . . . . . . . . . . . .2
Connecting an external amplifying system. . . . . . . . . . . . . . . . . . . . .2
Connecting the power cable . . . . . . . . . . . . . . . . . . . . . . . . . . . . . . .3
Turning on the power . . . . . . . . . . . . . . . . . . . . . . . . . . . . . . . . . . . .3
Adjusting the general volume. . . . . . . . . . . . . . . . . . . . . . . . . . . . . . .3
Adjusting the volume of the Vocal/Guitar section . . . . . . . . . . . . . . .3
The headphones . . . . . . . . . . . . . . . . . . . . . . . . . . . . . . . . . . . . . . . .4
Connecting a MIDI controller. . . . . . . . . . . . . . . . . . . . . . . . . . . . . . .4
Front and Rear Panels . . . . . . . . . . .6
Front Panel. . . . . . . . . . . . . . . . . . . . . . . . . . . . . . . . . . . . . . . . 6
Display. . . . . . . . . . . . . . . . . . . . . . . . . . . . . . . . . . . . . . . . . .12
Rear panel . . . . . . . . . . . . . . . . . . . . . . . . . . . . . . . . . . . . . . . 13
Operative modes . . . . . . . . . . . . . .15
Arrangement Play mode . . . . . . . . . . . . . . . . . . . . . . . . . . . .15
Backing Sequence mode . . . . . . . . . . . . . . . . . . . . . . . . . . . .16
Program mode. . . . . . . . . . . . . . . . . . . . . . . . . . . . . . . . . . . . 17
Song Play mode. . . . . . . . . . . . . . . . . . . . . . . . . . . . . . . . . . . 17
Song Edit mode . . . . . . . . . . . . . . . . . . . . . . . . . . . . . . . . . . . 17
Disk/Global mode. . . . . . . . . . . . . . . . . . . . . . . . . . . . . . . . . 18
Display pages. . . . . . . . . . . . . . . . . . . . . . . . . . . . . . . . . . . . . 18
Recording a display page . . . . . . . . . . . . . . . . . . . . . . . . . . . . . . . 18
Subpages . . . . . . . . . . . . . . . . . . . . . . . . . . . . . . . . . . . . . . . . . . . 19
Programming a parameter value. . . . . . . . . . . . . . . . . . . . . . . . . . 19
Tutorial . . . . . . . . . . . . . . . . . . . . .20
Demo. . . . . . . . . . . . . . . . . . . . . . . . . . . . . . . . . . . . . . . . . . . 20
Listening to the Demo. . . . . . . . . . . . . . . . . . . . . . . . . . . . . . . . . . . 20
The Backing Sequence demo. . . . . . . . . . . . . . . . . . . . . . . . . . . . . 21
Listening to the songs . . . . . . . . . . . . . . . . . . . . . . . . . . . . . . . . . . . 22
The arrangements . . . . . . . . . . . . . . . . . . . . . . . . . . . . . . . . . 25
What are styles and arrangements . . . . . . . . . . . . . . . . . . . . . . . . 25
How to program the MIDI . . . . . . . . . . . . . . . . . . . . . . . . . . . . . . . 25
Selecting an arrangement . . . . . . . . . . . . . . . . . . . . . . . . . . . . . . . 25
Starting the accompaniment . . . . . . . . . . . . . . . . . . . . . . . . . . . . . 26
Synchro start e stop . . . . . . . . . . . . . . . . . . . . . . . . . . . . . . . . . . . . 26
Fill . . . . . . . . . . . . . . . . . . . . . . . . . . . . . . . . . . . . . . . . . . . . . . . . . 27
Intro/ending . . . . . . . . . . . . . . . . . . . . . . . . . . . . . . . . . . . . . . . . . 27
Variations . . . . . . . . . . . . . . . . . . . . . . . . . . . . . . . . . . . . . . . . . . . 27
All the tracks, at once! . . . . . . . . . . . . . . . . . . . . . . . . . . . . . . . . . . 27
Fade in/out . . . . . . . . . . . . . . . . . . . . . . . . . . . . . . . . . . . . . . . . . . 27
Varying the tempo. . . . . . . . . . . . . . . . . . . . . . . . . . . . . . . . . . . . . 28
The real time tracks (Upper 1, Upper 2, Lower) . . . . . . . . . . . 29
What are the real time tracks?. . . . . . . . . . . . . . . . . . . . . . . . . . . . 29
Assigning the real time tracks to the keyboard. . . . . . . . . . . . . . . . 29
Activating and deactivating the real time tracks . . . . . . . . . . . . . . . 29
Blocking the programs of the real time tracks. . . . . . . . . . . . . . . . . 30
Changing the sounds of the real time tracks . . . . . . . . . . . . . . . . . . 30
Transposition . . . . . . . . . . . . . . . . . . . . . . . . . . . . . . . . . . . . . . . . . 31
Selecting a Keyboard Set . . . . . . . . . . . . . . . . . . . . . . . . . . . . . . . . 31
Recording a Keyboard Set . . . . . . . . . . . . . . . . . . . . . . . . . . . . . . . 31
The backing sequences . . . . . . . . . . . . . . . . . . . . . . . . . . . . . 32
What are the backing sequences? . . . . . . . . . . . . . . . . . . . . . . . . . 32
Recording the Backing Sequences . . . . . . . . . . . . . . . . . . . . . . . . . 32
Saving the Backing Sequences on disk. . . . . . . . . . . . . . . . . . . . . . 33
Deleting the Backing Sequences. . . . . . . . . . . . . . . . . . . . . . . . . . . 34
The Songs . . . . . . . . . . . . . . . . . . . . . . . . . . . . . . . . . . . . . . . 34
What are the Songs? . . . . . . . . . . . . . . . . . . . . . . . . . . . . . . . . . . . 34
Recording a song. . . . . . . . . . . . . . . . . . . . . . . . . . . . . . . . . . . . . . 34
Saving the Song as Standard MIDI File (SMF) . . . . . . . . . . . . . . . . 35
Editing Standard MIDI Files (SMF) . . . . . . . . . . . . . . . . . . . . . . . . . 36
The Vocal/Guitar section. . . . . . . . . . . . . . . . . . . . . . . . . . . . 39
Connecting a microphone or a guitar. . . . . . . . . . . . . . . . . . . . . . . 39
Using the Vocal/Guitar section. . . . . . . . . . . . . . . . . . . . . . . . . . . . 39
Changing the settings of the Vocal/Guitar section . . . . . . . . . . . . . 40
Programming the Vocal/Guitar section . . . . . . . . . . . . . . . . . . . . . 40
The programs. . . . . . . . . . . . . . . . . . . . . . . . . . . . . . . . . . . . . 42
Editing the programs . . . . . . . . . . . . . . . . . . . . . . . . . . . . . . . . . . . 42
MIDI . . . . . . . . . . . . . . . . . . . . . . . 44
What is MIDI? . . . . . . . . . . . . . . . . . . . . . . . . . . . . . . . . . . . . 44
The special channels. . . . . . . . . . . . . . . . . . . . . . . . . . . . . . . . 45
The Global channel . . . . . . . . . . . . . . . . . . . . . . . . . . . . . . . . . . . . 45
The Chord 1 and Chord 2 channels. . . . . . . . . . . . . . . . . . . . . . . . 45
The Keyboard Set channel . . . . . . . . . . . . . . . . . . . . . . . . . . . . . . . 45
The Arrangement channel . . . . . . . . . . . . . . . . . . . . . . . . . . . . . . . 46
What is General MIDI? . . . . . . . . . . . . . . . . . . . . . . . . . . . . . 46
What are Standard MIDI Files? . . . . . . . . . . . . . . . . . . . . . . . 46
Connecting the i40M to a MIDI keyboard . . . . . . . . . . . . . . . 47
Connecting the i40M to a digital piano . . . . . . . . . . . . . . . . . 48
Connecting the i40M to a MIDI accordion. . . . . . . . . . . . . . . 49
Connecting the i40M to a MIDI guitar . . . . . . . . . . . . . . . . . . 52
Connecting the i40M to an external sequencer . . . . . . . . . . . 53
Controlling another instrument with the i40M. . . . . . . . . . . . . 54
Arrangement Play mode. . . . . . . . 56
Tempo and chord scanning. . . . . . . . . . . . . . . . . . . . . . . . . . 56
Page 1: Performance monitor . . . . . . . . . . . . . . . . . . . . . . . . 57
Page 2: Style select. . . . . . . . . . . . . . . . . . . . . . . . . . . . . . . . . 58
Page 3: Track settings (1). . . . . . . . . . . . . . . . . . . . . . . . . . . . 59
Page 4: Track settings (2). . . . . . . . . . . . . . . . . . . . . . . . . . . . 60
Page 5: Ensemble/Variation change. . . . . . . . . . . . . . . . . . . 61
Page 6: Drum Mapping. . . . . . . . . . . . . . . . . . . . . . . . . . . . . 62
Page 7: Kick & Snare Designation. . . . . . . . . . . . . . . . . . . . . 62
Page 8: Keyboard scale. . . . . . . . . . . . . . . . . . . . . . . . . . . . . 63
Page 9: Effect select . . . . . . . . . . . . . . . . . . . . . . . . . . . . . . . . 64
Page 10: Effect modulation . . . . . . . . . . . . . . . . . . . . . . . . . . 64
Page 11: Effect placement . . . . . . . . . . . . . . . . . . . . . . . . . . . 64
Page 12: Effect 1 settings . . . . . . . . . . . . . . . . . . . . . . . . . . . . 64
Page 13: Effect 2 settings . . . . . . . . . . . . . . . . . . . . . . . . . . . . 64
Page 14: Vocal/Guitar mode/ Assigned parameters . . . . . . 65

Summary
vii
Page 15: Vocal effects (1) (Vocal mode). . . . . . . . . . . . . . . . .66
Page 16: Vocal Effects (2) (Vocal mode). . . . . . . . . . . . . . . . .66
Page 17: Mixer (Vocal mode) . . . . . . . . . . . . . . . . . . . . . . . .67
Page 18: Tone programming (Vocal mode). . . . . . . . . . . . . .67
Page 19: Drive programming . . . . . . . . . . . . . . . . . . . . . . . .68
Page 20: FX1 programming (Vocal mode) . . . . . . . . . . . . . .69
Page 21: FX2 programming (Vocal mode) . . . . . . . . . . . . . .70
Page 15: Guitar effects (1) (Guitar mode). . . . . . . . . . . . . . . .71
Page 16: Guitar effects (2) (Guitar mode). . . . . . . . . . . . . . . .72
Page 17: Mixer (Guitar mode). . . . . . . . . . . . . . . . . . . . . . . .72
Page 18: Tone programming (Guitar mode) . . . . . . . . . . . . .73
Page 19: Drive programming (Guitar mode) . . . . . . . . . . . . .73
Page 20: Modulation programming (Guitar mode) . . . . . . . .75
Page 21: Ambience programming (Guitar mode) . . . . . . . . .77
Page 22: NR and CR programming (Guitar mode) . . . . . . . .78
Page 23: Rename Arrangement. . . . . . . . . . . . . . . . . . . . . . .79
Page 24: Write Arrangement. . . . . . . . . . . . . . . . . . . . . . . . .79
Page 25: Write Keyboard Set . . . . . . . . . . . . . . . . . . . . . . . .80
Backing Sequence mode . . . . . . . . 81
• Saving the backing sequences before turning off. . . . . . . . .81
Page 1: Playback . . . . . . . . . . . . . . . . . . . . . . . . . . . . . . . . . .81
Page 1: Recording . . . . . . . . . . . . . . . . . . . . . . . . . . . . . . . . .82
Recording all the tracks in one go in real time. . . . . . . . . . . . . . . . . 82
Recording a track at a time in real time . . . . . . . . . . . . . . . . . . . . . 85
Page 2: Step recording. . . . . . . . . . . . . . . . . . . . . . . . . . . . . .89
Page 3: Erase Backing Sequence . . . . . . . . . . . . . . . . . . . . . .92
Page 4: Copy Backing Sequence . . . . . . . . . . . . . . . . . . . . . .92
Page 5: Edit 1. . . . . . . . . . . . . . . . . . . . . . . . . . . . . . . . . . . . .93
5-1. Delete measures . . . . . . . . . . . . . . . . . . . . . . . . . . . . . . . . . . . 93
5-2. Insert measures . . . . . . . . . . . . . . . . . . . . . . . . . . . . . . . . . . . . 93
5-3. Erase measures. . . . . . . . . . . . . . . . . . . . . . . . . . . . . . . . . . . . 94
Page 6: Edit 2. . . . . . . . . . . . . . . . . . . . . . . . . . . . . . . . . . . . .95
6-1. Copy measures. . . . . . . . . . . . . . . . . . . . . . . . . . . . . . . . . . . . 95
6-2. Bounce tracks . . . . . . . . . . . . . . . . . . . . . . . . . . . . . . . . . . . . . 96
6-3. Quantize. . . . . . . . . . . . . . . . . . . . . . . . . . . . . . . . . . . . . . . . . 96
Page 7: Shift note (Transposition) . . . . . . . . . . . . . . . . . . . . . .97
Page 8: Event edit. . . . . . . . . . . . . . . . . . . . . . . . . . . . . . . . . .97
Page 9: Extra Track settings (1). . . . . . . . . . . . . . . . . . . . . . .101
Page 10: Extra Track settings (2). . . . . . . . . . . . . . . . . . . . . .102
Page 11: Effect select . . . . . . . . . . . . . . . . . . . . . . . . . . . . . .103
Page 12: Effect modulation. . . . . . . . . . . . . . . . . . . . . . . . . .103
Page 13: Effect placement . . . . . . . . . . . . . . . . . . . . . . . . . .103
Page 14: Effect 1 settings . . . . . . . . . . . . . . . . . . . . . . . . . . .103
Page 15: Effect 2 settings . . . . . . . . . . . . . . . . . . . . . . . . . . .103
Page 16: Next Backing Sequence . . . . . . . . . . . . . . . . . . . .104
Page 17: Rename Backing Sequence. . . . . . . . . . . . . . . . . .105
Page 18: SMF converter. . . . . . . . . . . . . . . . . . . . . . . . . . . .105
Song Play mode . . . . . . . . . . . . . 106
Page 1: Performance monitor. . . . . . . . . . . . . . . . . . . . . . . .107
Page 2: Channel settings . . . . . . . . . . . . . . . . . . . . . . . . . . .109
Page 3: Transpose position. . . . . . . . . . . . . . . . . . . . . . . . . .110
Page 4: Effect select . . . . . . . . . . . . . . . . . . . . . . . . . . . . . . .111
Page 5: Effect modulation. . . . . . . . . . . . . . . . . . . . . . . . . . .111
Page 6: Effect placement. . . . . . . . . . . . . . . . . . . . . . . . . . . .111
Page 7: Effect 1 settings . . . . . . . . . . . . . . . . . . . . . . . . . . . .111
Page 8: Effect 2 settings . . . . . . . . . . . . . . . . . . . . . . . . . . . .111
Page 9: Song Play Harmony . . . . . . . . . . . . . . . . . . . . . . . .112
Song Edit mode . . . . . . . . . . . . . . 113
• Saving a song before turning off. . . . . . . . . . . . . . . . . . . . 113
Page 1: Load . . . . . . . . . . . . . . . . . . . . . . . . . . . . . . . . . . . .113
Page 2: Playback. . . . . . . . . . . . . . . . . . . . . . . . . . . . . . . . .114
Page 2: Recording . . . . . . . . . . . . . . . . . . . . . . . . . . . . . . . .115
Page 3: Track parameters . . . . . . . . . . . . . . . . . . . . . . . . . . 117
Page 4: Event edit. . . . . . . . . . . . . . . . . . . . . . . . . . . . . . . . . 118
Event filter . . . . . . . . . . . . . . . . . . . . . . . . . . . . . . . . . . . . . . . . . . .118
Event types . . . . . . . . . . . . . . . . . . . . . . . . . . . . . . . . . . . . . . . . . .118
Page 5: Shift notes (Transposition) . . . . . . . . . . . . . . . . . . . . 120
Page 6: Erase song . . . . . . . . . . . . . . . . . . . . . . . . . . . . . . . 120
Page 7: Edit . . . . . . . . . . . . . . . . . . . . . . . . . . . . . . . . . . . . . 121
7-1. Delete measures. . . . . . . . . . . . . . . . . . . . . . . . . . . . . . . . . . .121
7-2. Insert measures . . . . . . . . . . . . . . . . . . . . . . . . . . . . . . . . . . .121
7-3. Erase measures . . . . . . . . . . . . . . . . . . . . . . . . . . . . . . . . . . .122
Page 8: Effect select . . . . . . . . . . . . . . . . . . . . . . . . . . . . . . .123
Page 9: Effect modulation. . . . . . . . . . . . . . . . . . . . . . . . . . .123
Page 10: Effect placement . . . . . . . . . . . . . . . . . . . . . . . . . .123
Page 11: Effect 1 settings . . . . . . . . . . . . . . . . . . . . . . . . . . .123
Page 12: Effect 2 settings . . . . . . . . . . . . . . . . . . . . . . . . . . .123
Page 13: Save . . . . . . . . . . . . . . . . . . . . . . . . . . . . . . . . . . . 124
Disk/Global mode . . . . . . . . . . . . 125
• “Parameter modified - Write?” message. . . . . . . . . . . . . .125
Introduction to disks . . . . . . . . . . . . . . . . . . . . . . . . . . . . . . . 126
Write protection . . . . . . . . . . . . . . . . . . . . . . . . . . . . . . . . . . . . . .126
Inserting a disk . . . . . . . . . . . . . . . . . . . . . . . . . . . . . . . . . . . . . . .126
Removing a disk . . . . . . . . . . . . . . . . . . . . . . . . . . . . . . . . . . . . . .126
Cleaning the heads. . . . . . . . . . . . . . . . . . . . . . . . . . . . . . . . . . . .127
Precautions . . . . . . . . . . . . . . . . . . . . . . . . . . . . . . . . . . . . . . . . . .127
Possible problems . . . . . . . . . . . . . . . . . . . . . . . . . . . . . . . . . . . . .127
The disk supplied with the instrument. . . . . . . . . . . . . . . . . . . . . . .127
Page 1: DISK functions. . . . . . . . . . . . . . . . . . . . . . . . . . . . .128
1. Load . . . . . . . . . . . . . . . . . . . . . . . . . . . . . . . . . . . . . . . . . . . . .128
1-1. Load all . . . . . . . . . . . . . . . . . . . . . . . . . . . . . . . . . . . . . . . . .128
1-2. Load one . . . . . . . . . . . . . . . . . . . . . . . . . . . . . . . . . . . . . . . .129
1-3. Load global . . . . . . . . . . . . . . . . . . . . . . . . . . . . . . . . . . . . . .131
1-4. Load keyboard set. . . . . . . . . . . . . . . . . . . . . . . . . . . . . . . . .131
2. Save . . . . . . . . . . . . . . . . . . . . . . . . . . . . . . . . . . . . . . . . . . . . .131
3. Utility. . . . . . . . . . . . . . . . . . . . . . . . . . . . . . . . . . . . . . . . . . . . .132
Compatibility with Korg i30 data . . . . . . . . . . . . . . . . . . . . . . . . .133
Page 2: Echo Back / MIDI IN Octave. . . . . . . . . . . . . . . . . . 135
Page 3: MIDI Settings. . . . . . . . . . . . . . . . . . . . . . . . . . . . . .136
Page 4: Global MIDI parameters . . . . . . . . . . . . . . . . . . . . .137
Page 5: MIDI channel settings (1). . . . . . . . . . . . . . . . . . . . .139
Page 6: MIDI channel settings (2). . . . . . . . . . . . . . . . . . . . .139
Page 7: MIDI channel settings (3). . . . . . . . . . . . . . . . . . . . .140
Page 8: MIDI filter. . . . . . . . . . . . . . . . . . . . . . . . . . . . . . . . . 141
Page 9: Arrangement Harmony. . . . . . . . . . . . . . . . . . . . . .142
Page 10: Backing Sequence Harmony. . . . . . . . . . . . . . . . .142
Page 11: Song Play Harmony . . . . . . . . . . . . . . . . . . . . . . . 143
Page 12: Assignable pedal/switch . . . . . . . . . . . . . . . . . . .143
Setting quarter tones . . . . . . . . . . . . . . . . . . . . . . . . . . . . . . . . . . .144
Page 13: EC5 external controller . . . . . . . . . . . . . . . . . . . . . 145
Page 14: Lower memory . . . . . . . . . . . . . . . . . . . . . . . . . . .146

Summary
viii
Page 15: Chord recognition mode. . . . . . . . . . . . . . . . . . . .147
Page 16: Auto chord scanning/Damper polarity. . . . . . . . .148
Page 17: Main scale . . . . . . . . . . . . . . . . . . . . . . . . . . . . . .149
Page 18: Sub scale. . . . . . . . . . . . . . . . . . . . . . . . . . . . . . . .149
Page 19: User scale . . . . . . . . . . . . . . . . . . . . . . . . . . . . . . .150
Page20: MIDI data dump. . . . . . . . . . . . . . . . . . . . . . . . . . .150
Page 21: Joystick settings . . . . . . . . . . . . . . . . . . . . . . . . . . .151
Page 22: Write Global. . . . . . . . . . . . . . . . . . . . . . . . . . . . .152
Page 23: Assignable pedal/footswitch calibration. . . . . . . .152
Program mode. . . . . . . . . . . . . . .153
How to recover lost changes . . . . . . . . . . . . . . . . . . . . . . . . . . . . 153
Page 1: Program play . . . . . . . . . . . . . . . . . . . . . . . . . . . . .153
Performance Edit . . . . . . . . . . . . . . . . . . . . . . . . . . . . . . . . . . . . . 154
Page 2: Oscillator basic/Oscillator 2 relative . . . . . . . . . . . .155
Page 3: Oscillator tone. . . . . . . . . . . . . . . . . . . . . . . . . . . . .156
Page 4: Pitch EG . . . . . . . . . . . . . . . . . . . . . . . . . . . . . . . . .157
Page 5: VDF. . . . . . . . . . . . . . . . . . . . . . . . . . . . . . . . . . . . .159
Page 6: VDF EG. . . . . . . . . . . . . . . . . . . . . . . . . . . . . . . . . .160
Page 7: VDF keyboard tracking. . . . . . . . . . . . . . . . . . . . . .161
Page 8: VDF velocity sensitivity. . . . . . . . . . . . . . . . . . . . . . .163
Page 9: VDA EG . . . . . . . . . . . . . . . . . . . . . . . . . . . . . . . . .164
Page 10: VDA keyboard tracking . . . . . . . . . . . . . . . . . . . .165
Page 11: VDF velocity sensitivity. . . . . . . . . . . . . . . . . . . . . .167
Page 12: Vibrato . . . . . . . . . . . . . . . . . . . . . . . . . . . . . . . . .168
Page 13: Vibrato controller . . . . . . . . . . . . . . . . . . . . . . . . .169
Page 14: VDF MG. . . . . . . . . . . . . . . . . . . . . . . . . . . . . . . .170
Page 15: VDF MG controller/VDA level . . . . . . . . . . . . . . .171
Page 16: Controllers. . . . . . . . . . . . . . . . . . . . . . . . . . . . . . .172
Page 17: Effect select . . . . . . . . . . . . . . . . . . . . . . . . . . . . . .173
Page 18: Effect modulation. . . . . . . . . . . . . . . . . . . . . . . . . .173
Page 19: Effect placement . . . . . . . . . . . . . . . . . . . . . . . . . .173
Page 20: Effect 1 settings . . . . . . . . . . . . . . . . . . . . . . . . . . .173
Page 21: Effect 2 settings . . . . . . . . . . . . . . . . . . . . . . . . . . .173
Page 22: Rename program. . . . . . . . . . . . . . . . . . . . . . . . . 174
Page 23: Write program. . . . . . . . . . . . . . . . . . . . . . . . . . . 174
Effects. . . . . . . . . . . . . . . . . . . . . 175
Effect type. . . . . . . . . . . . . . . . . . . . . . . . . . . . . . . . . . . . . . . 175
“Effect select” pages. . . . . . . . . . . . . . . . . . . . . . . . . . . . . . . 175
“Effect modulation” pages . . . . . . . . . . . . . . . . . . . . . . . . . . 176
“Effect placement” pages. . . . . . . . . . . . . . . . . . . . . . . . . . . 177
Effect 1 settings pages . . . . . . . . . . . . . . . . . . . . . . . . . . . . . 178
Effect 2 settings pages . . . . . . . . . . . . . . . . . . . . . . . . . . . . . 178
Dynamic modulation . . . . . . . . . . . . . . . . . . . . . . . . . . . . . . 178
Shelving equalizer . . . . . . . . . . . . . . . . . . . . . . . . . . . . . . . . 179
Settings for each effect . . . . . . . . . . . . . . . . . . . . . . . . . . . . . 179
Appendices. . . . . . . . . . . . . . . . . 194
Messages. . . . . . . . . . . . . . . . . . . . . . . . . . . . . . . . . . . . . . . 194
Troubleshooting . . . . . . . . . . . . . . . . . . . . . . . . . . . . . . . . . . 198
General problems . . . . . . . . . . . . . . . . . . . . . . . . . . . . . . . . . . . . 198
Floppy disk related problems . . . . . . . . . . . . . . . . . . . . . . . . . . . . 199
List of detected chords. . . . . . . . . . . . . . . . . . . . . . . . . . . . . . 200
MIDI Implementation chart. . . . . . . . . . . . . . . . . . . . . . . . . . 202
MIDI Setup. . . . . . . . . . . . . . . . . . . . . . . . . . . . . . . . . . . . . . 203
Styles . . . . . . . . . . . . . . . . . . . . . . . . . . . . . . . . . . . . . . . . . . 204
Arrangements . . . . . . . . . . . . . . . . . . . . . . . . . . . . . . . . . . . 205
Programs. . . . . . . . . . . . . . . . . . . . . . . . . . . . . . . . . . . . . . . 207
Multisamples . . . . . . . . . . . . . . . . . . . . . . . . . . . . . . . . . . . . 211
Drum kits . . . . . . . . . . . . . . . . . . . . . . . . . . . . . . . . . . . . . . . 214
Drum samples . . . . . . . . . . . . . . . . . . . . . . . . . . . . . . . . . . . 220
Technical specifications . . . . . . . . . . . . . . . . . . . . . . . . . . . . 221
Index . . . . . . . . . . . . . . . . . . . . . 222

GETTING STARTED

Getting Started • Introduction
2
1. Introduction
Thank you for choosing Korg i40M, the interactive
music workstation created for even the most demand-
ing musicians! Given the legendary Korg sound and
the most sophisticated automatic accompaniment
functions, the i40M is the ideal instrument for those
who play professionally and those who play just for
pleasure.
The i40M is not only an instrument with great sound,
great design and easy to use, it is also a flexible instru-
ment that allows you to read and save Standard MIDI
Files, program new arrangements, and create new
sounds. On the whole, it is a complete instrument
which enhances the musician’s creativity!
We wish you years and years of great music with the
i40M!
User’s guide
The quickest and easiest way to obtain the best from
your new instrument is to read the instruction guide.
This guide is divided into two parts:
Getting Started - For those who want to start playing
straight away without too much theory. Follow the
instructions step by step and start playing now!
Reference - This is a more detailed look at the instru-
ment and is for those who want to exploit all its poten-
tiality to the full and become a real music programmer.
Safety Instructions
Before turning the instrument on, read carefully the
“Safety Instructions” on the inside cover. Done that?
Then let’s make way for the music!
Before you begin...
Accessories
The following accessories are supplied with the instru-
ment. Check that you have all of them and if any are
missing contact your retailer.
√User’s guide
√Floppy disk “Accessory Disk”
√Power cable
Connecting an external
amplifying system
You can connect the i40M to a professional amplifying
system (mixer or amplified speakers) or to a hi-fi sys-
tem. For more information see “Rear panel” on
page 13.
Connecting the i40M to a mixer (or to
two amplified diffusers)
Connect the OUTPUT jacks of the i40M to two mono
inputs of the mixer (or to the speaker inputs) using
two audio cables with mono jacks. To take the signal in
mono, connect the LEFT/MONO output only and one
channel of the mixer using an audio cable. For more
information refer to the user’s guide of the mixer (or
the speakers).

Getting Started • Introduction
3
Connecting the i40M to a hi-fi system
Connect the OUTPUT jacks of the i40M to the AUX or
TAPE inputs of the amplifier using two audio cables
with a mono jack at one end and an RCA connector at
the other end (do not use the PHONE or TUNER
inputs).
Connecting the power cable
●Plug the power cable into
the power socket.
Make sure that the mains
voltage is suitable for the
instrument (the voltage is
indicated next to the AC
power inlet).
Turning on the power
●Press the POWER
switch to turn the
instrument on.
On turning on, the
instrument will be in
the Arrangement
Play mode. If you
are connected to an
external amplifying
system, turn the speakers on only after having
switched on the i40M.
●To turn the instrument off, press the POWER
switch again.
In order to save on electricity, turn the instrument
off when you are not using it. Do not turn the
power off while the disk indicator is lit or while a
message such as “Loading”, “Saving” or “Format-
ting” is shown on the LCD display.
Note: When the instrument is turned off, all the data
contained in the RAM memory will be lost (e.g. back-
ing sequence and song). On the contrary, USER styles,
USER arrangements and USER programs are
retained. Before turning the instrument off, save back-
ing sequence (☞P. 33) and song (☞P. 35) on disk.
Adjusting the general volume
●Use the MASTER VOLUME knob
to adjust the general volume of
the internal sound generation.
Moving the knob towards “10” will
increase the volume, and moving it
towards the “0” will decrease the
volume. In the “0” position the instrument will be
mute.
If you are connected to an external amplifying sys-
tem, you should at this point turn the volume of the
mixer or the speakers up and then adjust both the
volume of the i40M and that of the speakers.
The MASTER VOLUME knob controls the level of
the internal sound generation both of the OUTPUT
jacks and the headphones.
Note: This knob does not control the volume of the
VOCAL/GUITAR section (input signal from the INPUT-
IN jack). Use the VOLUME knob to adjust the level of
this section.
Warning: At the maximum volume the sound can be
distorted. Should this happen, decrease the volume of
the i40M.
Adjusting the volume of the
Vocal/Guitar section
The VOCAL/GUITAR section takes the input signal
from the INPUT-IN jack and process it with dedicated
effects. The processed signal is combined with the
sounds generated by the internal sound generation
and comes out from the OUTPUT jacks.
●Use the VOLUME knob to adjust
the volume of the section.
Moving the knob towards “10” will
increase the volume, and moving it
towards the “0” will decrease the
volume. In the “0” position the VOCAL/GUITAR
section does not reach the OUTPUT jacks.
The VOLUME knob controls the level of the
VOCAL/GUITAR section both of the OUTPUT
jacks and the headphones.
Note: Use the GAIN knob located next to the INPUT-
IN jack to adjust the input level at best. Connect the
instrument, start playing and check the color of the
SIGNAL led on the control panel: if it is red, distortion
is present and the gain must be decreased; if it is
orange, distortion is close and the gain should be

Getting Started • Introduction
4
decreased slightly; if it is green, the level is correct. If
the led does not light up, the input level is too low and
the gain must be increased.
Suggestion: If the INPUT-IN jack is not used, set the
volume on zero to avoid any interference or residual
noise.
The headphones
●Connect the headphones to the PHONES jack
located on the rear panel.
Use stereo headphones with a standard jack. Adjust
the volume with the MASTER VOLUME knob.
Connecting a MIDI controller
For live performances the i40M must be connected to a
MIDI controller, such as a MIDI keyboard, a digital
piano, a MIDI accordion, a guitar controller, a wind
controller, a set of percussion pads or an external
sequencer. For detailed information see “MIDI” on
page 44. Let’s now illustrate two of the most common
situations: connecting a MIDI keyboard and connect-
ing a MIDI accordion.
Connecting a MIDI keyboard
The i40M can be controlled with any MIDI keyboard,
such as a master keyboard or a synthesizer with MIDI
OUT jack.
1Connect the MIDI OUT jack of the MIDI key-
board to the MIDI IN 1 jack of the i40M using a
standard MIDI cable.
2Program the keyboard to transmit over the MIDI
1 channel.
According to the factory settings, the MIDI 1 chan-
nel is the channel used by the i40M to receive most
information. For example, channel 1 corresponds to
Global that allows for using all the functions
related to the split point (Keyboard Mode section).
For more information on Global programming, see
“MIDI” on page 44 and the “GLB (Global)” on
page 139.
Note: If the keyboard transmits over the MIDI chan-
nel dedicated to the i40M Global, the keyboard
becomes the integrated keyboard of the i40M. The
i40M becomes virtually your keyboard instrument.
Suggestion: If the keyboard does not transmit over
the Global channel, see “MIDI” on page 44 for more
information.

Getting Started • Introduction
5
Connecting a MIDI accordion
You can connect a MIDI accordion and play a track of
the i40M with each section.
1Connect the MIDI OUT jack of the MIDI accor-
dion to the MIDI IN 1 jack of the i40M using a
standard MIDI cable.
2Press DISK/GLOBAL.
3Press the PAGE [+] button repeatedly to access
the MIDI Settings page.
4Press CURSOR [>] to select <SETUP>.
5Press the TEMPO/VALUE [+] to select one of the
MIDI “Accordion” setups.
There are three “Accordion” setups.
• “Accordion 1” is designed for those who have an
accordion with three fixed channels. This setup is
also suitable for backing sequence recording.
• “Accordion 2” is designed for those who have an
accordion with two channels on the right hand and
do not want to play the bass of the i40M.
• “Accordion 3” is designed for those who have an
accordion with two channels on the right hand,
want to play the bass of the i40M and have another
channel to change the Arrangements of the i40M
with Program Change.
For more information on the MIDI Setups, see
“MIDI” on page 44 and the “Page 3: MIDI Settings”
on page 136.
6Press ENTER/YES twice to confirm the MIDI
Setup selection.
The configuration of the MIDI channels and of the
other parameters selected with the MIDI Setup will
be retained until the configuration is manually
changed.
7Press REC/WRITE/LYRICS and then ENTER/YES
twice.
The automatic settings of the MIDI Setup are saved
in Global and will be available also after turning
the instrument off and on again.
Connecting other MIDI controllers
The MIDI configuration may vary according to the
type of controller connected to the i40M. To automati-
cally re-configure the i40M select a MIDI Setup (see
“MIDI” on page 44 and the “Page 3: MIDI Settings” on
page 136).
MIDI SETTINGS (Yes)
<PROTECT> <SETUP>
MIDI SETUP (Yes)
Setting:DEFAULT

Getting Started• Front and Rear Panels
6
2. Front and Rear Panels
Front Panel
1 Display
The editing pages, parameters and messages for the
user will appear in this display.
2 Floppy disk drive slot
3.5 inch double-sided double density (2DD) or dou-
ble-sided high density (HD) floppy disks can be
inserted in this drive. You can use Korg i-series for-
matted floppy disks and standard Ms-Dos® format-
ted floppy disks.
The i40M incorporates a disk drive without auditory
feedback (i.e. the “click” when the disk has been
pressed all the way in).
3 Disk eject button
Press this button to remove a floppy disk from the
drive. If pressing this button does not eject the disk,
do not try to force it out. Contact your dealer or
nearest Korg Service Station.
4 MASTER VOLUME knob
Output level of internal sound generation (OUTPUT
outlets and headphones).
This control does not adjust the level of the VOCAL/
GUITAR section (input signal through INPUT-IN).
Warning: Volume that is too high can cause serious
harm to your hearing. Keep the volume at a moderate
level.
Note: At higher volumes the sound can be distorted.
4
5
@
2
1
3
6
78
9
A
IJKL MN OP
WXY
QRST U V
\
Z
B
DEFGH
C

Getting Started • Front and Rear Panels
7
5 ACC.VOLUME knob (Accompaniment Volume)
Automatic accompaniment volume. In Song Play
and Song Edit modes it controls the volume of all
tracks, except the one selected (whose volume
remains constant).
6 MODE section
The buttons in this section activate the operating
modes of the instrument (see chapter “Operative
modes” on page 15).
• ARR. PLAY (Arrangement Play) button
This button accesses the Arrangement Play mode.
(The instrument is automatically in this mode when
it is turned on). With this mode you can use the auto-
matic accompaniments.
• B.SEQ (Backing Sequence) button
This button accesses the Backing Sequence mode.
With this mode you can record or playback musical
performances played with automatic accompani-
ments.
• SONG PLAY button
This button accesses the Song Play mode. With this
mode you can directly playback musical perfor-
mances in Standard MIDI File (SMF) format without
loading them from disk.
You can also read the SMF lyrics in the display (Lyr-
ics function). The display mode can be selected with
the REC/WRITE/LYRICS button.
• SONG EDIT button
This button accesses the Song Edit mode. With this
mode you can record, playback, edit and save a Stan-
dard MIDI File (SMF).
• DISK/GLOBAL button
This button accesses the Disk/Global mode. With
this mode you can load and save data from a floppy
disk, and program some of the instrument’s general
settings (e.g. pedals and MIDI channels).
• PROGRAM button
This button accesses the Program mode. With this
mode you can play and edit the single programs
(single sounds).
• DEMO buttons
Press both ARR.PLAY and B.SEQ to access the Demo
mode where you can listen to 16 demo pieces.
How to listen to all demos consecutively. To listen
to all demo pieces consecutively access the Demo
mode and press START/STOP. To stop the demo
playback press START/STOP.
How to listen to a single demo. To listen to a single
demo, access the Demo mode and select it. The
demo playback starts immediately.
To select a demo use the buttons of the PROGRAM/
ARRANG section. To select a demo from 1 to 8, press
PROGRAM/ARRANG to light up the ARRANG led,
and press a NUMBER 1-8 button.
To select a demo from 9 to 16, press PROGRAM/
ARRANG to light up the PROGRAM led and press a
NUMBER 1-8 button.
Press START/STOP to stop the demo playback.
How to exit the Demo mode. To exit the Demo
mode either press EXIT/NO or the button of one of
the operating modes (MODE section).
7 CHORD SCANNING section
Arrangement Play and Backing Sequence modes:
this section specifies which area of the keyboard will
be used to detect chords for the automatic accompa-
niment. To activate the FULL mode it is necessary to
light the leds of both LOWER and UPPER buttons.
• LOWER button
Chords will be detected in the Lower range (below
the split point). The chord recognition mode is
defined by the “ChordRecog (Chord recognition
mode)” parameter of the Disk/Global mode (see
page 147).
• UPPER button
Chords will be detected in the Upper range (above
and including the split point). The recognition mode
is automatically set at Fingered 2 (see page 147).
• FULL (LOWER + UPPER) buttons
Chords will be detected in the entire range. The rec-
ognition mode is automatically set at Fingered 2 (see
page 147).
• OFF (unlit leds)
Chords are not detected. If the leds are off, when
pressing START/STOP to start the accompaniment,
you can only listen to the Drum and Perc tracks. The
other accompaniment tracks do not play.
8 KEYBOARD MODE section
If the i40M is connected to a keyboard through the
Global channel, these buttons can be used to select
the set-up of the tracks on the keyboard in the
Arrangement Play e Backing Sequence modes.
Note: This section is particularly dedicated to the con-
nection of the i40M to a MIDI keyboard. It only works if
the MIDI controller transmits over the special Global
channel (see page 45).
• M.DRUM button
A different percussion sound is assigned to each
note of the keyboard.
• SPLIT button
The right hand (Upper 1 and Upper 2) and the left
hand (Lower) play different sounds and are sepa-
rated by the split point. The Upper 2 and Lower
tracks are alternative, one excludes the other on the
keyboard.

Getting Started• Front and Rear Panels
8
• FULL UPPER button
One or two tracks (Upper 1 and/or Upper 2) play on
the entire keyboard.
9 KEYBOARD ASSIGN section
These buttons select the realtime tracks (Upper 1,
Upper 2, Lower) in the Arrangement Play and Back-
ing Sequence modes. The Upper 2 and Lower are
alternative, one excludes the other on the keyboard.
10 VOCAL/GUITAR section
The VOCAL/GUITAR section applies effects to the
signal of a microphone, a guitar or a line source
(mono) coming to the INPUT-IN connector. The sig-
nal is then mixed with the sound of the internal
sound generation and sent to the OUTPUT outlets.
In Vocal mode it harmonizes the voice with the notes
received over the MIDI channel dedicated to har-
monisation. According to the factory settings, the
notes are received over channel 5.
The VOCAL/GUITAR section works in the Arrange-
ment Play, Backing Sequence and Song Play modes.
The settings are saved in the Keyboard Set. See “The
Vocal/Guitar section” on page 39.
• VOLUME knob
It controls the level of the VOCAL/GUITAR section
on the OUTPUT outlets.
• SIGNAL led
The SIGNAL led changes color according to the sig-
nal level. If it is off, there is no signal or the signal
level is very low. If it is green the signal is present. If
it is orange, the signal is close to saturation. If it is
red, the signal is saturated.
Warning: The signal cannot be saturated. If the led is
red, adjust the input gain with the GAIN knob in the
control panel.
• A/B switch button
It selects the operating mode of the A/B switch
between A and B.
• A/B knob
Programmable knob. It controls the value of the
parameter assigned to the A or B function (see
page 65). The A or B operating mode can be selected
with the A/B switch button.
Note: The knob does not work until the last value of
the controlled function is reached. For example, if the
knob is on “0” and the current parameter value is “5”,
the knob will not work until it reaches “5”.
• C button
Programmable button. It can act as “mute” for the
VOCAL/GUITAR section, the effects or the harmon-
isation.
Note: When you turn the instrument on, the VOCAL/
GUITAR section is deactivated. Select one of the Key-
board Sets to activate it. If you have connected a micro-
phone, choose a Keyboard Set in the bank A. If you
have connected a guitar, choose a Keyboard Set in the
bank B (clean settings) or C (overdrive settings).
11 PROGRAM/ARRANGEMENT section
These buttons are used to select programs and
arrangements.
To select a program (single sound) press PRO-
GRAM/ARRANG to light the PROGRAM led. Press
one of the BANK (A, B, C, D, E, F) buttons to choose
the bank, then select a two-digit number between 11
and 88 using the NUMBER buttons to choose the
program.
To select the DRUM bank press twice the F(USER/
DRUM) button until the abbreviation “Dr” shows in
the display. The Drum programs range from Dr11 to
Dr28.
To select an arrangement, press PROGRAM/
ARRANG to light the ARRANG led. Press one of the
BANK (A, B, USER) buttons to choose the bank, then
select a two-digit number between 11 and 88 using
the NUMBER buttons to choose the arrangement.
If the program or arrangement to be selected belongs
to the same bank of the selected program or arrange-
ment, only select the two-digit number without
pressing the BANK button.
In the Arrangement Play mode you can use the
Arrangement Preview and Program Preview func-
tions to show the program or arrangement name in
the display before selecting it.
Press a BANK button, if necessary press a NUMBER
button to select the tens, then select the program or
arrangement using the TEMPO/VALUE buttons
and press ENTER/YES to confirm.
12 VOLUME/PROGRAM buttons
These buttons are normally used to adjust the track
volume of the tracks and to mute it. To raise the vol-
ume press the upper button, to lower it press the
lower button. To mute a track press the upper and
lower button together. To take off the mute, press
one of the buttons briefly.
Arrangement Play mode: these buttons select the
tracks and change the volume. When a track has
been selected you can set a different program for
that track (see PROGRAM/ARRANG section).
Backing Sequence mode: these buttons select the
tracks and change the volume. To select the Extra
Tracks first press the TRACK SELECT button and
then the VOLUME buttons.
Song Play mode: these buttons select the MIDI chan-
nels (tracks) of the SMF and change the volume. To

Getting Started • Front and Rear Panels
9
go from channels 1-8 to channels 9-16 (and vice
versa) press the TRACK SELECT button.
Song Edit mode: these buttons select the tracks and
change the volume. To go from tracks 1-8 to tracks 9-
16 (and vice versa) press the TRACK SELECT but-
ton.
Program mode: these buttons modify the value of
the parameters indicated under each button.
13 TRACK SELECT button
Arrangement Play mode: mutes the ACC1, ACC2,
ACC3 tracks.
Backing Sequence mode: switches between the
arrangement tracks and the Extra Track.
Song Play mode: switches between the channels 1-8
and the channels 9-16 of the SMF. (In Song Play
mode channels and tracks are the same).
Song Edit mode: switches between tracks 1-8 and
tracks 9-16.
14 CURSOR buttons
These buttons move the cursor among the parame-
ters that appear in the display. Before modifying the
value of a parameter, the cursor must be positioned
on the value that needs to be modified (flashing
text).
15 TEMPO/VALUE buttons
These buttons modify the tempo or the parameter
value selected in the display. The TEMPO or VALUE
indicators show up in the display when they are
functioning.
16 EXIT/NO button
This button is used to go back to Page 1 of the cur-
rent operative mode and to return to the higher level
from the subpages (pages in which the indication of
previous or next page is not shown next to the num-
ber page).
The second function (NO) is to be used to give a neg-
ative reply to questions that may appear in the dis-
play.
Arrangement Play, Backing Sequence and Song
Play modes: takes you back to Page 1 of the mode.
Page 1 of the Arrangement Play mode: calls up the
settings of the realtime tracks saved in the Arrange-
ment.
Song Play mode: takes you back to the previous
page after pressing a VOLUME/PROGRAM button
to choose a track.
Song Play-JukeBox mode: makes you exit from the
JukeBox mode.
Song Edit mode: calls up Page 2 of the mode.
Disk/Global mode subpages: takes you back to the
top page.
17 ENTER/YES button
By pressing this button you can give a positive reply
to questions that may appear in the display and to
start some operations in the Disk/Global mode
(Load, Save, Format, MIDI Setup…).
Song Play mode: by pressing this button when the
cursor is on the name of a song, the song will be
inserted in the JukeBox list and the JukeBox mode
activated.
18 PAGE buttons
These buttons select the previous (-) or the next (+)
page in the current mode. The page number appears
on the right of the display. Two arrows appear before
or after the number to indicate the presence of previ-
ous (<) or next (>) pages.
If no arrows appear before and after the page num-
ber, you are in a subpage of the Disk/Global mode.
To exit press EXIT/NO (see page 19).
19 MEMORY-CHORD/TIE button
Arrangement Play and Backing Sequence modes:
keeps the accompaniment chord after taking your
hand off the keyboard.
Backing Sequence-Step Recording mode: inserts a
tie (ties the last note played to the next note that is
going to be played).
20 MEMORY-LOW/HAR/REST button
Arrangement Play and Backing Sequence modes: if
the Lower track is controlled by the Global channel,
this button keeps the Lower track notes after taking
your hands off the keyboard. (See “Page 14: Lower
memory” in the Disk/Global mode).
Arrangement Play, Backing Sequence, Song Play
modes: keeps the harmonization notes coming over
the Harmony channel (see page 142 and following).
Backing Sequence-Step Recording mode: creates a
pause.
21 BASS INV./< (Bass Inversion/backwards) button
Arrangement Play and Backing Sequence modes:
with this function the lowest note of a chord played
in inverted form will always be detected as the main
note of the chord. Thus, you can specify to the
arranger composite chords such as Am7/G or “F/
C”. When the Chord Scanning is FULL, the bass note
will not change until another bass note is played.
Backing Sequence-Step Recording mode: this but-
ton is used to go to the previous step.
22 SPLIT POINT/> (Split Point/Forward) button
Arrangement Play and Backing Sequence modes:
selects the split point (division of the keyboard).
Hold down the button and play the note you wish to
become the split point. This note and all the notes to
the right of it are part of the Upper range, the notes
to its lefts are part of the Lower range.

Getting Started• Front and Rear Panels
10
The split point can be saved in the Global in order to
remain available also after you turn the instrument
off and on again. (See “Page 22: Write Global” on
page 152).
Note: The split point is particularly useful when the
i40M is connected to a MIDI keyboard. It only works if
the MIDI controller transmits through the special Global
channel (see page 45).
Backing Sequence-Event Editing mode: goes to the
next step.
23 FADE IN/OUT button
If the accompaniment is not playing, this button
fades it in (the volume gradually increases from zero
to the maximum value). If the accompaniment is
playing, this button fades it out (the volume gradu-
ally decreases from the maximum value to zero). You
do not need to press START/STOP to start or stop
the accompaniment.
24 TEMPO (Tempo Lock) button
Led lit up: when you change the arrangement the
tempo will not change. The tempo can be manually
changed by using the TEMPO/VALUE buttons.
25 RESET/INS button
Backing Sequence, Song Play, Song Edit modes:
this button returns the sequencer to the first mea-
sure.
Arrangement Play and Backing Sequence modes:
restarts the chord scanner and returns to the begin-
ning of the measure.
The second function of the (INS) button is to insert a
Step Recording event, or an empty space where the
cursor is positioned when you wish to write a name.
Note: In any situation this button can be used as “MIDI
Panic”. Press it when a note gets stuck to unblock it.
26 TAP TEMPO/DEL button
You can set the tempo with this button. The tempo is
updated in the display.
The second function of the (DEL) button is to cancel
the event that has been selected in Step Recording,
or to cancel a letter where the cursor is positioned
when you wish to write a name.
27 REC/WRITE/LYRICS
(Recording/Writing/Lyrics) button
Backing Sequence and Song Edit modes: this but-
ton enters the record mode.
Arrangement Play and Program modes: this will
access the Write page where you can save your mod-
ified Arrangement, Keyboard Set o program.
Song Play mode: switches through the display
modes Lyrics 1 (lyrics 1), Lyrics 2 (lyrics 2), Play
(standard execution information).
Note: The Lyrics modes are only available if the SMF
contains the lyrics. The Lyrics 2 mode is only available
with some SMF.
Global mode: recalls the Write Global page.
28 SINGLE TOUCH button
Led lit up: when an arrangement is changed, the
programs of Upper 1, Upper 2 and Lower tracks are
recalled and saved in the new arrangement.
29 SUSTAIN button
Arrangement Play, Backing Sequence, Program,
Song Play modes: increases the length of the notes
(by extending the program sustain).
30 ENSEMBLE button
Arrangement Play and Backing Sequence modes:
harmonizes the melody played with your right hand
with the chords played with your left hand. The
Chord Scanning must be LOWER.
31 TRANSPOSE buttons
These buttons change the transposition (in semi-
tones) of the instrument. The transposition value
temporarily appears on the right side of the display.
In order to cancel the transposition you must press
both buttons together.
32 OCTAVE buttons
These buttons change the transposition (in octaves)
of the track selected in the display. In order to cancel
the transposition you must press both buttons
together.
33 VARIATION 1, 2, 3, 4 buttons
Arrangement Play and Backing Sequence modes:
these buttons select one of the four style variations.
Backing Sequence-Step Recording mode: these but-
ton are used to specify the length of the note being
input (the value of the notes is shown under the but-
tons).
34 FILL 1/2 (Fill-in) buttons
Arrangement Play and Backing Sequence modes:
pressing one of these buttons during performance
will add a fill-in.
Backing Sequence-Step Recording mode: these but-
tons are used to specify the length of the note being
input (the value of the notes is shown under the but-
tons).
35 INTRO/ENDING buttons
Arrangement Play and Backing Sequence modes:
pressing one of these buttons before you begin play-
ing will cause an introduction to be played after you
press START/STOP. Pressing one of these buttons
during a performance will cause an ending to be

Getting Started • Front and Rear Panels
11
played, after which the performance will end auto-
matically.
Backing Sequence-Step Recording mode: these but-
tons are used to specify the length of the note being
input (the value of the notes is shown under the but-
tons).
36 START/STOP button
Arrangement Play, Song Play and Demo modes:
this button starts or stops the automatic accompani-
ment or playback.
Backing Sequence and Song Edit modes: it starts or
stops playback. If the REC/WRITE/LYRICS led is lit
up, it starts or stops recording.
37 SYNCHRO-START and SYNCHRO STOP buttons
The SYNCHRO-START button makes the accompa-
niment start when you play a note or chord in the
chord detection area of the keyboard, without hav-
ing to press START/STOP.
The SYNCHRO-STOP button makes the accompani-
ment stop when the hand playing the notes in the
chord detection area of the keyboard is taken off the
keyboard.
38 KEYBOARD SET section
By pressing only one button in Arrangement Play
and Backing Sequence modes the Keyboard Set
select the set-up of the realtime tracks (Upper 1,
Upper 2 and Lower), the effects and the settings of
the VOCAL/GUITAR section.
In Song Play mode the Keyboard Set only select the
settings of the VOCAL/GUITAR section (and not
the track set-up).
To choose a Keyboard Set you have to press once, or
repeatedly BANK to choose bankA, B or C, then you
must press one of the number buttons to choose the
Keyboard Set.
In Arrangement Play you can save the current set-
up of the realtime tracks, the effects and the settings
of the VOCAL/GUITAR section in a Keyboard Set.
1. Press REC/WRITE/LYRICS.
2. Press one of the buttons in the KEYBOARD SET
section to recall the Write Keyboard Set page.
3. Press once, or repeatedly BANK to choose the
bank (A, B or C).
4. Press the number button which corresponds to
the Keyboard Set where you wish to save the set-
up.
5. Press ENTER/YES twice to confirm.

Getting Started• Front and Rear Panels
12
Display
1 Mode
The first line of the display indicates the operative
mode: ARR.PLAY, BACKING SEQ., SONG PLAY,
SONG EDIT, DISK/GLOBAL, PROGRAM.
2 Tempo/Value
The two indicators TEMPO and VALUE show in
alternation. They show the functioning of the
TEMPO/VALUE buttons. If these buttons act as
tempo controls the display shows TEMPO. If they
act as modifiers of the selected parameter the display
shows VALUE.
3 Split
Indicates that the SPLIT POINT button is currently
pressed, and the note shown below in the display is
the currently selected split point.
4 Transpose/Octave
The two indicators TRANSPOSE and OCTAVE show
in alternation. According to which one shows, the
value below indicates the transposition value by
semitones or octaves.
5 Page
Indicator of the current page. If [>] shows, there are
pages to follow. If [<] shows there are previous
pages. Go through the pages with the PAGE [+] and
[-] buttons.
6 Tempo
Current tempo. If the TEMPO indicator is showing,
you can vary the tempo with the TEMPO/VALUE
buttons.
7 Tempo mode/Clock (synchronization)
Tempo mode and type of synchronization.
AUTO means that the sequencer is reading the
tempo recorded in the song.
EXT means that the i40M is synchronized with the
metronome of an external device connected to its
MIDI IN. Only one of the MIDI IN connectors of the
i40M can receive the synchronism (see page 137).
You can choose the kind of synchronism you require
on “Page 4: Global MIDI parameters” of the Disk/
Global mode.
8 Chord name
9 Modifiable parameters
Two lines of characters that show the parameters of
the various edit pages. You can move through the
parameters with the CURSOR buttons and modify
the values with the TEMPO/VALUE buttons.
10 Volume indicators
Track volume. The tracks that are selected are shown
at the top and on the left:
none = accompaniment and realtime tracks shown
above the PROGRAM/VOLUME buttons
(Arrangement Play, Backing Sequence)
ET = Extra Track (Backing Sequence)
ch = channels (Song Play)
1-8 = tracks/channels 1-8 (Song Play, Song Edit)
9-16 = tracks/channels 9-16 (Song Play, Song Edit)
To select the hidden tracks press TRACK SELECT. If
all the indicators are off, the realtime and accompa-
niment tracks indicated above the VOLUME/PRO-
GRAM buttons are shown.
1
2
3
4
5
6
79
10
8
Table of contents
Other Korg Music Equipment manuals

Korg
Korg Pitchblack X Pro User manual

Korg
Korg nanoKEY Studio EFGSJ 3 User manual

Korg
Korg KMS-30 User manual

Korg
Korg PA 500 User manual

Korg
Korg A5 Guitar User manual

Korg
Korg 05R/W User manual

Korg
Korg Concept-15 User manual

Korg
Korg NS5R User manual

Korg
Korg Triton-Rack User manual

Korg
Korg The iS40 User manual
Popular Music Equipment manuals by other brands

Intellijel
Intellijel Dixie II+ manual

Roland
Roland S-1608 - ARCHITECTS AND ENGINEERS specification

Behringer
Behringer MULTICOM PRO-XL MDX4600 Technical specifications

flight of harmony
flight of harmony Infernal Noise Machine user guide

Roland
Roland VS8F-3 Supplementary manual

nord
nord Electro 5D 61 user manual