Korg D1WH User manual

EFGS 3
Owner’s Manual
Manuel d’utilisation
Bedienungsanleitung
Manual del usuario
Thank you for purchasing the Korg D1 digital piano.
To help you get the most out of your new instrument, please read this
manual carefully.
Merci d’avoir choisi la piano numérique D1 de Korg.
Afin de pouvoir exploiter au mieux toutes les possibilités offertes par
l’instrument, veuillez lire attentivement ce manuel.
Vielen Dank, dass Sie sich für einen D1 digtal-Klavier
von Korg entschieden haben.
Bitte lesen Sie sich diese Anleitung vollstädig durch, um bei der
Bedienung alles richtig zu machen.
Gracias por comprar el Piano digital D1 de Korg.
Por favor, lea este manual atentamente y guárdelo para futuras
consultas.
EFGS 3
Published 01/2022 Printed in China
www.korg.com

2
Precautions
Location
Using the unit in the following locations can re-
sult in a malfunction.
• In direct sunlight
• Locations of extreme temperature or humidity
• Excessively dusty or dirty locations
• Locations of excessive vibration
• Close to magnetic elds
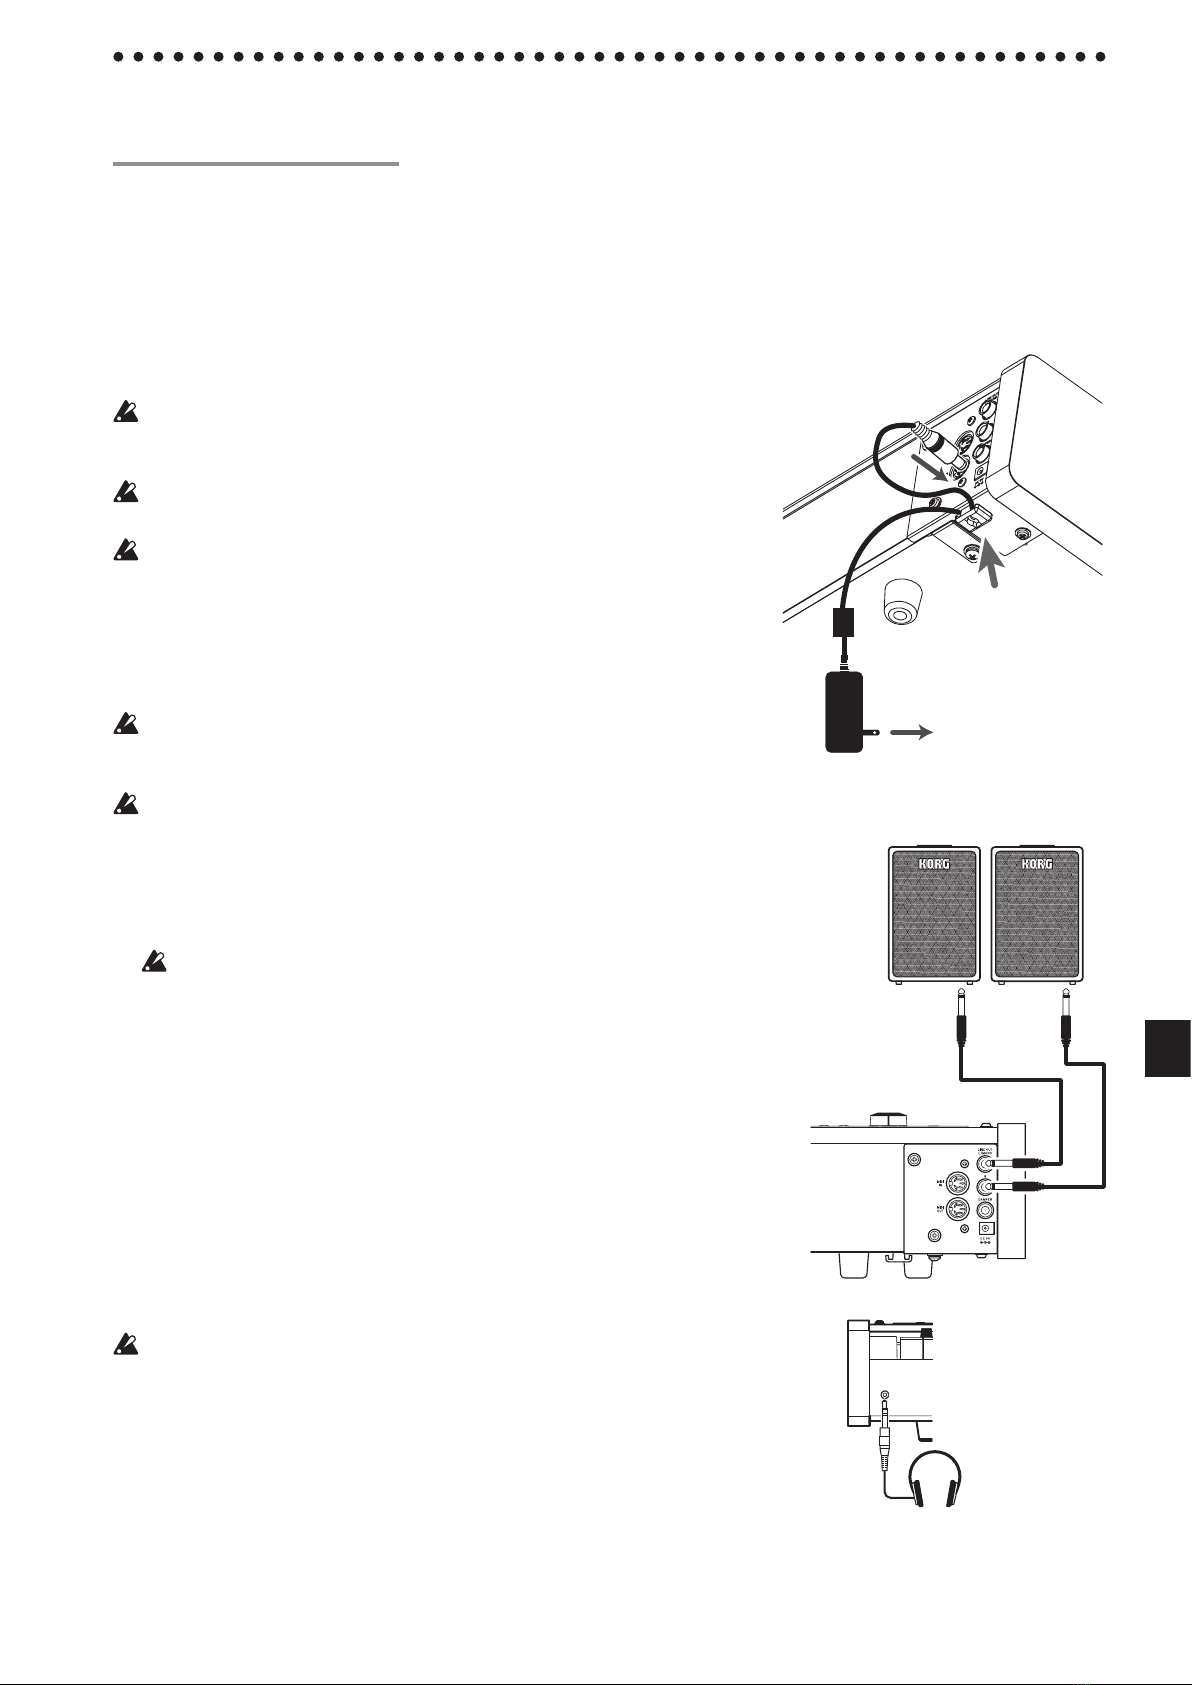
Power supply
Please connect the designated AC adapter to an
AC outlet of the correct voltage. Do not connect
it to an AC outlet of voltage other than that for
which your unit is intended.
Interference with other electrical
devices
Radios and televisions placed nearby may experi-
ence reception interference. Operate this unit at a
suitable distance from radios and televisions.
Handling
To avoid breakage, do not apply excessive force to
the switches or controls.
Care
If the exterior becomes dirty, wipe it with a clean,
dry cloth. Do not use liquid cleaners such as ben-
zene or thinner, or cleaning compounds or am-
mable polishes.
Keep this manual
After reading this manual, please keep it for later
reference.
Keeping foreign matter out of
your equipment
Never set any container with liquid in it near this
equipment. If liquid gets into the equipment, it
could cause a breakdown, re, or electrical shock.
Be careful not to let metal objects get into the
equipment. If something does slip into the equip-
ment, unplug the AC adapter from the wall out-
let. Then contact your nearest Korg dealer or the
store where the equipment was purchased.
* All product names and company names are the
trademarks or registered trademarks of their
respective owners.
THE FCC REGULATION WARNING (for USA)
NOTE: This equipment has been tested and found to comply
with the limits for a Class B digital device, pursuant to Part 15
of the FCC Rules. These limits are designed to provide reason-
able protection against harmful interference in a residential
installation. This equipment generates, uses, and can radiate
radio frequency energy and, if not installed and used in accor-
dance with the instructions, may cause harmful interference
to radio communications. However, there is no guarantee that
interference will not occur in a particular installation. If this
equipment does cause harmful interference to radio or televi-
sion reception, which can be determined by turning the equip-
ment off and on, the user is encouraged to try to correct the
interference by one or more of the following measures:
• Reorient or relocate the receiving antenna.
• Increase the separation between the equipment and receiver.
• Connect the equipment into an outlet on a circuit dierent
from that to which the receiver is connected.
• Consult the dealer or an experienced radio/TV technician for
help.
If items such as cables are included with this equipment, you
must use those included items.
Unauthorized changes or modication to this system can void
the user’s authority to operate this equipment.
SUPPLIER’S DECLARATION OF CONFORMITY (for USA)
Responsible Party : KORG USA INC.
Address : 316 SOUTH SERVICE ROAD, MELVILLE, NY
Telephone : 1-631-390-6500
Equipment Type : DIGITAL PIANO
Model : D1
This device complies with Part 15 of FCC Rules. Operation is
subject to the following two conditions:
(1) This device may not cause harmful interference, and (2) this
device must accept any interference received, including inter-
ference that may cause undesired operation.
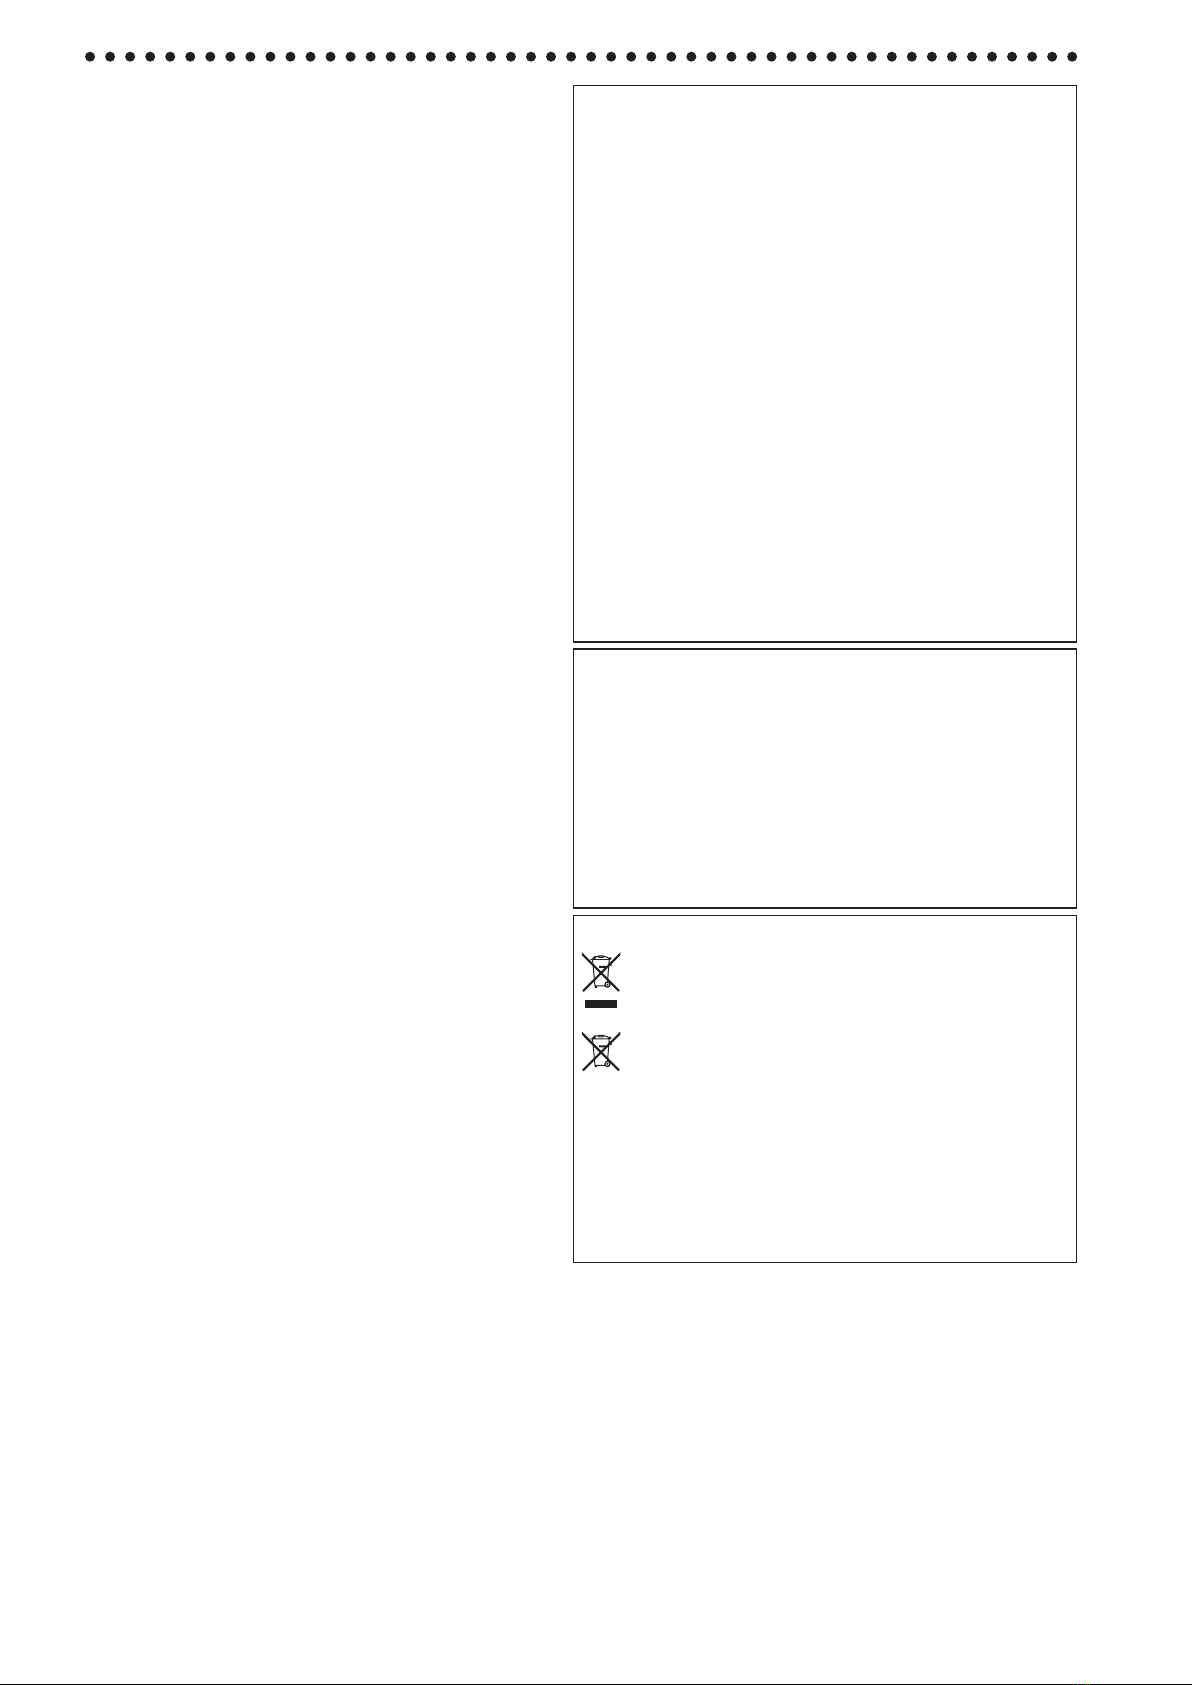
Notice regarding disposal (EU only)
When this “crossed-out wheeled bin” symbol is dis-
played on the product, owner’s manual, baery, or bat-
tery package, it signies that when you wish to dispose
of this product, manual, package or baery you must do
so in an approved manner. Do not discard this product,
manual, package or baery along with ordinary house-
hold waste. Disposing in the correct manner will prevent harm
to human health and potential damage to the environment.
Since the correct method of disposal will depend on the appli-
cable laws and regulations in your locality, please contact your
local administrative body for details. If the battery contains
heavy metals in excess of the regulated amount, a chemical
symbol is displayed below the “crossed-out wheeled bin” sym-
bol on the baery or baery package.

3
Table of Contents
Introduction---------------------------------------3
Main features------------------------------------------3
Parts and their functions ---------------------4
Preparation and demo performances----5
Before you begin playing---------------------------5
Listening to demo performances-----------------7
Playing the D1 ------------------------------------8
Playing a single sound (Single mode)-----------8
Playing two sounds at the same time (Layer
mode)----------------------------------------------------8
Using a damper pedal-------------------------------9
Eects ---------------------------------------------------9
The metronome---------------------------------------9
Other functions -------------------------------- 11
Touch control settings----------------------------- 11
Transpose -------------------------------------------- 11
Function mode -------------------------------------- 11
MIDI ------------------------------------------------ 14
What is MIDI? --------------------------------------- 14
What can you do with MIDI? -------------------- 14
Connections ----------------------------------------- 14
MIDI function mode-------------------------------- 14
Appendix----------------------------------------- 16
Troubleshooting------------------------------------- 16
Specications ---------------------------------------16
When using the ST-SV1 optional key-
board stand (sold separately)------------- 17
MIDI Implementation Chart ---------------- 66
Introduction
Main features
Thirty high-quality sounds
The D1 provides 30 built-in expressive high-quality
sounds, including a stereo concert grand piano. You can
use Layer mode to simultaneously play two sounds at
once.
Eects
The D1 provides 3 built-in digital eects. These eects can
adjust the brightness of the tone (Brilliance), simulate the
natural ambience of a concert hall (Reverb) and add rich-
ness to the sound (Chorus).
Metronome
The built-in metronome allows you to select the time sig-
nature, tempo, and volume, and you can even choose a bell
sound as the accent.
Touch control
You can choose from ve dierent seings to adjust how
the sound will respond to your keyboard playing dynam-
ics.
Temperaments
For authentic performance of a wide range of music, the
D1 allows you to select from nine temperaments, includ-
ing the equal temperament, pure temperaments (major
and minor), classical temperaments (Kirnberger and
Werckmeister) as well as temperaments used with Middle
Eastern and Indian folk music. When an acoustic piano
sound is selected, the stretched tuning used on pianos is
automatically selected.
Adjustable pitch
The Transpose function lets you change the pitch of the
piano, and the Pitch Control function allows you to make
nely tuned adjustments.
MIDI capabilities
The D1 supports the MIDI protocol, the standard that al-
lows music data to be transferred between musical instru-
ments and computers. MIDI allows two or more devices to
control or be controlled by each other, and also allows you
to use the D1 as a 16-part multitimbral tone generator.

4
12. Soundbuons:
This button is used to select from 30 sounds (10 × 3
banks). Two buons can be pressed to play two sounds
simultaneously (Layer mode).
13. Display:
The display shows seings, for example, for the Func-
tion mode and the metronome.
14. +,–buons:
These buons are used to select a value for the various
seings.
15. METRONOMEbuon:
This buon is used to start/stop the metronome. While
the metronome is being used, the buon lights up. In
addition, hold down the buon to enter the Metronome
seings mode, where various metronome seings can
be specied.
16. MIDI(IN,OUT)connectors:
These are connectors that are used to connect other
MIDI devices (sequencer, keyboards, etc.).
IN: Data input
(to be connected to the MIDI OUT connector of
another MIDI device).
OUT: Data output
(to be connected to the MIDI IN connector of
another MIDI device).
17. DC9Vjack:
Connect the included AC adapter here.
18. DAMPERjack:
Connect the damper pedal included with the D1, or a
DS-1H damper pedal (sold separately).
19. LINEOUT(L/MONO,R)jack:
These are the main audio output jacks. Use an audio
cable with a standard phone jack to connect the D1 to
the input jacks of a speaker with amplifier or to the
AUX IN of other audio equipment.
Use the VOLUME knob to set the output volume.
238
710 11
9
46
5
12 14
13 15
1
17 18
16
19
Control panel Rear panel
1. Headphonesjack:
A stereo mini plug for headphones can be inserted
here.
2. Powerbuon:
This buon turns the D1 on or o.
3. VOLUMEKnob:
This knob adjusts the volume for the LINE OUT and
the headphones jack.
4. PIANOSONGbuon:
This buon is used to enter the Piano song mode, after
which the button lights up. Simultaneously pressing
this button and the TRANSPOSE button enters the
Sound demo song mode.
5. TRANSPOSEbuon:
This buon is used to adjust transposition. While trans-
posing, the buon lights up. Simultaneously pressing
this button and the PIANO SONG button enters the
Sound demo song mode.
6. FUNCTIONbuon:
This buon is used to enter the Function mode, where
pitch, temperament and other settings can be speci-
ed. Hold down the buon to enter the MIDI function
mode, where MIDI seings can be specied. The buon
lights up when the D1 enters the Function mode and
blinks when it enters the MIDI function mode.
7. TOUCHbuon:
This buon lets you select the keyboard sensitivity.
8. BRILLIANCEbuon:
This buon is used to adjust the brightness of the tone.
9. REVERBbuon:
This button is used to turn on/off the reverb, which
adds ambience to the sound. When this eect is on, the
buon will be lit up.
10. CHORUSbuon:
This button is used to turn on/off the chorus, which
adds richness to the sound. When this eect is on, the
buon will be lit up.
11. BANKbuon/LEDs:
This button is used to select the desired sound bank.
The LED for the bank that’s currently selected will
light up.
Parts and their functions

5
Preparation and demo performances
Before you begin playing
About the stand
This instrument does not include a stand. Refer to page 17 if you wish to use
the ST-SV1 optional keyboard stand (sold separately) with the D1.
Connecting the included AC adapter
Insert the DC plug end of the AC adapter into the DC 9V jack on the rear panel,
and connect the plug of the AC adapter to an AC outlet.
Pass the AC adapter cord through the cord hook so that the plug won’t be
removed from the jack accidentally (Fig. 1). When you unhook the cord, don’t
pull on the cord with force.
Be sure to use the AC adapter that came with your unit. Using other AC
adapters may cause the malfunctions or other unforeseen events.
Be sure to plug the unit into an AC outlet of the appropriate voltage.
Connecting a audio equipment and headphones
The D1 does not have built-in speakers. In order to hear the sound of your per-
formance, you’ll need to connect the LINE OUT of the D1 to other audio equip-
ment such as a monitor amplifier, a mixer or a stereo set, or connect a pair of
headphones to the headphones jack.
You must only connect devices with the power turned o. Careless operation
may damage the D1 or the device where it’s connected, or malfunctions may
be caused.
Connection cables are sold separately. You will need to obtain the appropri-
ate commercially-available cables for your equipment.
Using a monitor amp or mixer
To use a monitor amp or mixer, use the LINE OUT jacks.
Plug in audio cables from the D1 to the input jack of a monitor amp or other au-
dio equipment.
The D1’s audio output is designed to produce a signal level that is higher
than ordinary consumer audio equipment such as CD players. For this
reason, playing at an excessive volume may damage the connected
speakers or audio equipment, so use caution with the volume level.
1. Minimizethevolumeofallconnectedequipment,andturnothepower.
2. ConnecttheD1’sLINEOUTjackstotheinputjacksofyourmonitoramp
or mixer.
If you’re playing back through your stereo audio system or an audio player
that has external input jacks, connect the D1 to the jacks that are marked
LINE IN, AUX IN, or external input. (You might need to obtain the appropri-
ate adapter plug or conversion cable.)
Using the headphones
Use the headphones jacks when connecting headphones.
Use stereo headphones with a stereo 1/8” mini plug.
Use headphones at night or when you don’t want disturb others.
To protect your hearing, do not listen to loud, high-volume sounds for ex-
tended periods of time through headphones.
Fig. 1
AC adapter
to AC outlet
DC
plug
Cord hook
LR
Monitor amplifier
connection example
Headphones connection
example

6
Turning the instrument on
Press the power buon to turn on the D1. (Fig. 2)
When the instrument is turned on, the buons on the control panel will light
up (the power buon will not light up).
To turn the instrument o, press the power buon again.
When the instrument is turned o, all functions and parameters, except
the auto power o function return to their factory default seings.
Auto power-o function
When 4 hours have passed without user input or demo performance, the
instrument will be automatically turned o. To disable this function, turn
o the auto power o function (see page 13).
Adjust the volume
Rotate the VOLUME knob that’s located next to the power switch toward
“MAX” to raise the volume level. Rotate it left toward “MIN” to lower the
level. (Fig. 2)
The VOLUME knob controls the output level of the headphones jack and the
LINE OUT jacks.
It is always beer to start with a low volume and then increase gradually.
Using the music stand
Aach the sheet music stand as shown in Fig. 3.
Fig. 2
Softer Loude
r
Music stand holes
Fig. 3

7
Listening to a piano song
1. PressthePIANOSONGbuon.
The PIANO SONG and PIANO1 buons will light up,
and the number for the piano song (001) will appear in
the display.
2. Afterabout3seconds,thePIANO1buonwillblink,
andplaybackofthepianosongwillbegin.
When playback of the rst piano song is nished, play-
back continues sequentially with second, third, etc.
When playback of the twentieth piano song is nished,
playback begins again with the rst piano song.
Listeningtoaspecicpianosong
The number for the piano song that you want to hear
can be selected by pressing the + or – buon beside the
display. If a different number is selected by pressing
the buttons, even while a song is being played, play-
back of the corresponding piano song will begin after a
few seconds.
3. Tostopplaybackofapianosong,pressthePIANO
SONGbuonagain.
Piano song list
No. display
Songtitle Composer
1001 Etude Op.10-12 F.Chopin
2002 Claire de lune C.Debussy
3003 Fantaisie-Impromptu Op.66 F.Chopin
4004 Wal No.6 Db-major Op.64-1 F.Chopin
5005 “Prelude 1” The Well-Tempered
Clavier, Book 1 J.S.Bach
6006 “Turkish March” Sonata K.331 W.A.Mozart
7007 Arabesque No.1 C.Debussy
8008 Für Elise L.v.Beethoven
9009 Liebesträume Nr.3 F.Liszt
10 010 La Campanella F.Liszt
11 011 Nocturne Op.9-2 F.Chopin
12 012 Spring Song Op.62-6 F.Mendelssohn
13 013 Reets dans I'eau C.Debussy
14 014 Gymnopédie No.1 E.Satie
15 015 Etude Op.10-3 F.Chopin
16 016 Old Feather Blues KORG original
17 017 La lle aux cheveux de lin C.Debussy
18 018 The Entertainer S.Joplin
19 019 Sunowers KORG original
20 020 Amazing Grace Hymn
1,3
2
2
Listening to demo performances
The D1 contains a total of 30 demo performances (10 sound
demo songs using 10 high-quality sounds and 20 familiar
piano songs using the piano sounds).
During playback of a sound demo song, you can play
using the keyboard; however, the sound cannot be
changed by using the sound buons.
During playback of a sound demo song, the settings
for eects (reverb and chorus) cannot be changed.
Listening to a sound demo song
1. SimultaneouslypressthePIANOSONGbuonand
theTRANSPOSEbuon.
The PIANO SONG button blinks, and the sound but-
tons blink sequentially.
In addition, the number for the sound demo song (d01)
appears in the display.
2. Afterabout3seconds,thePIANO1buonwillblink,
andplaybackofthesounddemosongcorresponding
tothatbuonwillbegin.
When playback of the PIANO1 demo song is fin-
ished, playback continues sequentially with PIANO2,
E.PIANO1, etc. When playback of the CHOIR demo
song is nished, playback begins again with the PIA-
NO1 demo song.
Listeningtoaspecicsounddemosong
When the sound buttons are blinking sequentially,
press the sound button for the demo song that you
want to hear.
If a different sound button is pressed, even while a
song is being played, playback of the corresponding
sound demo song will begin after a few seconds.
In addition, a sound demo song can be selected by
pressing the + or – buon beside the display.
3. Tostopplaybackofasounddemosong,pressthe
PIANOSONGbuonagain.
Sound demo song list
display Sound
buon Songtitle Composer
d01 PIANO1 À la Manière de Boro-
dine M.Ravel
d02 PIANO2 Wind and Tide Naoki Nishi
d03 E.PIANO1 Jam Session Naoki Nishi
d04 E.PIANO2 In Memory Michael Geisel
d05 HARPSI/
CLAV La Joyeuse J.P.Rameau
d06 VIBES/
GUITAR Jazz in Spain KORG original
d07 ORGAN1 Improvisation Michael Geisel
d08 ORGAN2 Prelude and Fugue
in C Major, BWV 553 J.S.Bach
d09 STRINGS Scoring Interlude Michael Geisel
d10 CHOIR Autumn Flares Michael Geisel
1
1,3
2
2

8
mains the same, even if a different sound button is
pressed.
2
1
Each time the D1 is turned on, the sound in bank 1 is
selected for all sound buons.
Playing two sounds at the same time
(Layer mode)
You can play two sounds at the same time on the key-
board. This is called the Layer mode.
Simultaneously press the two sound buttons for the
sounds to be played at the same time.
The two selected sound buons will light up.
The leftmost or uppermost selected sound buon is layer
1, and the other (rightmost or lowermost) one is layer 2 (see
the diagram at the below).
Layer 2
Layer 1
For example, if E.PIANO1 and ORGAN1 are selected,
E.PIANO1 is layer 1 and ORGAN1 is layer 2. In order to
use sounds in dierent banks, rst select the banks in the
Single mode for the sound buons to be pressed.
For example, to play by layering the grand piano and
jazz organ 2 sounds, select bank 2 (grand piano) for the
PIANO1 buon and bank 2 (jazz organ 2) for the ORGAN1
buon, and then press both buons simultaneously.
When selecting Layer mode, the total number of voices
that can play at the same time is reduced, depending
on the total number of oscillators used by the selected
sounds. (refer to “About maximum polyphony” on
page 16.)
Sounds in dierent banks for the same sound buon
(concert piano and grand piano for the PIANO1 but-
ton) cannot be selected.
Returning to the Single mode
To return to Single mode, just press a single sound se-
lection buon.
Layer mode settings
In Layer mode, the volume balance between sounds
can be adjusted, the octave for each sound can be shift-
ed, and the damper pedal can be enabled or disabled
for each sound. (refer to “Function mode” on page
11.)
Playing the D1
Playing a single sound (Single mode)
You can select a sound from the thirty sounds supplied
with the instrument (10 sounds x 3 banks).
Soundbuon Bank Soundname #
PIANO1 1Concert Piano 3
2Grand Piano 3
3Pop Piano 2
PIANO2 1Jazz Piano 3
2Honky-tonk Piano 2
3Electric Grand Piano 1
E.PIANO1 1Stage Electric Piano 1
2Bright Electric Piano 2
3Tremolo Electric Piano 1
E.PIANO2 1Digital Electric Piano1 2
2Digital Electric Piano2 2
360’s Electric Piano 1
HARPSI/CLAV 1Harpsichord 2
2Clav 1
3Synth Clav 2
VIBES/GUITAR 1Vibraphone 1
2Marimba 1
3Acoustic Guitar 2
ORGAN1 1Jazz Organ1 2
2Jazz Organ2 2
3Jazz Organ3 2
ORGAN2 1Pipe Organ1 2
2Pipe Organ2 2
3Positive Organ 2
STRINGS 1Strings 2
2Cinema Strings 2
3 Analog Strings 2
CHOIR 1Aah Choir 2
2Ooh Voices 2
3Classical Choir 3
(#) These columns show the number of oscillators per voice
that are used by each sound. (refer to “About maximum
polyphony” on page 16.)
1. Pressthesoundbuonforthesoundthatyouwant
toplay.
The selected buon will light up.
2. PresstheBANKbuttontoselectoneofthethree
sounds.
Each press of the BANK button switches the bank in
the order 1, 2, 3, 1, ..., and the corresponding LED to the
right of the BANK buon will light up.
For example, to select the electric grand piano sound,
press the PIANO2 buon, after which its buon lights
up.
Then, press the BANK button twice to select bank 3
(Electric Grand Piano); the LED below and to the right
of the BANK buon will light up.
In addition, the bank selected for a sound button re-

9
The seing appears in the display with 3 producing a deep
chorus eect and 1 producing a light chorus eect.
If a dierent sound is selected or if the D1 is turned o, the
on/o seing for this eect as well as this eect’s seing
return to their factory defaults (default seings).
The metronome
The D1 is equipped with a metronome, which can be
changed to a bell sound, which is convenient for practic-
ing.
Turning on/o the metronome
Press the METRONOME button. The
button lights up, and the metronome
starts.
To stop the metronome, press the METRONOME button
again. The buon turns o.
Specifying the tempo
When the tempo appears in the dis-
play (default seing of 120), regardless
of whether the metronome is turned
on or off, the tempo can be specified
with the + and – buons beside the display (The tempo can
also be specified in Metronome Settings mode.). The set-
ting range is 𝅘𝅥= 40
–
240.
To return to the default seing, simultaneously press the +
and – buons.
Specifying the Time Signature, Volume, Accent
Sound, Tempo and Sound
Use Metronome Seings mode to set the various functions
of the metronome.
1. HolddowntheMETRONOMEbuonuntiltheMet-
ronomeSeingsModeisentered.
The METRONOME buon blinks.
2. Pushthebuttontowhichthefunctionyouwishto
setisassigned.
The value will appear on the display.
Accent Sound
Tempo
Time
Signatur
e
Sound
Hold down th
e
Metronome Settings Mode
Volume
Using a damper pedal
You can use the pedal to make your playing more expres-
sive and realistic.
Pressing this pedal will sustain the sound, producing a
richly resonant decay. You can also add the damper reso-
nance to the concert piano, the grand piano and the jazz
piano sound (bank 1 and 2 of Piano1, bank 1 of Piano2).
Using the optional damper pedal DS-1H will let you vary
the amount of damper that’s applied according to how
deeply you press the pedal (“half-pedaling”).
In Layer mode, you can select the sound(s) where you
want to apply the damper effect. (refer to “Pedal of
layer mode” on page 12)
Eects
Brilliance
This eect changes the brightness of the sound.
TheseingcanbechangedbyholdingdowntheBRIL-
LIANCEbuonandpressingthe+or–buonbesidethe
display.
The setting appears in the display with 3 producing a
brighter sound and 1 producing a less bright sound.
The same seing is applied to all sounds and remains ap-
plied until the D1 is turned off. When the instrument is
turned on, the default seing 2 is selected.
Brilliance cannot be turned o.
Reverb
This eect adds ambience and depth to the sound, produc-
ing the sense of performing in a concert hall. As a factory
default, the on/o seing for this eect as well as this ef-
fect’s seing are saved with each sound.
EachpressoftheREVERBbuttonturnsthereverbon
(buonlightsup)oro(buonturnso).
Tochangethissetting,holddowntheREVERBbutton
andpressthe+or–buonbesidethedisplay.
The seing appears in the display with 3 producing a deep
reverb eect and 1 producing a light reverb eect.
If a dierent sound is selected or if the D1 is turned o, the
on/o seing for this eect as well as this eect’s seing
return to their factory defaults (default seings).
Chorus
Chorus adds modulation to the sound, producing an ex-
pansively rich sound. As a factory default, the on/o set-
ting for this eect as well as this eect’s seing are saved
with each sound.
EachpressoftheCHORUSbuonturnstheChorusef-
fecton(buonlightsup)oro(buonturnso).
Tochangethisseing,holddowntheCHORUSbuon
andpressthe+or–buonbesidethedisplay.

10
Seing
(Buon) SeingRange Default
seing
Time Signature
(PIANO1) 02 (2/4), 03 (3/4), 04 (4/4), 06 (6/4) 04
Volume
(PIANO2) 01–13 10
Accent Sound
(E.PIANO1)
oFF (no accent sound),
on1
(emphasized sound for the accent beat)
,
on2 (bell sound for the accent beat)
oFF
Tempo
(E.PIANO2) 40–240 (same as tempo seing) 120
Sound
(HARPSI/CLAV)
1 (acoustic),
2 (electronic) 1
3. Usethe+,–buonstosetthevalue.
Pressing the + and – buttons simultaneously, the fol-
lowing seings can be restored to the default seings.
• Volume
• Tempo
• Sound
4. Afterchangingtheseing,presstheMETRONOME
buontoexittheMetronomeSeingsMode.
When the Metronome Settings Mode is exited, the
METRONOME buon returns to its lighting status (lit
or not lit) before the Metronome Seings Mode was en-
tered.

11
Touch control settings
The keyboard sensitivity, or touch, can be programmed.
To change the seing, hold down the TOUCH buon and
press the + or – buon beside the display.
Display
Touchcontrolseings
001 Light. Loud notes can be produced even by playing
lightly.
002 Normal. Normal piano touch.
003 Heavy. Loud notes can be produced only by play-
ing very hard.
004 Stable. Sensitivity variations are reduced, and a
relatively stable sound is produced.
005 Steady. Steady notes are produced, like with an
organ, regardless of the force used to press the key.
When the instrument is turned on, the touch seing is
reset to 002 (Normal).
The seings are applied to all sounds.
Transpose
In some cases, a song may be wrien in a dicult key (e.g.,
many black keys), or you may wish to shift the pitch to
match another instrument or vocalist. In such cases, you
can transpose (shift the pitch) so that you can use an easier
fingering, or use the same familiar fingering to play at a
dierent pitch. This is called the Transpose function.
You can shift within a range of 11 semitones so that when
transposing upward by one semitone, playing the notes
shown at the left produces the pitches shown at the right.
When the instrument is turned on, the transposing is
reset.
While holding down the TRANSPOSE button, press the
keyboard key (F♯6–F7) for the desired transposition.
If a keyboard key other than C7 is pressed, the TRANS-
POSE button lights up to indicate that the keyboard is
transposed.
The pitch of the entire keyboard is transposed according
to the pitch of the pressed keyboard key in relation to C7.
To return to the original pitches, hold down the TRANS-
POSE buon and press the C7 key. The TRANSPOSE but-
ton turns o, and transposition is canceled.
Quiet
Loud
Quiet
Loud
Playing
strength
Loudness
002
001
003
004
005
Other functions
key Eect
F♯6–B6 6–1 semitones below
C7 Standard pitch
C♯7–F7 1–5 semitones higher
Function mode
The temperament as well as other pitch settings can be
specied from the Function mode.
Setting procedure for functions in the Function
mode
1. PresstheFUNCTIONbuon.
The FUNCTION and PIANO1 buons light up.
2. Presstheappropriatebuonshownbelowtoselecta
parameter.
The pressed button lights up, and the current setting
appears in the display.
3. Pressthe+or–buontoselectaseing.
Pressing the + and – buttons simultaneously, the fol-
lowing seings can be restored to the default seings.
• Pitch
• Volume balance of layer mode
• Octave of layer mode
4. Afterspecifyingthedesiredsettings,pressthe
FUNCTIONbuontoreturntothemodeforplaying.
The FUNCTION buon turns o.
When the D1 is turned off, all functions, except the
auto power-off function, return to their default set-
tings.
C4 C7 F7
F 6
Pitch
Temperament
Auto power-off
Volume balance of layer mode
Octave of layer mode
Pedal of layer mode

12
Additional Functions and Descriptions
*1: Temperament
Temperament types
Display Temperament
00 Equaltemperament(defaultseing):
Spacing all semitones at equal pitch intervals, this
temperament is the most widely used.
01 Puretemperament[major]:Major chords in the
key (C) are perfectly tuned.
02 Puretemperament[minor]:Minor chords in the
key (C) are perfectly tuned.
03 Arabic:This scale includes the quarter-tone inter-
vals used in Arabic music.
04 Pythagorean:This ancient Greek scale is espe-
cially eective for playing melodies. It consists of
perfect fths; however, other intervals – the major
third in particular – is out of tune.
05 Werckmeister:The Werckmeister III scale was
created in the later Baroque period to allow rela-
tively free transposition.
06 Kirnberger:The Kirnberger III scale is used
mainly for tuning harpsichords.
07 Slendroscale:This is an Indonesian gamelan
scale with ve notes per octave.
08 Pelogscale:This is an Indonesian gamelan scale
with seven notes per octave.
About stretched tuning
In order to produce the most natural resonance, PIANO1
and PIANO2 sounds use a “stretched tuning” that makes
the notes of the lower range slightly aer than equal tem-
perament, and the upper range slightly sharper. This is
how an acoustic piano is normally tuned by professional
tuners.
*2: Octave of layer mode (L1, L2)
1. Selectthelayerwiththe+or–buonbesidethedis-
play.
L1 appears for layer 1, and L2 appears for layer 2.
2. PresstheBANKbuon.
The octave seing (00) appears in the display.
3. Selecttheoctaveseingwiththe+or–buonbeside
thedisplay.
To return to the default setting, simultaneously press
the + and – buons.
To select the octave for the other layer, press the E.PIANO2
buon to select the layer.
If the sound is in the Single mode, – – – appears in the
display, and a seing cannot be specied.
List of functions
Button Function
Setting Display
Description [default setting]
PIANO1 Pitch 27.5...52.5
427.5...440.0...452.5Hz [40.0 : 440.0Hz]
In order to adapt the D1 pitch to that of an-
other instrument, you can adjust the pitch
in steps of 0.5 Hz.
The standard pitch is A=440Hz, and the de-
fault seing is 40.0.
PIANO2 Temperament *1 00...08
Equal...Pelog scale [00: Equal]
Nine different tunings are selectable, in-
cluding equal temperament, Kirnberger
and Werckmeister temperaments and so on.
E.PIANO1
Volume balance of layer mode
1–9...9–1
1–9 (
Layer 1 min.
)...9–9 (
Both max.
)...
9–1 (
Layer 2 min.
) [9–9]
Adjust the volume balance between the
sounds for layer 1 and layer 2.
The seing range is 1–9...9–9...9–1, with the
number on the left for layer 1 and the num-
ber on the right for layer 2.
E.PIANO2
Octave of layer mode (L1, L2)
*2
-01, 00, 01
±1 Octave [00]
Specify the sound range for layer 1 and
layer 2.
The setting range is ±1 octave for each
sound, and –01, 00 and 01 appear in the dis-
play.
HARPSI/
CLAV Pedal of layer mode o–_, _–o, o–o
Only 1, Only 2, Both layers [o–o]
Select the layer that the damper eect is ap-
plied to.
The seings are only for the layer 1 sound
(o – –), only for the layer 2 sound (– – o) and
for both sounds (o – o).
VIBES/
GUITAR Auto power-o *3 oFF, on
Disable, 4 hours
[on]

13
*3: Specifying the auto power-o function
When 4 hours have passed without a key pressed on the
keyboard or without an automatic performance played,
the instrument is automatically turned o. To disable this
function, turn off (oFF) this function. The default setting
is this function turned on. If this setting is changed, the
new seing is saved and remains selected, even if the D1 is
turned o.
1. EntertheFunctionmode,andthenpresstheVIBES/
GUITARbuon.
The VIBES/GUITAR sound button lights up, and the
seing (on) appears in the display.
2. Selecttheon/oseingwiththe+or–buonbeside
thedisplay.
1
2
2

14
MIDI function mode
When the D1 is turned on, the MIDI parameters are set to
transmission channel 1, all reception channels (1–16), Local
On and Omni O.
These settings can be changed from the MIDI function
mode.
Setting procedure for parameters in the MIDI
function mode
1. HolddowntheFUNCTIONbuon(foratleast3sec-
onds).
The FUNCTION buon blinks and the PIANO1 buon
lights up.
2. Presstheappropriatebuonshownbelowtoselecta
parameter.
The pressed button lights up, and the current setting
appears in the display.
MIDI
Channel
Local On/Off
PC Filter
Multi-timbral On/Off
CC Filter
3. Pressthe+or–buontoselectaseing.
4. ToexitFunctionMode,presstheFUNCTIONbuon.
The FUNCTION buon goes dark.
All MIDI seings are applied to all sounds.
When the D1 is turned off, all parameters return to
their factory default seings.
MIDI
What is MIDI?
MIDI, is the abbreviation of Musical Instrument Digital
Interface. It is an international standard that was created
to connect and transfer data between electronic musical
instruments, computers and other devices.
What can you do with MIDI?
Thanks to MIDI, you can use the D1 to control other in-
struments, use other instruments to control the D1, and
use a sequencer to create complex musical pieces.
When you use the D1 keyboard or pedal, or select a sound,
the notes, pedal activation and change in sound are trans-
mitted to another instrument, or are recorded by a se-
quencer.
Connections
Commercially available MIDI cables are used to transfer
MIDI data. Connect these cables from the MIDI connec-
tors of the D1 to the MIDI connectors of the external MIDI
device that you want to exchange data with. There are two
types of MIDI connector.
MIDI IN connector
This connector receives MIDI messages.
The MIDI IN connector lets you play the D1’s sounds from
an external MIDI device (e.g., MIDI keyboard or sequenc-
er). Use a MIDI cable to connect the D1’s MIDI IN connec-
tor to your external MIDI device’s MIDI OUT connector.
MIDI OUT connector
This connector transmits MIDI messages.
The MIDI OUT connector lets you control an external
MIDI device using the MIDI messages transmitted from
the D1. Use a MIDI cable to connect the D1’s MIDI OUT
connector to your external MIDI device’s MIDI IN connec-
tor.

15
*2: Table of sounds and corresponding program
change numbers.
CC0: Bank Select (MSB) for all sounds is set to 121.
SoundBuon Bank CC32 PC Sound
PIANO1 1 1 0 Concert Piano
2 0 0 Grand Piano
3 2 1 Pop Piano
PIANO2 1 0 1 Jazz Piano
2 0 3 Honky-Tonk Piano
3 0 2 Electric Grand Piano
E.PIANO1 1 0 4 Stage Electric Piano
2 1 4 Bright Electric Piano
3 3 4 Tremoro Electric Piano
E.PIANO2 1 0 5 Digital Electric Piano1
2 1 5 Digital Electric Piano2
3 2 4 60’s Electric Piano
HARPSI/CLAV 1 0 6 Harpsichord
2 0 7 Clav
3 1 7 Synth Clav
VIBES/
GUITAR
1 0 11 Vibraphone
2 0 12 Marimba
3 0 24 Acoustic Guitar
ORGAN1 1 0 16 Jazz Organ1
2 1 16 Jazz Organ2
3 0 17 Jazz Organ3
ORGAN2 1 0 19 Pipe Organ1
2 1 19 Pipe Organ2
3 2 19 Positive Organ
STRINGS 1 0 48 Strings
2 0 50 Cinema Strings
3 1 50 Analog Strings
CHOIR 1 0 52 Aah Choir
2 1 52 Ooh Voices
3 2 52 Classical Choir
List of MIDI functions
Button Function
Setting Display
Description [default setting]
PIANO1
MIDI Channnel *1 C01...C16
1...16 [C01]
Specify the transmission channel for MIDI
data.
PIANO2
Local On/O on, oFF
Enabling (turn on)/disabling (turn off) the
D1 sound source [on]
With the Local On seing, playing the D1’s
keyboard produces the sounds of the perfor-
mance as well as transmits MIDI data. With
the Local Off setting, playing the D1’s key-
board does not produce the sounds of the
performance; MIDI data is only transmied.
Normally this parameter is set to Local On
(default seing: on).
Disable this (set to “oFF”) in order to prevent
echo back (two sounds playing unintention-
ally at the same time).
E.PIANO1
PC Filter *2 on, oFF
Enabling/disabling program change trans-
mission/reception filtering [oFF: transmis-
sion/reception]
The programs on a connected MIDI device
can be changed by sending a MIDI change
number from the D1. In addition, the pro-
grams on the D1 can be changed by receiv-
ing a MIDI change number from a connect-
ed MIDI device.
If an incompatible program change number
is received, the D1 sound is not changed.
E.PIANO2
CC Filter on, oFF
Enabling/disabling control change transmis-
sion/reception filtering [oFF: transmission/
reception]
Messages, such as usage of the D1’s damper
pedal, can be transmitted to a connected
external MIDI device to control it, and these
messages can be received from the external
MIDI device to control the D1.
HARPSI/
CLAV
Multi-timbral On/O
on, oFF
Operating as a 16-part multi-timbral sound
module [on: operating]
The D1 can operate as a 16-part multi-tim-
bral sound module when an external MIDI
device is used to control its internal sound
generator.
*1: MIDI channel
In Layer Mode, this seing will be the transmission chan-
nel for layer 1, and the transmission channel for layer 2
will automatically be set to the following channel.
For example, if MIDI channel C07 is selected for layer 1,
MIDI channel C08 will automatically be specied for layer
2. If MIDI channel C16 is selected for layer 1, MIDI channel
C01 will be specied for layer 2.

16
Specications
Keyboard RH3 (Real weighted hammer action 3)
keyboard: 88 note (A0–C8)
Touchcontrol Five available
Pitch Transpose, Fine tuning
Temperament Nine kinds
Soundgeneration
Stereo PCM System
Polyphony 120 notes (max)
Sounds 30 sounds (10 x 3 banks)
Eects Brilliance, Reverb, Chorus (3 levels
each)
Demo 30 (Sound demo song x 10, Piano
Song x 20)
Metronome Tempo, Time signature, Accent,
sound and Volume controls
Pedal Damper
half-pedaling supported (when using
the optional DS-1H)
Connections LINE OUT (L/MONO, R), MIDI (IN,
OUT), Headphones jack, DAMPER
jack, DC 9V jack
Controls Power, VOLUME, PIANO SONG,
TRANSPOSE, FUNCTION, TOUCH,
BRILLIANCE, REVERB, CHORUS,
BANK, Sound × 10, +, –, METRO-
NOME
Powersupply DC 9V, AC adapter (included)
Powerconsumption1.5 W
Dimensions(W×D×H)
1327 × 263 × 128 mm
52.24 × 10.35 × 5.04 inches
(including protrusions on the in-
strument; not including sheet music
stand)
Weight 16 kg / 35.27 lbs.
Includeditems
AC adapter, Music stand, Damper
pedal, Owner’s Manual
Accessories(soldseparately)
ST-SV1 Keyboard Stand,
DS-1H Damper Pedal
• Specifications and appearance are subject to change
without notice for improvement.
Appendix
Troubleshooting
If during use any of the following problems should occur,
carefully examine the instrument to see if you can nd out
what the problem is, and try resolving it by following the
suggestions below. If the instrument still does not function
properly, please contact your dealer.
The instrument will not turn on
• Check that the AC adapter is correctly connected to the
piano and the outlet.
No sound
• Make sure that the volume is not set on MIN. If it is,
bring it up to an adequate level.
• Make sure that the MIDI Local function is not set on
OFF. If it is, set it to ON (or turn the instrument o and
then on again).
Notes are interrupted
• You have exceeded the maximum polyphony. see
“About maximum polyphony.”
The pitch or tone of the piano sounds wrong in some
key regions
• The D1’s piano sounds replicate the sound of an actual
piano as faithfully as possible. This means that in some
regions of the keyboard, you may feel that the over-
tones seem stronger, or that the tone or pitch seems
wrong. This is not a malfunction.
The connected MIDI device does not respond to trans-
mitted MIDI data
• Make sure that all MIDI cables are correctly connected.
Make sure that the D1 is receiving MIDI data on the
same channel as the MIDI device.
About maximum polyphony
If the number of notes being played simultaneously ex-
ceeds the maximum polyphony, some notes will be lost
since the D1 is equipped with a mechanism that stops
the rst note being played to give priority to notes played
with keys pressed later. Some D1 sounds, although they
may be a single sound, are generated by two or more os-
cillators (one note of a sound-generating circuit). Sounds
using just one oscillator, such as those in banks 1 and 2 of
VIBES/GUITAR, have a maximum polyphony of 120 notes.
Sounds using two oscillators, such as those in banks 3 of
PIANO1 and in banks 1 and 2 of E.PIANO2, have a maxi-
mum polyphony of 60 notes.
120 ÷ Number of sound oscillators = Maximum polyphony
Keep the maximum polyphony in mind and carefully
choose sounds when using Layer mode to play two sounds
simultaneously or when using the damper pedal.

17
The D1 can be used with an ST-SV1 keyboard stand (the
ST-SV1 BK model, sold separately). For the D1, use the
instructions shown below instead for step 8 when assem-
bling the ST-SV1 BK.
Using two people, lift the D1 (A), and attach it to the ST-
SV1 stand (B).
While one person prevents the D1 from falling down, The
other person lines up the screws (o) on the left and right
of the ST-SV1 with the screw holes (n) on the boom of the
D1. As a guide, the plate (f) should fit right between the
two grooves (p) on the center of the boom of the D1. Be
careful that the plate does not touch the screw (k) at center
front of the boom of the D1 and the head of the screw (l)
in the center towards the back.
Align the holes (n) under the D1 to match the screws (o) of
the ST-SV1.
Remove the included AC adapter before assembling
the ST-SV1.
Be very careful not to pinch your ngers during lifting
and aaching the D1 to the ST-SV1.
Make sure that the D1 is rmly secured to the ST-SV1
before playing. Failure to secure the ST-SV1 may cause
the D1 to fall o and injure you, or cause damage to
the D1.
When using the ST-SV1 optional keyboard
stand (sold separately)
1 2

18
Précautions
Emplacement
L’utilisation de cet instrument dans les endroits sui-
vants peut en entraîner le mauvais fonctionnement.
• En plein soleil
• Endroits très chauds ou très humides
• Endroits sales ou fort poussiéreux
• Endroits soumis à de fortes vibrations
• A proximité de champs magnétiques
Alimentation
Branchez l’adaptateur secteur mentionné à une prise
secteur de tension appropriée. Evitez de brancher
l’adaptateur à une prise de courant dont la tension
ne correspond pas à celle pour laquelle l’appareil est
conçu.
Interférences avec d’autres appa-
reils électriques
Les postes de radio et de télévision situés à proximité
peuvent par conséquent sourir d’interférences à la
réception. Veuillez dès lors faire fonctionner cet ap-
pareil à une distance raisonnable de postes de radio
et de télévision.
Maniement
Pour éviter de les endommager, manipulez les com-
mandes et les boutons de cet instrument avec soin.
Entretien
Lorsque l’instrument se salit, nettoyez-le avec un
chion propre et sec. Ne vous servez pas d’agents de
neoyage liquides tels que du benzène ou du diluant,
voire des produits inammables.
Conservez ce manuel
Après avoir lu ce manuel, veuillez le conserver soi-
gneusement pour toute référence ultérieure.
Evitez toute intrusion d’objets ou
de liquide
Ne placez jamais de récipient contenant du liquide
près de l’instrument. Si le liquide se renverse ou
coule, il risque de provoquer des dommages, un
court-circuit ou une électrocution.
Veillez à ne pas laisser tomber des objets métalliques
dans le boîtier (trombones, par ex.). Si cela se produit,
débranchez l’alimentation de la prise de courant et
contactez votre revendeur korg le plus proche ou la
surface où vous avez acheté l’instrument.
* Tous les noms de produits et de sociétés sont des
marques commerciales ou déposées de leur déten-
teur respectif.
Note concernant les dispositions
(Seulement EU)
Quand un symbole avec une poubelle barrée
d’une croix apparait sur le produit, le mode d’em-
ploi, les piles ou le pack de piles, cela signie que
ce produit, manuel ou piles doit être déposé chez
un représentant compétent, et non pas dans une
poubelle ou toute autre déchetterie convention-
nelle. Disposer de cee manière, de prévenir les dom-
mages pour la santé humaine et les dommages poten-
tiels pour l’environnement. La bonne méthode
d’élimination dépendra des lois et règlements appli-
cables dans votre localité, s’il vous plaît, contactez votre
organisme administratif pour plus de détails. Si la pile
contient des métaux lourds au-delà du seuil réglementé,
un symbole chimique est aché en dessous du symbole
de la poubelle barrée d’une croix sur la pile ou le pack
de piles.

19
Introduction
Principales caractéristiques
Trente timbres de qualité superbe
Le D1 offre 30 sons (ou “timbres”) pleins d’expression et
de qualité époustouflante, dont un son stéréo de piano à
queue de concert. Le mode Layer permet de jouer simulta-
nément deux timbres.
Eets
Le D1 comporte 3 eets numériques. Ces eets permeent
de régler la brillance du son (Brilliance), de simuler l’envi-
ronnement acoustique d’une salle de concert (Reverb) et de
rendre le son plus ample (Chorus).
Métronome
Le métronome intégré vous permet de spécier la mesure,
le tempo et le volume, et vous permet aussi d’employer le
son d’une cloche comme accent.
Fonction de réglage du toucher
La réponse dynamique du clavier est une des caractéristiques
les plus importantes d’un piano, et le D1 vous permet de
choisir parmi cinq types diérents de réponse dynamique.
Tempéraments
An de garantir un jeu authentique dans un vaste éventail
de styles musicaux, le D1 vous permet de choisir parmi
neuf tempéraments, comprenant la gamme tempérée, les
tempéraments purs (majeur et mineur), les tempéraments
classiques (Kirnberger et Werckmeister) ainsi que des tem-
péraments utilisés dans la musique traditionnelle d’Inde et
du Moyen-Orient. Quand vous choisissez un son de piano
acoustique, l’accord étendu utilisé sur les pianos est auto-
matiquement sélectionné.
Réglage de la hauteur
La fonction Transpose permet de modifier la hauteur du
timbre, tandis que la fonction Pitch Control permet d’eec-
tuer un accordage n.
Caractéristiques MIDI
Le D1 supporte le protocole MIDI, c’est à dire un protocole
standard qui permet d’échanger des données musicales
entre instruments musicaux et ordinateurs. Le protocole
MIDI permet à deux dispositifs (ou plus) de piloter ou d’être
pilotés l’un l’autre ; le D1 peut ainsi fonctionner comme un
générateur sonore à 16 parties multitimbres.
Table des matières
Introduction------------------------------------- 19
Principales caractéristiques ---------------------19
Parties et leurs fonctions ------------------ 20
Préparatifs et écoute des morceaux de
démonstration---------------------------------- 21
Avant de commencer à jouer--------------------21
Écoute des morceaux de démonstration-----23
Utilisation du D1 pour la lecture --------- 24
Jouer un timbre (mode Single)------------------24
Jouer deux timbres à la fois (mode Layer)---24
Utilisation d’une pédale forte--------------------25
Eets --------------------------------------------------25
Le métronome---------------------------------------25
Autres fonctions------------------------------- 27
Réglage du toucher--------------------------------27
Fonction Transpose--------------------------------27
Mode de fonctions ---------------------------------27
MIDI ------------------------------------------------ 30
Le MIDI, qu’est-ce que c’est ? ------------------30
Que peut-on faire avec le MIDI? ---------------30
Connexions ------------------------------------------30
Mode de fonctions MIDI --------------------------30
Appendice --------------------------------------- 32
Problèmes et solutions----------------------------32
Spécications ---------------------------------------32
Quand vous utilisez le pied pour clavier
ST-SV1 en option (vendue séparément)33
MIDI Implementation Chart ---------------- 66

20
Parties et leurs fonctions
11. BoutonettémoinBANK:
Ce bouton permet de choisir la banque de timbres vou-
lue. Le témoin de la banque active s’allume.
12. Boutonsdetimbres:
Ces boutons permeent de choisir parmi les 30 timbres
disponibles (10 × 3 banques). Vous pouvez enfoncer
deux boutons pour jouer simultanément deux timbres
(en mode Layer).
13. Écran:
Ache les réglages, comme par exemple ceux du mode
de fonctions et du métronome.
14. Boutons+,–:
Ces boutons permeent de régler les valeurs des divers
paramètres.
15. BoutonMETRONOME:
Ce bouton sert à activer/arrêter le métronome. Ce bou-
ton est allumé quand vous utilisez le métronome. En
outre, vous pouvez maintenir ce bouton enfoncé pour
activer le mode de réglage du métronome et régler
divers paramètres.
16. PrisesMIDI(IN,OUT):
Prises pour connecter des dispositifs tels que séquen-
ceurs, claviers, etc.
IN: Entrée de données
(à connecter la prise MIDI OUT d’un autre dis-
positif MIDI).
OUT: Sortie des données
(à connecter à la prise MIDI IN d’un autre dis-
positif MIDI)
17. PriseDC9V:
Branchez ici l’adaptateur secteur fourni.
18. PriseDAMPER:
Connectez à cee prise la pédale forte fournie avec le
D1, ou une pédale forte DS-1H (vendue séparément).
19. PriseLINEOUT(L/MONO,R):
Il s’agit des prises de sortie audio principale de
l’instrument. Branchez le D1 aux prises d’entrée de mo-
niteurs actifs ou à la prise AUX IN d’autres dispositifs
audio avec un câble audio à prise jack standard.
Pour réglez le volume de sortie, utilisez le commande
VOLUME.
238
710 11
9
46
5
12 14
13 15
1
17 18
16
19
Panneau avant Panneau arrière
1. Prisepourcasque:
Cee prise permet de brancher un casque à che mini-
jack stéréo.
2. Interrupteurd’alimentation:
Cet interrupteur permet de mere le D1 sous tension et
hors tension.
3. CommandeVOLUME:
Cee commande règle le niveau du signal transmis à la
prise LINE OUT et à la prise casque.
4. BoutonPIANOSONG:
Ce bouton permet d’activer le mode de morceau de
piano; le bouton s’allume quand ce mode est actif. Vous
pouvez enfoncer simultanément ce bouton et le bouton
TRANSPOSE pour activer le mode des morceaux de
démonstration de timbres.
5. BoutonTRANSPOSE:
Ce bouton permet de régler la fonction de transposi-
tion. Ce bouton s’allume quand la fonction de transpo-
sition est active. Vous pouvez enfoncer simultanément
ce bouton et le bouton PIANO SONG pour activer le
mode des morceaux de démonstration de timbres.
6. BoutonFUNCTION:
Ce bouton permet d’activer le mode de fonctions (Func-
tion) et de régler la hauteur, le tempérament et d’autres
paramètres. Maintenez ce bouton enfoncé pour activer
le mode MIDI et régler les paramètres MIDI. Le bouton
s’allume quand le mode de fonctions du D1 est actif et
clignote quand l’instrument passe en mode MIDI.
7. BoutonTOUCH:
Sélectionne la courbe de dynamique du toucher du
clavier.
8. BoutonBRILLIANCE:
Ce bouton permet de régler la brillance du son.
9. BoutonREVERB:
Ce bouton sert à activer/couper l’eet de réverbération,
utilisé pour recréer divers environnements acous-
tiques. Quand cet eet est actif, le bouton est allumé.
10. BoutonCHORUS:
Ce bouton sert à activer/couper l’eet de chorus, utilisé
pour rendre le son plus ample. Quand cet eet est actif,
le bouton est allumé.
This manual suits for next models
1
Table of contents
Languages:
Other Korg Musical Instrument manuals

Korg
Korg EASYSTART CX-3 Product information sheet

Korg
Korg SP-170S User manual

Korg
Korg tinyPIANO User manual

Korg
Korg Concert C-4500 User manual

Korg
Korg M3 Product information sheet

Korg
Korg O1/W FD User manual

Korg
Korg KARMA 2 General instructions

Korg
Korg HAVIAN 30 User manual

Korg
Korg iS35-HD Installation manual

Korg
Korg G1 User manual
Popular Musical Instrument manuals by other brands

Rob O'Reilly
Rob O'Reilly Expressiv MIDI GUITAR SYSTEM Getting started

Yamaha
Yamaha PortaSound PSS-280 owner's manual

Casio
Casio Celviano AP-38 user guide

Allen Organ Company LLC
Allen Organ Company LLC MDS-8 manual

LyxPro
LyxPro ISX-101 Maintenance Guide

Allen Organ Company LLC
Allen Organ Company LLC MDS-15 user manual