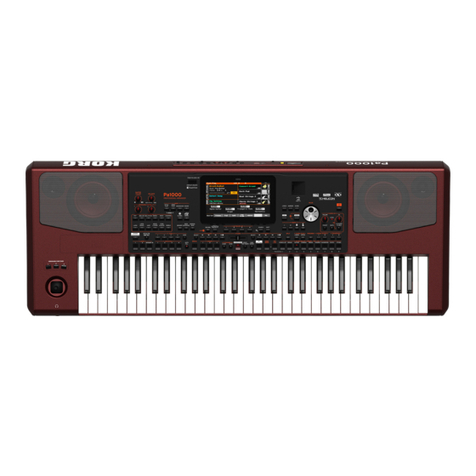
Korg microARRANGER User manual

Owner’s Manual
E 1

PRECAUTIONS
LOCATION
Usingtheunitinthefollowinglocationscanresultina
malfunction.
•Indirectsunlight
•Locationsofextremetemperatureorhumidity
•Excessivelydustyordirtylocations
•Locationsofexcessivevibration
•Closetomagneticfields
POWER SUPPLY
PleaseconnectthedesignatedACadaptertoanAC
outletofthecorrectvoltage.DonotconnectittoanAC
outletofvoltageotherthanthatforwhichyourunitis
intended.
INTERFERENCE WITH OTHER ELECTRICAL
DEVICES
Radiosandtelevisionsplacednearbymayexperience
receptioninterference.Operatethisunitatasuitable
distancefromradiosandtelevisions.
HANDLING
Toavoidbreakage,donotapplyexcessiveforcetothe
switchesorcontrols.
CARE
Iftheexteriorbecomesdirty,wipeitwithaclean,dry
cloth.Donotuseliquidcleanerssuchasbenzeneor
thinner,orcleaningcompoundsorflammablepolishes.
KEEP THIS MANUAL
Afterreadingthismanual,pleasekeepitforlaterrefer‐
ence.
KEEPING FOREIGN MATTER OUT OF YOUR
EQUIPMENT
Neversetanycontainerwithliquidinitnearthis
equipment.Ifliquidgetsintotheequipment,itcould
causeabreakdown,fire,orelectricalshock.
Becarefulnottoletmetalobjectsgetintotheequip‐
ment.Ifsomethingdoesslipintotheequipment,
unplugtheACadapterfromthewalloutlet.
ThencontactyournearestKorgdealerorthestore
wheretheequipmentwaspurchased.
THE FCC REGULATION WARNING (FOR USA)
Thisequipmenthasbeentestedandfoundtocomplywith
thelimitsforaClassBdigitaldevice,pursuanttoPart15
oftheFCCRules.Theselimitsaredesignedtoproviderea‐
sonableprotectionagainstharmfulinterferenceinaresi‐
dentialinstallation.Thisequipmentgenerates,
uses,andcanradiateradiofrequencyenergyand,ifnot
installedandusedinaccordancewiththeinstructions,
maycauseharmfulinterferencetoradiocommunications.
However,thereisnoguaranteethatinterferencewillnot
occurinaparticularinstallation.Ifthisequipmentdoes
causeharmfulinterferencetoradioortelevisionreception,
whichcanbedeterminedbyturningtheequipmentoff
andon,theuserisencouragedtotrytocorrecttheinterfer‐
encebyoneormoreofthefollowingmeasures:
•Reorientorrelocatethereceivingantenna.
•Increasetheseparationbetweentheequipmentand
receiver.
•Connecttheequipmentintoanoutletonacircuitdiffer‐
entfromthattowhichthereceiverisconnected.
•Consultthedealeroranexperiencedradio/TVtechni‐
cianforhelp.
Unauthorizedchangesormodificationtothissystemcan
voidtheuser’sauthoritytooperatethisequipment.
NOTICE REGARDING DISPOSAL (EU ONLY)
Whenthis“crossed‐outwheeledbin”symbolis
displayedontheproduct,owner’smanual,bat‐
tery,orbatterypackage,itsignifiesthatwhenyou
wishtodisposeofthisproduct,manual,package
orbatteryyoumustdosoinanapprovedmanner.
Donotdiscardthisproduct,manual,packageor
batteryalongwithordinaryhouseholdwaste.
Disposinginthecorrectmannerwillpreventharmto
humanhealthandpotentialdamagetotheenvironment.
Sincethecorrectmethodofdisposalwilldependonthe
applicablelawsandregulationsinyourlocality,pleasecon‐
tactyourlocaladministrativebodyfordetails.Ifthebattery
containsheavymetalsinexcessoftheregulatedamount,a
chemicalsymbolisdisplayedbelowthe“crossed‐out
wheeledbin”symbolonthebatteryorbatterypackage.
IMPORTANT NOTICE TO CONSUMERS
Thisproducthasbeenmanufacturedaccordingtostrict
specificationsandvoltagerequirementsthatareapplicable
inthecountryinwhichitisintendedthatthisproduct
shouldbeused.Ifyouhavepurchasedthisproductviathe
internet,throughmailorder,and/orviaatelephonesale,
youmustverifythatthisproductisintendedtobeusedin
thecountryinwhichyoureside.
WARNING:Useofthisproductinanycountryotherthan
thatforwhichitisintendedcouldbedangerousandcould
invalidatethemanufacturer’sordistributor’swarranty.
Pleasealsoretainyourreceiptasproofofpurchaseother‐
wiseyourproductmaybedisqualifiedfromthemanufac‐
turer’sordistributor’swarranty.

DATA HANDLING
Datastoredinmemorymayoccasionallybelostdueto
incorrectuseraction.Besuretosaveyourimportant
datatoamemorycard.KORGwillnotberesponsible
fordamagescausedbydataloss.
LCD DISPLAY
SomepagesofthemanualsshowLCDscreensalong
withanexplanationofoperationandfunctionality.All
soundnames,parameternames,andvaluesaremerely
examplesandmaynotalwaysmatchtheactualdisplay
thatyouareworkingon.
TRADEMARKS
Mac,theMaclogoandtheAudioUnitslogoaretrade‐
marksofAppleInc.,registeredintheU.S.andother
countries.
MS‐DOSandWindowsareregisteredtrademarksof
MicrosoftCorporation,registeredintheU.S.andother
countries.
Allproductnamesandcompanynamesarethetrade‐
marksorregisteredtrademarksoftheirrespective
owners.

THE BALANCE SLIDER
Whenturningtheinstrumenton,pleasebeassuredtheBALANCEsliderissettothecen‐
ter.ThissetsbothSequencer1(SEQ1)andSequencer2(SEQ2)totheirmaximumlevel.
ThiswillavoidyoustartaSongwithouthearinganything.

3
HOW TO…
Keyboard
…select a Sound Program 25
…select a Performance 25
…play a Sound Program across the
whole keyboard, as with a piano 24
…split the keyboard in two 24
…add sounds to the right hand 24
…mute/unmute sounds 24
Style Play mode
…select a Style 26
…start/stop the Style 27
…select a Fill or a Break 27
…select a Style Variation 27
…see the Style tracks 41
…create a new Style 52
Song Play mode
…play a Song (Standard MIDI File) 31
…see the Lyrics 74
…see the Song tracks 73
…start both Sequencers at the same time 18, 80
Backing Sequence mode
…record a new Backing Sequence (Song) 82
Song mode
…record a new Song 90
…edit a Standard MIDI File 88
In general
…turn the speakers off 125
…change the Damper polarity 126
…select the Arabic Scale 34

4
TABLE OF CONTENTS
Introduction
Welcome! . . . . . . . . . . . . . . . . . . . . . . . . . . . . . . . . . 8
Usefullinks....................................8
Aboutthismanual..............................9
Loadingtheoperatingsystem....................9
ReloadingtheFactoryData......................9
Start up . . . . . . . . . . . . . . . . . . . . . . . . . . . . . . . . . . 10
ConnectingtheACpoweradapter...............10
Turningtheinstrumentonandoff...............10
ControllingtheVolume........................10
TheBALANCEslider..........................10
Headphones..................................10
AudioOutputs................................11
AudioInputs.................................11
MIDIconnections..............................11
DamperPedal.................................11
Demo........................................11
Themusicstand...............................11
Front panel . . . . . . . . . . . . . . . . . . . . . . . . . . . . . . . 12
Display and User Interface . . . . . . . . . . . . . . . . . . 19
Displaycontrols...............................19
Interfacestructure.............................20
Messagewindows.............................21
SymbolsandIcons.............................21
Grayed‐outnon‐availableparameters............21
Rear panel . . . . . . . . . . . . . . . . . . . . . . . . . . . . . . . . 22
Basic Guide
Basic operations . . . . . . . . . . . . . . . . . . . . . . . . . . 24
Playingonthekeyboard........................24
Selecting,muting/unmutingandsoloingatrack...24
SelectingaPerformance........................25
SelectingaProgram............................25
SelectingaStyle...............................26
SelectingaSingleTouchSetting(STS)............26
Changingallkeyboardtracksatonce.............26
Shortcuttoseetheoriginalbank
foraStyle,PerformanceorProgram............26
Tutorial . . . . . . . . . . . . . . . . . . . . . . . . . . . . . . . . . . 27
PlayingaStyle
(AutomaticAccompaniment)..................27
PlayinginRealtime
(WithoutusingAutomaticAccompaniment)....28
RecordingaSong
(Simultaneouslyrecording
theStyleandrealtimeperformance)............30
PlayingaSongfromacard.....................31
EditingaSong................................32
TheArabicScale...............................34
MIDI . . . . . . . . . . . . . . . . . . . . . . . . . . . . . . . . . . . . . 35
WhatisMIDI?.................................35
Midifiles......................................35
TheGeneralMIDIstandard.....................35
TheGlobalchannel.............................35
TheChord1andChord2channels...............3
6
TheControlchannel............................36
MIDISetup....................................3
6
Connecting
microARRANGERtoaMasterkeyboard........3
6
Connecting
themicroARRANGERtoaMIDIaccordion......37
Connecting
themicroARRANGERtoanexternalsequencer..37
Playinganotherinstrument
withthemicroARRANGER....................3
8
Reference Guide
Style Play operating mode . . . . . . . . . . . . . . . . . . 40
What’saStyle?.................................40
StylesandPerformances........................40
ChangingandresettingtheTempo...............40
TheDIRECTSDbank...........................40
Mainpage.....................................41
Styletrackspage...............................41
HowtoselectPrograms.........................41
TheWritewindow.............................42
Menu.........................................42
Editpagestructure.............................42
Page1‐Mixer:Volume.........................43
Page2‐Mixer:Pan.............................43
Page3‐Mixer:FXSend.........................4
3
Page4‐Tuning:Detune.........................44
Page5‐Tuning:Scale...........................4
4
Page6‐Tuning:PitchBendSensitivity............44
Page7‐FX:A/BSelect..........................44
Page8‐FX:C/DSelect..........................45
Page9‐FX:Aediting...........................45
Page10‐FX:Bediting..........................4
5
Page11‐FX:Cediting..........................45
Page12‐FX:Dediting..........................45
Page13‐Track:Easyedit.......................4
5
Page14‐Track:Mode..........................46
Page15‐Track:Internal/External.................47
Page16‐R.T.controls:Damper..................47
Page17‐R.T.controls:Joystick..................47
Page18‐R.T.controls:Dynamicrange............4
8
Page19‐R.T.controls:Ensemble.................48
Page20‐Stylecontrols:Drum/Fill................49
Page21‐Stylecontrols:
WrapAround/KeyboardRange...............4
9
Page22‐Pads.................................50
Page23‐Preferences:Lock......................50
Page24‐Preferences:controls...................5
1

5
Style Record mode . . . . . . . . . . . . . . . . . . . . . . . . . 52
TheStyle’sstructure............................52
StyleImport/Export............................53
EnteringtheRecordmode......................53
ListeningtotheStylewhileinRecord/Editmode...53
ExitandSave/AbortStyle.......................54
TheWritewindow.............................54
Listofrecordedevents.........................54
FastDeleteusingthecontrolpanelbuttons........54
Mainpage....................................55
StyleTrackspage..............................56
StepRecordpage..............................57
StyleRecordprocedure.........................58
Menu........................................61
Editpagestructure.............................61
Page1‐Edit:Quantize.........................62
Page2‐Edit:Transpose........................62
Page3‐Edit:Velocity..........................63
Page4‐EventEdit.............................63
Page5‐EventFilter............................64
EventEditprocedure...........................65
Page6‐Edit:Delete............................66
Page7‐Edit:DeleteAll.........................67
Page8‐Edit:Copy.............................67
Page9‐StyleElementControls:Programs........68
Page10‐StyleElementControls:Expression......68
Page11‐StyleElementControls:KeyboardRange.68
Page12‐StyleElementControls:
ChordVariationTable........................69
Page13‐StyleControls:Mode/Tension...........69
Song Play operating mode . . . . . . . . . . . . . . . . . . 70
TheSongsandtheStandardMIDIFileformat.....70
Transportcontrols.............................70
MIDIClock...................................70
Switchingbetweensequencersduringediting.....70
SelectingaSongcomposingitsprogressivenumber70
Realtimeandsequencertracks...................70
MasterVolume,SequencerVolume,BALANCE...71
EffectsinSongPlaymode.......................71
GrooveQuantizewindow.......................71
TheWritewindow.............................72
Mainpage....................................73
Tracks1–8page................................73
Tracks9–16page...............................74
SongSelectpage...............................74
TheLyricspage................................74
PlayingaJukeboxfile..........................74
Menu........................................75
Editpagestructure.............................75
Page1‐Mixer:Volume.........................76
Page2‐Mixer:Pan.............................76
Page3‐Mixer:FXsendA/B.....................76
Page3‐Mixer:FXsendC/D.....................77
Page4‐FX:A/BSelect..........................77
Page4‐FX:C/DSelect..........................77
Page5‐FX:Aediting..........................78
Page6‐FX:Bediting...........................78
Page5‐FX:Cediting...........................78
Page6‐FX:Dediting..........................78
Page7‐Track:Mode...........................78
Page8‐Track:Internal/External.................79
Page9‐Jukebox...............................79
Page10‐Preferences...........................80
SavingalistofSongs...........................81
Backing Sequence operating mode . . . . . . . . . . . 82
Transportcontrols.............................82
TheBackingSequence,SongandSongPlaymodes.82
HowtoplaybackaSong........................82
RealtimeRecordingmode......................82
Chord/AccSteprecording......................83
MainPage(BackingSequencePlay)..............83
LoadSongpage...............................84
SaveSongpage................................84
RealtimeRecordingpage.......................85
Chord/AccStepRecordingpage.................85
HowtodeleteawholeSong....................87
Song operating mode . . . . . . . . . . . . . . . . . . . . . . 88
Transportcontrols.............................88
MasterVolumeandSequencerVolume...........88
TheSongsandtheStandardMIDIFileformat.....88
Fasttrackdeletion.............................88
HowtodeleteawholeSong....................88
Mainpage....................................88
Tracks1–8page...............................89
Tracks9–16page..............................89
SongSelectpage...............................89
SaveSongpage................................90
RealtimeRecordprocedure.....................90
StepRecordprocedure.........................91
SongRecordpage.............................92
StepRecordpage..............................93
Menu........................................94
Editpagestructure............................94
Page1‐Mixer:Volume.........................95
Page2‐Mixer:Pan............................95
Page3‐Mixer:FXBlock........................95
Page4‐Mixer:FXSendA/B(orC/D).............96
Page5‐Tuning:Detune........................96
Page6‐Tuning:Scale..........................96
Page7‐Tuning:PitchBend/Scale................97
Page8‐FX:A/BSelect.........................97
Page9‐FX:C/DSelect.........................97
Page10‐FX:Aediting.........................98
Page11‐FX:Bediting.........................98
Page12‐FX:Cediting.........................98
Page13‐FX:Dediting.........................98
Page14‐Track:Easyedit.......................98
Page15‐Track:Mode..........................99
Page16‐Track:Internal/External................99
Page17‐Edit:Quantize.......................100
Page18‐Edit:Transpose......................100
Page19‐Edit:Velocity........................100
Page20‐Edit:Delete..........................101
Page21‐Edit:CutMeasures...................101
Page22‐Edit:InsertMeasures.................101
Page23‐Edit:Copy..........................102
Page24‐EventEdit...........................102
Page25‐EventFilter..........................103
EventEditprocedure.........................104
6
Program operating mode . . . . . . . . . . . . . . . . . . . 105
Mainpage...................................105
SoundProgramsandDrumPrograms...........105
Menu.......................................105
Editpagestructure...........................106
TheComparefunction........................106
Howtoselectoscillators.......................106
EraseProgram/Oscillator......................106
The‘Write’window..........................106
Page1‐Basic................................107
Page2‐Sample(SoundPrograms)..............107
Page2‐DKSamples(DrumPrograms)..........108
Page3‐Pitch................................109
Page4‐PitchLFO1...........................110
Page5‐PitchLFO2...........................111
Page6‐PitchEG.............................111
Page7‐Filter................................112
Page8‐FilterModulation.....................113
Page9‐FilterLFO1...........................114
Page10‐FilterLFO2..........................115
Page11‐FilterEG............................115
Page12‐Amp...............................117
Page13‐AmpModulation....................117
Page14‐AmpLFO1..........................118
Page15‐AmpLFO2..........................118
Page16‐AmpEG............................118
Page17‐LFO1...............................120
Page18‐LFO2...............................122
Page19‐Effects..............................122
Page20‐FX1editing..........................122
Page21‐FX2editing..........................122
AMS(AlternateModulationSource)list.........123
Global edit environment . . . . . . . . . . . . . . . . . . . 125
TheWritewindow............................125
Menu.......................................125
Page1‐Generalcontrols......................125
Page2‐MasterTranspose.....................126
Page3‐Assignable
Pedal/Footswitch,AssignableSlider...........126
Page4‐MIDISetup...........................126
Page5‐MIDIControls........................127
Page6‐MIDIINChannels....................127
Page7‐MIDIINControls(1)..................128
Page8‐MIDIINControls(2)..................128
Page9‐MIDIINFilters.......................129
Page10‐MIDIOUTChannels.................129
Page11‐MIDIOUTFilters....................129
Card Edit environment . . . . . . . . . . . . . . . . . . . . . 130
TheWRITE/CARDINUSELED................130
Supportedcards..............................130
LoadingdatacreatedwiththePa80/Pa60/Pa50...131
Cardstructure...............................131
Filetypes....................................131
Fileandfoldersizedisplay....................132
Pagestructure................................ 132
Navigationtools..............................132
Menu........................................ 133
Page1‐Load.................................133
Page2‐Save................................. 135
Page3‐Copy................................. 138
Page4‐Erase................................. 139
Page5‐Format............................... 140
Page6‐NewDir.............................. 140
Page7‐Rename.............................. 140
Page8‐Utilities1............................. 141
Page9‐Utilities2............................. 142
Appendix
Factory Data . . . . . . . . . . . . . . . . . . . . . . . . . . . . . 144
Styles........................................ 144
StyleElements................................ 146
SingleTouchSettings(STS)..................... 146
Programs(bankorder)......................... 147
Programs(ProgramChangeorder).............. 154
DrumKits....................................160
DrumKitinstruments.........................161
Performances................................. 173
MIDISetup...................................174
Effects . . . . . . . . . . . . . . . . . . . . . . . . . . . . . . . . . . 175
Diagrams.................................... 175
DynamicModulationsources................... 175
Filter/Dynamic................................ 175
Pitch/PhaseMod.............................. 185
Mod./P.Shift.................................. 195
ER/Delay..................................... 202
Reverb.......................................208
Mono–MonoChain........................... 209
Assignable parameters . . . . . . . . . . . . . . . . . . . . 225
ListoffunctionsassignabletotheFootswitch..... 225
Listoffunctionsassignable
tothePedalorAssignableSlider.............. 226
ListofsoundsassignabletothePads............. 226
ListoffunctionsassignabletothePads........... 227
Scales........................................ 227
MIDI Controllers . . . . . . . . . . . . . . . . . . . . . . . . . . 228
MIDIImplementationChart.................... 229
Parameters . . . . . . . . . . . . . . . . . . . . . . . . . . . . . . 230
Recognized chords . . . . . . . . . . . . . . . . . . . . . . . 233
Error messages & Troubleshooting . . . . . . . . . . 235
Errormessages...............................235
Troubleshooting.............................. 238
Technical specifications . . . . . . . . . . . . . . . . . . . 239
Alphabetical Index . . . . . . . . . . . . . . . . . . . . . . . . 240

INTRODUCTION

8
Welcome!
Useful links
1. WELCOME!
ThankyouforpurchasingtheKorgProfessional
ArrangermicroARRANGER.
Thisinstrumentisanidealkeyboardforsongproduc‐
tion—itletsyouselectadesiredmusicalstyleandgen‐
erateahigh‐qualitybandaccompanimentsimplyby
playingchords,andthenyoucanplaythemelody
yourselftoeasilycreateanoriginalsong.
Herearesomeofthefeaturesofyournewinstrument:
•P
owerfulHI(HyperIntegrated)KORGsoundgen‐
erationsystem,asseeninourbestprofessional
synthesizers.
•OPOS(ObjectivePortableOperatingSystem)mul‐
titaskingoperatingsystem,toletyouloaddata
whileplayingyourinstrument.
•OperatingSystemupdates,toloadnewfeatures
fromcard.Don’tletyourinstrumentgetold!
•SolidStateDisk(SSD),foranysystemupdate–a
smartwaytoreplacetheusualROMmemory.
•SDcardslot,capableofreadingandwritingonSD
andMMCmemorytypes.
•DirectStyleaccessfromSDcard.
• GeneralMIDILevel2Sounds‐compatible.
•Mor
ethan662SoundPrograms.
•4multieffectprocessor,eachwith89effecttypes.
•160Performancesand1,216SingleTouchSettings
(STS),forfastsettingofkeyboardsoundsand
effects.
•304Styles.
•XDSDoubleSequencerwithCrossfader.
•Sty
leRecordandEdit
•Full‐featuredsequencer(SongRecordandEdit)
•In
tegratedspeakers,forthemosttruesound
reproduction.
•Wi
deCustomDisplay.
USEFUL LINKS
YourpreferredKORGdealeralsocarriesawiderange
ofKorghardwareandsoftwareaccessories.Pleaseask
yourdealeraboutadditionalPrograms,Styles,and
otherusefulmusicmaterials.
EachKORGdistributorcansupplyyouwithuseful
information.Justgivehimacallforadditionalservices.
IntheEnglish‐speakingworld,herearetherelevant
addresses:
USA KORGUSA,316SouthServiceRoad,Mel‐
ville,NewYork,11747,USA
Tel:1‐516‐333‐9100,Fax:1‐516‐333‐9108
UK KORGUKLtd,1HarrisonClose,Knowl‐
hill,MiltonKeynes,MK5,8PA,UK
Tel:01908304600,Fax:01908304699
UKTechnicalSupport
Tel:01908304637
E‐mail:info@korg.co.uk
ManyKORGdistributorsalsohavetheirownweb
pageontheinternet,whereyoucanfindinfosandsoft‐
ware.UsefulwebpagesinEnglisharethefollowing:
http://www.korg.com/
http://www.korg.co.uk/
Aplacetofindoperatingsystemupdatesandvarious
systemfiles(forexample,afullbackupofthefactory
data)isatthefollowinglink:
http://www.korgpa.com/

9
Welcome!
About this manual
ABOUT THIS MANUAL
Thismanualisdividedinthreesections:
•ABasicGuide,containinganoverviewofthe
instrument,aswellasaseriesofpracticalguides
(named“Tutorials”).
•AReferenceGuide,witheachpageandparame‐
terdescribedindetail.
•AnAppendix,withalistofdataandusefulinfor‐
mationfortheadvanceduser.
Withinthemanual,youwillfindthefollowingabbrevi‐
ations:
TheparametercanbesavedontoaPerfor‐
mancebypressingtheWRITEbutton.
Theparametercanbesavedontothecur‐
rentStylePerformancebypressingthe
WRITEbutton.
TheparametercanbesavedontoaSingle
TouchSettingbypressingtheWRITEbut‐
ton.
TheparametercanbesavedontoaGlobal
settingbygoingtotheGlobalenviron‐
ment(see“Globaleditenvironment”on
page125)andpressingtheWRITEbutton.
LOADING THE OPERATING SYSTEM
YourmicroARRANGERcanbeconstantlyupdatedas
newversionsoftheoperatingsystemarereleasedby
KORG.Youcandownloadtheoperatingsystemfrom
http://www.korgpa.com/.Please,readtheReadmefile
includedwiththeoperatingsystemitself.
Youcanseewhichversionoftheoperatingsystemsis
installedinyourmicroARRANGERbykeepingthe
SHIFTbuttonpressed,andpressingtheENTERand
EXITbuttonstogether.Theoperatingsystemversion
numberwillappearinthedisplay.PressEXITtoclose
themessagewindow.
Toloadanewsystem,followtheseinstructions:
1. Copythethreeoperatingsystem’sfilesintheroot
ofanSDcard.Thesearetheneededfiles:
•BPaMAR1.sys
•NBPaMAR1.sys
•OsPaMAR1.lzx
2. Turntheinstrumentoff,andinsertthecardcon‐
tainingtheoperatingsystemintothecardslot.
3. Turntheinstrumenton.Amessageappearsinthe
display,askingifyouwanttoloadtheoperating
system.
4. PressENTERtoload,orEXITtocanceltheloading
procedure.IfyoupressENTER,waituntilthe
loadingisfinished.
Whentheoperatingsystemisfinishedloading,a
messageappears,askingyoutoremovethecard
andpressanybutton.
Hint:Whendone,deletetheoperatingsystemfiles,to
avoidmicroARRANGERstartstheupgradeprocedure
eachtimeitisturnedonwiththesamecardinthedrive.
5. Removethecard,andpressanybutton.
RELOADING THE FACTORY DATA
Shouldtheinternalmemorycontentgetdamaged,you
canreloadtheoriginalFactoryDatafromthebackup
card.See“RestoreData”onpage141.

10
Start up
Connecting the AC power adapter
2. START UP
CONNECTING THE AC POWER ADAPTER
ConnectthesuppliedACpoweradaptertothededi‐
catedsocketontherearoftheinstrument.Then,plugit
intoawallsocket.
Warning:Useonlythesuppliedadapter,oranadapter
suggestedbyKorg.Otheradaptersmaylooksimilar,
buttheymaydamageyourinstrument!
TURNING THE INSTRUMENT ON AND OFF
Turningthepoweron
•Pressthepowerbutton( )locatedontheupperright
sideofthefrontpanel.
ThestartupscreenwillappearintheLCD,andaftera
timeitwilldisplaythemainpageinStylePlaymode
andtheunitwillbereadyforsoundoutput.
Turningthepoweroff
•Pressthepowerbutton( )locatedontheupperright
sideofthefrontpaneltoturnoffthepower.
Warning:
Whenturningtheinstrumentoff,alldatacontai‐
nedinRAM(avolatilememory,usedforSongediting)willbe
lost.Onthecontrary,datacontainedintheSSDdisk(anon‐
volatilememory,usedforFactoryandUserdata)willbepre‐
served.
Note:
NeverturnoffthepowerwhiletheSDcarddatais
beingreadorwritten.
ABOUT THE AUTO POWER-OFF FUNCTION
Withthefactorysettings,thisinstrumentwillautomat‐
icallypower‐offwhenfourhourshavepassedsince
youlastplayedthekeyboardorusedthebuttons.If
desired,youcanturnoff(disable)thisfunction.
Thepowerwillalsoturnoffautomaticallyafterfour
hourspasswithonlysongsordemosongsbeing
played.
Toadjustpoweron/offsettings,pressthe[GLOBAL]
buttontoentertheGLOBALpage,andadjusttheset‐
tingsonthePage1‐Gen.Controlspage.(“A u t o O f f ” on
page125)
CONTROLLING THE VOLUME
•UsetheMASTERVOLUME
slidertocontroltheoverall
volumeoftheinstrument.
Thisslidercontrolsthe
volumeofthesoundgoing
totheinternalspeakers,the
L/MONO&RIGHTOUT‐
PUTS,andtheHEADPHO‐
NESconnector.
Note:
Startatamoderatelevel,thenraisetheMASTER
VOLUMEup.Don’tkeepthevolumeatanuncomfortable
levelfortoolong.
•UsetheACC/SEQVOLUMEslidertocontroltheStyle
tracks(drums,percussion,bass…)volume.Thisslider
alsocontrolsbothoftheSequencerstracks,excluding
theRealtime(Keyboard)tracks.
•Bydefault,youcanusetheASSIGN.SLIDERtocontrol
thekeyboardtracksvolume.Thissliderisuser‐assigna‐
ble,butissettotheKeyboardExpressionparameterby
default.
THE BALANCE SLIDER
TheBALANCEslidersetstherelativevolumeofthe
twoonboardsequencers(Sequencer1andSequencer2).
•MoveitfullylefttosetSequencer1tothemaximum
levelandSequencer2tozero.
•MoveitfullyrighttosetSequencer1tozeroand
Sequencer2tothemaximumlevel.
•MoveittothecentertosetbothSequencersatthesame
level.
Note:Whenturningtheinstrumenton,movethissliderto
thecenter,toavoidstartingaSongattheminimumlevel.
HEADPHONES
Youcanconnectapairofheadphonestotherearpanel
headphonejack(PHONES:stereomini‐jack).Youcan
useheadphoneswithanimpedanceof16–200Ω (50Ω
recommended).Useaheadphonedistributortocon‐
nectmorethanonepairofheadphones.

11
Start up
Audio Outputs
AUDIO OUTPUTS
Youcansendthesoundtoanexternalamplification
system,insteadoftheinternalspeakers.Thisisuseful
whenrecording,orwhenplayinglive.
Stereo. ConnecttwomonocablestotheL/MONO&
RIGHTOUTPUTS.Connecttheotherendofthecables
toastereochannelofyourmixer,twomonochannels,
twopoweredmonitors,ortheTAPE/AUXinputof
youraudiosystem.Don’tusethePHONOinputsof
youraudiosystem!
Mono. ConnectamonocabletotheL/MONOOUT‐
PUT.Connecttheotherendofthecabletoamono
channelofyourmixer,apoweredmonitor,orachannel
ofyourTAPE/AUXinputofahi‐fisystem(youwill
hearthatchannelonly,unlessyoucansettheamplifier
toMonomode).
AUDIO INPUTS
Youcanconnecttheoutputofanotherelectronicmusi‐
calinstrument,anunpoweredmixer,oranyaudio
devicetotherearpanelinputjack(INPUT:stereomini‐
jack).Sincethisisaline‐levelinput,youʹllneedtousea
separatelysoldmicpreampormixerifyouʹreconnect‐
ingamic.
Usetheconnecteddevice’svolumecontroltoadjustthe
inputlevel.Becarefulnottomakeitdistort(or“clip”).
Hereishowtosetthevolumeoftheconnecteddevice:
•ifthesoundheardonmicroARRANGER’soutputsistoo
low,youshouldincreasetheoutputleveloftheconnec‐
teddevice.
•ifitsoundsfine,it’sok.
•ifitdistorts,youshouldlowerthelevelalittle,untilthe
soundsisfineagain.
MIDI CONNECTIONS
YoucanplaytheinternalsoundsofyourmicroAR‐
RANGERwithanexternalcontroller,i.e.amasterkey‐
board,aMIDIguitar,awindcontroller,aMIDI
accordion,oradigitalpiano.
1. ConnectastandardMIDIcablefromtheMIDIOUTof
yourcontrollertotheMIDIINconnectoronthemic‐
roARRANGER.
2. SelectatransmissionMIDIchannelonyourcontroller.
Somecontrollers,liketheMIDIaccordions,usually
transmitonmorethanonechannel(seemoreinforma‐
tionintheMIDIchapter).
3. OnthemicroARRANGER,selecttheMIDISetupthat
bestfitsyourcontrollerstype(see“Page4‐MIDISetup”
onpage126).
DAMPER PEDAL
ConnectaDamper(Sustain)pedaltotheDAMPER
connectoronthebackpanel.UseaKORGPS‐1,PS‐3or
DS‐1Hfootswitchpedal,oracompatibleone.Toswitch
theDamperpolarity,see“DamperPol.(DamperPolar‐
ity)”onpage126.
DEMO
Listentothebuilt‐inDemoSongstoappreciatethe
powerofthemicroARRANGER.Thereare16Demo
Songstochoosefrom.
1. PresstheSTYLEPLAYandSONGPLAYbuttons
together.TheirLEDsstartblinking.
Atthispoint,ifyoudon’tpressanyotherbutton,allthe
DemoSongswillbeplayedback.
2. ChooseapageusingthePAGEbuttons.Therearetwo
differentpagesintheDemomode.
3. SelectaDemoSongbypressingthecorresponding
VOLUME/VALUEbuttonaroundthedisplay.TheDemo
willautomaticallystart.
4. StoptheDemobypressingSTART/STOP.
5. ExittheDemomodebypressingoneoftheMODEbut‐
tons.
THE MUSIC STAND
AmusicstandcomesstandardwithyourmicroAR‐
RANGER.Fititintothetwodedicatedholesinthe
backpanel.

12
Front panel
3. FRONT PANEL
1 Power switch ( )
ThisturnsthemicroARRANGERʹspoweronoroff.
2 MASTER VOLUME
Thisslidercontrolstheoverallvolumeoftheinstru‐
ment,bothoftheinternalspeakers,theL/MONOand
RIGHToutputs,andtheHEADPHONESoutput.
Warning:Atthemaximumlevel,withrich‐soundingSongs,
StylesorPrograms,theinternalspeakerscoulddistortdur‐
ingsignalpeaks.Shouldthishappen,lowertheMasterVol‐
umealittle.
3 ACC/SEQ VOLUME
Thisslidercontrolstheaccompanimenttracksvolume
(StylePlaymode)ortheSongtracksvolume,excluding
theRealtimetracks(SongandSongPlaymodes).This
isarelativecontrol,wheretheeffectivemaximum
valueisdeterminedbytheMASTERVOLUMEslider
position.
4 ASSIGN.SLIDER
Thisisafreelyprogrammableslider(see“Sld(Slider)”
onpage126).Bydefault,itactsastheKeyboard
Expressioncontrol,toletyoubalancetherelativevol‐
umeoftheRealtime(Keyboard)tracks.
5 MODE section
Eachofthesebuttonsrecallsoneoftheoperatingmodes
oftheinstrument.Eachmodeexcludestheothers.
STYLEPLAY
StylePlaymode,whereyoucanplay
Styles(automaticaccompaniments)and/
orplayuptofourRealtimetracksonthe
keyboard.
Inthemainpage,Realtime(Keyboard)
tracksareshownontherighthalfofthe
display.Youcanreachthemainpageby
pressingEXITfromanyoftheStylePlay
editpages.Ifyouareinadifferentoperat‐
ingmode,pressSTYLEPLAYtorecallthe
StylePlaymode.IftheTRACKSELECT
LEDison,pressTRACKSELECTtoturn
itoffandseetheRealtimetracks.
Thisoperatingmodeisautomatically
selectedwhentheinstrumentisturned
on.
SONGPLAY
SongPlaymode,whereyoucanplayback
16‐trackSongsinStandardMidiFile
(SMF)formatdirectlyfromthememory
card.Youcanalsoplay“.MID”and
“.KAR”filesdirectlyfromthememory
card.SincethemicroARRANGERis
equippedwithtwosequencers,youcan
evenplaytwoSongsatthesametime,and
mixthemwiththeBALANCEslider.
InadditiontotheSongtracks,youcan
playonetofourRealtime(Keyboard)
tracks,alongwiththeSong(s).Inthemain
page,Realtime(Keyboard)tracksare
shownontherighthalfofthedisplay.You
canreachthemainpagebypressingEXIT
fromanyoftheSongPlayeditpages.If
youareinadifferentoperatingmode,
pressSONGPLAYtorecalltheSongPlay
mode.IftheTRACKSELECTLEDisonor
flashing,pressTRKSELECToneortwo
timestoturnitoffandseetheRealtime
tracks.
B.SEQ BackingSequencemode,whereyoucan
recordanewSongbasedontheRealtime
andStyletracks,andsaveitasanewStan‐
dardMIDIFile.
SONG Songmode,whereyoucanplay,record,or
editaSong.
PROGRAM Programmode,toplaysingleSoundPro‐
gramsonthekeyboard,oreditthem.
PresstheSTYLEPLAYandSONGPLAY
buttonstogethertoselecttheDemomode.
ThismodeletsyoulistentosomeDemo
Songs,toletyouhearthesonicpowerof
themicroARRANGER.
6GLOBAL
ThisbuttonrecallstheGlobaleditenvironmentwhere
youcanselectvariousglobalsettings.Thiseditenvi‐
ronmentoverlapsanyoperatingmode,whichwillstill
remainactiveinthebackground.PressEXITtogoback
totheunderlyingoperatingmode.
39
38
34
35
40
1
43
4746452625
242320
1916
15
1817 21 22
49 44 42413736
3331
29
30
28
30
32
2 53 67
4
8 9 10 11 12 13 14
27
48
DEMO

13
Front panel
7 SD CARD
ThisbuttonrecallstheCardeditenvironment,where
youcanexecutevariousoperationsonfilesandcards
(Load,Save,Format,etc…).Thiseditenvironment
overlapsanyoperatingmode,thatstillremainsactive
inthebackground.PressEXITtogobacktotheunder‐
lyingoperatingmode.
8 MEMORY (TIE)
ThisbuttonturnstheLowerandChordMemoryfunc‐
tionsonoroff.Gotothe“Page24‐Preferences:con‐
trols”editpage(StylePlaymode,seepage51)to
decideifthisbuttonshouldbeaChordMemoryonly,
oraLower/ChordMemorybutton.Whenitworksasa
Lower/ChordMemory:
ONThesoundtotheleftofthesplitpoint,and
thechordfortheautomaticaccompani‐
ment,arekeptinmemoryevenwhenyou
raiseyourhandfromthekeyboard.
OFF Thesoundandchordsarereleasedas
soonasyouraiseyourhandfromthekey‐
board.
ThisbuttondoublesasaTIEfunctionfortheSong
mode(seechapter13).
9 BASS INV. (REST)
ThisbuttonturnstheBassInversionfunctiononoroff.
ON Thelowestnoteofachordplayedin
invertedformwillalwaysbedetectedas
therootnoteofthechord.Thus,youcan
specifytothearrangercompositechords
suchasAm7/Gor“F/C”.
OFF Thelowestnoteisscannedtogetherwith
theotherchordnotes,andisnotalways
consideredastherootnote.
ThisbuttondoublesasaRESTfunctionfortheSong
mode(seechapter13).
10 MAN. BASS
ThisbuttonturnstheManualBassfunctiononoroff.
Note:WhenyoupresstheMAN.BASSbutton,theBass
trackvolumeisautomaticallysettothemaximumvalue.The
volumeisautomaticallysetbacktotheoriginalvaluewhen
theMAN.BASSbuttonisdeactivated.
ON Theautomaticaccompanimentstopsplay‐
ing(apartfortheDrumandPercussion
tracks),andyoucanmanuallyplaythe
BasstrackontheLowerpartofthekey‐
board.Youcanstarttheautomaticaccom‐
panimentagainbypressingoneofthe
CHORDSCANNINGbuttons.
OFF Thebasstrackisautomaticallyplayedby
theStyle.
11 SPLIT POINT (<)
KeepthisbuttonpressedtoopentheSplitPointwin‐
dow.Whilethiswindowisopen,youcansetthesplit
pointsimplybyplayingthesplitpointnoteonthekey‐
board.Then,releasetheSPLITPOINTbutton.
Tomemorizetheselectedsplitpointnote,pressthe
GLOBALbutton,thenpressWRITEtosavetheGlobal
intomemory(see“TheWritewindow”onpage125).
ThisbuttondoublesasaPREVIOUSEVENTfunc‐
tionfortheBackingSequenceandSongmodes(see
chapters12and13).
12 G.QUANTIZE (>)
PressthisbuttontoopentheGrooveQuantizewindow,
whereyoucanselectarealtimegroovequantizationto
beappliedtotheSong(onlySequencer1).See“Groove
Quantizewindow”onpage71.
ThisbuttondoublesasaNEXTEVENTfunctionfor
theBackingSequenceandSongmodes(seechapters12
and13).
13 TEMPO (= LOCK)
ThisbuttonturnstheTempoLockfunctiononoroff.
ON WhenyouselectadifferentStyleorPer‐
formance,thetempodoesn’tchange.You
canstillchangeitusingtheDIALorthe
TEMPObuttons.
OFF WhenyouselectadifferentStyleorPer‐
formance,thememorizedtempovalueis
automaticallyselected.
14
ThisbuttonturnstheSingleTouchfunctiononoroff.
ON WhenadifferentStyle(orthesameagain)
isselected,aSingleTouchSetting(STS1)is
automaticallyselected,meaningthatthe
Realtimetracksandeffectswillchange,
togetherwiththeStyletracksandeffects.
OFF WhenyouselectadifferentStyle(orthe
sameagain),theStyletracksandeffects
arechanged,whiletheRealtimetracksare
notchanged.
15 STYLE section (NUMERIC KEYPAD)
UsethesebuttonstoopentheStyleSelectwindowand
selectaStyle.See“SelectingaStyle”onpage26.
Theleftmostbuttonletsyouselecttheupperorlower
rowofStylebanks.Pressituntilyou’veselectedthe
rowyou’relookingfor.(AfterbothLEDshaveturned
on,pressthebuttonagaintoturnthemoff).
UPPERLEDON
Upper‐rowStylesselected.
LOWERLEDON
Lower‐rowStylesselected.
AwordaboutStylebanksandnames.Stylesfrom“8/
16BEAT”to“WORLD3”,andfrom“LATIN1”to
“TRAD”arestandardStyles,theusercan’tnormally
overwritewithaLoadoperation(unlessyouremove
theprotection;see“FactoryStyleProtect”onpage142).
“DIRECTSD”StylesareStylesdirectlyaccessedfrom
thememorycard(noneedtoloadfromcard).See“The
DIRECTSDbank”onpage40.
Stylesfrom“USER1”to“USER3”arelocationswhere
youcanloadnewStylesfromthememorycard.
Eachbutton(Stylebank)contains2pages,eachwithup
to8Styles.BrowsethroughtheStylesusingthePAGE
buttons.
ThereisashortcuttoseetheoriginalbankforaStyle.
YoucanseetheoriginalbankwhereaStyleiscon‐
tained.JustkeeptheSHIFTbuttonpressed,andthen
SINGLE TOUCH

14
Front panel
pressthelefmostbuttonoftheSTYLEsection.Ames‐
sagewindowwillappear,showingthenameofthe
originalbank.ReleasetheSHIFTbuttontoexitthewin‐
dow.
Thereisashortcuttoseeallpagesoftheselected
bank.Tocycleallpagesforaselectedbank,pressthe
bank’sbuttonuntilyouseethepagethatyou’relooking
for.
Thesebuttonsdoubleasanumerickeypadoncertain
pages(see“SelectingaSongcomposingitsprogressive
number”onpage70).
16 FADE IN/OUT
WhentheStylestoped,pressthisbuttontostartitwith
avolumefade‐in(thevolumegoesfromzerotothe
maximum).
WhentheStyleisplaying,pressthisbuttontostopit
withavolumefade‐out(thevolumegradually
decreases).
Youdon’tneedtopressSTART/STOPtostartorstop
theStyle.
17 VARIATION 1–4 (NOTE LENGTH) buttons
Eachofthesebuttonswillselectoneofthefourvaria‐
tionsofthecurrentStyle.Eachvariationcanvaryin
patternsandsounds.
ThesebuttonsdoubleasaNOTELENGTHfunction
fortheSongmode(seechapter13).
18 FILL 1–2 (NOTE LENGTH) buttons
Thesetwobuttonstriggerafill‐in.Pressthemtwice(LED
blinking)toletthemplayinloop,andselectanyother
Styleelement(Fill,Intro,Variation…)toexittheloop.
TheyalsodoubleasaNOTELENGTHfunctionfor
theSongmode(seechapter13).
19 COUNT IN / BREAK
WhiletheStyleisnotrunning,pressthisbutton,then
pressSTART/STOP.Thiscombinationtriggersaone‐
barinitialcount,thentheStylestartsplaying.
WhiletheStyleisalreadyinplay,thisbuttontriggersa
break(anemptymeasurebeginningwithakick+crash
shot).Pressittwicetoletitplayinloop,andselectany
otherStyleelement(Fill,Intro,Variation…)toexitthe
loop.
20 ENDING 1–2 (DOT, TRIPLET) buttons
WhiletheStyleisrunning,thesetwobuttonstriggeran
Ending,andstoptheStyle.Pressoneofthem,andthe
StylewillstoprunningwithanEnding.Ifpressed
whiletheStyleisstopped,theyactasanadditional
coupleofIntros.
Pressthemtwice(LEDblinking)toletthemplayin
loop,andselectanyotherStyleelement(Fill,Intro,
Variation…)toexittheloop.
ENDING1alsodoublesasaDOTfunction,and
ENDING2doublesasaTRIPLETfunction,tobeused
inSongmode(seechapter13).
Note:Ending1playsashortsequencewithdifferentchords,
whileEnding2playsonthelastrecognizedchord.
21 INTRO 1–2 buttons
ThesetwobuttonssetthearrangerinIntromode.After
pressingoneofthesebuttons,starttheStyle,anditwill
beginwiththeselectedintro.TheINTROLEDwill
automaticallygooffattheendoftheintro.
Pressthemtwice(LEDblinking)toletthemplayina
loop,andselectanyotherStyleelement(Fill,Intro,
Variation…)toexittheloop.
Note:Intro1playsashortsequencewithdifferentchords,
whileIntro2playsonthelastrecognizedchord.
22 START/STOP
StartsorstopstheStylethat’srunning.
Youcanresetall‘frozen’notesandcontrollers
onthemicroARRANGERandanyinstrumentcon‐
nectedtoitsMIDIOUT,byusingthe“Panic”keycom‐
bination.JustpressSHIFT+START/STOPtostopall
notesandresetallcontrollers.
23 SYNCHRO START / STOP (DELETE)
ThisbuttonturnstheSynchroStartandSynchroStop
functionsonoroff.Pressitrepeatedlytoturnthefunc‐
tionsonoroff.TheLEDswillcycleinthisorder:
STARTSTART+STOPOFF.
STARTLEDON
WhenthisLEDislit‐up,justplayachord
inthechordrecognitionarea(usually
underthesplitpoint,see“CHORD
SCANNINGsection”onpage17)toauto‐
maticallystarttheStylerunning.Ifyou
like,youcanturnoneoftheINTROson
beforestartingtheStyle.

15
Front panel
START+STOPLEDsON
WhenbothLEDsarelit‐up,raisingyour
handfromthekeyboardmomentarilywill
stoptheStylefromplaying.Ifyouplaya
chordagain,theStylestartsagain.
OFF AllSynchrofunctionsareturnedoff.
ThisbuttondoublesasaDELETEfunctionforthe
BackingSequenceandSongmodes(seechapters12
and13).
Itisalsousedtodeletetheselectedcharacter,during
textediting.
24 TAP TEMPO/RESET (INSERT)
Thisisadouble‐functionbutton,actinginadifferent
waydependingontheStylestatus(stop/play).
TapTempo:WhentheStyleisnotplaying,youcan
“beat”thetempoonthisbutton.Attheend,theaccom‐
panimentstartsplaying,usingthe“tappedin”tempo.
Reset:WhenyoupressthisbuttonwhiletheStyleisin
play,theStylepatterngoesbacktothepreviousstrong
beat.
ThisbuttondoublesasanINSERTfunctionforthe
BackingSequenceandSongmodes(seechapters12
and13).
Itisalsousedtoinsertacharacteratthecursorposi‐
tion,duringtextediting.
25 WRITE/CARD IN USE
InStylePlaymode,thisbuttonopenstheWritewin‐
dow,thatletsyousaveallthetracksontoaPerfor‐
mance,theRealtime(Keyboard)tracksinaSingle
TouchSetting(STS),ortheaccompanimenttracksonto
aStylePerformance.(See“TheWritewindow”on
page42).
IntheGlobaleditenvironment,pressittosaveGlobal
parametersinmemory.(See“TheWritewindow”on
page125).
Thisbutton’sLEDworksasaCARDINUSEindica‐
tor,andturnsonwhenthecardslotisinuse.
26 ENSEMBLE
ThisbuttonturnstheEnsemblefunctiononoroff.
Whenon,theright‐handmelodyisharmonizedwith
theleft‐handchords.
Note:TheEnsemblefunctionworksonlywhenthekeyboard
isinSPLITmode,andtheLOWERChordScanningmode
selected.
27 RECORD
ThisbuttonsetstheinstrumentinRecordmode
(dependingonthecurrentoperatingmode).
28 MENU
ThisbuttonopenstheMenupageforthecurrentoper‐
atingmodeoreditenvironment.Afteropeninga
menu,youcanjumptooneoftheeditpagesbypress‐
ingthecorrespondingVOLUME/VALUEbuttons;or
browsethemusingthePAGEbuttons.Otherwise,go
backtothemainpageofthecurrentoperatingmode,
orclosetheeditenvironment,bypressingtheEXIT
button.
Seetherelevantchapterdevotedtoeachoperating
modeoreditenvironment,toseetheir“maps”indetail.
29 PAGE -/+
AfterpressingMENUtoopenamenu,usethesebut‐
tonstobrowsetheeditpagesofanoperatingmodeor
editingenvironment.PressEXITtogobackfroman
editpagetothemainpageofthecurrentoperating
mode,ortoclosetheGlobalorCardEditenvironment.
Inaddition,youcanusethesebuttonstoselectadiffer‐
entpageinaStyleSelectorProgramSelectwindow.
30 VOLUME/VALUE (MUTE) A–H buttons
Withinthisuser’smanual,eachbuttonpairismarked
withanalphabeticletter(A–H).See“DisplayandUser
Interface”onpage19formoredetails.
Acorrespondingtracknameisprintedovereachbut‐
tonpair.Thesenamesshowthecorrespondingtrack
thebuttonpairaffectsinthemainpageoftheStyle
Playmode.
•Thelefthalfisforthemainpage,whereyoucan
seetheRealtimetracks,andtheStyletracks
groupedtogether:
•TherighthalfisfortheStyletrackspage,where
youcanseeeachoftheaccompanimenttracks:
See“SymbolsandIcons”onpage21.
Usethesebuttonstoperformvariousoperationsonthe
commandsandfunctionsappearinginthedisplay.
SELECTING
Useeachbuttonpairtoselectthecorre‐
spondingiteminthedisplay(i.e.atrack,a
parameteroracommand).Useeitherthe
leftorrightbuttoninapair.

16
Front panel
VOLUME Whileyouareinthemainpagesofany
operatingmode,selectatrackanduse
thesebuttonstochangethetrack’svol‐
ume.Usetheleftbuttontodecreaseit,or
therightbuttontoincreaseit.
MUTE Pressbothbuttonsinapairtomutethe
correspondingtrack.Pressbothbuttons
againtounmutethetrack.
SOLO WhileintheStylePlay,SongPlay
andSongmodes,youcansolooneofthe
tracks.JustkeeptheSHIFTbutton
pressed,andpressbothoftheVOLUME/
VALUEbuttonscorrespondingwiththe
trackyouwishtosolo.
Toexitthesolomode,keeptheSHIFTbut‐
tonpressedagain,andpressboththe
VOLUME/VALUEbuttonscorresponding
tothesoloedtrack.
VALUE Useeachbuttonpairtochangethecorre‐
spondingparameter’svalue.Theleftbut‐
tondecreasesthevalue,therightbutton
increasesit.
31 TRACK SELECT
Dependingontheoperatingmode,thisbutton
switchesbetweenthevarioustracksview.
STYLEPLAYMODE
SwitchesbetweentheRealtimetracksand
theStyletracks.
SONGPLAYMODE
Switchesbetweenthemainpage(showing
theRealtime/Keyboardtracks),Song
tracks1–8,andSongtracks9–16.
SONGMODE
Switchesbetweenthemainpage,Song
tracks1–8andSongtracks9–16.
TheTRACKSELECTLEDshowsthecurrentpage
view:
Off Mainpage(Realtimetracks,orSongcon‐
trols)
On 2ndpage(Styletracks,orSongtracks1–8)
Flashing 3rdpage(Songtracks9–16)
32 SINGLE TOUCH SETTING
(F-1–F-4 FUNCTION KEYS) buttons
WhileinthemainpageoftheStylePlayorBacking
Sequencemode,thesebuttonsselectaSingleTouch
Settingeach.EachoftheStylesincludesamaximumof
fourSingleTouchSettings(STS),toautomaticallycon‐
figuretheRealtimetracksandeffectsatthetouchofa
finger.WhentheSINGLETOUCHLEDislit,anSTSis
automaticallyselectedwhenselectingaStyle.
InEditmode,thesebuttonsdoubleasfunctionkeys,
toselectthecorrespondingitemsinthedisplay.
33 SHIFT
Withthisbuttonhelddown,pressingcertainotherbut‐
tonswillaccesstoasecondfunction.
34 TEMPO/VALUE section
TheDIALandtheDOWN/‐ andUP/+buttonscanbe
usedtocontroltheTempo,assignadifferentvalueto
theselectedparameterinthedisplayorscrollalistof
filesintheSongSelectandCardpages.TheVALUE
LEDshowsthestatusofthissection.
DIAL Turnthedialclockwisetoincreasethe
valueortempo.Turnitcounter‐clockwise
todecreasethevalueortempo.
Whenusedwhilepressingthe
SHIFTbutton,thiscontrolalwaysactsasa
Tempocontrol.
DOWN/‐andUP/+
DOWN/‐ decreasesthevalueortempo;
UP/+increasesthevalueortempo.
KeeptheSHIFTbuttonpressed
down,andpresseithertheDOWN/‐or
UP/+buttontoresettheTempotothe
valuethat’ssavedontotheselectedStyle.
35 VALUE LED
ThisLEDshowsthestatusoftheDIALandDOWN/‐
andUP/+buttons.
ON TheDIALandDOWN/‐andUP/+buttons
actasValuecontrols,tochangethevalue
oftheselectedparameterinthedisplay.
OFF TheDIALandDOWN/‐andUP/+buttons
controltheTempo.
36 EXIT/NO
Usethisbuttontoperformvariousactions,leaving
fromthecurrentstatus:
•exitadialogbox
•ans
wer“No”toanyquestionthatappearsinthe
display
•exi
ttheMenuwindow
•gobacktothemainpageofthecurrentoperating
mode
•ex
ittheGlobalorCardEditenvironment,andgo
backtothemainpageofthecurrentoperating
mode
•exi
tfromaStyle,PerformanceorProgramSelect
window
37 ENTER/YES
Usethisbuttontoperformvariousactions,agreeing
thecurrentselectedstatus:
•answer“Yes”toanyquestionthatappearsinthe
display
•confirmacommand
38 DISPLAY HOLD
ThisbuttonturnstheDisplayHoldfunctiononoroff.
ON Whenyouopenatemporarywindow(like
theProgramSelectwindow),itremainsin
thedisplayuntilyoupressEXIT/NO,or
anoperatingmodebutton.
OFF Anytemporarywindowclosesafteracer‐
taintime,orafterselectinganiteminthe
window.

17
Front panel
39 CHORD SCANNING section
InStylePlayandBackingSequencemode,usethese
buttonstodefinethewaychordsarerecognizedbythe
arranger.
LOWER Chordsaredetectedbelowthesplitpoint.
Thenumberofnotesyoushouldplayto
formachordisdefinedbytheChord
ScanningModeparameter(see“Chord
RecognitionMode”onpage51).
UPPER Chordsaredetectedabovethesplitpoint.
Youmustalwaysplaythreeormorenotes
toletthearrangerrecognizeachord.
FULL(bothLEDson)
Chordsaredetectedonthefullkeyboard
range.Youmustalwaysplaythreeor
morenotestoletthearrangerrecognizea
chord.
OFF Nochordswillbedetected.Afterpressing
START/STOP,onlytheDrumandPercus‐
sionaccompanimenttrackscanplay.
40 KEYBOARD MODE section
ThesebuttonsdefinehowthefourKeyboard(orReal‐
time)tracksarepositionedonthekeyboard.
SPLIT TheLowertrackplaysbelowthesplit
point,whiletheUpper1,Upper2and
Upper3tracksplayaboveit.Bydefault,
selectingthiskeyboardmodeautomati‐
callyselectstheLowerchordscanning
mode(see“ChordRecognitionMode”on
page51).
FULLUPPER
TheUpper1,Upper2and/orUpper3
tracksplayonthewholekeyboardrange.
TheLowertrackdoesnotplay.Bydefault,
selectingthiskeyboardmodeautomati‐
callyselectstheFullchordscanningmode
(see“ChordRecognitionMode”on
page51).
41 STYLE CHANGE
ThisbuttonturnstheStyleChangefunctiononoroff.
ON WhenyouselectaPerformance,theStyle
couldchange,accordingtowhichStyle
numberismemorizedontothePerfor‐
mance.
OFF WhenyouselectaPerformance,theStyle
andStyletracksettingsremain
unchanged.OnlyRealtime(Keyboard)
trackssettingsarechanged.
42
PressthisbuttontousethePROGRAM/PERFOR‐
MANCEsectiontoselectaPerformance.
43
PressthisbuttontousethePROGRAM/PERFOR‐
MANCEsectiontoselectaProgram,andassignitto
theselectedtrack.
44 PROGRAM/PERFORMANCE section
UsethesebuttonstoopentheProgramSelectorPerfor‐
manceSelectwindow,andselectaProgramoraPerfor‐
mance.See“SelectingaProgram”onpage25,or
“SelectingaPerformance”onpage25.Foralistof
availablePrograms,see“Programs(ProgramChange
order)”onpage154.
Theleftmostbuttonselectstheupperorlowerrowof
ProgramorPerformancebanks.Pressituntilyou’ve
selectedtherowthatyou’relookingfor.(Afterboth
LEDshaveconsecutivelyturnedon,pressthebutton
againtoturnthemoff).
UPPERLEDON
UpperrowofProgramsorPerformances
selected.
LOWERLEDON
LowerrowofProgramsorPerformances
selected.
Onthefrontpanel,Programbanksareidentifiedby
theinstrumentnames,whilePerformancebanksare
identifiedbynumbers(1–10;0=bank10).
AnoteaboutProgrambanksandnames.Programs
from“PIANO”to“SFX”arestandardPrograms,the
usercan’tdirectlymodify.
Programs“USER1”and“USER2”arelocationswhere
youcanloadnewProgramsfromthememorycard.
“USERDK”iswhereyoucanloadnewdrumkits.
EachProgrambankcontainsvariouspages,eachwith
upto8Programs.Youcanbrowsethemusingthe
PAGEbuttons.
ShortcuttoseetheoriginalbankforaPerformanceor
Program.YoucanseetheoriginalbankwhereaPerfor‐
manceorProgramiscontained.JustkeeptheSHIFT
buttonpressed,andthenpressthelefmostbuttonof
thePROGRAM/PERFORMANCEsection.Amessage
windowwillappear,showingthenameoftheoriginal
bank.ReleasetheSHIFTbuttontoexitthewindow.
Shortcuttoseeallpagesoftheselectedbank.Tocycle
allofthepagesforaselectedbank,pressthebank’s
button.
45 PADS (1–4, STOP)
Theseprogrammablepadscanbeusedtotriggera
soundeffect.UsetheSTOPbuttontostopacyclic
sound.(See“ListofsoundsassignabletothePads”on
page226).
EachPadcorrespondstoadedicatedPadtrack.
46 TRANSPOSE
Thesebuttonstransposethewholeinstrumentinsemi‐
tonesteps(MasterTranspose).Thetranspositionvalue
isshown(asanotename)onthetoprightofthedis‐
play.
Pressbothbuttonstogether,toresettheMasterTrans‐
posetozero.
PERFORM.
PROGRAM

18
Front panel
Note:TheMasterTransposehasnoeffectontrackssetto
Drummode(and,evenifsetinadifferentstatus,onthe
DrumandPercussiontracks).See“Page14‐Track:Mode”
onpage46,and“Page7‐Track:Mode”onpage78.
LowerstheMasterTransposeasemitone.
RaisestheMasterTransposeasemitone.
47 OCTAVE
Thesebuttonstransposetheselectedtrackinstepsofa
wholeoctave(12semitones;max±2octaves).Thetrans‐
positionvalueisshown(inoctaves)onthetopright
areaofthedisplay.
Pressbothbuttonstogether,toresettheOctaveTrans‐
posetozero.
Note:TheOctaveTransposehasnoeffectontrackssetto
Drummode(and,evenifsetinadifferentstatus,onthe
DrumandPercussiontracks).
–Lowerstheselectedtrackanoctave.
+Raisestheselectedtrackanoctave.
48 BALANCE slider
InSongPlaymode,thissliderbalancesthevolumeof
thetwoon‐boardsequencers.Whenfullyontheleft,
onlySequencer1canbeheard.Whenfullyontheright,
onlySequencer2canbeheard.Wheninthemiddle,
bothsequencerswillplayatfullvolume.
49 SEQUENCER TRANSPORT CONTROLS - SEQ1
and SEQ2
Theinstrumentisequippedwithtwosequencers
(Sequencer1andSequencer2),eachwithitsownsetof
transportcontrols.
<<and>> RewindandFastForwardcommands.If
youusethemwhiletheSongisinplay,
theymakeitscrollbackorforward.
Whenpressedonce,thesebuttonsmove
theSongtothepreviousorfollowing
measure.Whenkeptpressed,theymake
theSongscrollcontinuously,untilyou
releasethem.
InJukeboxmode(Sequencer1),
keeptheSHIFTbuttonpressed,andpress
thesebuttonstoscrolltothepreviousor
nextSongintheJukeboxlist(see“Page9‐
Jukebox”onpage79).
PAUSE PausestheSongatthecurrentposition.
PressPAUSEorPLAY/STOPtostartthe
Songplayingagain.
PLAY/STOPStartsorstopsthecurrentSong.When
youstoptheSong,theSongPositiongoes
backtomeasure1.
InSongPlaymode,pressingthis
buttonwhilekeepingSHIFTpressed,
startsbothsequencersatthesametime.
Table of contents
Other Korg Musical Instrument manuals

Korg
Korg TRITON Le User guide

Korg
Korg SP 250 User manual

Korg
Korg NAUTILUS-61 User manual

Korg
Korg NAUTILUS Series User manual

Korg
Korg Stage Vintage SV-1 User manual

Korg
Korg SP-500 Instructions for use

Korg
Korg SP 250 User manual

Korg
Korg PA1X User manual

Korg
Korg LP-180 User manual

Korg
Korg M1R User manual
Popular Musical Instrument manuals by other brands

Percussion Play
Percussion Play Ground Fixed Grand Marimba installation instructions

Kawai
Kawai Anytime X2 ATX2-p owner's manual

Panasonic
Panasonic SXPX665 - ELECTRONIC PIANO operating manual

Roland
Roland G-70 owner's manual

DigiDesign
DigiDesign Digi 002 Getting started guide

Gibson
Gibson Digital Guitar owner's manual