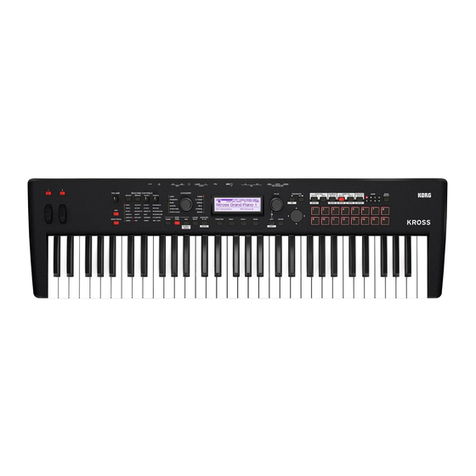
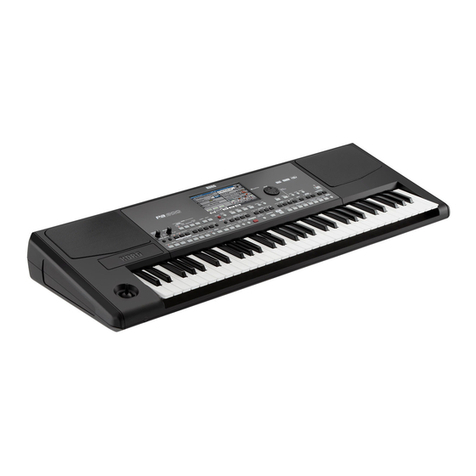
Korg KROSS Series User manual

1


日本語 Español EnglishFrançaisDeutsch
Contents
Precautions . . . . . . . . . . . . . . . . . . . . . . . . . . . . . . . . . 1
Introduction . . . . . . . . . . . . . . . . . . . . . . . . . . . . . . . . . 2
Main features ........................................................................2
Front panel . . . . . . . . . . . . . . . . . . . . . . . . . . . . . . . . . . 2
Rear panel and connections . . . . . . . . . . . . . . . . . . . . 4
Turning the power on/off . . . . . . . . . . . . . . . . . . . . . . 5
Getting ready to play ............................................................5
Auto power off function .......................................................5
Pages and functions . . . . . . . . . . . . . . . . . . . . . . . . . . 6
Selecting and playing sounds . . . . . . . . . . . . . . . . . . . 6
Selecting a program or combination.....................................6
Using Favorites.....................................................................6
Performing with the arpeggiator...........................................7
Performing with the step sequencer......................................7
Performing with the drum track............................................7
Performing with the pad sampler..........................................7
Audio recorder and pad audio play . . . . . . . . . . . . . . . 8
Recording on the MIDI sequencer. . . . . . . . . . . . . . . . 8
Recording your performance as MIDI..................................8
Save the song that you created .............................................8
Listening to the demo songs. . . . . . . . . . . . . . . . . . . . 9
Restoring the factory settings . . . . . . . . . . . . . . . . . . 9
Specifications (general). . . . . . . . . . . . . . . . . . . . . . . . 9
Sommaire
Précautions . . . . . . . . . . . . . . . . . . . . . . . . . . . . . . . . . 1
Introduction . . . . . . . . . . . . . . . . . . . . . . . . . . . . . . . . . 2
Caractéristiques principales..................................................2
Panneau avant . . . . . . . . . . . . . . . . . . . . . . . . . . . . . . . 2
Panneau arrière et connexions . . . . . . . . . . . . . . . . . . 4
Mise sous/hors tension . . . . . . . . . . . . . . . . . . . . . . . . 5
Préparatifs avant de jouer .....................................................5
Fonction de coupure automatique d’alimentation ................6
Pages et fonctions. . . . . . . . . . . . . . . . . . . . . . . . . . . . 6
Sélectionner et jouer des sons . . . . . . . . . . . . . . . . . . 6
Sélection d’un programme ou d’une combinaison...............6
Utilisation de la fonction Favorites ......................................7
Jouer avec l’arpégiateur........................................................7
Jouer avec le séquenceur pas à pas.......................................7
Jouer avec la piste de batterie...............................................8
Jouer avec l’échantillonneur à pads......................................8
Enregistreur audio et lecture avec les pads . . . . . . . 8
Enregistrer avec le séquenceur MIDI . . . . . . . . . . . . . 9
Enregistrer le jeu sous forme de données MIDI...................9
Sauvegarder le morceau créé................................................9
Écouter des morceaux de démonstration . . . . . . . . 10
Rétablir les réglages d’usine. . . . . . . . . . . . . . . . . . . 10
Caractéristiques techniques (généralités) . . . . . . . 10
Inhalt
Vorsichtsmaßnahmen . . . . . . . . . . . . . . . . . . . . . . . . . 1
Einleitung . . . . . . . . . . . . . . . . . . . . . . . . . . . . . . . . . . . 2
Wichtigste Eigenschaften .....................................................2
Oberseite . . . . . . . . . . . . . . . . . . . . . . . . . . . . . . . . . . . 2
Rückseite und Anschlüsse . . . . . . . . . . . . . . . . . . . . . 4
Ein-/Ausschalten . . . . . . . . . . . . . . . . . . . . . . . . . . . . . 5
Vorbereitungen .....................................................................5
Energiesparfunktion .............................................................5
Seiten und Funktionen. . . . . . . . . . . . . . . . . . . . . . . . . 6
Auswahl und Spielen von Sounds . . . . . . . . . . . . . . . . 6
Auswahl eines Programms oder einer Kombination............6
Mit Favoriten arbeiten..........................................................6
Mit dem Arpeggiator spielen................................................7
Mit dem Schrittsequenzer spielen ........................................7
Spielen mit Schlagzeugspur .................................................7
Mit dem Pad Sampler spielen...............................................7
Audio-Recorder und Pad Audio Play . . . . . . . . . . . . . 8
Aufnahme mit dem MIDI-Sequenzer . . . . . . . . . . . . . 8
Ihr Spiel als MIDI aufzeichnen ............................................8
Ihren neuen Song speichern .................................................9
Demosongs anhören. . . . . . . . . . . . . . . . . . . . . . . . . . . 9
Laden der Werkseinstellungen . . . . . . . . . . . . . . . . . . 9
Technische Daten (allgemein). . . . . . . . . . . . . . . . . . 10
Contenido
Precauciones . . . . . . . . . . . . . . . . . . . . . . . . . . . . . . . . 1
Introducción . . . . . . . . . . . . . . . . . . . . . . . . . . . . . . . . . 2
Características principales....................................................2
Panel frontal. . . . . . . . . . . . . . . . . . . . . . . . . . . . . . . . . 2
Panel posterior y conexiones . . . . . . . . . . . . . . . . . . . 4
Encendido/apagado . . . . . . . . . . . . . . . . . . . . . . . . . . . 5
Prepararse para tocar ............................................................5
Función de Auto Apagado (auto power-off) ........................6
Páginas y funciones. . . . . . . . . . . . . . . . . . . . . . . . . . . 6
Seleccionar y tocar sonidos . . . . . . . . . . . . . . . . . . . . 6
Seleccionar un programa o una combinación.......................6
Favoritos (Favorites) ............................................................7
Interpretar con el arpegiador ................................................7
Interpretar con el secuenciador por pasos ............................7
Interpretar con la pista de batería .........................................8
Interpretar con la función de sampler (muestreo) por pads..8
Grabador de audio y reproducción de audio por pads 8
Grabar en el secuenciador MIDI . . . . . . . . . . . . . . . . . 9
Grabar una interpretación como MIDI.................................9
Guardar la canción creada ....................................................9
Escuchar las canciones de demostración . . . . . . . . 10
Restaurar los ajustes de fábrica. . . . . . . . . . . . . . . . 10
Especificaciones (general). . . . . . . . . . . . . . . . . . . . . 10
En
Fr
De
Es

目次
安全上のご注意
. . . . . . . . . . . . . . . . . . . . . . . . . . . . . . . . . 1
データについて.....................................................................1
著作権について.....................................................................1
はじめに
. . . . . . . . . . . . . . . . . . . . . . . . . . . . . . . . . . . . . . . 2
おもな特長 ............................................................................2
フロント・パネル
. . . . . . . . . . . . . . . . . . . . . . . . . . . . . . . 2
リア・パネルと接続
. . . . . . . . . . . . . . . . . . . . . . . . . . . . . 4
電源を入れる、切る
. . . . . . . . . . . . . . . . . . . . . . . . . . . . . 5
演奏までの準備.....................................................................5
オート・パワー・オフ機能...................................................5
ページとファンクション
. . . . . . . . . . . . . . . . . . . . . . . . . 6
音色を選ぶ、演奏する
. . . . . . . . . . . . . . . . . . . . . . . . . . . 6
プログラムやコンビネーションを選ぶ ................................6
フェイバリット機能を使う...................................................6
アルペジエーターで演奏する ...............................................7
ステップ・シーケンサーで演奏する ....................................7
ドラムトラックを鳴らす ......................................................7
パッド・サンプラーで演奏する ...........................................7
オーディオ・レコーダー
/
パッド・オーディオ・プレイ
8
MIDI
シーケンサーに録音する
. . . . . . . . . . . . . . . . . . . . 8
演奏を MIDI で録音する ......................................................8
作成したソングをセーブする ...............................................8
デモ・ソングを聴く
. . . . . . . . . . . . . . . . . . . . . . . . . . . . . 9
工場出荷時の設定に戻す
. . . . . . . . . . . . . . . . . . . . . . . . . 9
仕
様(概
略)
. . . . . . . . . . . . . . . . . . . . . . . . . . . . . . . . . . . 9
保証規定(必ずお読みください)
. . . . . . . . . . . . . . . . . . 10
アフターサービス
. . . . . . . . . . . . . . . . . . . . . . . . . . . . . . 10
Ja

EnglishFrançaisDeutschEspañol
En-1
Precautions
Precautions
Location
Using the unit in the following locations can result in a malfunction.
• In direct sunlight
• Locations of extreme temperature or humidity
• Excessively dusty or dirty locations
• Locations of excessive vibration
• Close to magnetic fields
Power supply
Please connect the designated AC adapter to an AC outlet of the
correct voltage. Do not connect it to an AC outlet of voltage other
than that for which your unit is intended.
Interference with other electrical devices
Radios and televisions placed nearby may experience reception
interference. Operate this unit at a suitable distance from radios and
televisions.
Handling
To avoid breakage, do not apply excessive force to the switches or
controls.
Care
If the exterior becomes dirty, wipe it with a clean, dry cloth. Do not
use liquid cleaners such as benzene or thinner, or cleaning compounds
or flammable polishes.
Keep this manual
After reading this manual, please keep it for later reference.
Keeping foreign matter out of your equipment
Never set any container with liquid in it near this equipment. If liquid
gets into the equipment, it could cause a breakdown, fire, or electrical
shock.
Be careful not to let metal objects get into the equipment. If
something does slip into the equipment, unplug the AC adapter from
the wall outlet. Then contact your nearest Korg dealer or the store
where the equipment was purchased.
Data handling
Incorrect usage or malfunctions may cause the contents of the
memory to be lost. Please use the included Editor to back up your
important data to your computer or removable media. Please be aware
that Korg will accept no responsibility for any damages which may
result from loss of data.
Copyright Warning
This professional device is intended only for use with works for which
you yourself own the copyright, for which you have received
permission from the copyright holder to publicly perform, record,
broadcast, sell, and duplicate, or in connection with activities which
constitute “fair use” under copyright law. If you are not the copyright
holder, have not received permission from the copyright holder, or
have not engaged in fair use of the works, you may be violating
copyright law, and may be liable for damages and penalties.
If you are unsure about your rights to a work, please consult a
copyright attorney.
KORG TAKES NO RESPONSIBILITY FOR ANY
INFRINGEMENT COMMITTED THROUGH USE OF KORG
PRODUCTS.
* All product names and company names are the trademarks or registered trademarks
of their respective owners.
DECLARATION OF CONFORMITY (for USA)
Responsible Party : KORG USA INC.
Address : 316 SOUTH SERVICE ROAD, MELVILLE, NY
Telephone : 1-631-390-6500
Equipment Type : SYNTHESIZER WORKSTATION
Model : KROSS2-61/KROSS2-88
This device complies with Part 15 of FCC Rules.
Operation is subject to the following two conditions:
(1) This device may not cause harmful interference,and
(2) this device must accept any interference received,
including interference that may cause undesired operation.
THE FCC REGULATION WARNING (for USA)
NOTE: This equipment has been tested and found to comply with the lim-
its for a Class B digital device, pursuant to Part 15 of the FCC Rules.
These limits are designed to provide reasonable protection against harm-
ful interference in a residential installation. This equipment generates,
uses, and can radiate radio frequency energy and, if not installed and
used in accordance with the instructions, may cause harmful interference
to radio communications. However, there is no guarantee that interfer-
ence will not occur in a particular installation. If this equipment does
cause harmful interference to radio or television reception, which can be
determined by turning the equipment off and on, the user is encouraged
to try to correct the interference by one or more of the following mea-
sures:
• Reorient or relocate the receiving antenna.
• Increase the separation between the equipment and receiver.
• Connect the equipment into an outlet on a circuit different from that to
which the receiver is connected.
• Consult the dealer or an experienced radio/TV technician for help.
If items such as cables are included with this equipment, you must use
those included items.
Unauthorized changes or modification to this system can void the user’s
authority to operate this equipment.
Notice regarding disposal (EU only)
When this “crossed-out wheeled bin” symbol is displayed on
the product, owner’s manual, battery, or battery package, it sig-
nifies that when you wish to dispose of this product, manual,
package or battery you must do so in an approved manner. Do
not discard this product, manual, package or battery along with
ordinary household waste. Disposing in the correct manner will
prevent harm to human health and potential damage to the envi-
ronment. Since the correct method of disposal will depend on the appli-
cable laws and regulations in your locality, please contact your local
administrative body for details. If the battery contains heavy metals in
excess of the regulated amount, a chemical symbol is displayed below
the “crossed-out wheeled bin” symbol on the battery or battery package.

En-2
Introduction
Thank you for purchasing the Korg KROSS synthesizer workstation.
To ensure trouble-free enjoyment, please read this manual carefully and use the
product as directed.
In addition to this document, the following PDF manuals are also provided. You can
download these PDF manuals from the Korg website (www.korg.com).
Operation Guide:
Explains how to use the KROSS.
Parameter Guide:
Explains all of the parameters, organized by mode and
page.
Voice Name List:
Lists the sounds and other factory-set data.
Main features
Choose a sound and start playing. Create your own sounds, phrases, and
rhythms. Record your own vocal or guitar. The KROSS is a friendly and high-
quality synthesizer that makes it easy to do these things, turning your musical
wishes into accomplishments.
The rich expressive power of the EDS-i sound engine
The KROSS features high-quality sounds powered by the EDS-i (Enhanced
Definition Synthesis-integrated) sound engine inherited from Korg's profes-
sional synthesizers. You’ll enjoy richly expressive sounds in your performances
and productions.
A wide range of preset sounds and effects
The 128MB* of PCM sample data provides numerous instruments and sound
effects. There are 1,417 realistic preload sounds. As expansion PCM memory,
you can add an optional 128MB* PCM library. (*When converted to 48 kHz 16-
bit linear PCM)
Choose from 134 types of effect. These effects include chorus, delay, reverb,
overdrive, vintage effects, amp simulation, and even a vocoder.
REALTIME CONTROLS section
Here you can modify the sound or effect in real time while you perform, and
make simple edits. You can also change settings for external audio input and the
vocoder function, and adjust the tempo of the arpeggiator and sequencer.
Quick layer/split function
It’s easy to set up the
quick layer function
and the
quick split function
for
layering two sounds or assigning them to the left- and right-hand regions of the
keyboard.
Favorites function for instantly recalling sounds
A total of 128 sounds can be registered to the 16 pads on the front panel, and
recalled instantly. This is a great convenience for live performances.
Pad sampler function
You can use the 16 pads to easily sample external input via mic or line, or to
resample your performance on the KROSS. The sample data is automatically
stored on an SD card (commercially available). You can also load WAVE files
and create loops.
Versatile functions to enhance your performances and productions
Your performances and productions will be enhanced by functions such as the
arpeggiator
which automatically plays rhythm chords and arpeggios, the
drum track
which lets you instantly play drum patterns in a wide variety of
styles, and the
step sequencer
which plays back original drum patterns that you
create intuitively using the 16 pads.
Sequencer for MIDI recording and playback
The 16-track MIDI sequencer features
♩
/480 resolution, and allows your perfor-
mances using the keyboard and controllers to be recorded and played back as
MIDI data. It can also record and play sample playback performances using the
pad sampler.
Multi-track audio recorder for overdubbing your vocals and key-
board performances
There's a built-in audio recorder that can record your KROSS performance and
external audio input onto an SD card. The recorder lets you record or overdub
the performance of the KROSS or of an external input, load WAVE files, and
play back using the 16 pads (pad audio play).
Lightweight body that you can take with you and play anywhere
The KROSS synthesizer features a full-sized keyboard that's light enough to
take anywhere. Since it can be powered by AA batteries as well as by an AC
adapter, you can enjoy it anytime and anywhere.
Computer connection via USB
You can connect the KROSS to your computer via USB for easy exchange of
MIDI data or audio data.
By using the KROSS Editor or Plug-In Editor, you can edit while simultane-
ously viewing numerous parameters on your computer, or use the KROSSas a
software synthesizer within your DAW.
* KROSS The Editor and Plug-In Editor can be downloaded from the Korg
website (www.korg.com).
Front panel
1. Keyboard
2. Controllers
SW1 and SW2 buttons
Use the SW1 and SW2 buttons to switch octaves on the keyboard, to turn porta-
mento on/off, or to lock/unlock the pitch bend wheel. You can specify which
function is controlled (See "Setting the functions of SW1 and SW2" of the Oper-
ation Guide)
.
Pitch bend wheel (left)
Turn this toward or away from yourself to control the pitch. You can adjust the
amount of change it produces (See "Controlling Pitch" of the Operation Guide).
Tip:
When you release the pitch bend wheel, it returns to the center position.
Modulation wheel (right)
Turn this away from yourself to control various program parameters or effect
parameters. Vibrato is typically assigned to this wheel, but you can change the
parameter that's controlled (See "Controlling Pitch" of the Operation Guide).
3. VOLUME knob
This knob adjusts the volume of the AUDIO OUTPUT L/MONO, R outputs, as
well as the volume of the headphone jack.
4. ARP (arpeggiator) button
The arpeggiator function sounds an arpeggiated chord based on the notes that
you hold down on the keyboard.
5. DRUM TRACK button
This button plays back internal drum patterns.
6. REALTIME CONTROLS
Use the
SELECT button
to select a function, and use the
SWITCH button
and the
KNOB1 knob
and
KNOB2 knob
to change settings. When you're
playing a program or combination, you can use these to modify the sound or
effect in real time, to make simple edits, to turn external audio input on/off, to
change settings for the vocoder function, and to adjust the tempo of the arpeggi-
ator and sequencer.
7. M O D E
PROG button, COMBI button, SEQ button ( )
These buttons select the mode. Switch between modes as needed when you want to
perform, compose, edit the overall settings of the KROSS, or save data.
Program mode (PROG)
In this mode you can play or edit “
programs
,” which are the basic sounds of
the KROSS.
Combination mode (COMBI)
In this mode you can play or edit “
combinations
,” which are sounds that com-
bine multiple programs.
You can create
layers
which cause programs to sound simultaneously,
splits
which assign different programs to different regions of the keyboard, and even
combine layers and splits if you like.
Bass
Strings
Piano
Drums

EnglishFrançaisDeutschEspañol
En-3
Sequencer mode (SEQ)
You can use the 16-track MIDI sequencer to create phrases and songs.
Your performance on the keyboard and controllers is recorded and played back
as MIDI data.
Global/media mode (GLOBAL/MEDIA)
To switch to global/media mode, hold down the EXIT button and press the SEQ
button ( ).
Here you can adjust various settings for the KROSS, such as keyboard transpose
and sensitivity, controllers, and MIDI.
You can also save or load sound settings and song data of the KROSS to or from
an SD card.
8. CATEGORY dial, LED
Use the CATEGORY dial to choose the category of sounds that you want to
play. Use the VALUE dial to select programs from within the chosen category.
9. LAYER/SPLIT (quick layer/split) button
This button lets you create a layer in which two sounds are heard simultane-
ously, or a split in which the left and right regions of the keyboard play different
sounds.
Quick layer
This is a function that sets-up layer settings in which two sounds are heard
simultaneously. You can also adjust the volume balance. (See "Quick Layer" of
the Operation Guide)
Quick split
This is a function that sets-up split settings in which you can play two sounds
separately in the left and right regions of the keyboard. You can select each of
the two programs, adjust their volume and octave, and save them as a combina-
tion. (See "Quick Split" of the Operation Guide)
10. AUDIO REC (audio recorder)
(Play/Pause) button ( )
This button lets you adjust settings and perform operations for the audio
recorder, which lets you record your KROSS performance and the external
audio input.
11. Display
This shows the parameters and values that specify the sounds of the KROSS.
Tip:
If surrounding conditions make it difficult for you to read the display, adjust
the contrast. You can adjust this at any time by holding down the the EXIT but-
ton and turning the VALUE dial.
12. Function/page controllers
FUNCTION button, PAGE- button, PAGE+ button, MENU button
Use these buttons to move between pages in the display, to view a list of the
functions of each page, and to execute those functions.
13. VALUE dial, ENTER button, EXIT button ( )
Use the VALUE dial to change the value of parameters.
Use the ENTER button to execute a function, to select a radio button, or to turn a
check box on/off.
Use the EXIT button to cancel execution of a function or a change in a parame-
ter value, or to close a dialog box. Holding down the EXIT button and press
another button executes that button's
SHIFT function
, letting you access the
setup page of a function or Global mode.
14. Cursor buttons
, , ,
Use these buttons to control the cursor or value in the display.
15. SEQUENCER
(REC) button ( ), (Start/Stop) button
These buttons control the MIDI sequencer that records MIDI data such as your
keyboard performance.
The (REC) button is also used to recall the auto song setup function.
16. STEP SEQ (step sequencer)
ACTIVE button ( ), RUN button
These buttons operate the step sequencer function which lets you use pads 1–16
to create drum loop patterns.
17. FAVORITES
ACTIVE button ( )
This button operates the Favorites function which lets you register sounds to
pads 1–16 and recall them instantly at any time.
18.
SAMPLER (pad sampler)
ACTIVE button
()
, HOLD button
()
These buttons operate the pad sampler function. This function lets you sample
audio from the input jacks or load WAVE files or other sample files, and assign
them to the 1–16 pads for playback.
Note:
We recommend that you use an SD card. You can use this to automatically
save or load sample data.
19. AUDIO PLAY (pad audio play)
ACTIVE button ( )
You can use pads 1–16 to switch at one touch between audio songs that you
recorded using the KROSS's audio recorder or existing audio files, and play
them.
20. BANK SELECT button, BANK LEDs A–H
Use this button to select the bank for pads 1–16.
21. Pads 1–16
Use pads 1–16 to control the step sequencer, favorites, pad sampler, and pad
audio play.
Piano
Strings
Split point
Piano
Bass
732
141
8 11 13
54
6
9 10
12 15 16 17 18 19 20 21
KROSS 61-key

En-4
Rear panel and connections
1. KORG logo
The KORG logo is illuminated by an LED. You can specify whether the logo is
illuminated or not .
Power supply connection
2. (
Power) button, 3. DC 9V (power supply) jack,
4. cord hook
Connect the AC adapter to the power supply by following the procedure below.
If you’re using batteries, refer to "Using the KROSS on batteries", below.
Check the following before you make connections
•
Be sure you're using an AC power outlet of the correct voltage for your unit.
•
You must use only the included AC adapter.
Connecting the AC adapter
a.
Connect the DC plug of the included AC adapter to the DC 9V (power) jack
of this unit.
b
. Using the KROSS’s cord hook, fasten the cord so that the DC plug is not acci-
dentally disconnected.
c
. Connect the plug of the AC adapter to an AC outlet.
The KROSS has an auto power-off function. If approximately four hours
have elapsed since the KROSS was last operated, the power turns off auto-
matically (with the factory settings).(See p.5 "Auto power off function")
Connecting audio devices
Power-off your devices before making connections.
If you leave the
power on when making connections, your devices or speakers might be
damaged.
5. OUTPUT L/MONO, R jacks
You can connect these jacks to your monitor amp or mixer.
Adjust the volume level using the VOLUME knob. (
ø6.3mm
phone jack)
6. MIC IN jack
This is a monaural input jack for connecting a dynamic mic or an electric guitar.
(
ø6.3mm
phone jack)
Note:
This jack does not support phantom power or plug-in power.
7. (headphone) jack
Connect stereo headphones here. (stereo mini-phone jack)
Note:
The headphone jack of the KROSS 88-key is located on the front of the unit at
the left.
8. LINE IN jack
This is a stereo line input jack for connecting an audio player. (stereo mini-
phone jack)
Note:
Input settings can be made in the AUDIO IN dialog box.
(See "Connecting
your input devices" of the Operation Guide)
Note:
The input signals from the MIC IN jack and the LINE IN jack cannot be used
simultaneously.
Connecting to a computer or MIDI device
9. (USB B) port
You can connect this port to a computer, and transmit and receive performance data
and sound settings as MIDI data. This port can also send and receive audio data.
10. MIDI IN/OUT connectors
You can connect these connectors to an external MIDI device, and transmit and
receive performance data and sound settings as MIDI data.
Preparing to save or load data
11. SD card slot
Sounds and song data can be saved or loaded using an SD card; in addition, the
pad sampler function can automatically save or load sampling data, and the
audio recorder function can use the card for recording and playback. The
KROSS can use SD cards and SDHC cards.
When using an SD card for the first time on the KROSS, you must for-
mat it. (See "Formatting SD card" of the Operation Guide)
Inserting or removing an SD card
1. Inserting an SD card into the slot
With the label of the commercially avail-
able SD card facing upward, insert the card
into the SD card slot and press it inward
until it clicks into place.
Insert the card in the correct orientation.
2. Removing an SD card
Press the card inward until it is partially ejected; then pull it out of the
slot.
Note:
Store the SD card correctly as described in the owner's manual included
with the card.
Never insert or remove an SD card while the unit is starting up or shut-
ting down, while data is being saved or loaded, while the audio recorder
is recording or playing, or while recording or editing with the pad sam-
pler.
Connecting foot controllers
You can connect various options that let you operate the KROSS with your feet.
You can use a connected foot controller to control the KROSS.
Note:
When connecting a foot controller for the first time, you'll need to make adjust-
ments and assignments.
(See "Connecting foot controllers" of the Operation Guide)
12. DAMPER (damper pedal) jack
A damper pedal (separately sold option) sustains the notes as long as you con-
tinue pressing it, even after you take your hand off the keyboard. The Korg DS-
1H (sold separately) supports half-damper action.
13. ASSIGNABLE SWITCH jack
You can use a pedal switch (separately sold option) to switch sounds, or to play/
stop the sequencer or drum track.
14. ASSIGNABLE PEDAL jack
You can use an expression/volume pedal (separately sold option) to control the
volume, tone, or effect.
AC adapter
(Included)
DC plug
to an AC outlet
DAMPER ASSIGNABLE
PEDAL
ASSIGNABLE
SWITCH
SD card
MIDI keyboard
MIDI IN MIDI OUT
MIDI cable
USB cable
Computer
Audio player, etc.
Mic
Monitor Amplier, etc.
INPUT
Headphones
12 13 14 10
11 9 5 7 8 6 2 3 41
KROSS 61-key
SD Card Slot
SD Card

EnglishFrançaisDeutschEspañol
En-5
Using the KROSS on batteries
Batteries that can be used
Use six AA nickel-metal hydride or alkaline batteries.
Note:
Zinc-carbon batteries cannot be used.
Note:
Batteries are not included. You must purchase them separately.
Don’t mix new and old batteries, or batteries of different types. Failing to
observe this guideline might cause the batteries to leak or burst.
Remove exhausted batteries immediately. Failing to observe this guide-
line might cause the batteries to leak or burst.
Installing batteries
1. Open the cover of the battery compartment, and insert the batteries
KROSS 61-Key
The battery compartment of the KROSS 61-key model is located on the
bottom of the unit. When turning the unit upside down, place it on a blan-
ket or similar material to prevent damage to the knobs and dials.
KROSS 88-Key
The battery compartment is located at the left of the front panel.
Tip:
At the right of the front panel is a compartment that can store small
items such as a USB cable.
Do not apply excessive
force to the battery com-
partment cover.
2. Close the battery compartment cover
To close the cover, reverse the process of opening it.
On the KROSS, specify the type of batteries
After installing the batteries, turn on the power and specify the type of batteries
that you installed. To specify this, set the GLOBAL/MEDIA mode parameter
Battery Type. (See "Battery type setting" of the Operation Guide)
Battery remaining indication ( , , )
An indicator in the upper right of the screen shows the approximate remaining battery
capacity. If you're using the AC adapter, this indicates .
Note:
If the
symbol is flashing, the batteries are almost exhausted. Immediately
save any important data, and replace the batteries. Alternatively, switch to using the
AC adapter.
Turning the power on/off
Getting ready to play
1. Preparing the power supply
Either connect the AC adapter, or install AA batteries.
2. Connecting peripheral equipment
Connect your
audio equipment, foot controllers
, and
SD card
.
Depending on how you’re using the KROSS, you can also connect MIDI
and USB devices at this time. Adjust the volume of your connected audio
equipment (such as a monitor amp) to minimize it, or turn it off.
3. Turning the power on
Minimize the VOLUME knob of the KROSS, and then
turn on the power by holding down the power button
until the display backlight is lit.
Do not insert or remove an SD card from the slot while
the KROSS is starting-up.
4. Adjust the volume while playing the keyboard
Turn on the power of your monitor amp. Adjust the
VOLUME knob of the KROSS and the volume control
of your monitor amp so that the volume is appropriate.
The KROSS has an auto power-off function. If a cer-
tain length of time elapses without the unit being oper-
ated, the power turns off automatically.
When you've finished
First, adjust the VOLUME knob of the KROSS and the volume control of your
monitor amp to minimize the volume. Next, turn off the power of your monitor
amp. Finally,
turn off the power by holding down the power button of the
KROSS
until the backlight goes dark.
You must save your data before you turn off the power.
Unsaved data will be lost. Be sure to save important data to internal
memory or to an SD card.
Do not turn off the power while an operation is in progress.
Never turn off the power while the display indicates “Now writing into
internal memory.” Doing so might cause internal data to be damaged.
Auto power off function
The KROSS has an auto power-off function that automatically turns off the
power when the unit has not been played or operated(*) for a certain length of
time.
With the factory settings, this is set to four hours.
*
Using the VOLUME knob is not considered to be an operation.
Auto power-off settings
If auto power-off is enabled, a window regarding auto power-off appears when
start-up is completed.
If you want to change the time setting, or to disable the auto power-off function,
set the GLOBAL mode parameter Automatic Power-Off.
(See "Auto power-off function" of the Operation Guide)
Warning message before auto-off
When the specified length of time has elapsed without any operation being per-
formed on the KROSS a message warns you that the auto power-off function is
about to turn off the power.
If you want to continue using the KROSS, press the keyboard, or operate a but-
ton or a controller.
Note:
Following this operation, the same message appears again if the specified
length of time elapses without any operation being performed.
While pressing the latch, pull
upward and remove
When inserting the batteries, make sure that you
observe the correct polarity (“+” and “–”)
a.
b.
c.
To open cover, slide while pressing down
When inserting the batteries,
make sure that you observe
the correct polarity (“+” and “–”)

En-6
Pages and functions
Each screen of displayed information is called a “
page
.”
To open a desired page, use the PAGE- and PAGE+ buttons, or press the MENU
button and choose from the page menu.
Each page also provides convenient "
functions
."
In a page menu or function list, use the PAGE- and PAGE+ buttons to select an
item, and use the MENU button to display or execute the item.
When you’re at the page you want, use the cursor buttons
,
,
,
to select
a parameter, and use the VALUE dial to adjust the value. Press the ENTER but-
ton to confirm the value, or to turn a radio button etc. on/off. The EXIT button
cancels an operation.
Selecting and playing sounds
Selecting a program or combination
On the KROSS, you can use the CATEGORY dial and the VALUE dial to select
sounds intuitively and easily.
1. Select a mode
In the MODE section, press the PROG button or the COMBI button to
select program mode or combination mode. The MAIN page appears.
When (category select icon) is shown, you can use the CATEGORY
dial to select sounds.
Tip :
In other than the MAIN page, when a parameter indicated by is
selected, you can use the CATEGORY dial to select sounds.
2. Select the category of sound
Turn the CATEGORY dial to select the category of sound. When you
operate the CATEGORY dial, the sound select list appears.
3. Select the variation of sound, and play
Turn the VALUE dial to select a variation of sound within the category. To
return to the MAIN page, press the MENU (OK) button or the ENTER but-
ton. If you press the FUNCTION (Cancel) button or the EXIT button, you
return to the sound that had been selected before you switched sounds.
Ti p :
You can also select sounds from the MAIN page. Use the VALUE dial
or the
,
cursor buttons to select a sound.
Using Favorites
The Favorites function lets you use the 1–16 pads to register your favorite sounds and
instantly recall at any time. (See "Favorites function" of the Operation Guide)
Recalling a sound
Here's how to recall a sound that you registered. With the factory settings, spe-
cially recommended sounds are registered in favorite banks A‒D.
1. Turn on the Favorites function
Press the FAVORITES ACTIVE button to turn it on.
2. Select a Favorites bank
Use the BANK SELECT button to select the Favorites bank that contains
the sound that you want to recall. The A B C D E F G H LEDs light con-
secutively. In this example, select A.
3. Recall a sound
Press one of the pads 1–16 to recall a sound.
Ti p :
To turn off the Favorites function, press any one of the PROG, COMBI,
or SEQ buttons.
Registering a sound to a pad
Here’s how to register a sound to one of the pads 1–16.
1. From the programs or combinations, select the sound that you want
to register
2. Enter registration mode
Hold down the EXIT button and press the FAVORITES ACTIVE button
to enter registration mode.
3. Select the bank for registration
Press the BANK SELECT button to select the bank.
4. Register the sound to a pad
Press one of the pads 1–16 to register the sound.
Ti p :
You can also make this registration by executing the Add to Favorite
function of program mode or combination mode
(See "Add to Favorite
function" of the Operation Guide).
Ti p :
There is also a way to change an already-registered sound.
(See "Regis-
tering a sound in Favorites" of the Operation Guide)
Saving your Favorites
When you've finished registering sounds to pads, save your Favorites settings. If
you turn off the power without saving the settings you've registered, they will be
lost when you turn off the power.
1. Press the FAVORITES ACTIVE button to turn on the Favorites
function
2. Select the Write Favorites function
Page menu
Move between
pages
Page Page Tab ParametersMode/Page title
Function list
Cursor buttons
: Choose a parameter
ENTER button
: Confirm a value, turn a setting on/off
VALUE dial
: Change the value
EXIT ( ) button
: Cancel a setting, close a dialog box,
or use with other buttons to access a
shift function
Category select icon
Mode

EnglishFrançaisDeutschEspañol
En-7
Press the FUNCTION button. Use the PAGE- (▲) button to select Write
Favorites, and then press the MENU (OK) button.
3. Execute save
Press the MENU (OK) button to save the data.
Performing with the arpeggiator
The arpeggiator is a function that automatically plays rhythmic chords or arpeg-
gios according to the keys that you press (See "Arpeggiator function" of the
Operation Guide).
Basic operation
1. Press the ARP button to turn the arpeggiator on
2. Start playing
The arpeggiator starts when you press the keyboard. For some sounds, the
arpeggiator starts in a specific region of the keyboard. Try pressing keys
in different regions.
3. Adjust the tempo
In the REALTIME CONTROLS section, use the SELECT button to select
TEMPO, and use the KNOB1 knob to adjust the tempo. Alternatively,
press the SWITCH button (TAP) several times to adjust the tempo.
4. Stop performing and turn off the arpeggiator
The arpeggiator stops when you take your hand off the keyboard. If the
arpeggiator does not stop, turn off the ARP button.
Performing with the step sequencer
The step sequencer is a function that lets you use the 1–16 pads to easily create
drum loop patterns. (See "Step sequencer" of the Operation Guide)
Tip:
The loop patterns that you create can be saved together with the sounds and
songs.
Basic operation
1. Start playing
When you turn the STEP SEQ RUN button on, the loop pattern starts
playing. Turn it off to stop the pattern.
2. Adjust the tempo
In "Performing with the arpeggiator", refer to step 3"Adjust the tempo"
3. Select the tones that you want to enter, such as kick or snare
While holding down the the EXIT button, press the STEP SEQ ACTIVE
button to access the step sequencer setup screen. In this screen, hold down
the STEP SEQ ACTIVE button and press pads 1–12 to select a tone
(sound). By default, the following drum instruments (drum set) are
assigned to each tone.
4. Enter the pattern (turn steps on/off)
Press pads 1–16 to enter the pattern. Each step whose pad is lit will pro-
duce sound. Each time you press a pad, it alternates on/off. The steps are
the timing intervals at which sounds are heard.
5. Turn off the step sequencer to stop playback
When you turn off the STEP SEQ RUN button, playback stops.
Performing with the drum track
The drum track is a function that plays drum patterns in a variety of styles (See
"Drum Track function" of the Operation Guide).
Basic operation
1. Turn on the function and start playing (start/standby)
Turn on the DRUM TRACK button; the drum track starts playing.
Note:
If the button blinks, the drum track is in the standby condition. The drum
track starts when you press the keyboard.
2. Adjust the playback speed
In "Performing with the arpeggiator", refer to step 3"Adjust the tempo"
3. Stop playback
When you turn off the DRUM TRACK button, playback stops.
Performing with the pad sampler
The pad sampler is a function that lets you sample from an external source via
the mic or line input of the KROSS, or from the performance of the KROSS
itself (maximum 14 seconds), and assign the samples to the 16 pads for conve-
nient playback and performance. Up to four samples can be played simultane-
ously (See "Pad Sampler" of the Operation Guide).
Note:
We recommend that you use an SD card. If an SD card formatted by the
KROSS is left inserted in the SD card slot, recorded data and settings are saved auto-
matically.
Basic operation
1. Prepare for recording (sampling)
If you want to record the sounds of the KROSS, use program mode or
combination mode to select the sound that you want to play. If you want
to record sound from an external input, connect your mic, guitar, or other
source to the KROSS's MIC IN jack or LINE IN jack. (See "Connecting
your input devices" of the Operation Guide)
2. Select the recording-destination pad
Hold down the EXIT button and press the SAMPLER ACTIVE button to
access the SAMPLER SETUP window. Use the cursor keys to select a
pad in which a sample has not yet been recorded (indicated as EMPTY;
A01 in this example), and press the MENU (REC) button to access the
SAMPLE RECORDING window..
Tip:
If you want to adjust the volume of an external input, press the PAGE-
(A-IN) button to access the AUDIO-IN QUICK SETTING dialog box
3. Record (sample)
Press the MENU ( ) button, then press the MENU ( ) button to
start recording; then perform on the KROSS or through your mic. You can
record up to a maximum length of 14 seconds. When you’ve finished,
press the PAGE+(
) button to stop recording.
Tip:
To assign samples to other pads, select another vacant pad and repeat
the above procedure.
4. Use the pads to perform (play back) samples
The pad that you recorded in step 3 (pad 2 in this example) is lit; in this
state, the sample you recorded in step 3 plays while you hold down pad 2.
In the EDIT SAMPLE window, you can adjust detailed settings for the
playback method.
Refer to the operation guide for additional details on use.
Tone 1 : Kick Tone 5: H.H Op en Tone 9: Tom H
Tone 2: Snare 1 Tone 6: Crash Tone 10: Perc 1
Tone 3: Snare 2 Tone 7: Ride Tone 11: Perc 2
Tone 4: H.H Close Tone 8: Tom L Tone 12: SFX
Tone 1
Tone 2
Step 1
Step 2
Step 3
Step 16
Tone 3
: Step On
Tone 12
ACCENT Tone (13)
Zone A Zone B
Drum Track Pattern

En-8
Audio recorder and pad audio play
The audio recorder function lets you make multi-track recordings of your perfor-
mance on the KROSS, and the pad audio play function makes it easy to use the
pads to play back audio songs that you recorded. (See "Audio recorder" of the
Operation Guide)
Note:
The recorded songs and settings are saved on an SD card. Insert an SD card
that was formatted by the KROSS.
Using the audio recorder to record an audio song
As an example, we'll explain the procedure for recording with a mic.
1. Select a mic program
It's easy and convenient to record from a mic if you use a program whose
input and effect settings are designed for use with a mic.
2. Connect your mic
In the REALTIME CONTROLS section, use the SELECT button to select
AUDIO IN 1; then turn off the SWITCH (ON/OFF) button, and turn the VOL-
UME knob all the way to the left to lower the volume. Then connect a dynamic
mic to the rear panel mic input (MIC IN) jack.
You must turn off the SWITCH (ON/OFF) button and use the VOLUME knob to
minimize the volume before you connect a mic or other device. If you fail to observe
this precaution, your speaker system might be damaged.
3. Enable the mic input
After you've connected the mic, once again press the REALTIME CON-
TROLS section SWITCH (ON/OFF) button to turn it on (lit); the mic is
enabled.
4. Adjust the volume of the mic input
Adjust the VOLUME knob to an appropriate volume; then while playing
the keyboard or playing back the audio recorder, vocalize into the mic and
use the SELECT button to select REALTIME CONTROLS section
AUDIO IN 1, and use the KNOB1 (GAIN) knob to adjust the volume bal-
ance.
5. Open the audio setup window
While holding down the EXIT button, press the AUDIO REC
(Play/Pause) button to open the AUDIO RECORDER SETUP window.
Press the MENU ( (Rec Control)) button to enter the record-standby
condition. (AUDIO REC (Play/Pause) button: blinking red)
6. Record
When you press the MENU ( ) button or the AUDIO REC
(Play/Pause) button, recording starts. (AUDIO RECORDER button: lit
red) Play the KROSS or input audio from a mic or guitar to record.
To stop recording, press the PAGE+(
) button. When you stop recording,
you automatically return to the point at which recording started.
Tip:
If you want to overdub, change the location or the sound and repeat the
above procedure.
Using the pads to play audio songs
1. Assign audio songs to pads
While holding down the EXIT button, press the AUDIO PLAY ACTIVE button
to open the AUDIO PLAY SETUP window. Use the cursor keys to select a pad
to which an audio song has not yet been assigned (indicated as Empty; A01 in
this example), and press the MENU (EDIT) button to access the AUDIO SONG
SETUP window. As the Audio Song, select the song that you recorded earlier
(000 in this example).
Tip:
If you want to assign separate audio songs to multiple pads, repeat the
above procedure using different audio songs and other unassigned pads.
2. Use the pads to play back audio songs
The pad that you recorded in step 1 (pad 1 in this example) is lit; in this
state when you press pad 1, the assigned audio song plays (the pad illumi-
nation becomes brighter). When you press pad 1 once again, the playback
is paused.
Note:
If you start playback from a different pad while an audio song is playing,
the previously-playing audio song stops. You can’t play back multiple audio
songs simultaneously.
Recording on the MIDI sequencer
The KROSS provides recording functionality that lets you create phrases and
songs.The MIDI sequencer records your performance as MIDI data. After recording,
you can edit your performance and the control data, and change the instrument that is
played. (See "Sequencer" of the Operation Guide)
Recording your performance as MIDI
Auto song setup
Auto song setup is a function that sets-up the sequencer with the program or
combination you’re playing, along with the arpeggiator and the drum track, and
puts the sequencer in the record-standby condition. Proceed as follows.
1. Execute auto song setup
Select a sound in program mode or combination mode, and press
the
SEQUENCER
(REC) button; the setup confirmation dialog box appears.
Once again press the (REC) button (or press the MENU (OK) button);
setup occurs, and the sequencer is in the record-standby condition.
2. Start recording, play back, and stop
Press the SEQUENCER (Start/Stop) button; after a two-measure
pre-count, recording starts. Perform in time with the click.
When you’ve finished performing, once again press the (Start/Stop)
button to stop recording. You automatically return to the point at which
you started recording (in this case, the beginning of the song).
3. Listen to the recorded performance
Press the SEQUENCER (Start/Stop) button, and listen to the per-
formance.
Ti p :
If you decide to re-record your performance, you can execute Undo
from the function list and return to the state prior to recording.
Ti p :
If you hold down the EXIT button and press the REC button, you move
to the point at which to start recording or playback. (With the default set-
tings, the beginning of the song)
Save the song that you created
Save the song that you created on the SD card.
Songs cannot be saved in internal memory.
When you turn off the power, data in internal memory is lost.
Use an SD card that was formatted by the KROSS. For details on format-
ting, see the operation guide.
Never remove the SD card while “Scanning Media” is displayed when
the SD card is inserted.
About the saved data
Song data is saved as a .SNG file. This data includes performance data
and sound (program) numbers.
It does not include the program
sound data itself.
(SNG: SoNG)
Sound data is saved as a .PCG file. To ensure that the sounds are repro-
duced correctly during playback, we recommend that you save the
.PCG file together with the .SNG file.
(PCG: Program/Combination/Global)
Saving songs and sounds together
1. Select the page
Hold down the EXIT button and press the SEQ button; you’re now in
global/media mode. Press the PAGE+ button or the PAGE- button to
select the MEDIA>FILE page.
Tip:
You can jump to the MEDIA>FILE page by holding down the EXIT
button and pressing the SEQ button twice.

EnglishFrançaisDeutschEspañol
En-9
2. Select the function Save All
Press the FUNCTION button. Use the PAGE+ (
) or PAGE- (
) but-
tons to select
Save All
, and then press the MENU (OK) button.
3. Assign a name to the file, and save it
Press the MENU (OK) button to save the data.
Note:
To assign a name to the file that will be saved, press the ENTER button
and enter a name in the text edit dialog box that appears.
Saving a song
Select and execute the function Save SEQ. The rest of the procedure is the same.
See "Saving songs and sounds together", above.
Listening to the demo songs
This procedure loads program and combination data and demo song data
into the KROSS. This means that any edited or newly created favorite
data will be overwritten, and your data will be lost. If you want to keep
this data, save it on an SD card (commercially available). (See "Saving
songs and sounds together")
1. In global mode, select the page to load
Hold down the EXIT button and press the SEQ button to enter global/media
mode. Access the GLOBAL > BASIC page (if something other than the
BASIC page is shown, press the EXIT button).
2. Load the demo songs and preload programs
Press the FUNCTION button. Use the PAGE+ (
) or PAGE- (
) buttons
to select Load Preload/Demo Data, and then press the MENU (OK) but-
ton. In the Kind field of the dialog box, select
All (Preload PCG and
Demo Songs)
.
Press the MENU (OK) button. A confirmation message appears; once
again press the MENU (OK) button. Loading is executed.
Never turn off the power while data is being loaded.
3. Press the SEQ button to enter sequencer mode
Access the SEQ > MAIN page (if this is not shown, press the EXIT button).
4. Use Song Select to select a demo song
Use cursor buttons
, , ,
to select the parameter, and use the
VALUE dial etc. to make your selection.
5. Start and stop playback
Press the SEQUENCER (Start/Stop) button to start playback.
Playback stops automatically when the performance is over. To stop mid-
way through the performance, press the (Start/Stop) button once
again.
The loaded demo song disappears when the power is turned off; reload it
if necessary.
Restoring the factory settings
This operation returns the preload data for programs, combinations, drum kits,
and user arpeggio patterns, as well as the global settings, to their factory-set
state.
As described in steps 1 and 2 of "Recording on the MIDI sequencer", set the
Kind parameter of the dialog box to
All Preload PCG
, and execute the load
operation.
Specifications (general)
System:
EDS-i (Enhanced Definition Synthesis - integrated)
Keyboard section:
KROSS2-61: 61-note (velocity sensitive, aftertouch not supported)
KROSS2-88: 88-note NH keyboard (natural weighted hammer action, velocity sensitive,
aftertouch not supported)
Maximum polyphony:
120 voices (120 oscillators)
Preset PCM memory:
Approximately 128 MB (*when converted to 48 kHz 16-bit linear PCM)
Expansion PCM memory:
Approximately 128MB (*when converted to 48 kHz 16-bit linear PCM, for keyboard perfor-
mance)
Sounds:
896 combinations (384 preload, 512 user)
1545 programs (768 preload, 512 user (4 user banks), 265 preset)
Favorites:
128 (16 favorites x 8 banks)
Drum kits:
67 (42 preload, 9 preset, 16 user)
Effects:
134 types, 5 insert effects, 2 master effects
Recorders:
16-track MIDI sequencer,
audio recorder (audio format: PCM audio format, stereo 48 kHz/16-bit)
Pad sampler:
16 pads, stereo 48 kHz/16-bit, WAVE file import is supported
Control inputs/outputs:
DAMPER (half damper is supported), ASSIGNABLE SWITCH,
ASSIGNABLE PEDAL
MIDI IN, MIDI OUT, USB (TYPE B) USB-MIDI interface
Audio outputs:
AUDIO OUTPUT L/MONO, R: ø6.3mm phone jack (TS unbalanced)
Headphone output: ø3.5mm stereo mini-phone jack
USB (TYPE B): USB-AUDIO interface (stereo out)
Audio inputs:
LINE IN: ø3.5mm stereo mini-phone jack
MIC IN: ø6.3mm phone jack (TS unbalanced)
Phantom power and plug-in power are not supported
USB (TYPE B): USB-AUDIO interface (stereo in)
Power supply:
AC adapter connector (DC 9V, )
Six AA alkaline or nickel-metal hydride batteries
Battery service life:
Six AA alkaline batteries approximately six hours
Six AA nickel-metal hydride batteries (1900 mAh) approximately seven hours
* With the default settings. Service life varies depending on the batteries used and on
the conditions of use.
SD cards that can be used:
SD memory cards up to 2 GB
SDHC memory cards up to 32 GB
(SDXC memory cards are not supported)
Dimensions (width x depth x height):
KROSS2-61: 935 x 269 x 88 mm / 36.81" x 10.59" x 3.46"
KROSS2-88: 1,448 x 383 x 136 mm / 57.01" x 15.08" x 5.35"
Weight:
KROSS2-61: 3.8 kg / 8.38lbs.
KROSS2-88: 12.3 kg / 27.12lbs.
Power consumption:
5W
Included items:
AC adapter, KROSS Quick Start Guide (this document)
Options:
XVP-20, XVP-10: expression/volume pedal, EXP-2: foot controller, DS-1H: damper pedal,
PS-1, PS-3: pedal switches
* Specifications and appearance are subject to change without notice for
improvement.
Song Select

En-10

EnglishFrançaisDeutschEspañol
Fr-1
Précautions
Emplacement
L’utilisation de cet instrument dans les endroits suivants peut en
entraîner le mauvais fonctionnement.
• En plein soleil
• Endroits très chauds ou très humides
• Endroits sales ou fort poussiéreux
• Endroits soumis à de fortes vibrations
• A proximité de champs magnétiques
Alimentation
Branchez l’adaptateur secteur mentionné à une prise secteur de ten-
sion appropriée. Evitez de brancher l’adaptateur à une prise de cou-
rant dont la tension ne correspond pas à celle pour laquelle l’appareil
est conçu.
Interférences avec d’autres appareils électriques
Les postes de radio et de télévision situés à proximité peuvent par
conséquent souffrir d’interférences à la réception. Veuillez dès lors
faire fonctionner cet appareil à une distance raisonnable de postes de
radio et de télévision.
Maniement
Pour éviter de les endommager, manipulez les commandes et les
boutons de cet instrument avec soin.
Entretien
Lorsque l’instrument se salit, nettoyez-le avec un chiffon propre et
sec. Ne vous servez pas d’agents de nettoyage liquides tels que du
benzène ou du diluant, voire des produits inflammables.
Conservez ce manuel
Après avoir lu ce manuel, veuillez le conserver soigneusement pour
toute référence ultérieure.
Evitez toute intrusion d’objets ou de liquide
Ne placez jamais de récipient contenant du liquide près de l’instru-
ment. Si le liquide se renverse ou coule, il risque de provoquer des
dommages, un court-circuit ou une électrocution.
Veillez à ne pas laisser tomber des objets métalliques dans le boîtier
(trombones, par ex.). Si cela se produit, débranchez l’alimentation de
la prise de courant et contactez votre revendeur korg le plus proche
ou la surface où vous avez acheté l’instrument.
Gestion des données
Une erreur de manipulation ou un dysfonctionnement peut provo-
quer la perte du contenu de la mémoire. Veuillez utiliser le logiciel
“Editor” fourni pour archiver vos données importantes sur ordina-
teur ou sur un support de mémoire amovible. Korg décline toute res-
ponsabilité pour tout dommage résultant de la perte de données.
AVERTISSEMENT DE COPYRIGHT
Cet appareil professionnel est destiné à l’enregistrement de mor-
ceaux dont vous êtes l’ayant droit ou pour lesquels vous avez obtenu
la permission de l’ayant droit. Sachez qu’une telle permission est
requise pour tout morceau que vous comptez utiliser en public, à la
radio, à des fins commerciales ou toute autre activité à but lucratif.
L’utilisation de morceaux dont vous ne détenez pas les droits
d’auteur et pour lesquels vous n’avez reçu aucune permission de
l’ayant droit vous expose à des poursuites judiciaires.
Si vous n’êtes pas sûr de vos droits sur une oeuvre, veuillez consulter
un avocat spécialisé.
KORG DECLINE TOUTE RESPONSABILITE POUR QUELQUE
INFRACTION QUE CE SOIT, MEME SI ELLE A ETE COMMISE
AVEC UN PRODUIT KORG.
* Tous les noms de produits et de sociétés sont des marques commerciales ou
déposées de leur détenteur respectif.
Note concernant les dispositions (Seulement EU)
Quand un symbole avec une poubelle barrée d’une croix appa-
rait sur le produit, le mode d’emploi, les piles ou le pack de
piles, cela signifie que ce produit, manuel ou piles doit être
déposé chez un représentant compétent, et non pas dans une
poubelle ou toute autre déchetterie conventionnelle.
Disposer de cette manière, de prévenir les dommages pour la
santé humaine et les dommages potentiels pour l’environne-
ment. La bonne méthode d’élimination dépendra des lois et règlements
applicables dans votre localité, s’il vous plaît, contactez votre organisme
administratif pour plus de détails. Si la pile contient des métaux lourds
au-delà du seuil réglementé, un symbole chimique est affiché en dessous
du symbole de la poubelle barrée d’une croix sur la pile ou le pack de
piles.

Fr-2
Introduction
Merci d’avoir choisi le synthétiseur workstation KROSS de Korg.
Afin de pouvoir exploiter au mieux toutes les possibilités offertes par l’instru-
ment, veuillez lire attentivement ce manuel.
Outre ce document, les manuels suivants sont aussi disponibles en format PDF.
Vous pouvez télécharger ces manuels électroniques (PDF) sur le site internet
de Korg (www.korg.com).
Guide de l’utilisateur :
Décrit l’utilisation du KROSS.
Voice Name List :
Il s’agit de la liste des sons et d’autres données définis à
l’usine.
Caractéristiques principales
Choisissez simplement un son et mettez-vous à jouer. Créez vos propres sons,
phrases et rythmes. Enregistrez vos parties de chant ou de guitare. Le KROSS
est un synthétiseur de haute qualité et simple d’utilisation qui vous permet de
faire toutes ces choses et de donner forme et vie à toutes vos idées musicales.
L’extraordinaire richesse d’expression du moteur sonore EDS-i
Les sons de qualité superbe du KROSS sont produits par le moteur sonore
EDS-i (“Enhanced Definition Synthesis-integrated”, soit un moteur intégrant
une synthèse de définition rehaussée), hérité des synthétiseurs professionnels
de Korg. Cet instrument met entre vos mains une incroyable palette de sons
expressifs adaptés à la scène et aux travaux de production.
Un large éventail de sons et d’effets préprogrammés
Les 128Mo* de données d’échantillons PCM proposent de nombreux sons
d’instruments et d’effets. Vous disposez d’un total de 1.417 sons réalistes char-
gés à l’usine. Vous pouvez étendre la mémoire PCM en ajoutant une biblio-
thèque PCM de 128Mo* disponible en option. (*Moyennant conversion au
format PCM linéaire 16 bits 48 kHz)
Vous pouvez choisir parmi 134 types d’effets. Vous y trouverez des effets cho-
rus, delay, réverb, overdrive, des effets vintage, de simulation d’ampli et même
un vocodeur.
Section REALTIME CONTROLS
Ces commandes permettent de modifier le son ou l’effet en temps réel durant
le jeu et d’effectuer de simples éditions. Vous pouvez en outre changer les
réglages d’entrée de la source audio externe et les paramètres de vocodeur, et
régler le tempo de l’arpégiateur et du séquenceur.
Fonction de superposition/partage rapide
Grâce aux fonctions
Quick Layer
et
Quick Split
, il est à la fois simple et
rapide de superposer deux sons ou de les assigner aux parties gauche et droite
du clavier.
Fonction Favorites pour un rappel instantané des sons
Vous pouvez assigner jusqu’à 128 sons aux 16 pads en face avant, pour un rap-
pel-éclair des sons. C’est un sérieux avantage sur scène.
Fonction d’échantillonneur à pads
Les 16 pads de l’instrument permettent d’échantillonner facilement une source
externe via l’entrée micro ou de ligne, ou de rééchantillonner votre jeu sur le
KROSS. Les données échantillonnées sont automatiquement mémorisées sur
carte SD (disponible dans le commerce). Vous pouvez en outre charger des
fichiers WAVE et créer des boucles.
Fonctions flexibles pour étoffer vos interprétations et productions
Vous pouvez étoffer vos interprétations et productions grâce aux fonctions
telles que
l’arpégiateur
, qui génère automatiquement des accords rythmique-
sou des arpèges, la
piste de batterie
, qui produitinstantanément des motifs
(patterns) de batterie d’un large éventail destyles différents, et le
séquenceur
pas à pas
, qui vous permetd’utiliser les 16 pads pour créer intuitivement des
motifsde batterie originaux.
Séquenceur pour enregistrement et lecture MIDI
L’instrument dispose d’un séquenceur MIDI à 16 pistes d’une résolution de
♩
/
480. Il permet d’enregistrer votre jeu sur le clavier et l’utilisation des fonctions
de jeu sous forme de données MIDI et de reproduire ces données de jeu. Vous
pouvez en outre enregistrer et reproduire votre jeu sur les pads d’échantillon-
nage.
Enregistreur audio multipiste pour superposer vos parties de chant
et declavier
L’enregistreur audio intégré permet d’enregistrer votre jeu sur le KROSS ainsi
qu’un signal d’entrée audioexterne sur carte SD. Vous pouvez en outre super-
poser des enregistrements(“overdub”) de votre jeu sur le KROSS ou d’une
source externe et charger et lire des fichiers WAVE avec les 16 pads (mode de
lecture audio des pads).
Un poids plume qui s’emporte partout
Malgré son clavier de taille réglementaire, le KROSS est un synthétiseur très
léger et donc mobile. Comme il peut être alimenté aussi bien par piles AA
qu’avec un adaptateur secteur, vous pouvez jouer où bon vous semble.
Connexion à un ordinateur via USB
Vous pouvez brancher le KROSS à un ordinateur et échanger facilement des
données MIDI ou audio via USB.
Les logiciels “KROSS Editor” ou “Plug-In Editor” permettentd’éditer un
grand nombre de paramètres sur un écran d’ordinateur ou d’utiliser le KROSS
comme synthétiseur plug-in au sein de votre station de travail audio numérique
(DAW).
* Vous pouvez télécharger le “KROSS Editor” et “Plug-In Editor” sur le site
internet de Korg (www.korg.com).
Panneau avant
1. Clavier
2. Fonctions de jeu
Commutateurs SW1 et SW2
Les commutateurs SW1 et SW2 permettent de transposer le clavier par octave,
d’activer et de couper le portamento ou de bloquer/débloquer la molette de
Pitch Bend. Vous pouvez leur attribuer la fonction voulue (voyez "Réglage de
la fonction de SW1 et SW2" dans le Guide de l’utilisateur).
Molette de Pitch Bend (gauche)
Actionnez cette molette vers l’avant ou vers l’arrière pour contrôler la hauteur.
Vous pouvez définir la plage du changement de hauteur produit par la molette
(voyez "Controle de la hauteur" dans le Guide de l’utilisateur).
Astuce :
Quand vous relâchez la molette de Pitch Bend, elle retourne en
position centrale.
Molette de modulation (droite)
L’action de cette molette permet de contrôler divers paramètres de programme
ou d’effets. Le contrôle du vibrato est habituellement affecté à cette molette,
mais vous pouvez lui attribuer le paramètre souhaité (voyez "Controle de la
hauteur" dans le Guide de l’utilisateur).
3. Commande VOLUME
Cette commande règle le volume des sorties audio AUDIO OUTPUT L/
MONO et R et de la prise casque.
4. Bouton ARP (arpégiateur)
L’arpégiateur est une fonction générant un arpège sur base des touches que
vous maintenez enfoncées sur le clavier.
5. Bouton DRUM TRACK
Ce bouton permet de jouer les motifs de batterie de l’instrument.
6. REALTIME CONTROLS
Choisissez une fonction avec le
bouton SELECT
et modifiez les paramètres
avec le
bouton SWITCH
et les
commandes KNOB1
et
KNOB2
. Quand
vous jouez avec un programme ou une combinaison, ces commandes permet-
tent de modifier le son ou l’effet en temps réel, d’effectuer de simples modifi-
cations, d’activer et de couper l’entrée d’une source audio externe, de changer
les paramètres de la fonction vocodeur et de régler le tempo de l’arpégiateur et
du séquenceur.

EnglishFrançaisDeutschEspañol
Fr-3
7. MO DE
Bouton PROG, bouton COMBI, bouton SEQ ( )
Ces boutons servent au choix du mode. Choisissez le mode voulu pour jouer,
composer, éditer les paramètres globaux du KROSS ou sauvegarder des don-
nées.
Mode Program (PROG)
Ce mode permet d’éditer ou de jouer avec les "
programmes
", les sons de base
du KROSS.
Mode Combination (COMBI)
Ce mode permet d’éditer ou de jouer avec les "
combinaisons
" qui, comme
leur nom l’indique, combinent plusieurs sons de base.
Vous pouvez créer des
superpositions
(deux programmes superposés) et des
partages
(un programme différent est assigné aux deux parties du clavier).
Vous pouvez aussi combiner les fonctions de superposition et de partage.
Mode Sequencer (SEQ)
Vous pouvez utiliser le séquenceur MIDI à 16 pistespour créer des phrases et
des morceaux.
Le séquenceur permet d’enregistrer votre jeu sur le clavier et l’utilisation des
contrôleurs sous forme de données MIDI puis de reproduire ces données.
Mode Global/Media (GLOBAL/MEDIA)
Pour activer le mode Global/Media, maintenez enfoncé le bouton EXIT et
appuyez sur le bouton SEQ ( ).
Ce mode permet de régler divers paramètres globaux du KROSS, comme la
transposition et la sensibilité du clavier, les contrôleurs et les réglages MIDI.
Vous pouvez aussi utiliser une carte SD pour sauvegarder ou charger des
réglages de sons et des données de morceaux du KROSS.
8. Molette et témoin CATEGORY
Choisissez la catégorie de sons voulue avecla molette CATEGORY. La com-
mande VALUE permet de choisir les programmes voulus au sein de cette caté-
gorie.
9. Bouton LAYER/SPLIT (fonctions Quick Layer/Split)
Ce bouton permetde superposer deux sons ou de partager le clavier en assi-
gnant un son différent aux parties gauche et droite du clavier.
Quick Layer
Cette fonction crée une superposition de deux sons audibles simultanément.
Vous pouvez en outre équilibrer le volume des deux sons. (Voyez "Quick
Layer" dans le Guide de l’utilisateur)
Quick Split
Cette fonction divise le clavier en deux zones permettant chacune de jouer un
son différent. Vous pouvez choisir le programme et régler le volume et
l’octave de chaque moitié du clavier, puis sauvegarder les réglages sous forme
de combinaison. (Voyez "Quick Split" dans le Guide de l’utilisateur)
10. AUDIO REC (enregistreur audio)
Bouton (lecture/pause) ( )
Ce bouton permet de régler et de piloter les fonctions de l’enregistreur audio,
grâce auquel vous pouvez enregistrer votre jeu sur le KROSS et le signal de la
source externe.
11. Écran
Affiche les paramètres et réglages du KROSS déterminant les sons de l’instru-
ment.
Astuce :
Pour une lisibilité optimale, vous pouvez adapter le contraste de
l’écran à l’éclairage ambiant. Vous pouvez effectuer ce réglage à tout moment
en maintenant enfoncé le bouton EXIT et en tournant la molette VALUE.
12. Commandes de fonction/de page
Bouton FUNCTION, bouton PAGE-, bouton PAGE+, bouton MENU
Utilisez ces boutons pour naviguer dans les pages d’écran, afficher la liste des
fonctions de chaque page d’écran et pour exécuter ces fonctions.
13. Molette VALUE, bouton ENTER, bouton EXIT ( )
Réglez la valeur du paramètre avec la molette VALUE.
Appuyez sur le bouton ENTER pour exécuter une fonction, sélectionner un
bouton radio ou cocher/décocher une case de sélection.
Appuyez sur le bouton EXIT pour annuler l’exécution de la fonction ou un
changement de paramètre, ou pour fermer une boîte de dialogue. Maintenez
enfoncé le bouton EXIT et appuyez sur un autre bouton pour exécuter la
fonc-
tion SHIFT
du bouton en question. Cela vous permet d’accéder à la page de
réglages d’une fonction ou au mode Global.
14. Boutons de curseur
,
,
,
Ces contrôleurs permettent de déplacer le curseur d’écran et de changer les
valeurs affichées.
15. SEQUENCER
Bouton (enregistrement) ( ), bouton (démarrage/
arrêt)
Ces boutons commandent le séquenceur MIDI permettant d’enregistrer votre
jeu sous forme de données MIDI.
Le bouton (enregistrement) sert aussi au rappel de la fonction “Auto Song
Setup” de configuration instantanée du séquenceur.
16. STEP SEQ (séquenceur pas à pas)
Bouton ACTIVE ( ), bouton RUN
Ces boutons contrôlent le séquenceur pas à pas utilisé pour créer des boucles
de batterie avec les pads 1~16.
17. FAVORITES
Bouton ACTIVE ( )
Ce bouton commande la fonction “Favorites” utilisée pour assigner des sons
aux pads 1~16 pour un accès instantané.
Bass
Strings
Piano
Drums
Piano
Strings
Point de partage
Piano
Bass
732
141
8 11 13
54
6
9 10
12 15 16 17 18 19 20 21
KROSS 61-key

Fr-4
18.
SAMPLER (échantillonneur à pads)
Bouton ACTIVE
()
, bouton HOLD
()
Ces boutons contrôlent l’échantillonneur à pads. Cette fonction permet
d’échantillonner le signal de l’entrée audio ou de charger des fichiers WAVE
ou d’autres échantillons, et d’assigner ces échantillons aux pads 1~16 afin de
les intégrer à votre jeu.
Remarque:
Nous vous conseillons de vous procurer une carte SD. Vous pou-
vez utiliser cette fonction pour sauvegarder et charger automatiquement des
données d’échantillon.
19. AUDIO PLAY (lecture audio des pads)
Bouton ACTIVE ( )
Les pads 1~16 permettent de lancer d’une simple pression la lecture de fichiers
audio échantillonnés avec la fonction d’enregistreur audio du KROSS ou de
fichiers audio existants.
20. Bouton BANK SELECT, témoins BANK A–H
Ce bouton permet de choisir la banque voulue pour les pads 1~16.
21. Pads 1~16
Les pads 1~16 contrôlent le séquenceur pas à pas, les favoris, l’échantillonneur
à pads et la lecture audio des pads.
Panneau arrière et connexions
1. Logo KORG
Le logo KORG est illuminé par une diode. Si vous le souhaitez, vous pouvez
couper l’illumination du logo.
Connexion de l’alimentation
2. Bouton (
alimentation), 3. Prise DC 9V (alimentation),
4. Crochet pour cordon
Branchez l’adaptateur secteur en effectuant la procédure ci-dessous.
Si vous alimentez l’instrument avec des piles, voyez "Alimentation du KROSS
sur piles" ci-dessous.
Vérifiez les points suivants avant d’effectuer les
connexions
•
Veillez à ce que la prise de courant fournisse bien un courant de tension
compatible avec l’instrument.
•
Utilisez exclusivement l’adaptateur secteur fourni.
Connexion de l’adaptateur secteur
a.
Branchez la fiche CC (petite fiche) de l’adaptateur secteur fourni à la prise
DC 9V en face arrière de l’instrument.
b
. Arrimez le cordon de l’adaptateur secteur avec le crochet pour cordon du
KROSS pour éviter un débranchement accidentel de la fiche CC.
c
. Branchez la fiche secteur de l'adaptateur à une prise de courant de tension
appropriée.
Le KROSS est doté d’une fonction de coupure automatique de l’alimen-
tation. La fonction de coupure automatique de l’alimentation (activée à la
sortie d’usine) met automatiquement le KROSS hors tension quand l’ins-
trument n’est pas manipulé pendant environ quatre heures. (Voyez p.6
"Fonction de coupure automatique d’alimentation")
Connexion de dispositifs audio
Coupez l’alimentation des appareils avant d’effectuerla moindre
connexion.
Si vous effectuez desconnexions en laissant des appareils
sous tension, vousrisquez d’endommager votre matériel ou les enceintes.
5. Prises OUTPUT L/MONO, R
Branchez ces prises à votre amplificateur de moniteur ou console de mixage.
Réglez le niveau de volume avec la commande VOLUME. (prise jack de
6,3mm de ø
)
6. Prise MIC IN
Cette prise d’entrée mono permet de brancher un micro dynamique ou une gui-
tare électrique. (prise jack de
6,3mm de ø
)
Remarque:
Cette prise ne comporte pas d’alimentation fantôme ou plug-in.
7. P r i s e (c a s q u e)
Branchez un casque stéréo à cette prise. (prise mini-jack stéréo)
Remarque:
La prise casque de la version 88 touches du KROSS se trouve
du côté avant gauche de l’instrument.
8. Prise LINE IN
Cette entrée ligne stéréo permet de brancher un lecteur audio. (prise mini-jack
stéréo)
Remarque:
La fenêtre de dialogue AUDIO IN permet d’effectuer les
réglages d’entrée.
(Voyez "Connexion des sources d’entree" dans le Guide de
l’utilisateur)
Remarque:
Vous ne pouvez pas utiliser simultanément les signaux des prises
d’entrée MIC IN et LINE IN.
Connexion à un ordinateur ou à un dispositif
MIDI
9. Port (USB B)
Ce port permet de relier l’instrument à votre ordinateur et de transférer/rece-
voir desdonnées de jeu et vos réglages de sons via MIDI. Ce port permet aussi
d’envoyer et de recevoir des données audio.
10. Prises MIDI IN/OUT
Ces prises permettent de relier l’instrument à un dispositif MIDI externe et de
transférer/recevoir desdonnées de jeu et vos réglages de sons via MIDI.
Préparatifs pour la sauvegarde ou le
chargement de données
11. Fente pour carte SD
Vous pouvez utiliser une carte SD pour sauvegarder/chargerdes données de
sons et de morceaux, sauvegarder/charger automatiquement des échantillons
pour la fonction d’échantillonneur à pads et pour enregistrer/lire des données
avec l’enregistreur audio. Le KROSS prend en charge les cartes de mémoire
SD et SDHC.
Avant d’utiliser une carte SD pour la première fois, formatez-la sur le
KROSS.
(Voyez "Formater une carte SD" dans le Guide de l’utilisateur)
DAMPER ASSIGNABLE
PEDAL
ASSIGNABLE
SWITCH
MIDI IN MIDI OUT
INPUT
Casque
Micro
Adaptateur secteur
(Fourni)
Fiche CC
A une prise
de courant
Carte SD
Clavier MIDI
Câble MIDI
Câble USB
Ordinateur
Lecteur audio, etc.
Amplicateur etc.
12 13 14 10
11 9 5 7 8 6 2 3 41
KROSS 61 touches

EnglishFrançaisDeutschEspañol
Fr-5
Insertion et extraction d’une carte SD
1. Insertion d’une carte SD dans la fente
Orientez l’étiquette de la carte SD (dispo-
nible dans le commerce) vers le haut et
enfoncez l’extrémité dotée du connecteur
dans la fente pour carte SD jusqu’à ce qu’un
déclic confirme qu’elle est en place.
Veillez à orienter correctement la carte.
2. Extraction d’une carte SD
Poussez sur la carte pour l’enfoncer davantage : un déclic se produit et la
carte ressort de la fente. Extrayez-la complètement de la fente.
Remarque:
Conservez vos cartes SD de façon adéquate, en suivant les
instructions accompagnant la carte.
N’insérez ni n’extrayez jamais de carte SD durantl’accès aux données comme
durant la mise sous tensionou hors tension de l’instrument, la sauvegarde ou le
chargement de données, la lecture ou l’enregistrement avec l’enregistreur audio
ou durant l’enregistrement ou l’édition avec l’échantillonneur à pads.
Connexion de pédales
Vous pouvez brancher plusieurs pédales (en option) pour piloter le KROSS
avec les pieds. Ces pédales permettent de contrôler divers paramètres du
KROSS.
Remarque:
Quand vous branchez une pédale en option pour la première
fois, vous devez effectuer certains réglages et assignations.
(Voyez
"Connexion de pedales" dans le Guide de l’utilisateur)
12. Prise DAMPER (pédale forte)
Vous pouvez utiliser une pédale forte (en option) pour maintenir le son après le
relâchement des touches. La pédale DS-1H (en option) de Korg prend en
charge la fonction ‘half-damper’.
13. Prise ASSIGNABLE SWITCH
Vous pouvez utiliser une pédale commutateur (en option) pour changer de son
ou lancer/arrêter le séquenceur ou la piste de batterie.
14. Prise ASSIGNABLE PEDAL
Vous pouvez utiliser une pédale d’expression/de volume (en option)pour pilo-
ter le volume, le timbre ou les effets.
Alimentation du KROSS sur piles
Types de piles compatibles
Utilisez 6 piles AA alcalines ou au nickel-hydrure métallique.
Remarque:
N’utilisez pas de piles au zinc-carbone.
Remarque:
Les piles ne sont pas fournies. Procurez-vous des piles du type
approprié.
Ne mélangez jamais des piles neuves et usées ou despiles de types diffé-
rents. Ignorer cette précaution peutentraîner une fuite, voire un éclate-
ment.
Retirez immédiatement des piles épuisées. Ignorer cette précaution peu-
tentraîner une fuite, voire un éclatement.
Mise en place des piles
1. Ouvrez le couvercle du compartiment des piles et insérez les piles
KROSS 61 touches
Le compartiment à piles sur la version 61 touches du KROSS se trouve
sur le dessous de l’instrument. Quand vous retournez l’instrument, pla-
cez-le sur une couverture pour éviter d’endommager les commandes et
les boutons.
KROSS 88 touches
Le compartiment des piles se trouve du côté gauche du panneau avant.
Astuce :
Le côté droit du panneau avant comporte un compartiment de
rangement pour des objets de petite taille tels qu’un câble USB.
Veillez à ne pas forcer le
couvercle du comparti-
ment des piles.
2. Fermez le couvercle du compartiment des piles
Pour fermer le couvercle, procédez dans l’ordre inverse de l’ouverture.
Spécifier le type de piles mises en place dans le KROSS
Quand les piles sont en place, mettez l’instrument sous tension puis spécifiez
le type de piles utilisées. Vous pouvez effectuer ce réglage avec le paramètre
“Battery Type” du mode GLOBAL/MEDIA. (Voyez “Selection du type de
piles” dans le Guide de l’utilisateur)
Indication d’autonomie résiduelle des piles ( , , )
Un symbole affiché dans le coin supérieur droit de l’écran indique l’autonomie rési-
duelle approximative des piles. Quand vous alimentez l’instrument avec son adapta-
teur secteur, le symbole est affiché.
Remarque:
Le symbole
clignote pour indiquer que les piles sont
presque plates. Sauvegardez immédiatement vos données importanteset ins-
tallez des piles neuves. Si vous n’avez pas de piles de rechange sous la main,
branchez l’adaptateur secteur de l’instrument.
Mise sous/hors tension
Préparatifs avant de jouer
1. Alimentation de l’instrument
Branchez l’adaptateur secteur ou installez des piles AA.
2. Connexion de périphériques
Branchez votre
dispositif audio, les pédales
et la
carte SD
. Selon l’utili-
sation voulue du KROSS, vous pouvez aussi y brancher des dispositifs
MIDI et USB. Réglez le volume de l’équipement audio connecté (tel
qu’un amplificateur de moniteur) sur le minimum, ou mettez l’équipe-
ment hors tension.
3. Mise sous tension
Réglez la commande VOLUME du KROSS sur le mini-
mum, puis
mettez l’instrument sous tension en
appuyant sur son bouton d’alimentation
jusqu’à ce que
l’écran s’illumine.
N’insérez et n’extrayez jamais de carte SD quand le KROSS est en cours
de démarrage.
4. Réglez le volume en jouant sur le clavier
Mettez votre amplificateur de moniteur sous tension.
Réglez le niveau comme bon vous semble avec la com-
mande VOLUME du KROSS et la commande de
volume de l’amplificateur de moniteur.
Fente pour
carte SD
Carte SD
Appuyez sur l’onglet, relevez
le couvercle et retirez-le
Quand vous insérez les piles, orientez-les en
respectant les indications de polarité (“+” et “–”)
a.
b.
c.
Pour ouvrir le couvercle, faites-le glisser
en appuyant dessus
Quand vous insérez les piles,
orientez-les en respectant les
indications de polarité (“+” et “–”)

Fr-6
Le KROSS est doté d’une fonction de coupure automatique de l’alimen-
tation. L’alimentation est automatiquement coupée quand l’instrument
reste inutilisé pendant une durée déterminée.
Après le réglage
Réglez d’abord la commande VOLUME du KROSS et la commande de
volume de votre amplificateur de moniteur sur le minimum. Mettez ensuite
votreamplificateur hors tension. Enfin,
mettez le KROSS hors tension en
maintenant enfoncé son bouton d’alimentation
jusqu’à ce que le rétroé-
clairage de son écran s’éteigne.
Sauvegardez toutes les données que vous voulez conserver avant la mise
hors tension.
Les données non sauvegardées sont perdues. Sauvegardez donc vos don-
nées importantes en mémoire interne ou sur carte SD.
Ne mettez jamais l’instrument hors tension quand il exécute une opéra-
tion.
Ne coupez jamais l’alimentation quand l’écran affiche le message “Now
writing into internal memory”. Vous risqueriez d’endommager des don-
nées internes.
Fonction de coupure automatique d’alimenta-
tion
Le KROSS est doté d’une fonction de coupure automatique de l’alimentation
qui met automatiquement l’instrument hors tension quand son clavier et ses
commandes restent inutilisés(*) pendant un temps prédéfini.
Cette fonction est réglée par défaut sur 4 heures.
*
Une manipulation de la commande VOLUME n’est pas considérée comme une
opération et n’est donc pas tenue en compte par cette fonction.
Réglages de coupure automatique de l’alimentation
Quand la fonction de coupure automatique de l’alimentation est activée, une
fenêtre liée à ce paramètre s’affiche quand le démarrage du système se ter-
mine.
Si vous souhaitez changer le délai de coupure automatique de l’alimentation
ou désactiver cette fonction, réglez le paramètre “Automatic Power-Off” du
mode GLOBAL.
(Voyez "Fonction ‘Auto Power Off’" dans le Guide de l’utilisateur)
Message d’avertissement avant la mise hors tension
automatique
Quand le délai spécifié s’est écoulé sans aucune manipulation du KROSS, un
message vous avertit que la fonction de coupure automatique de l’alimentation
est sur le point de mettre l’instrument hors tension.
Si vous souhaitez continuer à utiliser le KROSS, appuyez sur une touche du
clavier ou sur un bouton ou contrôleur.
Remarque:
Ce message d’avertissement s’affiche à nouveau si vous laissez
le même intervalle s’écouler sans aucune manipulation de l’instrument.
Pages et fonctions
Les informations sont présentées et organisées à l’écran sur un “
page
”.
Pour afficher la page voulue, utilisez les boutons PAGE- et PAGE+ ou
appuyez sur le bouton MENU et choisissez dans le menu de pages.
Chaque page propose une série de "
fonctions
" pratiques.
Dans un menu de pages ou une liste de fonctions, utilisez les boutons PAGE-
et PAGE+ pour choisir l’élément voulu et appuyez sur le bouton MENU pour
afficher ou exécuter l’élément choisi.
Quand vous êtes à la page voulue, utilisez les boutons de curseur (
,
,
,
) pour sélectionner un paramètre etla molette VALUE pour régler sa valeur.
Appuyez sur le bouton ENTER pour confirmer le réglage, pour sélectionner/
désélectionner un bouton radio, etc. Le bouton EXIT permet d’annuler l’opé-
ration.
Sélectionner et jouer des sons
Sélection d’un programme ou d’une combinai-
son
Les molettes CATEGORY et VALUE du KROSS permettent de choisir les
sons de façon simple et intuitive.
1. Sélectionnez le mode
Appuyez sur le bouton PROG ou le bouton COMBI de la section MODE
pour choisir respectivement le mode Program ou le mode Combination.
La page MAIN s’affiche.
Page
Onglet de page
Paramètres
Mode/Titre de page
Menu de pages
Changement
de page
Liste de fonctions
Boutons de curseur
: Sélection de paramè
Bouton ENTER
: Confirme l’entrée d’une valeur,
active/désactive une fonction
Molette VALUE
: Réglage
Bouton EXIT ( )
: Annule un réglage, ferme une fenêtre de
dialogue ou, utilisé avec d’autres boutons,
offre l’accès à des fonctions supplémen-
taires
This manual suits for next models
2
Table of contents
Languages:
Other Korg Synthesizer manuals

Korg
Korg PS60 User manual

Korg
Korg wavestate native User manual

Korg
Korg PS-3200 User manual

Korg
Korg MONOPOLY POLYSIX MS-20 User manual

Korg
Korg 770 User manual

Korg
Korg ES-50 Lambda User manual

Korg
Korg Nu:Tekt NTS-1 digital kit User manual

Korg
Korg DW-6000 User manual

Korg
Korg opsix User manual

Korg
Korg Wavestation User manual