Installation description
Car-specific Hi-fi Soft mute with 84xxx cable
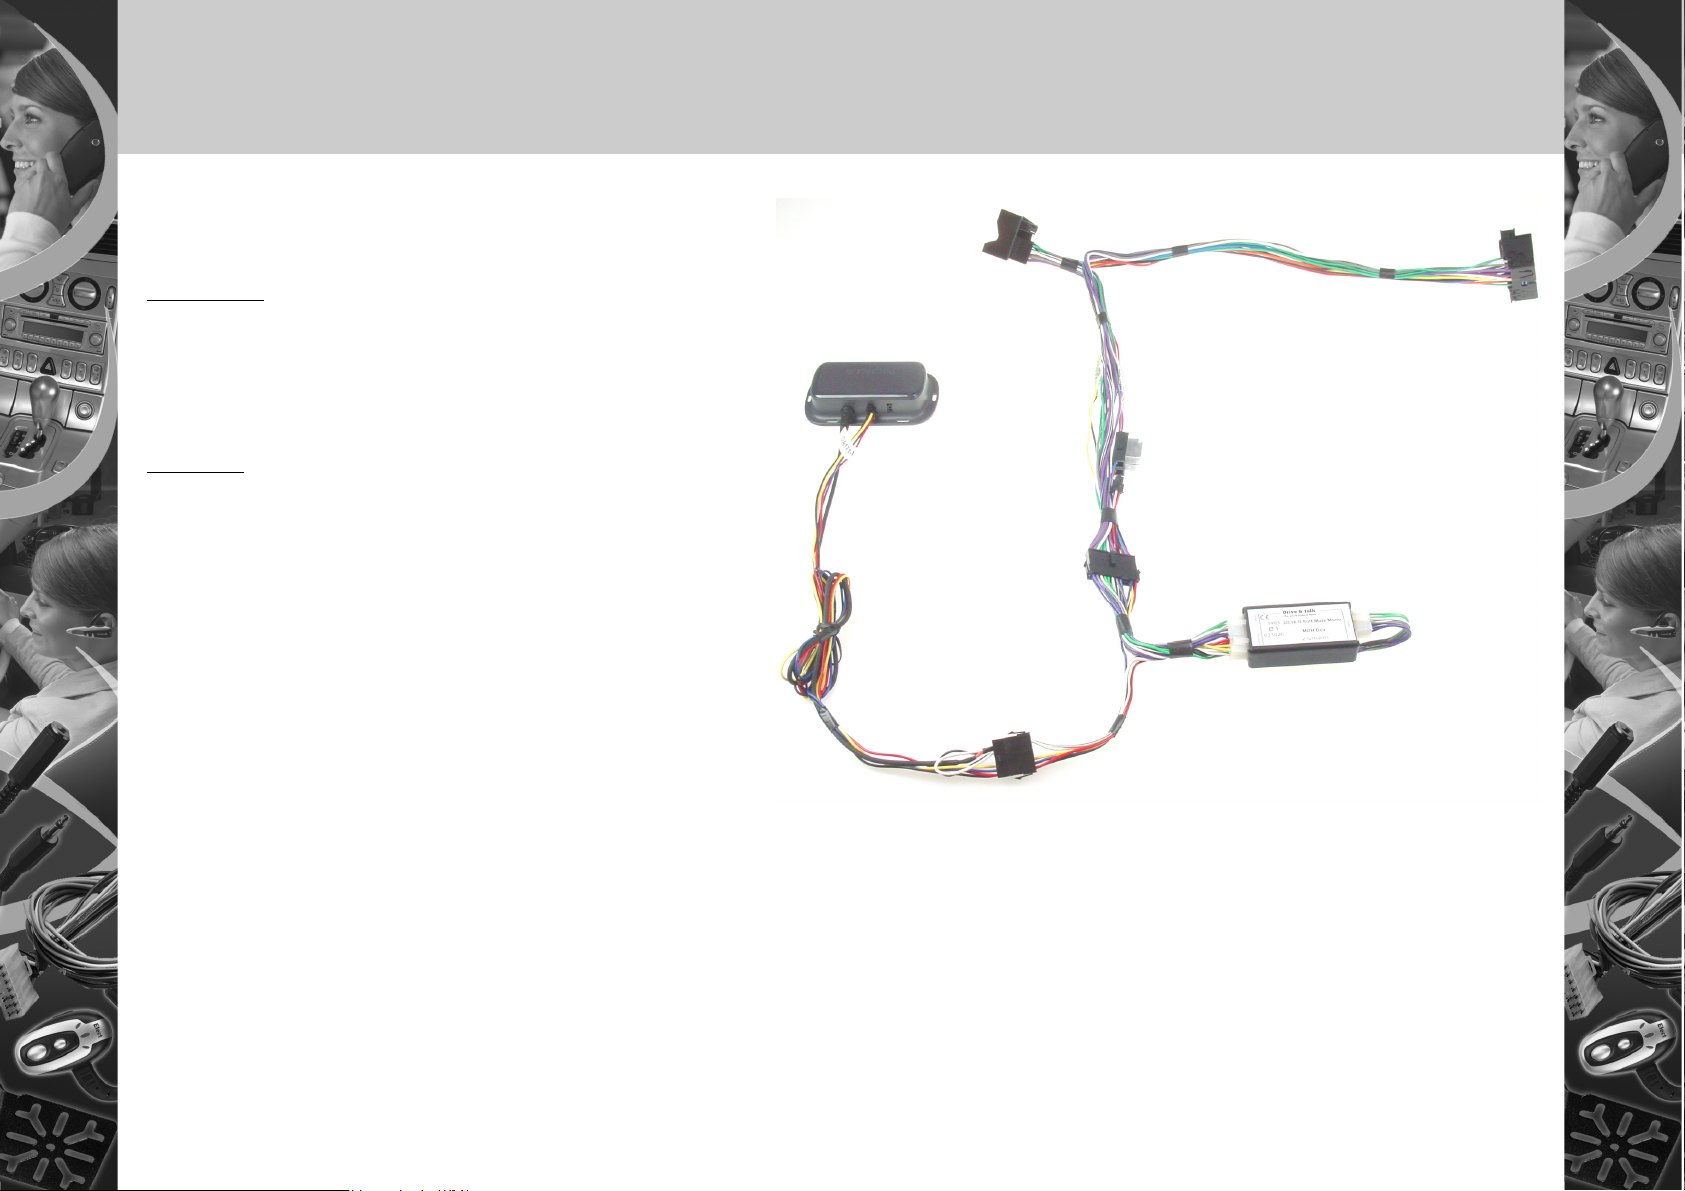
Needed items:
A. Mutebox. P/N: MOH
B. Car-specific cable. P/N: 84xxx
C. Box adaptor. P/N: AA300
D. 3G Carkit adaptor. P/N: DAxxx
E. Carkit.
Note: The Mutebox
A
is always delivered with cables
B
&
C.
Installation:
1. Remove the radio unit from the centre consol.
2. Insert the Car-specific cable
B
between the connector on the radio and
the connector on the cars wiring loom. If there, in the connector removed
from the radio, are inserted small plugs which pins has no connection to the
radio. Then these plugs has to be moved to the connector fitted into the radio.
These small plugs can be used for ex. CD-changer, navigation, Optic Most-bus,
Can-bus or Steering wheel controls.
3. Check ignition source in connector
F
. If some of the supported car models
have an ignition source in the connector on the car-specific cable
B
the blue
ignition wire is connected to this position. If none of the supported car models
have an ignition source available in the connector then the blue ignition wire
is connected to the constant 12v source with a bullet connector. If an ignition
source is needed for the chosen carkit an IGNIBOX item no. “I” can be inserted
to create an artificial ignition source or the blue ignition wire can be discon-
nected from the red constant 12v and manually connected to an ignition
source found elsewhere.
4. Connect the carkit adaptor
D
to the Box adaptor
C
by connecting the 16 pin connector on the 3G carkit adaptor
D
to the Box adaptor
C
. If the carkit adaptor
D
includes a 4 pin
connector this can be directly connected to the 4 pin connector on a Kram Aux cable for improved Music quality. Note: An Aux cable is included in some 84xxx cables.
5. Connect the carkit
E
to the carkit adaptor
D
.
6. Connect the mute wire. If a Mute input exists in the connector on the Car-specific cable the yellow mute wire is connected to this position when delivered. If no Mute input is
available in the connector then the yellow mute wire is found close to the male connector fitted with a bullet connector. It can then be manually connected to a mute input. Con-
necting the mute wire is an option but may be required in some cars to achieve a full mute of all speakers. Note: Not all cars are equipped with a mute input.
7. Test the carkit. When the carkit, adaptor cable and Car-specific cable is installed correctly it will redirect your call through the cars front speakers and mute remaining speakers.
Note: In some car models it is necessary to have the radio turned ON to get carkit sound from this solution.
9. Finally the speaker volume needs to be pre
Finally the speaker volume needs to be preFinally the speaker volume needs to be pre
Finally the speaker volume needs to be pre-
--
-adjusted.
adjusted.adjusted.
adjusted. Connect the phone to the carkit and adjust the carkit volume to its middle position. Make a call and adjust the volume
to an appropriate level by using the adjustment screw on the back of the mutebox.
10.
10.10.
10. Refit the radio.
For further information regarding the installation of the carkit please refer to the carkit manual.
See our complete Radio Mute program on our website www.kram.dk
Drive & Talk
Hi-fi Soft mute
Drive & Talk
Hi-fi Soft mute
A
B
C
D
E
F


