manuals.online logo
Brands
  1. Home
  2. •
  3. Brands
  4. •
  5. KRAM telecom
  6. •
  7. Automobile Accessories
  8. •
  9. KRAM telecom 67725X719 Operator's manual

KRAM telecom 67725X719 Operator's manual

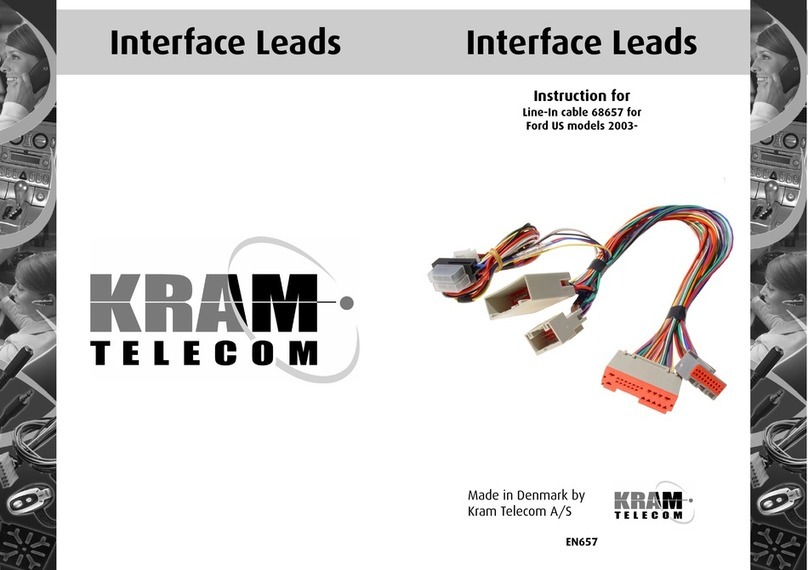
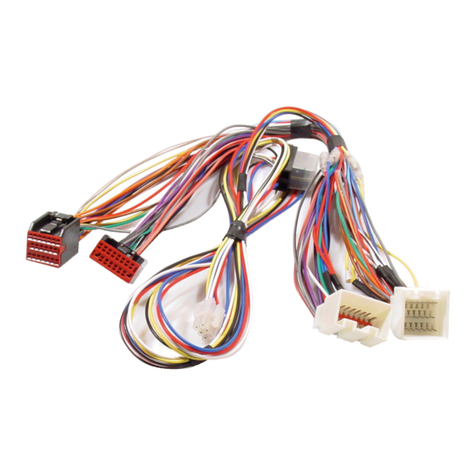
Interface Lead Item nr. 67725X719 for
Opel / Vauxhall with Quadlock connector.
Including AUX connection for Music.
Product Description
The Interface leads range allows connection of Aftermarket carkits to OEM Phone preparation.
Interface Leads are used when installing aftermarket telephone carkits. It is used for car stereos with a Phone
Line-In function or VDA preparation. It enables the use of the car speakers when answering/making calls from
your cell phone. For a complete cable-set two item no. are required. The first is a car-specific Interface Lead.
The second is a carkit-specific Interface adaptor cable .
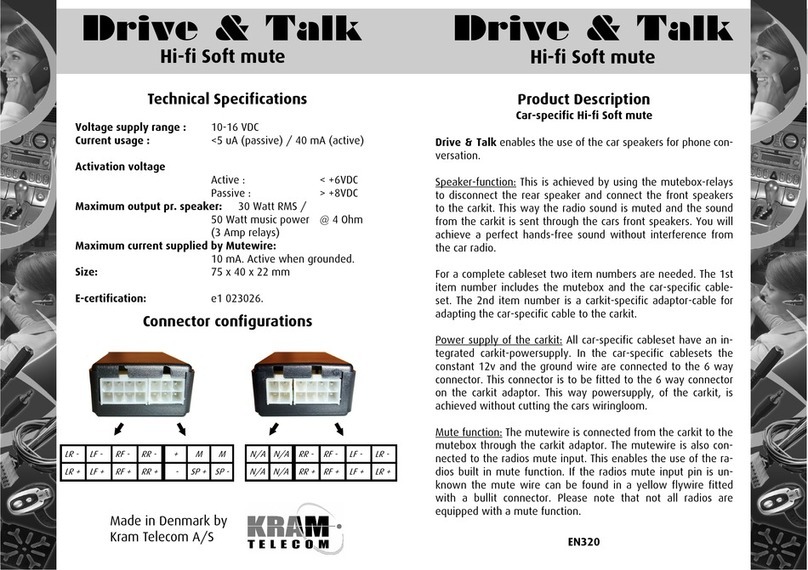
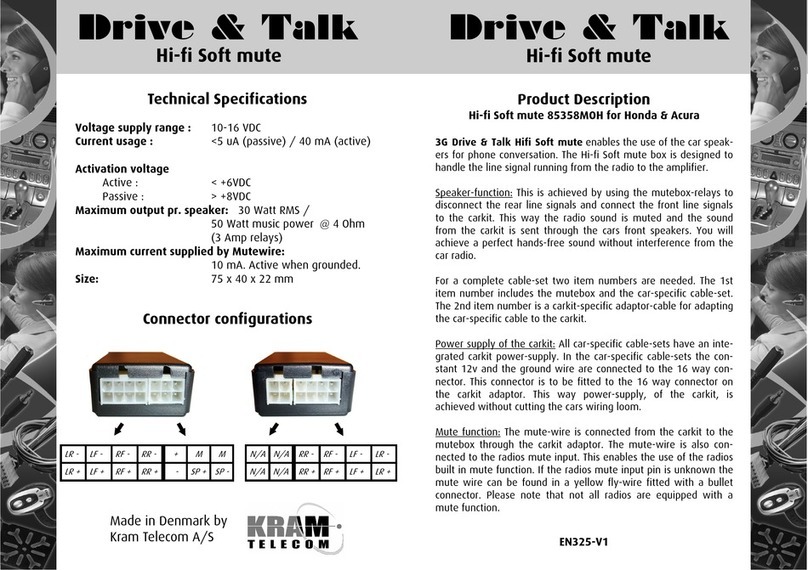
Speaker-function: This is achieved by connecting the carkit directly to the cars Line-In input/VDA connector. By
using the radios built-in switch function the telephone conversation is heard through the car speakers while the
radio sound is muted. This way you will achieve a perfect hands free sound without interference from the car
radio.
Power supply of the carkit: All Interface Leads are delivered with power and ground from the car connector
connected to the carkit, this way cutting the cars wiring loom is avoided.
Ignition supply: If an ignition source is available in the radio/VDA connector then it is also available in the 16
pin connector. If an ignition source is not available a constant 12V source is connected to the Ignition pin via
bullet connectors. If a real ignition is required for the chosen carkit, an IGNIBOX item no. “I” can be connected
to create an artificial ignition or an ignition source found elsewhere can be connected to the bullet with the
blue wire. The 12V ignition wires in the Interface leads are blue.
Aux integration
Some Interface leads have the radio AUX input available in a 4 pin connector. This will allow the use of the car
sound system amplifier for Music playback when installing Music carkits and thereby achieving higher audio
quality.
EN725-V1
Troubleshooting Guide
Carkit does not start up. Check if there is 12V between the black and the red wire and also between the black
and blue wire, in the 16 pin connector, when the car is started. If there is not 12v on both wires please check
the following:
1. If there is supply on the red constant 12v wire but not on the blue ignition wire the car may require an
alternative ignition source. See installation step 5.
2. Check that the bullets on the supply wires are properly connected. The supply wires are the red, blue
and black wires.
3. Check for a blown fuse on the Interface Lead or in the cars fuse-box.
The carkit does not turn off.
1. Please make sure the key is removed from the ignition barrel. On many new cars ignition is not turned
off until the key is pulled out.
2. Is there an ignition supply on the blue wire? There should be no voltage on the blue wire when there
is no key in the ignition. See installation step 4.
Speakers are not muted.
1. Check that the mute wire is connected to the right position. See installation step 3.
2. Locate the radio instruction manual and check for special menu settings regarding phone input.
3. Please check that there is close to 0V on the yellow mute wire during a call. If there are more than
approximately 0V the carkit may be defective please try another carkit.
Speakers are muted but there are no carkit sound.
1. Please check that the carkit and radio volume is turned up.
2. Locate the radio instruction manual and check for special menu settings regarding phone input.
3. The carkit may be defective. Please try another carkit.
Radio will not turn on or not working properly after installation.
1. Please check for a blown fuse at the back of the radio or in the car fuse-box.
2. Please check that all connectors are properly connected and that there are no bend or damaged pins.
3. Remove the Interface Lead and connect the radio to the original car connector. If the radio is now
working replace the Interface Lead.
Volume to high or sound is disordered.
1. Please try to turn down the carkit volume and turn up the volume using the radio volume control in-
stead. If the carkit volume has to be turned almost completely down improved adjustment range can
be achieved by connecting a inline resistor item number: 68897 inline with the white wire to limit the
carkit output.
2.
There may be a Ground loop problem when combining this exact carkit and radio model. Please try to
insert Ground loop isolator item number: 69897 inline with the white and white/black wires from the
carkit.
Technical Specifications
Description: L-shaped with bullet connections for Ground, Constant 12v and Ignition.
Normal Wire dimensions : AWG 18 for power wires, AWG 20 for all other wires
Standard Fuse sizes: 3 Amp for constant supply, 1 Amp for Ignition supply
Maximum Fuse size: 7,5 Amp for constant supply, 7,5 Amp for Ignition supply
Size: 400 x 400 mm
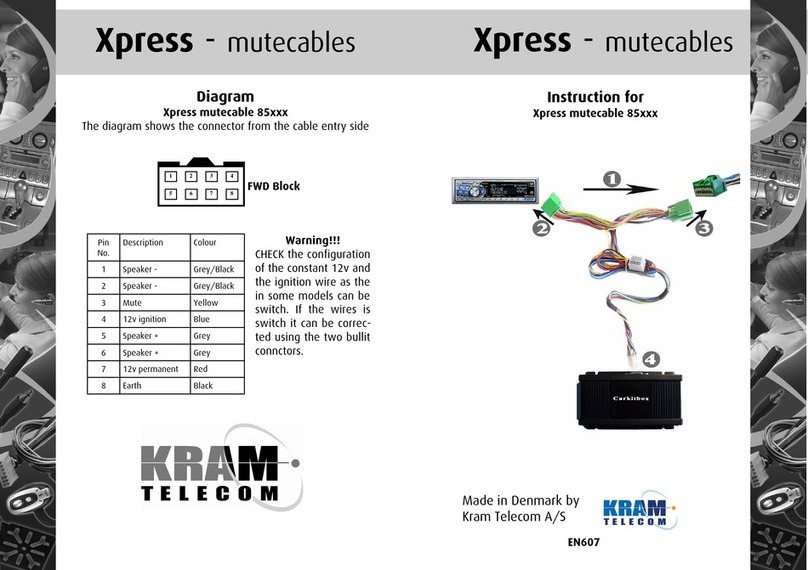
Configuration chart for 16 pin connector:
Connector seen from cable entry side
12V
Const.
12V
IGN
Carkit
RF+
Carkit
LF+
GND Mute
Out
Mute
In
Carkit
RF-
Carkit
LF-
Interface Leads Interface Leads
Installation description
Interface Lead Item Nr. 67725X719
for Opel / Vauxhall with Quadlock connector.
Including AUX connection for Music.
Needed items:
A: Interface Lead.
B: Interface Lead carkit adaptor.
C: Carkit.
Note: The Carkit Cand Interface Lead adaptor Bare bought sepa-
rately.
Installation:
1st: Remove the key from the ignition barrel. This is done to
avoid error messages on the car electrical system.
2nd. Remove the radio and disconnect the Fakra connector from
rear of the radio.
3rd. Insert the Interface Lead between the radio and the re-
moved radio connector.
4th. Check ignition source. Not all models have an ignition source in the prewired position in the cable set.
Therefore it is possible to disconnect the blue ignition wire from the cable set and connect it to an ignition source
found elsewhere or the red constant 12v wire by using the bullet connectors . Alternatively a IGNIBOX item nr. “I”
can be inserted to generate an artificial ignition.
5th: Check fuse size. The fuse on the Audio2Car cable should not be bigger than the ones used on the wiring
loom supplied with the carkit. The fuses on the Audio2Car cable should be replaced with a size similar to the ones
supplied with the carkit.
Note: Never exceed the Maximum Fuse size for the Interface Lead. See maximum fuse sizes on the last page.
6th. Connect the carkit ‘C’ to the Interface Lead using the Interface Lead adaptor ‘B’. Only Interface Lead
adaptors for Music carkit include a 4 pin AUX connector. For all other carkits this connector is left unconnected.
7th. Cars equipped with CD70 or DVD90 radioes. These navigation radios will require a Isolations coil item
number 69897 inserted inline with the white and white/black wires on the Interface Lead to avoid distortion of
the carkit sound. See picure:
8th. Cars equipped with DAB radio tuner in combination with CDC40 radio. These cars already use the AUX
input for the external DAB tuner and the AUX input should therefore not be used for the carkit. To avoid noise
issues please do not connect anything to the 4 pin Aux connector on the Interface lead.
9th. Test function and adjust volume. When the Interface Lead is installed correctly it will redirect your call
through the car front speaker. Adjust the volume setting using the carkit and radio volume control. Note that too
high carkit volume will distort the sound. Note: If you do not get sound the Telephone input may not be active, in
that case please contact a Opel dealership and have the Telephone input activated using the workshop computer.
10th: Use of included AUX connection (Optional). For improved Music quality please choose the carkit AUX/
Line-out as output for Music. This sometimes has to be selected in the carkit menu. Then select the AUX input on
the radio. Carkit Music will then be played via the radio and radio amplifier. (Continues on next page)
Interface Leads Interface Leads
See our complete Interface Lead program on www.kram.dk
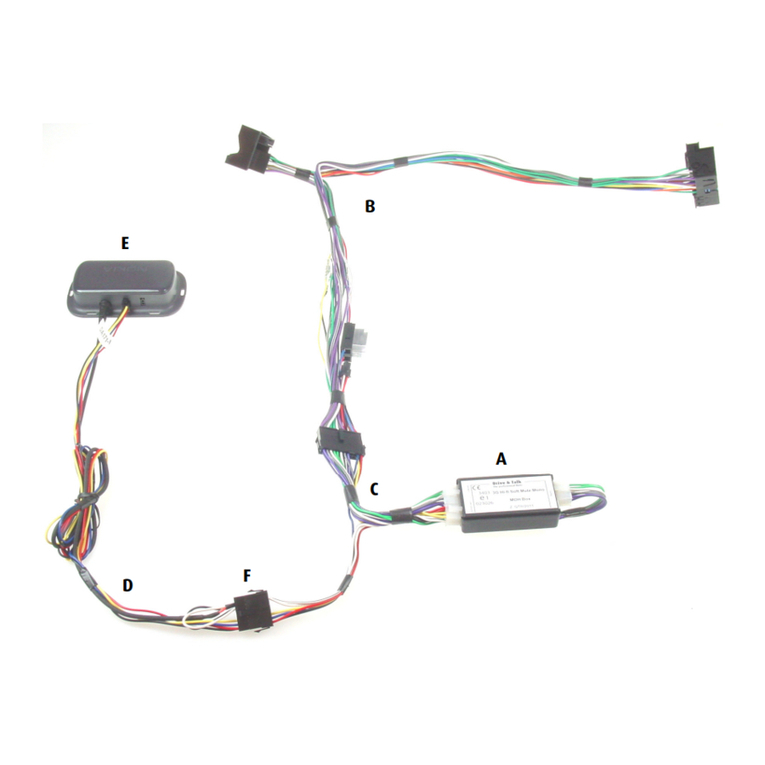
A: Interface Lead
Item number 67xxx
B: Interface Adaptor
Item number DAxxx
C: Carkit
16 pin Connectors
Bullet Connectors
F: 4 pin
Aux
It is also possible to use the AUX input for other accessories by connecting a Aux adaptor to the 4 pin connector
on the Interface Lead. See our AUX adaptor program at www.kram.dk
Note: Generally only radios with MP3 logo on the front have the AUX input. Some radios may require the AUX
input activated with a workshop computer before it can be selected on the radio.

Other KRAM telecom Automobile Accessories manuals

KRAM telecom 68657 User manual

KRAM telecom

KRAM telecom 68657 User manual

KRAM telecom 68631 User manual

KRAM telecom

KRAM telecom 68631 User manual

KRAM telecom Drive & Talk User manual

KRAM telecom

KRAM telecom Drive & Talk User manual

KRAM telecom 68656 User manual

KRAM telecom

KRAM telecom 68656 User manual

KRAM telecom 85358MOH User manual

KRAM telecom

KRAM telecom 85358MOH User manual

KRAM telecom Hi-fi Soft mute Operator's manual

KRAM telecom

KRAM telecom Hi-fi Soft mute Operator's manual

KRAM telecom Xpress mutecable 85 Series User manual

KRAM telecom

KRAM telecom Xpress mutecable 85 Series User manual

KRAM telecom Drive & Talk User manual

KRAM telecom

KRAM telecom Drive & Talk User manual

Popular Automobile Accessories manuals by other brands

Jotto Desk 425-5376 quick start guide

Jotto Desk

Jotto Desk 425-5376 quick start guide

Curt Manufacturing 31048 installation instructions

Curt Manufacturing

Curt Manufacturing 31048 installation instructions

ZROADZ Z845401 installation guide

ZROADZ

ZROADZ Z845401 installation guide

JKS Steering Brace System installation instructions

JKS

JKS Steering Brace System installation instructions

v.link CI-VL2-MBN45 manual

v.link

v.link CI-VL2-MBN45 manual

Crawford Performance Overland Series manual

Crawford Performance

Crawford Performance Overland Series manual

ULTIMATE SPEED UAMM 12 A1 Operation and safety notes

ULTIMATE SPEED

ULTIMATE SPEED UAMM 12 A1 Operation and safety notes

Prorack K422 Assembly and Fitting Instructions

Prorack

Prorack K422 Assembly and Fitting Instructions

Blaupunkt RC TY 1.0 Operating and installation instructions

Blaupunkt

Blaupunkt RC TY 1.0 Operating and installation instructions

HUSKY LINERS 2991 Care and use instructions

HUSKY LINERS

HUSKY LINERS 2991 Care and use instructions

Cequent Tow Ready 63132 manual

Cequent

Cequent Tow Ready 63132 manual

Brink 4399 Fitting instructions

Brink

Brink 4399 Fitting instructions

Paxton Automotive Novi Supercharger Owner's installation guide

Paxton Automotive

Paxton Automotive Novi Supercharger Owner's installation guide

WALMEC 40041 Mounting instructions

WALMEC

WALMEC 40041 Mounting instructions

Menabo Polaris Fitting instructions

Menabo

Menabo Polaris Fitting instructions

Mitsubishi MOTORS MD361884 quick start guide

Mitsubishi MOTORS

Mitsubishi MOTORS MD361884 quick start guide

Volvo 30664082 installation instructions

Volvo

Volvo 30664082 installation instructions

rough country 921106090 manual

rough country

rough country 921106090 manual

manuals.online logo
manuals.online logoBrands
  • About & Mission
  • Contact us
  • Privacy Policy
  • Terms and Conditions

Copyright 2025 Manuals.Online. All Rights Reserved.