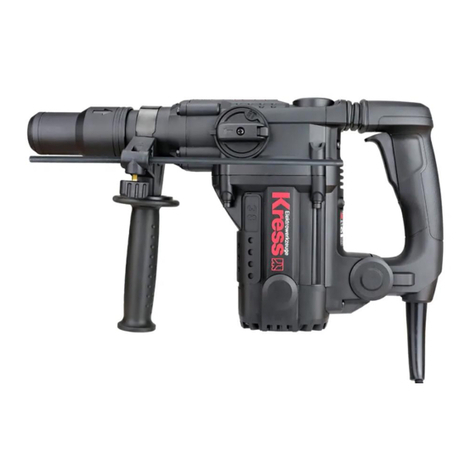
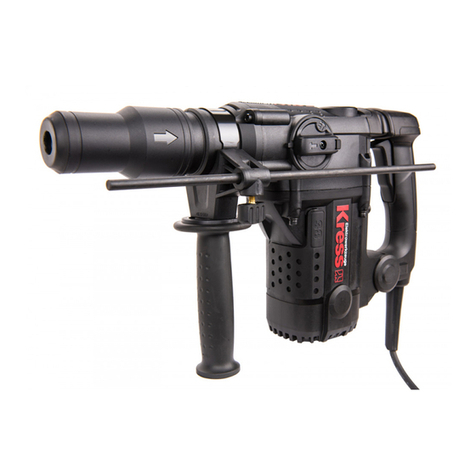
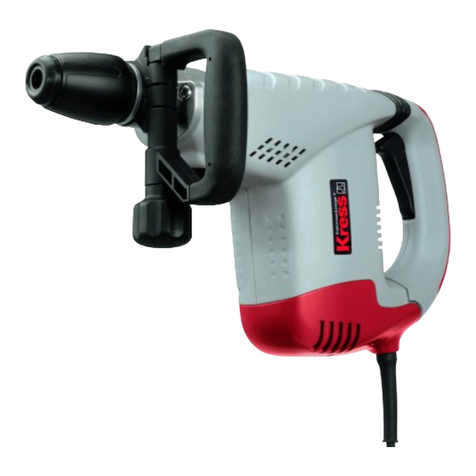
KRESS KUX12P User manual

Rotary hammer EN P05
Bohrhammer DE P09
Marteau perforateur FR P13
Martello rotativo IT P17
Martillo rotatorio ES P21
Martelo rotativo PT P25
Boorhamer NL P29
Перфоратор RU P33
Młot obrotowy PL P38
Rotationshammer DK P42
Rotorhammare SV P46
KUX12P


1
2
3
7 8 4
5
6

AB
C
1
2
9

5
EN
ORIGINAL INSTRUCTIONS
GENERAL POWER TOOL
SAFETY WARNINGS
WARNING Read all safety warnings and
all instructions. Failure to follow the warnings
and instructions may result in electric shock, fire and/or
serious injury.
Save all warnings and instructions for future
reference.
The term “power tool” in the warnings refers to your
mains-operated (corded) power tool or battery-
operated (cordless) power tool.
1) Work area safety
a) Keep work area clean and well lit.
Cluttered
or dark areas invite accidents.
b) Do not operate power tools in explosive
atmospheres, such as in the presence of
flammable liquids, gases or dust.
Power
tools create sparks which may ignite the dust or
fumes.
c) Keep children and bystanders away while
operating a power tool.
Distractions can cause
you to lose control.
2) Electrical safety
a) Power tool plugs must match the outlet.
Never modify the plug in any way. Do
not use any adapter plugs with earthed
(grounded) power tools.
Unmodified plugs and
matching outlets will reduce risk of electric shock.
b) Avoid body contact with earthed or
grounded surfaces, such as pipes,
radiators, ranges and refrigerators.
There is
an increased risk of electric shock if your body is
earthed or grounded.
c) Do not expose power tools to rain or wet
conditions.
Water entering a power tool will
increase the risk of electric shock.
d) Do not abuse the cord. Never use the cord
for carrying, pulling or unplugging the
power tool. Keep cord away from heat, oil,
sharp edges or moving parts.
Damaged or
entangled cords increase the risk of electric shock.
e) When operating a power tool outdoors, use
an extension cord suitable for outdoor use.
Use of a cord suitable for outdoor use reduces the
risk of electric shock.
f) If operating a power tool in a damp location
is unavoidable, use a residual current
device (RCD) protected supply.
Use of an
RCD reduces the risk of electric shock.
3) Personal safety
a) Stay alert, watch what you are doing and
use common sense when operating a
power tool. Do not use a power tool while
you are tired or under the influence of
drugs, alcohol or medication.
A moment of
inattention while operating power tools may result
in serious personal injury.
b) Use personal protective equipment. Always
wear eye protection.
Protective equipment
such as dust mask, non-skid safety shoes, hard
hat, or hearing protection used for appropriate
conditions will reduce personal injuries.
c) Prevent unintentional starting. Ensure
the switch is in the off-position before
connecting to power source and/or battery
pack, picking up or carrying the tool.
Carrying power tools with your finger on the switch
or energising power tools that have the switch on
invites accidents.
d) Remove any adjusting key or wrench before
turning the power tool on.
A wrench or a key
left attached to a rotating part of the power tool
may result in personal injury.
e) Do not overreach. Keep proper footing and
balance at all times.
This enables better control
of the power tool in unexpected situations.
f) Dress properly. Do not wear loose clothing
or jewellery. Keep your hair and clothing
away from moving parts.
Loose clothes,
jewellery or long hair can be caught in moving
parts.
g) If devices are provided for the connection
of dust extraction and collection facilities,
ensure these are connected and properly
used.
Use of dust collection can reduce dust-
related hazards.
4) Power tool use and care
a) Do not force the power tool. Use the
correct power tool for your application.
The
correct power tool will do the job better and safer
at the rate for which it was designed.
b) Do not use the power tool if the switch
does not turn it on and off.
Any power tool
that cannot be controlled with the switch is
dangerous and must be repaired.
c) Disconnect the plug from the power
source and/or remove the battery pack,
if detachable, from the power tool before
making any adjustments, changing
accessories, or storing power tools.
Such
preventive safety measures reduce the risk of
starting the power tool accidentally.
d) Store idle power tools out of the reach
of children and do not allow persons
unfamiliar with the power tool or these
instructions to operate the power tool.
P
ower tools are dangerous in the hands of
untrained users.
e) Maintain power tools and accessories.
Check for misalignment or binding of
moving parts, breakage of parts and
any other condition that may affect the
power tool’s operation. If damaged, have
the power tool repaired before use.
Many
accidents are caused by poorly maintained power
tools.
f) Keep cutting tools sharp and clean.
Properly
maintained cutting tools with sharp cutting edges
are less likely to bind and are easier to control.
g) Use the power tool, accessories and
tool bits etc. in accordance with these
instructions, taking into account the
working conditions and the work to be
performed. Use of the power tool for operations
different from those intended could result in a
hazardous situation.

6
EN
5) Service
a) Have your power tool serviced by a
qualified repair person using only identical
replacement parts. This will ensure that the
safety of the power tool is maintained.
HAMMER SAFETY
WARNINGS
1. Wear ear protectors. Exposure to noise can
cause hearing loss.
2. Use auxiliary handle(s), if supplied with the
tool. Loss of control can cause personal injury.
3. Hold power tool by insulated gripping
surfaces, when performing an operation
where the cutting accessory may contact
hidden wiring or its own cord. Cutting
accessory contacting a “live” wire may make
exposed metal parts of the power tool “live” and
could give the operator an electric shock.
ADDITIONAL SAFETY
RULES FOR HAMMER
1. Always wear a dust mask.
SYMBOLS
To reduce the risk of injury, user must
read instruction manual
Wear ear protection
Wear eye protection
Wear dust mask
Double insulation
Waste electrical products must not be
disposed of with household waste.
Please recycle where facilities exist.
Check with your local authorities or
retailer for recycling advice.
Warning
COMPONENT LIST
1.
ON/OFF SWITCH WITH VARIABLE SPEED
CONTROL
2.
SWITCH LOCK-ON BUTTON
3.
FORWARD AND REVERSE ROTATION
CONTROL
4.
FUNCTION MODE SELECTION SWITCH
5. AUXILIARY HANDLE
6. ADJUSTABLE DEPTH GAUGE
7. DUST PROTECTION CAP
8. TOOL HOLDER LOCKING SLEEVE
9.
RELEASE BUTTON FOR FUNCTION MODE
SELECTION SWITCH (See Fig. C)
Not all the accessories illustrated or described are
included in standard delivery.
TECHNICAL DATA
Type Designation:
KUX12P (X12P-designation of
machinery, representative of hammer)
Voltage 230-240V~50Hz
Power input 850W
No-load speed 1300/min
Impact rate 5500bpm
Impact energy 3.0J
Drilling capacity
max
Masonry 26mm
Steel 13mm
Wood 30mm
Protection class /ll
Machine weight 2.8kg
NOISE INFORMATION
A weighted sound pressure LpA:89.9dB(A)
A weighted sound power LpA:101.9dB(A)
KPA& KWA 3.0dB(A)
Wear ear protection.

7
EN
VIBRATION INFORMATION
Vibration total values (triax vector sum) determined
according to EN 60745:
Mode description
Vibration emission
value
Uncertainty
K
Hammer drilling
into concrete ah,HD=7,685m/s2K=1.5 m/s
chiseling ah,Cheq=14,236m/s2K=1.5 m/s
The declared vibration total value may be used for
comparing one tool with another, and may also be used
in a preliminary assessment of exposure.
WARNING: The vibration emission value during
actual use of the power tool can differ from the
declared value depending on the ways in which the tool
is used dependant on the following examples and other
variations on how the tool is used:
How the tool is used and the materials being cut or
drilled.
The tool being in good condition and well maintained
The use the correct accessory for the tool and ensuring
it is sharp and in good condition.
The tightness of the grip on the handles and if any anti
vibration accessories are used.
And the tool is being used as intended by its design
and these instructions.
This tool may cause hand-arm vibration
syndrome if its use is not adequately managed.
WARNING: To be accurate, an estimation of
exposure level in the actual conditions of use
should also take account of all parts of the operating
cycle such as the times when the tool is switched off
and when it is running idle but not actually doing the
job. This may signicantly reduce the exposure level
over the total working period.
Helping to minimise your vibration exposure risk.
ALWAYS use sharp chisels, drills and blades
Maintain this tool in accordance with these instructions
and keep well lubricated (where appropriate)
If the tool is to be used regularly then invest in anti
vibration accessories.
Plan your work schedule to spread any high vibration
tool use across a number of days.
ACCESSORIES
Auxiliary handle 1
Depth gauge 1
We recommend that you purchase your accessories
from the same store that sold you the tool. Refer to
the accessory packaging for further details. Store
personnel can assist you and offer advice.
OPERATING NSTRUCTIONS
NOTE: Before using the tool, read the
instruction book carefully.
1. ON/OFF SWITCH WITH VARIABLE SPEED
CONTROL
Depress to start and release to stop your tool. This
tool has a variable speed switch (1) that delivers
higher speeds with increased trigger pressure - speed
is controlled by varying the pressure applied to the
switch. (See Fig. A)
2. SWITCH LOCK-ON BUTTON
Depress the on/off switch (1) then the lock on button
(2) (See Fig. A) release the on/off switch rst and the
lock-on button second. Your switch is now locked on
for continuous use. To switch off your tool just depress
and release the on/off switch.
3. AUXILIARY HANDLE
Slide the handle onto the drill and rotate to the desired
working position. To clamp the auxiliary handle rotates
the handle clockwise. To loosen the auxiliary handle,
rotate the handle anti-clockwise. (See Fig. B)
WARNING: Always use the auxiliary handle.
4. FORWARD AND REVERSE ROTATION
CONTROL
With the drill pointing away from you, push the forward/
reverse-lever (3) to the left “ “ for forward rotation.
Push the forward/reverse-lever (3) to the right for
reverse rotation “ “.
WARNING: Never change the direction of
rotation while the tool is rotating, wait until it has
stopped.
5. ADJUSTABLE DEPTH GAUGE
Fit the drill bit into the chuck. Loosen the depth stop
by rotating the handle anti-clockwise. Slide the depth
gauge until the distance between the depth gauge end
and the drill bit end is equal to the depth of hole/screw
you wish to make. Then clamp the depth gauge by
rotating the handle clockwise.
6. FUNCTION MODE SELECTION (See Fig. C)
The operation of the gearbox for each application is set
with the function mode selection switch (4), to change
between functions, depress the release button (9) and
rotate the selector to the desired operating mode.
For simultaneous drilling and
impacting of concrete or
masonry, choose the Hammer
drilling position.
For drilling into steel, wood
and plastics choose the Rotary
drilling position.

8
EN
For impacting only - for
light chipping, chiseling and
demolition applications choose
the Hammer position.
For adjustment of the chiseling
position choose the bit angle
position
WARNING: The operating mode selector switch
may be actuated only at a standstill.
WARNING: Prolonged use will cause the
aluminum housing to become hot, do not touch.
MAINTENANCE
Remove the plug from the socket before
carrying out any adjustment, servicing or
maintenance.
Your power tool requires no additional lubrication or
maintenance. There are no user serviceable parts in
your power tool. Never use water or chemical cleaners
to clean your power tool. Wipe clean with a dry cloth.
Always store your power tool in a dry place. Keep the
motor ventilation slots clean. Keep all working controls
free of dust.
If the supply cord is damaged, it must be replaced by
the manufacturer, its service agent or similarly qualied
persons in order to avoid a hazard.
ENVIRONMENTAL
PROTECTION
Waste electrical products must not be disposed
of with household waste. Please recycle where
facilities exist. Check with your local authorities
or retailer for recycling advice.
PLUG REPLACEMENT
(ONLY FOR REWIRABLE
PLUG OF UK & IRELAND)
If you need to replace the tted plug then follow the
instructions below.
IMPORTANT
The wires in the mains lead are colored in accordance
with the following code:
Blue = Neutral Brown = Live
As the colors of the wires in the mains lead of this
appliance may not correspond with the colored
markings identifying the terminals in your plug,
proceed as follows. The wire which is colored blue
must be connected to the terminal which is marked
with N. The wire which is colored brown must be
connected to the terminal which is marked with L.
Warning:Never connect live or neutral wires
to the earth terminal of the plug. Only t an
approved 13ABS1363/A plug and the correct rated
fuse.
NOTE: If a moulded plug is tted and has to be
removed take great care in disposing of the plug
and severed cable, it must be destroyed to prevent
engaging into a socket.
Connect
Blue to N
(neutral)
Outer sleeve
firmly clamped
Cable grip
Brown L (live)
13 Amp fuse approved
to BS1362
DECLARATION OF
CONFORMITY
We,
Positec Germany GmbH
Grüner Weg 10, 50825 Cologne, Germany
Declare that the product,
Description Electric hammer
Type KUX12P (X12P-designation of machinery,
representative of hammer)
Function Hammering various materials
Complies with the following Directives,
2006/42/EC,
2011/65/EU&(EU)2015/863,
2014/30/EU
The notied body involved
Name: Société Nationale de Certification et
d’Homologation
Address: BP 23 L-5201 Sandweiler
Standards conform to
EN 60745-1,
EN 60745-2-6,
EN 55014-1,
EN 55014-2,
EN 61000-3-2,
EN 61000-3-3
The person authorized to compile the technical le,
Name Marcel Filz
Address Positec Germany GmbH Grüner Weg
10, 50825 Cologne, Germany
2020/07/29
Allen Ding
Deputy Chief Engineer, Testing & Certication
Positec Technology (China) Co., Ltd
18, Dongwang Road, Suzhou Industrial
Park, Jiangsu 215123, P. R. China

9
DE
ORIGINALBETRIEBSANLEITUNG
PRODUKTSICHERHEIT
ALLGEMEINE
SICHERHEITSHINWEISE FÜR
ELEKTROWERKZEUGE
WARNUNG Lesen Sie alle
Sicherheitshinweise und Anweisungen.
Versäumnisse bei der Einhaltung der
Sicherheitshinweise und Anweisungen können
elektrischen Schlag, Brand und/oder schwere
Verletzungen verursachen.
Bewahren Sie alle Sicherheitshinweise und
Anweisungen für die Zukunft auf.
Der in den Sicherheitshinweisen verwendete Begriff
„Elektrowerkzeug“ bezieht sich auf akkubetriebene
Elektrowerkzeuge (ohne Netzkabel).
1) ARBEITSPLATZSICHERHEIT
a) Halten Sie Ihren Arbeitsbereich sauber und
gut beleuchtet. Unordnung oder unbeleuchtete
Arbeitsbereiche können zu Unfällen führen.
b) Arbeiten Sie mit dem Elektrowerkzeug nicht
in explosionsgefährdeter Umgebung, in der
sich brennbare Flüssigkeiten, Gase oder
Stäube befinden. Elektrowerkzeuge erzeugen
Funken, die den Staub oder die Dämpfe entzünden
können.
c) Halten Sie Kinder und andere
Personen während der Benutzung des
Elektrowerkzeugs fern. Bei Ablenkung können
Sie die Kontrolle über das Gerät verlieren.
2) ELEKTRISCHE SICHERHEIT
a) Der Anschlussstecker des
Elektrowerkzeuges muss in die Steckdose
passen. Der Stecker darf in keiner
Weise verändert werden. Verwenden Sie
keine Adapterstecker gemeinsam mit
schutzgeerdeten Elektrowerkzeugen.
Unveränderte Stecker und passende Steckdosen
verringern das Risiko eines elektrischen Schlages.
b) Vermeiden Sie Körperkontakt mit geerdeten
Oberflächen wie von Rohren, Heizungen,
Herden und Kühlschränken. Es besteht ein
erhöhtes Risiko durch elektrischen Schlag, wenn Ihr
Körper geerdet ist.
c) Halten Sie Elektrowerkzeuge von Regen oder
Nässe fern. Das Eindringen von Wasser in ein
Elektrowerkzeug erhöht das Risiko eines elektrischen
Schlages.
d) Zweckentfremden Sie das Kabel nicht, um
das Elektrowerkzeug zu tragen, aufzuhängen
oder um den Stecker aus der Steckdose zu
ziehen. Halten Sie das Kabel fern von Hitze,
Öl, scharfen Kanten oder sich bewegenden
Geräteteilen. Beschädigte oder verwickelte Kabel
erhöhen das Risiko eines elektrischen Schlages.
e) Wenn Sie mit einem Elektrowerkzeug
im Freien arbeiten, verwenden Sie nur
Verlängerungskabel, die auch für den
Außenbereich geeignet sind. Die Anwendung
eines für den Außenbereich geeigneten
Verlängerungskabels verringert das Risiko eines
elektrischen Schlages.
f) Wenn der Betrieb des Elektrowerkzeuges
in feuchter Umgebung nicht
vermeidbar ist, verwenden Sie einen
Fehlerstromschutzschalter. Der Einsatz eines
Fehlerstromschutzschalters vermindert das Risiko
eines elektrischen Schlages.
3) SICHERHEIT VON PERSONEN
a) Seien Sie aufmerksam, achten Sie darauf,
was Sie tun, und gehen Sie mit Vernunft
an die Arbeit mit einem Elektrowerkzeug.
Benutzen Sie kein Elektrowerkzeug, wenn
Sie müde sind oder unter dem Einfluss von
Drogen, Alkohol oder Medikamenten stehen.
Ein Moment der Unachtsamkeit beim Gebrauch des
Elektrowerkzeuges kann zu ernsthaften Verletzungen
führen.
b) Tragen Sie persönliche Schutzausrüstung
und immer eine Schutzbrille. Das Tragen
persönlicher Schutzausrüstung, wie Staubmaske,
rutschfeste Sicherheitsschuhe, Schutzhelm
oder Gehörschutz, je nach Art und Einsatz des
Elektrowerkzeuges, verringert das Risiko von
Verletzungen.
c) Vermeiden Sie eine unbeabsichtigte
Inbetriebnahme. Vergewissern Sie sich,
dass das Elektrowerkzeug ausgeschaltet
ist, bevor Sie es an den Akku anschließen,
es aufnehmen oder tragen. Wenn Sie beim
Tragen des Elektrowerkzeuges den Finger am
Schalter haben oder das Gerät eingeschaltet an die
Stromversorgung anschließen, kann dies zu Unfällen
führen.
d) Entfernen Sie Einstellwerkzeuge oder
Schraubenschlüssel, bevor Sie das
Elektrowerkzeug einschalten. Ein Werkzeug
oder Schlüssel, der sich in einem drehenden
Geräteteil befindet, kann zu Verletzungen führen.
e) Vermeiden Sie eine abnormale
Körperhaltung. Sorgen Sie für einen
sicheren Stand und halten Sie jederzeit
das Gleichgewicht. Dadurch können Sie das
Elektrowerkzeug in unerwarteten Situationen besser
kontrollieren.
f) Tragen Sie geeignete Kleidung. Tragen Sie
keine weite Kleidung oder Schmuck. Halten
Sie Haare, Kleidung und Handschuhe fern
von sich bewegenden Teilen. Lockere Kleidung,
Schmuck oder lange Haare können von sich
bewegenden Teilen erfasst werden.
g) Wenn Staubabsaug- und
-auffangeinrichtungen montiert werden
können, vergewissern Sie sich, dass diese
angeschlossen sind und richtig verwendet
werden. Verwendung einer Staubabsaugung kann
Gefährdungen durch Staub verringern.
4) VERWENDUNG UND BEHANDLUNG DES
ELEKTROWERKZEUGES
a) Überlasten Sie das Gerät nicht. Verwenden
Sie für Ihre Arbeit das dafür bestimmte
Elektrowerkzeug. Mit dem passenden
Elektrowerkzeug arbeiten Sie besser und sicherer im
angegebenen Leistungsbereich.
b) Benutzen Sie kein Elektrowerkzeug, dessen
Schalter defekt ist. Ein Elektrowerkzeug, das sich
nicht mehr ein- oder ausschalten lässt, ist gefährlich
und muss repariert werden.
c) Klemmen Sie den Stecker von der
Stromversorgung ab und/oder entfernen

10
DE
Sie den Akku (falls abnehmbar) aus
dem Elektrowerkzeug, bevor Sie
Geräteeinstellungen vornehmen,
Zubehörteile wechseln oder das Gerät
weglegen. Diese Vorsichtsmaßnahme verhindert
den unbeabsichtigten Start des Elektrowerkzeuges.
d) Bewahren Sie unbenutzte Elektrowerkzeuge
außerhalb der Reichweite von Kindern
auf. Lassen Sie Personen das Gerät nicht
benutzen, die mit diesem nicht vertraut
sind oder diese Anweisungen nicht gelesen
haben. Elektrowerkzeuge sind gefährlich, wenn Sie
von unerfahrenen Personen benutzt werden.
e) Pflegen Sie Elektrowerkzeuge mit Sorgfalt.
Kontrollieren Sie, ob bewegliche Teile
einwandfrei funktionieren und nicht
klemmen, ob Teile gebrochen oder so
beschädigt sind, dass die Funktion des
Elektrowerkzeuges beeinträchtigt ist. Lassen
Sie beschädigte Teile vor dem Einsatz des
Gerätes reparieren. Viele Unfälle haben ihre
Ursache in schlecht gewarteten Elektrowerkzeugen.
f) Halten Sie Schneidwerkzeuge scharf und
sauber. Sorgfältig gepflegte Schneidwerkzeuge mit
scharfen Schneidkanten verklemmen sich weniger
und sind leichter zu führen.
g) Verwenden Sie Elektrowerkzeug, Zubehör,
Einsatzwerkzeuge usw. entsprechend diesen
Anweisungen. Berücksichtigen Sie dabei die
Arbeitsbedingungen und die auszuführende
Tätigkeit. Der Gebrauch von Elektrowerkzeugen für
andere als die vorgesehenen Anwendungen kann zu
gefährlichen Situationen führen.
5) SERVICE
a) Lassen Sie Ihr Elektrowerkzeug nur von
qualifiziertem Fachpersonal und nur mit
Original-Ersatzteilen reparieren. Damit wird
sichergestellt, dass die Sicherheit des Gerätes
erhalten bleibt.
SICHERHEITSHINWEISE
FÜR HÄMMER
1. Tragen Sie Gehörschutz, Wenn Sie die
Schlagbohrmaschine benutzen. Lärmaussetzung
kann Gehörverlust verursachen.
2. Benutzen Sie den zusätzlichen Handgriff, der
mit dem Werkzeug geliefert wird. Kontrollverlust
kann Personenschäden zufolge haben.
3. Halten Sie das Werkzeug nur an den
isolierten griffigen Oberflächen, wenn
Sie einen Einsatz durchführen, bei dem
Schneidwerkzeuge eventuell versteckte
Kabel berühren könnten. Berührung mit
einem unter Strom stehenden Kabel kann auch die
Metallteile des Gerätes unter Strom setzen und dem
Bedienenden einen Stromschlag versetzen.
ZUSÄTZLICHE
SICHERHEITSREGELN FÜR
HÄMMER
1. Tragen Sie eine Staubschutzmaske.
SYMBOLE
Zur Reduzierung der Verletzungsgefahr
bitte die Bedienungsanleitung durchlesen
Tragen Sie einen Gehörschutz
Tragen Sie eine Schutzbrille
WARNUNG!
Schutzisolation
Elektroprodukte dürfen nicht mit dem
normalen Haushaltsmüll entsorgt werden,
sondern sollten nach Möglichkeit zu
einer Recyclingstelle gebracht werden.
Ihre zuständigen Behörden oder Ihr
Fachhändler geben Ihnen hierzu gerne
Auskunft.
KOMPONENTEN
1.
EIN / AUS-SCHALTER MIT VARIABLER
GESCHWINDIGKEITSREGELUNG
2.
SCHALTERFESTSTELLKNOPF
3.
LINKS- UND RECHTSLAUF
4.
FUNKTIONSWAHLSCHALTER
5.
ZUSATZHANDGRIFF
6.
TIEFENANSCHLAG
7.
STAUBSCHUTZKAPPE
8.
WERKZEUGHALTERSCHLOSS
9.
ENTRIEGELUNGSKNOPF (SIEHE ABB. C)
Abgebildetes oder beschriebenes Zubehör gehört
teilweise nicht zum Lieferumfang.
TECHNISCHE DATEN
Typ KUX12P (X12P- Bezeichnung der Maschine,
Repräsentant Bohrhammer)
Spannung 230-240V~50Hz
Nennaufnahmeleistung 850W

11
DE
Leerlaufdrehzahl 1300/min
Schlagzahl 5500bpm
Schlagkraft 3.0J
Bohrleistung
max
Mauerwerk 26mm
Stahl 13mm
Holz 30mm
Schutzklasse /ll
Maschinengewicht 2.8kg
GERÄUSCHINFORMATION
Gewichteter Schalldruck LpA:89.9dB(A)
Gewichtete Schallleistung LpA:101.9dB(A)
KPA& KWA 3.0dB(A)
Ohrenschützer anlegen.
VIBRATIONSINFORMATIONEN
Gesamtschwingungswert (dreiachsige Vektorsumme)
nach EN 60745:
Modusbes-
chreibung
Schwingungse-
missionswert
Unsicherheit
K
Hammer-
bohren
in Beton
ah,HD=7,685m/s2K=1.5 m/s
Meißeln ah,Cheq=14,236m/s2K=1.5 m/s
Der angegebene Gesamt vibrationswert kann zum
Vergleich eines Werkzeugs mit einem anderen und
auch zur vorläugen Expositionsbewertung verwendet
werden.
WARNUNG: Der Vibrationsemissionswert kann
während des tatsächlichen Gebrauchs des
Elektrowerkzeugs vom angegebenen Wert abweichen, je
nachdem, wie das Werkzeug gemäß folgenden
Beispielen und weiteren Verwendungsmöglichkeiten
eingesetzt wird:
Die Verwendung des Werkzeugs und die Art, wie die
Materialien geschnitten oder angebohrt werden.
Der Pege- und Wartungszustand des Werkzeugs.
Die Verwendung des richtigen Zubehörs und dessen
Schärfe und Zustand.
Die Festigkeit der Handgriffe und die Benutzung von
Antivibrationszubehör.
Der bestimmungsgemäß eund diesen Anweisungen
entsprechende Gebrauch.
Wird dieses Werkzeug nicht angemessen
gehandhabt, kann es zum Auftreten des Hand-
Arm-Vibrationssyndroms kommen.
WARNUNG: Sie sollten die tatsächlichen
Arbeitsabschnitte genau ermitteln, um so den
Belastungsrad abzuschätzen. Auf diese Weise kann der
Belastungsgrad während der gesamten Arbeitszeit
möglicherweise wesentlich gemindert werden.
So minimieren Sie das Risiko, dem Sie bei Vibrationen
ausgesetzt sind.
Verwenden Sie IMMER scharfe Meißel, Bohrer und
Sägeblätter.
Pegen Sie dieses Werkzeug den Anweisungen
entsprechend und achten Sie stets auf eine gutes
Einfetten (wo erforderlich).
Bei regelmäßiger Verwendung von Elektrowerkzeug
sollten Sie in Antivibrationszubehör investieren.
Erstellen Sie einen Arbeitsplan, um die Verwendung
von hochvibrierenden Werkzeugen auf mehrere Tage zu
verteilen.
ZUBEHÖRTEILE
Zusatzhandgriff 1
TIEFENANSCHLAG 1
Wir empfehlen Ihnen, sämtliche Zubehörteile beim
selben Fachhändler zu beziehen, bei dem Sie auch Ihr
Elektrowerkzeug gekauft haben. Weitere Informationen
nden Sie auf der Verpackung der Zubehörteile. Auch Ihr
Fachhändler berät Sie gerne.
BETRIEBSANLEITUNG
NOTIZ: Bitte lesen Sie die Bedienungsanleitung
sorgfältig durch, bevor Sie das Werkzeug
verwenden.
1. EIN / AUS-SCHALTER MIT VARIABLER
GESCHWINDIGKEITSREGELUNG
Drücken Sie, um das Werkzeug zu starten und
loszulassen. Das Werkzeug hat einen variablen
Geschwindigkeitsschalter (1), der eine höhere
Geschwindigkeit durch Erhöhen des Auslösedrucks
liefert. Die Geschwindigkeit wird durch Ändern des auf
den Schalter ausgeübten Drucks gesteuert. (Siehe Abb.
A)
2. SCHALTERFESTSTELLKNOPF
Drücken Sie den Ein / Ausschalter (1), dann die
Entriegelungstaste (2) (siehe Abbildung A) und lassen Sie
die Ein / Aus-Taste los. Ihr Switch ist jetzt gesperrt und
Sie können ihn weiter verwenden. Um das Werkzeug zu
schließen, drücken Sie einfach den Ein / Ausschalter und
lassen ihn wieder los.
3. ZUSATZHANDGRIFF
Schieben Sie den Griff auf den Bohrer und drehen
Sie ihn in die gewünschte Arbeitsposition. Drehen Sie
zum Festklemmen des Zusatzhandgriffs den Handgriff
im Uhrzeigersinn. Drehen Sie den Griff gegen den
Uhrzeigersinn, um den Zusatzgriff zu lösen. (Siehe
Abb.B)
WARNUNG: Verwenden Sie immer den
Zusatzhandgriff.
4. VORWÄRTS UND RÜCKWÄRTSSTEUERUNG
Wenn der Bohrer aus Ihrer Richtung zeigt, drehen
Sie den Vorwärts / Rückwärts-Joystick (3) nach “
“ links vorwärts. Schieben Sie den Vorwärts /

12
DE
Rückwärts-Joystick (3) nach rechts, um “ “ in die
entgegengesetzte Richtung zu drehen.
WARNUNG: Ändern Sie die Drehrichtung
nicht, während sich das Werkzeug dreht,
sondern warten Sie, bis es zum Stillstand
kommt.
5. EINSTELLBARER TIEFENANSCHLAG
Setzen Sie den Bohrer in das Bohrfutter ein. Drehen
Sie den Griff gegen den Uhrzeigersinn, um den
Tiefenanschlag freizugeben. Schieben Sie den
Tiefenanschlag, bis der Abstand zwischen dem Ende
des
Tiefenanschlags und dem Ende des Bohrers der Tiefe
des Lochs/der Schraube entspricht. Dann stellen
Sie den Tiefenmesser fest, indem Sie den Griff im
Uhrzeigersinn drehen.
6. FUNKTIONSMODUSWAHL (Siehe Abb. C)
Jeder Betriebsmodus des Getriebes wird über den
Funktionswahlschalter (4) eingestellt. Um zwischen
den Funktionen zu wechseln, drücken Sie die
Entriegelungstaste (9) und drehen Sie den Wahlschalter
auf die gewünschte Betriebsart.
Um Beton oder Mauerwerk
zu bohren, wählen Sie die
Bohrposition “Hammerbohren”.
Wählen Sie zum Bohren von
Löchern in Stahl, Holz und
Kunststoff die Bohrposition
“Bohren”.
Wenn Sie nur leichte
Meißel- oder Zerlegungsarbeiten
ausführen möchten, stellen Sie
den Schalter auf die Position
“Hämmern”
Mit dieser Schalter- position
wählen Sie den Meißelwinkel
WARNUNG: Der Betriebsartenwahlschalter
kann nur im Stillstand betätigt werden..
WARNUNG: Berühren Sie das
Aluminiumgehäuse nicht, wenn der
Bohrhammer längere Zeit verwendet wird.
WARTUNG
Ziehen Sie den Stecker aus der Steckdose,
bevor Sie Einstellungen, Reparaturen oder
Wartungen vornehmen.
Ihre Elektrowerkzeuge erfordern keine zusätzliche
Schmierung oder Wartung. Das Elektrowerkzeug enthält
keine vom Benutzer zu wartenden Teile. Verwenden Sie
zum Reinigen von Elektrowerkzeugen niemals Wasser
oder chemische Reinigungsmittel. Mit einem trockenen
Tuch abwischen. Lagern Sie Ihr Elektrowerkzeug immer
an einem trockenen Ort. Halten Sie die Lüftungsschlitze
des Motors sauber. Halten Sie alle Arbeitskontrollen
staubfrei.
Wenn das Netzkabel beschädigt ist, muss es vom
Hersteller, seinem Kundendienst oder einer ähnlich
qualizierten Person ausgetauscht werden, um Gefahren
zu vermeiden.
UMWELTSCHUTZ
Elektroprodukte dürfen nicht mit dem normalen
Haushaltsmüll entsorgt werden, sondern sollten
nach Möglichkeit zu einer Recyclingstelle
gebracht werden. Ihre zuständigen Behörden oder Ihr
Fachhändler geben Ihnen hierzu gerne Auskunft.
KONFORMITÄTSERK-
LÄRUNG
Wir,
Positec Germany GmbH
Grüner Weg 10, 50825 Cologne, Germany
erklären hiermit, dass unser Produkt
Beschreibung Elektrischer Hammer
Typ KUX12P (X12P- Bezeichnung der Maschine,
Repräsentant Bohrhammer)
Funktionen Hämmern verschiedener Materialien
Den Bestimmungen der folgenden Richtlinien entspricht:
2006/42/EC,
2011/65/EU&(EU)2015/863,
2014/30/EU
Die betroffene benannte Stelle
Nennen: Société Nationale de Certification et
d’Homologation
Anschrift: BP 23 L-5201 Sandweiler
Werte nach
EN 60745-1, EN 60745-2-6,
EN 55014-1, EN 55014-2,
EN 61000-3-2, EN 61000-3-3
Zur Kompilierung der technischen Datei ermächtigte
Person,
Name Marcel Filz
Adresse Positec Germany GmbH Grüner Weg
10, 50825 Cologne, Germany
2020/07/29
Allen Ding
Stellvertretender Chengenieur,
Prüfung und Zertizierung
Positec Technology (China) Co., Ltd
18, Dongwang Road, Suzhou Industrial
Park, Jiangsu 215123, P. R. China

13
FR
NOTICE ORIGINALE
AVERTISSEMENTS
GÉNÉRAUX DE SÉCURITÉ
POUR L’OUTIL
AVERTISSEMENT Lire tous les
avertissements de sécurité et toutes les
instructions.Ne pas suivre les avertissements et
instructions peut donner lieu à un choc électrique, un
incendie et/ou une blessure sérieuse.
Conserver tous les avertissements et toutes
les instructions pour pouvoir s’y reporter
ultérieurement.
Le terme «outil» dans les avertissements fait référence
à votre outil électrique alimenté par le secteur (avec
cordon d’alimentation) ou votre outil fonctionnant sur
batterie (sans cordon d’alimentation).
1) SÉCURITÉ DE LA ZONE DE TRAVAIL
a) Conserver la zone de travail propre et bien
éclairée. Les zones en désordre ousombres sont
propices aux accidents.
b) Ne pas faire fonctionner les outils
électriques en atmosphère explosive,
par exemple en présence de liquides
inflammables, de gaz ou de poussières.
Les outils électriques produisent des étincelles qui
peuvent enflammer les poussières ou les fumées.
c) Maintenir les enfants et les personnes
présentes à l’écart pendant l’utilisation de
l’outil. Les distractions peuvent vous faire perdre le
contrôle de l’outil.
2) SÉCURITÉ ÉLECTRIQUE
a) Il faut que les fiches de l’outil électrique
soient adaptées au socle. Ne jamais modifier
la fiche de quelque façon que ce soit. Ne
pas utiliser d’adaptateurs avec des outils à
branchement de terre. Des fiches non modifiées
et des socles adaptés réduiront le risque de choc
électrique.
b) Éviter tout contact du corps avec des
surfaces reliées à la terre telles que les
tuyaux, les radiateurs, les cuisinières et les
réfrigérateurs. Il existe un risque accru de choc
électrique si votre corps est relié à la terre.
c) Ne pas exposer les outils à la pluie ou à
des conditions humides. La pénétration d‘eau
à l’intérieur d’un outil augmentera le risque de choc
électrique.
d) Ne pas maltraiter le cordon. Ne jamais
utiliser le cordon pour porter, tirer ou
débrancher l’outil. Maintenir le cordon à
l’écart de la chaleur, du lubrifiant, des arêtes
ou des parties en mouvement. Des cordons
endommagés ou emmêlés augmentent le risque de
choc électrique.
e) Lorsqu’on utilise un outil à l’extérieur,
utiliser un prolongateur adapté à l’utilisation
extérieure. L’utilisation d’un cordon adapté à
l’utilisation extérieure réduit le risque de choc
électrique.
f) Si l’usage d’un outil dans un emplacement
humide est inévitable, utiliser une
alimentation protégée par un dispositif à
courant différentiel résiduel (DDR).L’usage d’un
DDR réduit le risque de choc électrique.
3) SÉCURITÉ DES PERSONNES
a) Restez vigilant, regardez ce que vous êtes
en train de faire et faites preuve de bon
sens dans votre utilisation de l’outil. Ne pas
utiliser un outil lorsque vous êtes fatigué ou
sous l’emprise de drogues, d’alcool ou de
médicaments. Un moment d’inattention au cours
de l’utilisation d’un outil peut entraîner des blessures
graves.
b) Utiliser un équipement de sécurité. Toujours
porter une protection pour les yeux. Les
équipements de sécurité tels que les masques
contre les poussières, les chaussures de sécurité
antidérapantes, les casques ou les protections
acoustiques utilisés dans les conditions appropriées
réduiront le risque de blessures.
c) Éviter tout démarrage intempestif. S’assurer
que l’interrupteur est en position arrêt avant
de brancher l’outil au secteur et/ou au bloc
de batteries, de le ramasser ou de le porter.
Porter les outils en ayant le doigt sur l’interrupteur ou
brancher des outils dont l’interrupteur est en position
marche est source d’accidents.
d) Retirer toute clé de réglage avant de mettre
l’outil en marche. Une clé laissée fixée sur
une partie tournante de l’outil peut entraîner des
blessures.
e) Ne pas se précipiter. Garder une position
et un équilibre adaptés à tout moment. Cela
permet un meilleur contrôle de l’outil dans des
situations inattendues.
f) S’habiller de manière adaptée. Ne pas porter
de vêtements amples ou de bijoux. Garder
les cheveux, les vêtements et les gants à
distance des parties en mouvement. Des
vêtements amples, des bijoux ou les cheveux longs
peuvent être attrapés par des parties en mouvement.
g) Si des dispositifs sont fournis pour
le raccordement d’équipements pour
l’extraction et la récupération des
poussières, s’assurer qu’ils sont connectés
et correctement utilisés. Utiliser des collecteurs
de poussière peut réduire les risques dus aux
poussières.
4) UTILISATION ET ENTRETIEN DE L’OUTIL
a) Ne pas forcer l’outil. Utiliser l’outil adapté à
votre application. L’outil adapté réalisera mieux le
travail et de manière plus sûre au régime pour lequel
il a été construit.
b) Ne pas utiliser l’outil si l’interrupteur ne
permet pas de passer de l’état de marche à
celui d’arrêt et vice versa. Tout outil qui ne peut
pas être commandé par l’interrupteur est dangereux
et doit être réparé.
c) Débrancher la fiche de la source
d’alimentation secteur et/ou le bloc de
batteries de l’outil avant tout réglage,
changement d’accessoires ou avant de
ranger l’outil. De telles mesures de sécurité
préventives réduisent le risque de démarrage
accidentel de l’outil.
d) Conserver les outils à l’arrêt hors de la
portée des enfants et ne pas permettre à des
personnes ne connaissant pas l’outil ou les

14
FR
présentes instructions de le faire fonctionner.
Les outils sont dangereux entre les
e) Observer la maintenance de l’outil. Vérifier
qu’il n’y a pas de mauvais alignement ou
de blocage des parties mobiles, des pièces
cassées ou toute autre condition pouvant
affecter le fonctionnement de l’outil. En cas
de dommages, faire réparer l’outil avant de l’utiliser.
De nombreux accidents sont dus à des outils mal
entretenus.
f) Garder affûtés et propres les outils
permettant de couper. Des outils destinés à
couper correctement entretenus avec des pièces
coupantes tranchantes sont moins susceptibles de
rester bloqués et sont plus faciles à contrôler.
g) Utiliser l’outil, les accessoires et les lames
etc., conformément à ces instructions, en
tenant compte des conditions de travail et
du travail à réaliser. L’utilisation de l’outil pour
des opérations différentes de celles prévues pourrait
donner lieu à des situations dangereuses.
5) MAINTENANCE ET ENTRETIEN
a) Faire entretenir l’outil par un réparateur
qualifié utilisant uniquement des pièces de
rechange identiques. Cela assurera le maintien de
la sécurité de l’outil.
AVERTISSEMENTS DE
SÉCURITÉ POUR LES
MARTEAUX
1. Porter une protection pour les oreilles.
L’exposition au bruit peut causer une perte d’audition.
2. Veuillez utiliser les poignées auxiliaires
fournies avec l’outil. La perte de contrôle peut
engendrer des blessures.
3. Tenir l’outil par ses surfaces antidérapantes
et isolées si l’outil de coupe risque d’entrer
en contact avec des câbles cachés. L’entrée
en contact avec un câble sous tension rendra les
parties en métal de l’outil également sous tension et
l’utilisateur pourrait recevoir une décharge électrique.
RÈGLES DE SÉCURITÉ
SUPPLÉMENTAIRES POUR
LE MARTEAU
1.Porter un masque contre la poussière.
SYMBOLES
Pour réduire le risque de blessure,
l’utilisateur doit lire le mode d’emploi.
Porter une protection pour les oreilles
Porter une protection pour les yeux
Porter un masque contre la poussière
Avertissement
Double isolation
Les déchets d’équipements électriques
et électroniques ne doivent pas être
déposés avec les ordures ménagères. Ils
doivent être collectés pour être recyclés
dans des centres spécialisés. Consultez
les autorités locales ou votre revendeur
pour obtenir des renseignements sur
l’organisation de la collecte.
LISTE DES COMPOSANTS
1.
INTERRUPTEUR MARCHE / ARRÊT AVEC
CONTRÔLE DE VITESSE VARIABLE
2.
BOUTON DE VERROUILLAGE DE
L'INTERRUPTEUR
3.
CONTRÔLE DE ROTATION AVANT ET AR-
RIÈRE
4.
COMMUTATEUR DE SÉLECTION DU MODE
DE FONCTION
5.
POIGNÉE AUXILIAIRE
6.
JAUGE DE PROFONDEUR RÉGLABLE
7.
CAPUCHON DE PROTECTION CONTRE LA
POUSSIÈRE
8.
MANCHON DE VERROUILLAGE DU PORTE-
OUTIL
9.
BOUTON DE DÉVERROUILLAGE (VOIR
FIG.C)
Les accessoires reproduits ou décrits ne sont pas
tous compris avec le modèle standard livré.
CARACTÉRISTIQUES
TECHNIQUES
Type KUX12P (X12P-désignation des machines,
représentatif du marteau)
Tension 230-240V~50Hz
Puissance 850W
Vitesse à vide 1300/min
Cadence de frappe nomi-
nale 5500bpm
Energie d'impact 3.0J

15
FR
Capacité
de perçage
maximale
Béton 26mm
Acier 13mm
Bois 30mm
Double isolation /ll
Masse de la machine 2.8kg
INFORMATIONS SUR LE
BRUIT
Une pression acoustique pon-
dérée LpA:89.9dB(A)
Une puissance sonore pondérée LpA:101.9dB(A)
KPA& KWA 3.0dB(A)
Portez une protection auditive.
INFORMATIONS SUR LES
VIBRATIONS
Valeurs totales de vibration (somme vectorielle triax)
déterminées conformément à EN 60745:
Description du
mode
Valeur d'émission
vibratoire
Incertitude K
Forage au
marteau dans
le béton
ah,HD=7,685m/s2K=1.5 m/s
Burinage ah,Cheq=14,236m/s2K=1.5 m/s
Il est possible d’utiliser la valeur totale déclarée des
vibrations pour comparer cet outil à un autre outil, et
il est aussi possible d’utiliser cette valeur pour une
appréciation préliminaire de l’exposition.
AVERTISSEMENT: La valeur d’émission de
vibrations pendant l’utilisation réelle de l’outil
électrique peut différer de la valeur déclarée selon la
manière dont l’outil est utilisé, selon les exemples
suivants et d’autres variations sur la manière dont l’outil
est utilisé:
Comment l’outil est utilisé et quels matériaux sont
coupés ou percés.
L’outil est en bon état et bien entretenu.
L’utilisation du bon accessoire pour l’outil et l’assurance
qu’il est affûté et en bon état.
La bonne tenue des poignées et, le cas échéant, les
accessoires anti-vibrations utilisés.
L’outil est utilisé comme prévu dans sa conception et
dans le présent mode d’emploi.
Cet outil peut causer un syndrome des
vibrations main-bras s’il n’est pas correctement
géré.
AVERTISSEMENT: Pour être précise, une
évaluation du niveau d’exposition en conditions
réelles d’utilisation doit également tenir compte de
toutes les parties du cycle d’utilisation telles que les
moments où l’outil est éteint, et ceux où il fonctionne au
ralenti mais ne réalise pas réellement de tâche. Ceci
peut réduire de manière signicative le niveau
d’exposition et la durée d’utilisation totale.
An de minimiser le risque d’exposition aux vibrations :
Utilisez TOUJOURS des burins, des forets et des lames
affûtés.
Entretenez cet outil de manière conforme au mode
d’emploi et maintenez-le lubrié (le cas échéant).
Si l’outil doit être utilisé régulièrement, investissez dans
des accessoires anti-vibrations.
Planiez votre travail pour étaler l’utilisation des outils à
forte vibration sur plusieurs jours.
ACCESSOIRES
Poignée auxiliaire 1
Jauge de profondeur 1
Nous recommandons d’acheter tous les accessoires
dans le magasin d’acquisition de la machine. Pour plus
d’informations, se référer à l’emballage des accessoires.
Le personnel du magasin est également là pour vous
conseiller.
MODE D’EMPLOI
REMARQUE:Avant d’utiliser l’outil, lisez
attentivement le manuel d’utilisation.
1. INTERRUPTEUR MARCHE / ARRÊT AVEC
COMMANDE DE VITESSE VARIABLE
Appuyez pour démarrer et relâchez pour arrêter votre
outil. Cet outil possède un interrupteur à vitesse variable
(1) qui offre des vitesses plus élevées avec une pression
de déclenchement accrue - la vitesse est contrôlée en
faisant varier la pression appliquée à l’interrupteur. (Voir
Fig.A)
2. BOUTON DE VERROUILLAGE DE
L’INTERRUPTEUR
Appuyez sur l’interrupteur marche / arrêt (1), puis sur le
bouton de verrouillage (2) (voir Fig.A), relâchez d’abord
l’interrupteur marche / arrêt et le bouton de verrouillage
ensuite. Votre interrupteur est maintenant verrouillé
pour une utilisation continue. Pour éteindre votre outil,
appuyez et relâchez simplement l’interrupteur marche
/ arrêt.
3. POIGNÉE AUXILIAIRE
Faites glisser la poignée sur la perceuse et tournez-la
jusqu’à la position de travail souhaitée. Pour serrer
la poignée auxiliaire, tournez la poignée dans le sens
des aiguilles d’une montre. Pour desserrer la poignée
auxiliaire, tournez la poignée dans le sens inverse des
aiguilles d’une montre. (Voir Fig.B)
AVERTISSEMENT: Utilisez toujours la
poignée auxiliaire.

16
FR
4. CONTRÔLE AVANT ET INVERSE DE LA
ROTATION
Avec le foret pointé loin de vous, poussez le levier avant
/ arrière (3) vers la gauche “ “ pour une rotation vers
l’avant. Poussez le levier de marche avant / arrière (3)
vers la droite pour une rotation vers arrière “ “.
AVERTISSEMENT : Ne changez jamais le
sens de rotation lorsque l’outil tourne,
attendez qu’il soit arrêté.
5. JAUGE DE PROFONDEUR AJUSTABLE
Insérez le foret dans le mandrin. Desserrez la butée de
profondeur en tournant la poignée dans le sens inverse
des aiguilles d’une montre. Faites glisser la jauge
de profondeur jusqu’à ce que la distance entre son
extrémité et celle du foret soit égale à la profondeur du
trou / de la vis que vous souhaitez faire. Serrez ensuite la
jauge de profondeur en tournant la poignée dans le sens
des aiguilles d’une montre.
6. SÉLECTION DU MODE DE FONCTION (Voir
Fig.C)
Le fonctionnement de la boîte de vitesses pour chaque
application est réglé à l’aide du sélecteur de mode
de fonction (4). Pour passer d’une fonction à l’autre,
appuyez sur le bouton de déverrouillage (9) et tournez le
sélecteur vers le mode de fonctionnement souhaité.
Pour percer et percuter
simultanément du béton ou de la
maçonnerie, choisissez la position
de Perçage par marteau.
Pour le perçage dans l’acier, le
bois et les plastiques, choisissez
la position de Perçage rotatif.
Pour un impact uniquement pour
les applications d’écaillage léger,
de burinage et de démolition,
choisissez la position Marteau.
Pour le réglage de la position de
burinage, choisissez la position de
l’angle de bit
AVERTISSEMENT : Le sélecteur de mode
de fonctionnement ne peut être actionné
qu’à l’arrêt de la machine.
AVERTISSEMENT : Une utilisation
prolongée fera chauffer le boîtier en
aluminium, ne le touchez pas.
ENTRETIEN
Retirer la fiche de la prise avant de procéder à
un réglage, une réparation ou un entretien.
Il n’y a pas de pièces réparables par l’utilisateur dans
cet outil. Ne jamais utiliser d’eau ou de nettoyants
chimiques pour nettoyer l’outil. Nettoyer avec un
chiffon sec. Toujours conserver l’outil motorisé dans
un endroit sec. Maintenir les fentes de ventilation du
moteur propres. Empêcher que les commandes de
marche soient couvertes de sciure. Il est normal que des
étincelles soient visibles dans les fentes de ventilation,
cela n’endommagera pas l’outil motorisé.
Si l’alimentation est endommagée, elle doit être
remplacée par le fabricant, son agent de maintenance
ou une personne qualiée de façon similaire, an d’éviter
tout danger.
PROTECTION DE
L’ENVIRONNEMENT
Les déchets d’équipements électriques et
électroniques ne doivent pas être déposés avec
les ordures ménagères. Ils doivent être collectés
pour être recyclés dans des centres spécialisés.
Consultez les autorités locales ou votre revendeur pour
obtenir des renseignements sur l’organisation de la
collecte.
DÉCLARATION DE
CONFORMITÉ
Nous,
Positec Germany GmbH
Grüner Weg 10, 50825 Cologne, Germany
Déclarons ce produit
Description Marteau électrique
Type KUX12P (X12P-désignation des machines,
représentive pour marteau)
Fonction Martelage de divers matériaux
Conforme aux directives suivantes:
2006/42/EC,
2011/65/EU&(EU)2015/863,
2014/30/EU
L’organisme impliqué notié
Nom : Société Nationale de Certification et
d’Homologation
Adresse: BP 23 L-5201 Sandweiler
Et conforme aux normes :
EN 60745-1, EN 60745-2-6,
EN 55014-1, EN 55014-2,
EN 61000-3-2, EN 61000-3-3
La personne autorisée à compiler le dossier technique,
Nom Marcel Filz
Adresse Positec Germany GmbH
Grüner Weg 10, 50825 Cologne, Germany
2020/07/29
Allen Ding
Ingénieur en chef adjoint, Essais &Certication
Positec Technology (China) Co., Ltd
18, Dongwang Road, Suzhou Industrial
Park, Jiangsu 215123, P. R. China

17
IT
ISTRUZIONI ORIGINALI
AVVISI GENERALI PER
LA SICUREZZA DEGLI
UTENSILI A MOTORE
ATTENZIONE! È assolutamente necessario
leggere attentamente tutte le istruzioni.
Eventuali errori nell’adempimento delle istruzioni qui di
seguito riportate potranno causare scosse elettriche,
incendi e/o lesioni gravi.
Conservare tutti gli avvisi e le istruzioni per
poterle consultare quando necessario.
Il termine qui di seguito utilizzato«utensile elettrico» si
riferisce ad utensili elettrici alimentati dalla rete (con linea
di allacciamento), nonché ad utensili elettrici alimentati a
pile (senza linea di allacciamento).
1) POSTO DI LAVORO
a) Mantenere pulito ed ordinato il posto di
lavoro. Il disordine e le zone di lavoro non illuminate
possono essere fonte di incidenti.
b) Evitare d’impiegare l’utensile in ambienti
soggetti al rischio di esplosioni nei quali si
trovino liquidi, gas o polveri infiammabili. Gli
utensili elettrici producono scintille che possono far
infiammare la polvere o i gas.
c) Mantenere lontani i bambini ed alter persone
durante l’impiego dell’utensile elettrico.
Eventuali distrazioni potranno comportare la perdita
del controllo sull’utensile.
2) SICUREZZA ELETTRICA
a) La spina per la presa di corrente
dovrà essere adatta alla presa. Evitare
assolutamente di apportare modifiche alla
spina. Non impiegare spine adattatrici
assieme ad utensili con collegamento a
terra. Le spine non modificate e le prese adatte allo
scopo riducono il rischio di scosse elettriche.
b) Evitare il contatto fisico con superfici
collegate a terra, come tubi, riscaldamenti,
cucineelettriche e frigoriferi. Sussiste un
maggior rischio di scosse elettriche nel momento in
cui il corpo é messo a massa.
c) Custodire l’utensile al riparo dalla pioggia
o dall’umidità. L’eventuale infiltrazione di acqua
in un utensile elettrico va ad aumentare il rischio
d’insorgenza di scosse elettriche.
d) Non usare il cavo per scopi diversi da quelli
previsti al fine di trasportare o appendere
l’apparecchio, oppure di togliere la spina
dalla presa di corrente. Mantenere l’utensile al
riparo da fonti di calore, dall’olio, dagli spigolio da
parti di strumenti in movimento. I cavi danneggiati
o aggrovigliati aumentano il rischio d’insorgenza di
scosse elettriche.
e) Qualora si voglia usare l’utensile
all’aperto,impiegare solo ed esclusivamente
cavi di prolunga omologati per l’impiego
all’esterno. L’uso di un cavo di prolunga omologato
per l’impiego all’esterno riduce il rischio d’insorgenza
di scosse elettriche.
f) Se si deve utilizzare l’utensile a motore
in un luogo umido, utilizzare una fonte di
alimentazione con protezione a corrente
residua. L’uso di un dispositivo a corrente residua
reduce il rischio di folgorazioni elettriche.
3) SICUREZZA DELLE PERSONE
a) È importante concentrarsi su ciò che si
sta facendo e a maneggiare con giudizio
l’utensile elettrico durante le operazioni di
lavoro. Non utilizzare l’utensile in caso di stanchezza
o sotto l’effetto di droghe, bevande alcoliche e
medicinali. Un attimo di distrazione durante l’uso
dell’utensile potrà causare lesioni gravi.
b) Indossare sempre equipaggiamento
protettivo individuale, nonché guanti
protettivi. Se si avrà cura d’indossare
equipaggiamento protettivo individuale come la
maschera antipolvere, la calzatura antisdrucciolevole
di sicurezza, il casco protettivo o la protezione
dell’udito, a seconda dell’impiego previsto per
l’utensile elettrico, si potrà ridurre il rischio di ferite.
c) Evitare avviamenti involontari. Controllare
che l’interruttore sia nella posizione off
prima di effettuare il collegamento a una
sorgente di alimentazione/batteria, e prima
di sollevare o trasportare l’utensile. Il fatto
di tenere il dito sopra all’interruttore o di collegare
l’utensile accesso all’alimentazione di corrente potrà
essere causa di incidenti.
d) Togliere gli attrezzi di regolazione o la chiave
inglese prima di accendere l’utensile. Un
utensile o una chiave inglese che si trovino in una
parte di strumento in rotazione potranno causare
lesioni.
e) È importante non sopravvalutarsi. Avere
curadi mettersi in posizione sicura e di
mantenere l’equilibrio. In tale maniera sarà
possibile controllare meglio l’apparecchio in
situazioni inaspettate.
f) Indossare vestiti adeguati. Evitare di
indossare vestiti lenti o gioielli. Tenere i
capelli, i vestiti ed i guanti lontani da pezzi
in movimento. Vestiti lenti, gioielli o capelli lunghi
potranno impigliarsi in pezzi in movimento.
g) Se sussiste la possibilità di montare
dispositivi di aspirazione o di captazione
della polvere, assicurarsi che gli stessi siano
stati installati correttamente e vengano
utilizzati senza errori. L’impiego dei suddetti
dispositivi diminuisce il pericolo rappresentato dalla
polvere.
4) MANEGGIO ED IMPIEGO ACCURATO DI
UTENSILI ELETTRICI
a) Non sovraccaricare l’utensile. Impiegare
l’utensile elettrico adatto per sbrigare il
lavoro. Utilizzando l’utensile elettrico adatto si potrà
lavorare meglio e con maggior sicurezza nell’ambito
della gamma di potenza indicata.
b) Non utilizzare utensili elettrici con
interruttori difettosi. Un utensile elettrico che
non si può più accendere o spegnere è pericoloso e
dovrà essere riparato.
c) Scollegare la spina dalla sorgente di
alimentazione e/o la batteria dall’utensile
prima di effettuare regolazione, cambiare
accessori, o riporre gli utensili a motore. Tale
precauzione eviterà che l’apparecchio possa essere
messo in funzione inavvertitamente.
d) Custodire gli utensili elettrici non utilizzati

18
IT
al di fuori della portata dei bambini. Non fare
usare l’apparecchio a persone che non sono
abituate ad usarlo o che non abbiano letto
le presenti istruzioni. Gli utensili elettrici sono
pericolosi se utilizzati da persone inesperte.
e) Effettuare accuratamente la manutenzione
dell’apparecchio. Verificare che le parti mobili
dello strumento funzionino perfettamente e
non s’inceppino, che non ci siano pezzi rotti
o danneggiati al punto tale da limitare la
funzione dell’apparecchio stesso. Far riparare
le parti danneggiate prima d’impiegare l’apparecchio.
Numerosi incidenti vengono causati da utensili
elettrici la cui manutenzione è stata effettuata poco
accuratamente.
f) Mantenere affilati e puliti gli utensili da
taglio. Gli utensili da taglio curati con particolare
attenzione e con taglienti affilati s’inceppano meno
frequentemente e sono più facili da condurre.
g) Utilizzare utensili elettrici, accessori,
attrezzi,ecc. in conformità con le presenti
istruzioni e secondo quanto previsto per
questo tipo specifico di apparecchio.
Osservare le condizioni di lavoro ed il lavoro da
eseguirsi durante l’impiego. L’impiego di utensili
elettrici per usi diversi da quelli consentiti potrà dar
luogo a situazioni di pericolo.
5) ASSISTENZA
a) Fare riparare l’apparecchio solo ed
esclusivamente da personale specializzato e
solo impiegando pezzi di ricambio originali. In
tale maniera potrà essere salvaguardata la sicurezza
dell’apparecchio.
INDICAZIONI DI SICUREZZA
PER MARTELLI
1. Indossare protezione per le orecchie.
L’esposizione al rumore può provocare la perdita
dell’udito.
2. Usare le impugnature ausiliarie fornite in
dotazione all’attrezzo. La perdita di controllo può
provocare lesioni personali.
3. Afferrare lo strumento per le apposite
maniglie quando si eseguono operazioni
durante le quali l’attrezzo potrebbe entrare in
contatto con cavi nascosti. Il contatto con cavi
elettrici in tensione espone l’operatore al rischio di
scosse elettriche.
AGGIUNTIVE REGOLE
DI SICUREZZA PER IL
MARTELLO
1. Indossare una mascherina antipolvere.
SIMBOLI
Per ridurre il rischio di lesioni, l’utente
deve leggere il manuale di istruzioni
Indossare protezione per le orecchie
Indossare protezione per gli occhi
Indossare una mascherina antipolvere
Attenzione
Doppio isolamento
I prodotti elettrici non possono essere
gettati tra i riuti domestici. L’apparecchio
da rottamare deve essere portato al
centro di riciclaggio per un corretto
trattamento. Controllare con le autorità
locali o con il rivenditore per localizzare il
centro di riciclaggio più vicino.
ELEMENTI
DELL’APPARECCHIO
1.
INTERRUTTORE ON/OFF PER CONTROLLO
DELLA VELOCITÀ VARIABILE
2.
PULSANTE INTERRUTTORE DI BLOCCO
3.
CONTROLLO DELLA ROTAZIONE IN
AVANTI E INDIETRO
4.
INTERRUTTORE PER SELEZIONARE LA
MODALITÀ OPERATIVA
5.
IMPUGNATURA AUSILIARIA
6.
PROFONDIMETRO REGOLABILE
7.
TAPPO ANTIPOLVERE
8.
MANICA DI BLOCCAGGIO DEL PORTAUT-
ENSILI
9.
PULSANTE DI SBLOCCO (VEDI FIG.C)
Accessori illustrati o descritti non fanno
necessariamente parte del volume di consegna.
DATI TECNICI
Codice KUX12P (X12P-denominazione del mac-
chinario, rappresentante del martello)
Voltaggio 230-240V~50Hz
Potenza 850W

19
IT
Velocità nominale a vuoto 1300/min
Velocità impatto 5500bpm
Energia di impatto 3.0J
Capacità
massima di
forare
Muratura 26mm
Acciaio 13mm
Legna 30mm
Doppio isolamento /ll
Peso 2.8kg
INFORMAZIONI SUL
RUMORE
Pressione sonora ponderata LpA:89.9dB(A)
potenza sonora ponderata LpA:101.9dB(A)
KPA& KWA 3.0dB(A)
Indossare cufe antirumore.
INFORMAZIONI SULLE
VIBRAZIONI
Valore totale di vibrazione (somma vettoriale triassiale)
determinati secondo EN 60745:
Descrizione della
modalità
Valore di emissione
delle vibrazioni
Incertezza K
Martello fora nel
calcestruzzo ah,HD=7,685m/s2K=1.5 m/s
Scalpellatura ah,Cheq=14,236m/s2K=1.5 m/s
Il valore totale dichiarato delle vibrazioni può essere
utilizzato per confrontare un utensile con un altro e in una
valutazione di esposizione preliminare.
AVVERTENZA: Il valore delle vibrazioni emesse
durante il reale utilizzo dello strumento può
differire dal valore dichiarato in base ai modi con cui
viene usato lo strumento, ai seguenti esempi e ad altre
variabili:
Come viene usato l’apparecchio e i materiali tagliati o
forati.
Le condizioni e la buona manutenzione dello strumento.
L’uso dell’accessorio corretto per il taglio e la sua
aflatura, nonché le sue buone condizioni.
La stretta sull’impugnatura e l’eventuale utilizzo di
accessori antivibrazione.
L’adeguatezza dell’utilizzo dell’utensile rispetto a quanto
previsto.
Questo strumento potrebbe causare la sindrome
da vibrazioni mano-braccio se il suo utilizzo non
viene gestito correttamente.
AVVERTENZA: Per essere precisi, una stima del
livello di esposizione nelle attuali condizioni di
utilizzo dovrebbe anche tenere conto di tutte le parti del
ciclo operativo, come le volte in cui lo strumento viene
spento e il tempo in cui viene lasciato girare a vuoto
senza realmente fare il suo lavoro. Questo potrebbe
ridurre signicativamente il livello di esposizione sul
periodo di lavoro totale:
Un aiuto a minimizzare il proprio rischio di esposizione
alle vibrazioni.
USARE sempre scalpelli, trapani e lame aflati.
Conservare questo strumento sempre in conformità
a queste istruzioni e mantenerlo ben lubricato (dove
appropriato).
Se lo strumento deve essere usato regolarmente,
investire in accessori antivibrazione.
Pianicare il programma di lavoro in modo da
suddividere i lavori che implicano le maggiori vibrazioni
nell’arco di più giorni.
ACCESSORI
Impugnatura ausiliaria 1
Profondimetro 1
Si raccomanda di acquistare tutti gli accessori nello
stesso negozio in cui è stato acquistato l’attrezzo. Fare
riferimento alla sezione “Consigli sul funzionamento del
trapano” di questo manuale oppure alla confezione degli
accessori per altri dettagli. Il personale del negozio può
aiutarvi e consigliarvi.
ISTRUZIONI D’USO
NOTA: Prima di utilizzare l’utensile, leggere
attentamente il manuale di istruzioni.
1. INTERRUTTORE ON/OFF PER CONTROLLO
DELLA VELOCITÀ VARIABILE
PPremere per avviare e rilasciare per arrestare l’utensile.
Quest’utensile ha un interruttore a velocità variabile
(1) che offre velocità più elevate con una maggiore
pressione di scatenare - la velocità viene controllata
dalla varia pressione applicata all’interruttore. (Vedi Fig.A)
2. PULSANTE INTERRUTTORE DI BLOCCO
Premere l’interruttore on/off (1), quindi il pulsante
di blocco (2) (vedere la gura A) rilasciare prima
l’interruttore on/off e il pulsante di blocco secondo. Il
tuo interruttore è ora bloccato per un utilizzo continuo.
Per spegnere l’utensile, basta premere e rilasciare
l’interruttore on/off.
3. IMPUGNATURA AUSILIARIA
Far scorrere l’impugnatura sul trapano e ruotarla
nella posizione laovorativa desiderata. Per bloccare
l’impugnatura ausiliaria, ruotarla in senso orario. Per
allentare l’impugnatura ausiliaria, ruotarla in senso
antiorario. (Vedi Fig. B)
AVVERTIMENTO: Utilizzare sempre
l’impugnatura ausiliaria.
4. CONTROLLO DELLA ROTAZIONE IN AVANTI E
INDIETRO
Quando il trapano punta lontano da te, spingere la

20
IT
leva in avanti / indietro (3) verso sinistra “ “ per la
rotazione in avanti. Spingere la leva in avanti / indietro (3)
verso destra per la rotazione indietra“ “.
AVVERTENZA: Non cambiare mai il senso di
rotazione mentre sta ruotando, attendere no a
quando si arresta.
5. PROFONDIMETRO REGOLABILE
Inserire il pezzo del trapano nel mandrino. Ruotare
l’impugnatura in senso antiorario per allentare l’arresto
di profondità. Far scorrere il profondimetro nché la
distanza tra il profondimetro e il pezzo del trapano è
uguale alla profondità desiderata del foro/vite. Quindi
ruotare l’impugnatura in senso orario per bloccare il
profondimetro.
6. SELEZIONE DELLA MODALITÀ OPERATIVA
(VEDI FIG.C)
Il cambio per ciascuna applicazione è impostato
l’interruttore per selezionare la modalità operativa (4).
Per cambiare la funzione, premere il pulsante di sblocco
(9) e ruotare l’interruttore per selezionare sulla modalità
operativa desiderata.
Per foratura e impatti simultanei
di calcestruzzo o muratura,
selezionare la posizione di
foratura del martello.
Per la foratura di acciaio, legno e
plastica, selezionare la posizione
di foratura rotante.
Solo per impatto - per
applicazioni di leggera
spezzatura, scalpello e
demolizione, selezionare la
posizione del martello.
Per la regolazione della posizione
di scalpello, selezionare la
posizione dell’angolo del pezzo
AVVERTENZA: Si può avviare l’interruttore
per selezionare la modalità operativa solo
quando si arresta.
AVVERTENZA: L’uso prolungato farà
surriscaldare l’alloggiamento in alluminio,
si prega di non toccarlo.
MANUTENZIONE
Rimuovere la spina dalla presa di corrente prima
di eseguire qualsiasi regolazione, riparazione o
manutenzione.
Il tuo elettroutensile non richiede lubricazione o
manutenzione aggiuntiva. Non ci sono parti da
riparare dall’utente nel tuo elettroutensile. Non
utilizzare mai l’acqua o detergenti chimici per pulire
il tuo elettroutensile. Pulirlo con un panno asciutto.
Conservarlo sempre in un luogo asciutto. Mantenere
pulite le fessure di ventilazione del motore. Mantenere
tutti i controlli lavorativi senza di polvere.
Se il cavo di alimentazione è rotto, darlo sostituire
dal produttore, dall’agente di servizio o da persone
qualicate per evitare pericoli.
TUTELA AMBIENTALE
I prodotti elettrici non possono essere gettati tra
i riuti domestici. L’apparecchio da rottamare
deve essere portato al centro di riciclaggio per
un corretto trattamento. Controllare con le autorità locali
o con il rivenditore per localizzare il centro di riciclaggio
più vicino.
DICHIARAZIONE DI
CONFORMITÀ
NOI
Positec Germany GmbH
Grüner Weg 10, 50825 Cologne, Germany
Dichiara che l’apparecchio,
Descrizione Mantello elettrico
Codice KUX12P (X12P- denominazione del mac-
chinario, rappresentante del martello)
Unzione Martellarre vari materiali
E’ conforme alle seguenti direttive:
2006/42/EC,
2011/65/EU&(EU)2015/863,
2014/30/EU
Il corpo noticato interessato
Nome:
Société Nationale de Certification et
d’Homologation
Indirizzo:
BP 23 L-5201 Sandweiler
Gli standard sono conformi a
EN 60745-1, EN 60745-2-6,
EN 55014-1, EN 55014-2,
EN 61000-3-2, EN 61000-3-3
La persona autorizzata a compilare il documento
tecnico,
Nome Marcel Filz
Indirizzo Positec Germany GmbH Grüner Weg
10, 50825 Cologne, Germany
2020/07/29
Allen Ding
Capo ingegnere, test e certicazione
Positec Technology (China) Co., Ltd
18, Dongwang Road, Suzhou Industrial
Park, Jiangsu 215123, P.R. China
Other manuals for KUX12P
1
Table of contents
Languages:
Other KRESS Rotary Hammer manuals

KRESS
KRESS KUC61 User manual

KRESS
KRESS KUX15P User manual

KRESS
KRESS 1100 MH MAX User manual

KRESS
KRESS KU334 User manual

KRESS
KRESS KU320 User manual

KRESS
KRESS KUC60 User manual

KRESS
KRESS KUX21 User manual

KRESS
KRESS KUC61.9 Installation manual

KRESS
KRESS KUX12P Installation manual

KRESS
KRESS KUC50 User manual