manuals.online logo
Brands
  1. Home
  2. •
  3. Brands
  4. •
  5. Kyocera
  6. •
  7. Solar Panel
  8. •
  9. Kyocera KD Series Quick guide

Kyocera KD Series Quick guide

KYOCERA Assembly and Maintenance Instructions, March 2010
SOLAR MODULES Assembly and Maintenance Instructions I March 2010
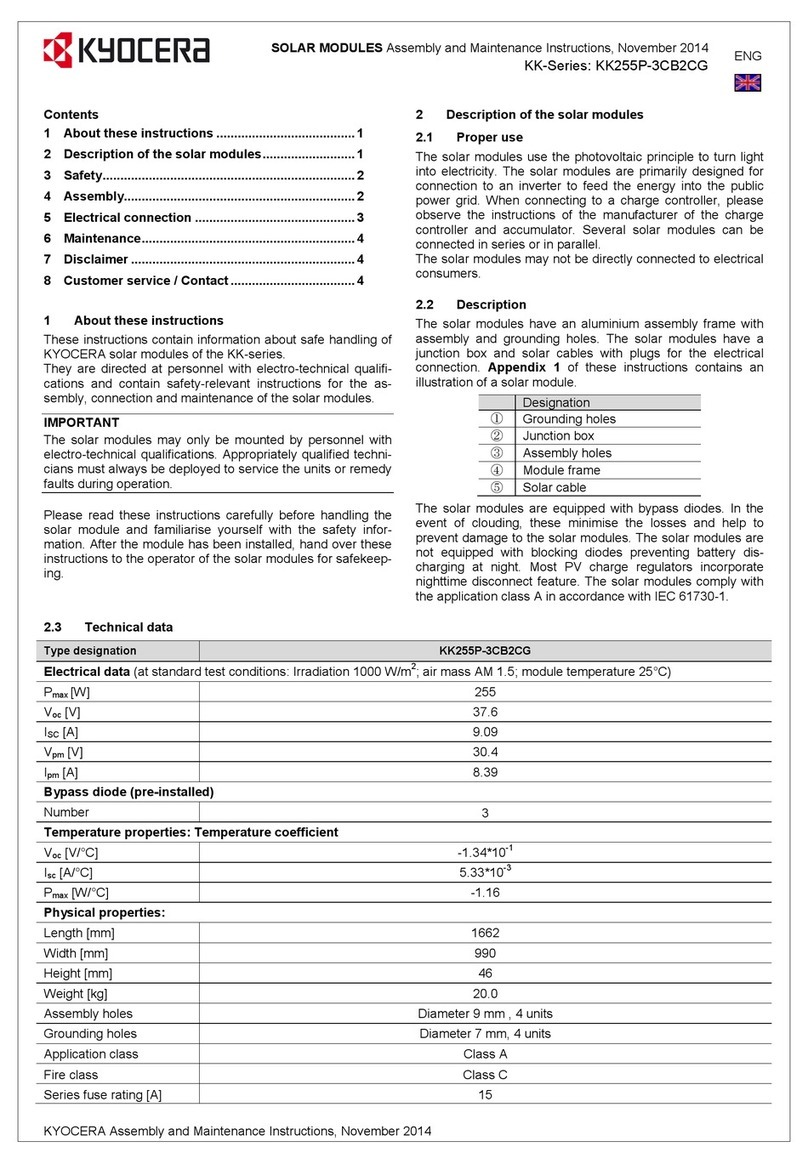
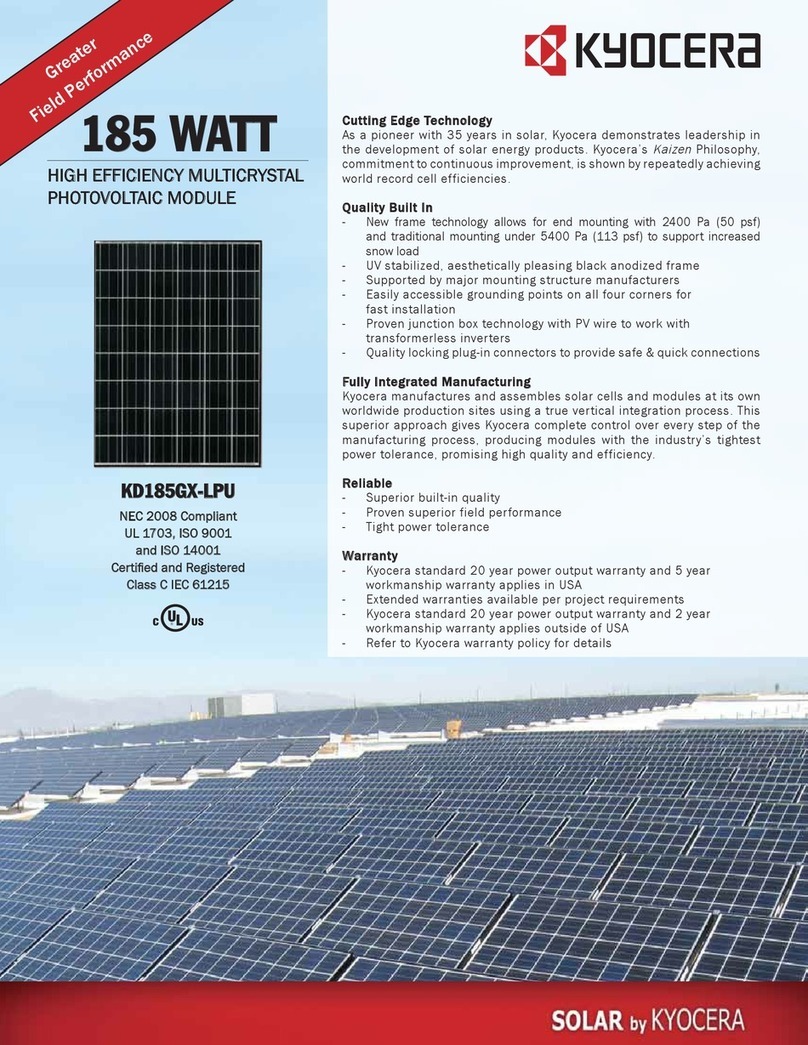
KD-Series: KD135GH-2PU-KD235GH-2PB
Contents
1About these instructions .............................................1
2Description of the solar modules ................................1
3Safety..........................................................................2
4Assembly.....................................................................2
5Electrical connection...................................................3
6Maintenance ...............................................................4
7Disclaimer ...................................................................4
8Customer service / Contact.........................................4
1About these instructions
These instructions contain information about safe handling of
KYOCERA solar modules of the KD-series.
They are directed at personnel with electro-technical qualifi-
cations and contain safety-relevant instructions for the as-
sembly, connection and maintenance of the solar modules.
IMPORTANT
The solar modules may only be mounted by personnel with
electro-technical qualifications. Appropriately qualified tech-
nicians must always be deployed to service the units or rem-
edy faults during operation.
Please read these instructions carefully before handling the
solar module and familiarise yourself with the safety informa-
tion. After the module has been installed, hand over these
instructions to the operator of the solar modules for safe-
keeping.
2Description of the solar modules
2.1 Proper use
The solar modules use the photovoltaic principle to turn light
into electricity. The solar modules are primarily designed for
connection to an inverter to feed the energy into the public
power grid. When connecting to a charge controller, please
observe the instructions of the manufacturer of the charge
controller and accumulator. Several solar modules can be
connected in series or in parallel.
The solar modules may not be directly connected to electrical
consumers.
2.2 Description
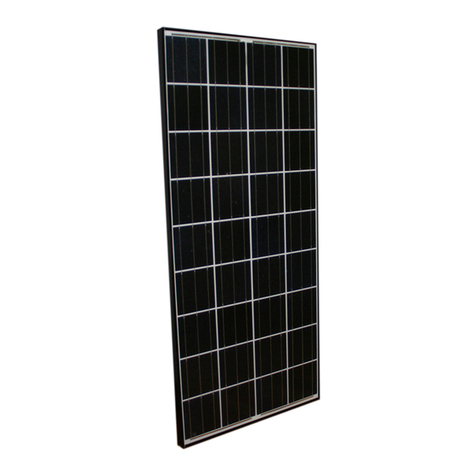
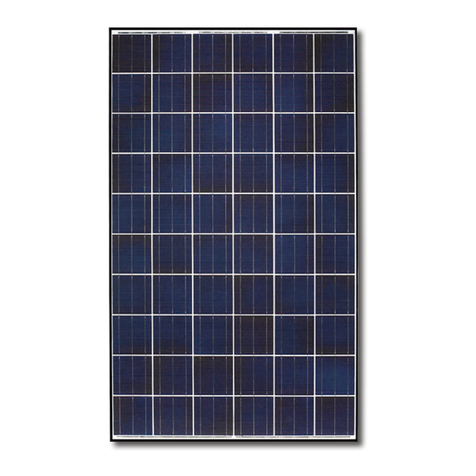
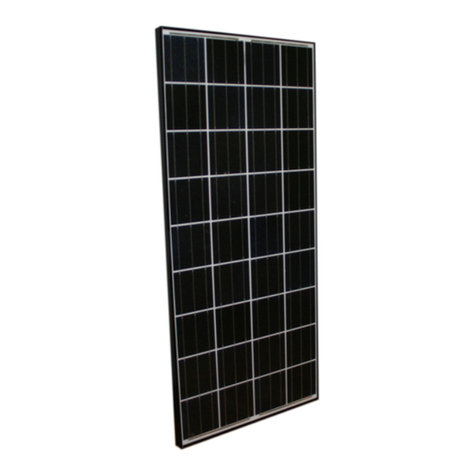
The solar modules have an aluminium assembly frame with
assembly and grounding holes. The solar modules have a
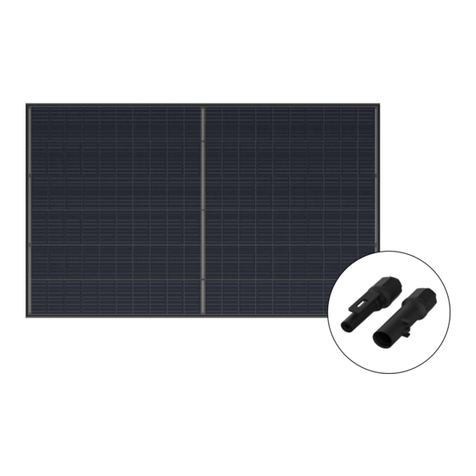
junction box and solar cables with plugs for the electrical
connection. Appendix 1 of these instructions contains an
illustration of a solar module.
Designation
①Grounding holes
②Junction box
③Assembly holes
④Module frame
⑤Solar cable
The solar modules are equipped with bypass diodes. In the
event of clouding, these minimise the losses and help to
prevent damage to the solar modules. The solar modules are
not equipped with blocking diodes preventing battery dis-
charging at night. Most PV charge regulators incorporate
nighttime disconnect feature. The solar modules comply with
the application class A in accordance with IEC/EN 61730-1.
2.3 Technical data
Type designation KD135GH
-2PU
KD185GH
-2PU
KD210GH
-2PU
KD215GH
-2PU
KD230GH
-2FB
KD230GH
-2PB
KD235GH
-2FB
KD235GH
-2PB
Electrical data (at standard test conditions: Irradiation 1000 W/m2; air mass AM 1.5; module temperature 25°C)
Pmax [W] 135 185 210 215 230 230 235 235
Voc [V] 22.1 29.5 33.2 33.2 36.9 36.9 36.9 36.9
ISC [A] 8.37 8.58 8.58 8.78 8.36 8.36 8.55 8.55
Vpm [V] 17.7 23.6 26.6 26.6 29.8 29.8 29.8 29.8
Ipm [A] 7.63 7.84 7.90 8.09 7.72 7.72 7.89 7.89
Bypass diode (pre-installed)
Number 2 3 3 3 3 3 3 3
Phase fuse [A] 15 15 15 15 15 15 15 15
Temperature properties: Temperature coefficient
Voc [V/°C] -0.80*10-1 -1.06*10-1 -1.20*10-1 -1.20*10-1 -1.33*10-1 -1.33*10-1 -1.33*10-1 -1.33*10-1
Isc [A/°C] 5.02*10-3 5.15*10-3 5.15*10-3 5.27*10-3 5.02*10-3 5.02*10-3 5.13*10-3 5.13*10-3
Pmax [W/°C] -6.14*10-1 -8.40*10-1 -9.60*10-1 -9.91*10-1 -1.04 -1.04 -1.07 -1.07
Physical properties:
Length [mm] 1500 1338 1500 1500 1662 1662 1662 1662
Width [mm] 668 990 990 990 990 990 990 990
Height [mm] 46 46 46 46 46 46 46 46
Weight [kg] 12.5 16.0 18.0 18.0 21.0 21.0 21.0 21.0
Assembly holes Diameter 9 mm, 4 units
Grounding holes Diameter 9 mm, 4 units
Application class Class A
ENG
KYOCERA Assembly and Maintenance Instructions, March 2010
3Safety
Solar modules generate power, producing voltage and cur-
rent as soon as they are exposed to light. A single solar mod-
ule generates a voltage of below 50 VDC; if several modules
are connected in series, the voltages of the individual mod-
ules accumulate and can pose a hazard.
Hazard!
Potentially fatal risk due to electrical shock if
damaged solar modules are touched.
•Only touch solar modules with fractured or
broken front glass or a damaged rear foil if
you are wearing rubber gloves.
•Only touch damaged solar modules if it is
absolutely necessary.
Warning!
Risk of falling when working on roofs.
•Use suitable fall protection equipment.
•Observe the accident prevention regulations.
Warning!
Risk of injury from falling objects.
•Cordon off a safe distance around the haz-
ardous zone when working on roofs.
Caution!
To avoid damage to the solar module, please
observe the following points:
•Do not apply paint or any adhesives to the
rear side of the solar module.
•Never use the junction box or the solar cable
to carry the unit.
•Do not expose the solar module to concen-
trated light.
•Do not allow any objects to fall upon the
solar module.
•Avoid scratches to the front glass.
4Assembly
Assembly work may only be performed by
trained and qualified personnel.
4.1 Safety information relating to assembly
Caution!
KYOCERA solar modules are “non-explosion-
protected operating equipment”.
•Do not install the solar module close to
flammable gases or vapours.
Hazard!
Potentially fatal risk if live parts are touched.
•Cover the solar module with opaque foils or
materials during assembly.
4.2 Select the location
NOTE
Before installing the PV system, contact local authorities to
determine the necessary permits, installation and inspection
requirements. During assembly, pay attention to the local
building standards.
The solar modules can be installed on roofs or open space on
support structures. To achieve maximum power yields for
feeding into the public grid, the following should be observed
when selecting the installation site: The solar irradiation
should be as high as possible distributed throughout the year.
To this end, the surface of the solar modules in the northern
hemisphere must face south. In Europe, the ideal module
slope is approx. 30° - 40°. While a bigger module slope leads
to energy losses, smaller module slope can also lead to high
accumulations of non-slipping snow on the module, which
might cause damages to the module or its frame. The solar
modules should not be exposed to shadows cast by trees or
buildings as this would lead to energy losses. For more infor-
mation about the selection of the site, please contact the
KYOCERA customer service.
4.3 Preparatory work for assembly
The solar module must be mounted to a support structure.
Please observe the information provided by the mount manu-
facturer when selecting the support structure.
If installed on a roof, the solar modules must be mounted on
a fire-resistant surface.
Caution!
Risk of breaking the solar module.
•Do not walk across or step on the solar
module.
Warning!
Risk of falling when working on roofs.
•Use suitable fall protection equipment.
•Do not perform assembly work in strong
winds.
•Only perform assembly work in dry weather
conditions.
•Observe the accident prevention regulations.
KYOCERA Assembly and Maintenance Instructions, March 2010
4.4 Mounting the solar module
Please observe the following during assembly:
•A clearance of at least 15 mm needs to be kept be-
tween the module frame and the attachment surface.
This allows the cool ambient air to circulate below the
solar module. This is necessary for optimum perform-
ance in all application ranges.
•There should be a clearance of at least 3.2 mm be-
tween the individual module frames to allow heat-
related expansion.
•The solar modules can be installed in either an up-
right or landscape position.
•If high accumulations of snow on the lowest module
row occur on site, the lower part of the frame may be
damaged when slipping snow is piled up there. This
can be avoided by e.g. attaching support parts at the
lowest modules.
•When selecting the material for the support structure,
pay attention to the electrochemical series in order to
avoid galvanic corrosion between different kinds of
metal.
•Fasten modules firmly to a support structure designed
to withstand the local wind and snow loads
4.4.1 Screw attachment
Assembly material
•Stainless steel screws, diameter 8 mm (4 units)
•Nuts with locking teeth (4 units)
NOTE
No holes may be drilled into the module frame.
Procedure
9Please see the drawing in Appendix 1 of these
instructions for the positions of the mounting holes.
9Drill the required assembly holes to the support
structure.
9Tighten the screws with adequate torque (usually
12.5 Nm) to securely attach the solar module to the
supporting frame. As adequate torque figure depends
on selected bolt nuts, follow the manufacturers'
recommended numbers.
4.4.2 Clamps
Assembly material
•Rustproof module clamps (at least 4 units).
•Please observe the information provided by the
manufacturer when selecting the clamps.
NOTE
The module clamps
- must not bend the module frame.
- must not touch the front glass.
- must not cast a shadow on the front glass.
- must not damage the surface of the frame.
- must be at least 40 mm long respectively.
- must overlap the module frame by at least 7 mm.
- must cover the module frame by min. 360 mm² respectively.
Minimum clamp length for each overlap:
Procedure
9Define the positions of the clamps based on the
drawings in Appendix 2.
9Tighten the module clamps to the torque stated by
the clamp manufacturer.
9Fasten modules firmly by clamps designed to with-
stand the local wind and snow loads.
4.4.3 Assembly to insertion system
When mounting the modules to an insertion system, follow
the instructions in the drawings in Appendix 2. Please ob-
serve the information provided by the manufacturer.
5Electrical connection
5.1 Safety information relating to the electrical
connection
5.2 Wiring of the solar modules
NOTE
The maximum system voltage of solar modules connected to
each other may not exceed 1000 VDC. When designing the
system, please note that the module voltage increases when
the temperatures are low. Do not connect the modules in
parallel without max. over current protection.
Under normal conditions, solar modules can supply higher
currents and/or a higher voltage than reported at the stan-
dard test conditions (see chapter 2.3 “Technical Data”).
Therefore, when determining component voltage ratings,
conductor current ratings, fuse sizes, and the size of controls
connected to the output of the solar modules, the stipulated
values of ISC and Voc should be multiplied with a factor of 1.25.
Only interconnect modules of the same type within a system.
The solar modules are equipped ex-works with 4 mm2-solar
cables. The solar cables have Multi-Contact® PV-3-plugs.
These plugs are designed for series wiring only. Always use
special solar cables with a diameter of at least 4 mm² and
Multi-Contact® PV-3-plugs for further series or parallel wiring.
When wiring, proceed as follows:
•Ensure the poles are connected correctly and that the
plugs are connected properly without gaps
•Observe the minimum bending radius of 24.5 mm of
the solar cables that are used.
5.3 Connection of the solar modules
Please observe the information provided by the manufacturer
of the inverter when connecting the solar modules to an
inverter.
overlap [mm] 7 7.5 8 8.5 9 10
minimum
length [mm] 51.5 48 45 42.4 40 40
Only specially trained and qualified personnel
may make the electrical connection.
Hazard!
Potentially fatal risk if live parts are touched.
•Never disconnect or connect electrical con-
tacts when under load.
•Only use dry, insulated tools for the electrical
assembly work.
•Never touch live parts with bare hands.
•Cover the solar module during installation
with opaque foils or materials.
•Do not wear any metal jewellery.
KYOCERA Assembly and Maintenance Instructions, March 2010
5.4 Grounding of the solar modules
To minimise the risk of an electrical shock, the frames of the
solar modules should be grounded.
Assembly material
•stainless steel screw, diameter 8 mm with serrated
washer and nut
•suitable grounding cable
NOTE
Ensure that the anodised layer of the frame is penetrated and
a secure electrical contact is created with the frame.
Procedure
9Please see the drawing in Appendix 1 of these in-
structions for the positions of the grounding holes.
9Screw the grounding cable firmly to one of the
grounding holes using the stainless steel screw and a
min. torque of 8 Nm.
6Maintenance
Only specially trained and qualified personnel
may service the solar system.
KYOCERA solar modules are designed for long-term service
and are almost maintenance-free.
6.1 Safety information relevant for maintenance
6.2 Cleaning the solar module
When the slope is adequate (> 15 degrees), the solar mod-
ules do not need to be cleaned thanks to the self-cleaning
effect of the rain. If heavily soiled, clean with plenty of water,
a mild detergent and a soft cloth/sponge.
6.3 Solar module maintenance
The system should be inspected once a year with regard to
the following:
•Secure hold and no rust on any of the attachments
•Secure connection, cleanliness and that all cable con-
nections are free of corrosion
•Soundness of cables and front glass
7Disclaimer
KYOCERA’s “Limited Warranty for Photovoltaic-Modules”
does not apply if this assembly and maintenance instruction is
not strictly observed. KYOCERA will not assume any liability for
damage arising from improper use, wrong assembly, opera-
tion or maintenance.
8Customer service / Contact
KYOCERA Fineceramics GmbH
Solar Division
Fritz-Mueller-Strasse 27
D-73730 Esslingen / Germany
•for technical questions:
Tel: +49 (0)711-93934-998
Fax: +49 (0)711-93934-861
E-Mail: [email protected]
•for general questions:
Tel: +49 (0)711-93934-999
Fax: +49 (0)711-93934-950
E-Mail: [email protected]
You will find more information and the latest data sheets,
warranty conditions, certificates etc. in the download
section of our website: www.kyocerasolar.eu
Warning!
Risk of falling when working on roofs.
•Use suitable fall protection equipment.
•Observe the accident prevention regulations.
Appendix 1
cGrounding holes
dJunction box
eAssembly holes
fModule frame
gSolar cable

Mounting table A-1
Montagetabelle A-1
Tabla de montaje A-1
Tableau de montage A-1
Tabella di montaggio A-1
Montážní tabulka A-1
Appendix 2 I Anhang 2 I Anexo 2 I Annexe 2 I Appendice 2 I Příloha 2
Installation with long side frame
Befestigung an der langen Rahmenseite
Fijación al lado largo del bastidor
Fixation sur la partie longue du cadre
Fissaggio sul lato lungo del telaio
Upevnění na dlouhé straněrámu
KD230GH-2PB, KD235GH-2PB
KD230GH-2FB, KD235GH-2FB
<5400 Pa
Bolting
Verschrauben
Atornillado
Vissage
Fissaggio a vite
Přišroubování
Clamping
Klemmen
Bornes
Connexion
Fissaggio con morsetti
Svorky
:
Permissible clamping range
Zulässiger Klemmbereich
Zona de bornes permisible
Plage de connexion admise
Area di bloccaggio consentita
Přípustná oblast upnutí
1100mm281mm
1100mm281mm
1100mm281mm
1100mm281mm
1100mm281mm
1100mm281mm
1100mm
100mm 100mm 100mm 100mm
281mm
100mm 100mm 100mm 100mm
1100mm
100mm 100mm 100mm 100mm
281mm
100mm 100mm 100mm 100mm
100mm 100mm
1100mm281mm
100mm
100mm 100mm
1100mm281mm
100mm
100mm 100mm
1100mm
281mm
100mm
100mm 100mm
1100mm
281mm
<2400 Pa
A-1
Mounting table B-1
Montagetabelle B-1
Tabla de montaje B-1
Tableau de montage B-1
Tabella di montaggio B-1
Montážní tabulka B-1
Appendix 2 I Anhang 2 I Anexo 2 I Annexe 2 I Appendice 2 I Příloha 2
Installation with long side frame
Befestigung an der langen Rahmenseite
Fijación al lado largo del bastidor
Fixation sur la partie longue du cadre
Fissaggio sul lato lungo del telaio
Upevnění na dlouhé straněrámu
KD210GH-2PU, KD215GH-2PU
<2,400 Pa <5,400 Pa
Bolting
Verschrauben
Atornillado
Vissage
Fissaggio a vite
Přišroubování
Clamping
Klemmen
Bornes
Connexion
Fissaggio con morsetti
Svorky
Inlay
Einlegen
Inserción
Insertion
Incasso
Vkládání
:
943mm
100mm 100mm 100mm 100mm
278.5mm 943mm
100mm 100mm 100mm 100mm
278.5mm
943mm
100mm 100mm 100mm 100mm
278.5mm 943mm
100mm 100mm 100mm 100mm
278.5mm
100mm 200mm
943mm278.5mm
100mm 200mm
943mm278.5mm
100mm 200mm
943mm278.5mm
100mm 200mm
943mm278.5mm
200mm 100mm
943mm
278.5mm
200mm 100mm
943mm
278.5mm
200mm 100mm
943mm
278.5mm
200mm 100mm
943mm
278.5mm
943mm278.5mm 943mm278.5mm
Inlay mounting-bar
Einlegesystem
Sistema de inserción
Système d’insertion
Sistema d’installazione
Vkládací systém
:
Permissible clamping range
Zulässiger Klemmbereich
Zona de bornes permisible
Plage de connexion admise
Area di bloccaggio consentita
Přípustná oblast upnutí
943mm278.5mm 943mm278.5mm
B-1
Appendix 2 I Anhang 2 I Anexo 2 I Annexe 2 I Appendice 2 I Příloha 2
KD210GH-2PU, KD215GH-2PU
Support rack
Unterstützung
Soporte
Renfort
Supporto
Podpěra
150mm
150mm 150mm
150mm
750mm
100mm 100mm
750mm
100mm 100mm
750mm
100mm 100mm
750mm
100mm 100mm
750mm
100mm 100mm
750mm
100mm 100mm
750mm
100mm 100mm
750mm
100mm 100mm
750mm
100mm 100mm
750mm
100mm 100mm
750mm
100mm 100mm
750mm
100mm 100mm
150mm
150mm 150mm
150mm
750mm
100mm 100mm
150mm
150mm
750mm
100mm 100mm
150mm
150mm
750mm
100mm 100mm
150mm
150mm
750mm
100mm 100mm
150mm
150mm
Clamping
Klemmen
Bornes
Connexion
Fissaggio con morsetti
Svorky
:
Permissible clamping range
Zulässiger Klemmbereich
Zona de bornes permisible
Plage de connexion admise
Area di bloccaggio consentita
Přípustná oblast upnutí
:
Inlay
Einlegen
Inserción
Insertion
Incasso
Vkládání
:
Inlay mounting-bar
Einlegesystem
Sistema de inserción
Système d’insertion
Sistema d’installazione
Vkládací systém
Support rack
Unterstützung
Soporte
Renfort
Supporto
Podpěra
:
Installation with short side frame
Befestigung an der kurzen Rahmenseite
Fijación al lado corto del bastidor
Fixation sur la partie courte du cadre
Fissaggio sul lato corto del telaio
Upevnění na krátké straněrámu
Mounting table B-2
Montagetabelle B-2
Tabla de montaje B-2
Tableau de montage B-2
Tabella di montaggio B-2
Montážní tabulka B-2
<2,400 Pa <5,400 Pa
B-2
Mounting table C-1
Montagetabelle C-1
Tabla de montaje C-1
Tableau de montage C-1
Tabella di montaggio C-1
Montážní tabulka C-1
Appendix 2 I Anhang 2 I Anexo 2 I Annexe 2 I Appendice 2 I Příloha 2
Installation with long side frame
Befestigung an der langen Rahmenseite
Fijación al lado largo del bastidor
Fixation sur la partie longue du cadre
Fissaggio sul lato lungo del telaio
Upevnění na dlouhé straněrámu
KD185GH-2PU
825mm256.5mm 825mm256.5mm
100mm
256.5mm 825mm
100mm 100mm100mm 100mm
256.5mm 825mm
100mm 100mm100mm
100mm
256.5mm 825mm
100mm 100mm100mm 100mm
256.5mm 825mm
100mm 100mm100mm
825mm256.5mm 825mm256.5mm
825mm
200mm 200mm
256.5mm 825mm
200mm 200mm
256.5mm
825mm
200mm 200mm
256.5mm 825mm
200mm 200mm
256.5mm
825mm
200mm 200mm
256.5mm 825mm
200mm 200mm
256.5mm
825mm
200mm 200mm
256.5mm 825mm
200mm 200mm
256.5mm
825mm256.5mm 825mm256.5mm
Inlay
Einlegen
Inserción
Insertion
Incasso
Vkládání
:
Inlay mounting-bar
Einlegesystem
Sistema de inserción
Système d’insertion
Sistema d’installazione
Vkládací systém
Clamping
Klemmen
Bornes
Connexion
Fissaggio con morsetti
Svorky
:
Permissible clamping range
Zulässiger Klemmbereich
Zona de bornes permisible
Plage de connexion admise
Area di bloccaggio consentita
Přípustná oblast upnutí
Bolting
Verschrauben
Atornillado
Vissage
Fissaggio a vite
Přišroubování
<2,400 Pa <5,400 Pa
C-1
Appendix 2 I Anhang 2 I Anexo 2 I Annexe 2 I Appendice 2 I Příloha 2
KD185GH-2PU
Installation with short side frame
Befestigung an der kurzen Rahmenseite
Fijación al lado corto del bastidor
Fixation sur la partie courte du cadre
Fissaggio sul lato corto del telaio
Upevnění na krátké straněrámu
Mounting table C-2
Montagetabelle C-2
Tabla de montaje C-2
Tableau de montage C-2
Tabella di montaggio C-2
Montážní tabulka C-2
669mm
100mm 100mm
669mm
100mm 100mm
669mm
100mm 100mm
669mm
100mm 100mm
669mm
100mm 100mm
669mm
100mm 100mm
669mm
100mm 100mm
669mm
100mm 100mm
150mm
150mm 150mm
150mm
150mm
150mm 150mm
150mm
669mm
100mm 100mm
669mm
100mm 100mm
669mm
100mm 100mm
669mm
100mm 100mm
669mm
150mm
150mm
100mm 100mm
669mm
150mm
150mm
100mm 100mm
669mm
150mm
150mm
100mm 100mm
669mm
150mm
150mm
100mm 100mm
Support rack
Unterstützung
Soporte
Renfort
Supporto
Podpěra
Clamping
Klemmen
Bornes
Connexion
Fissaggio con morsetti
Svorky
:
:
Permissible clamping range
Zulässiger Klemmbereich
Zona de bornes permisible
Plage de connexion admise
Area di bloccaggio consentita
Přípustná oblast upnutí
Inlay
Einlegen
Inserción
Insertion
Incasso
Vkládání
:
Inlay mounting-bar
Einlegesystem
Sistema de inserción
Système d’insertion
Sistema d’installazione
Vkládací systém
Support rack
Unterstützung
Soporte
Renfort
Supporto
Podpěra
:
<2,400 Pa <5,400 Pa
C-2
Mounting table D-1
Montagetabelle D-1
Tabla de montaje D-1
Tableau de montage D-1
Tabella di montaggio D-1
Montážní tabulka D-1
Appendix 2 I Anhang 2 I Anexo 2 I Annexe 2 I Appendice 2 I Příloha 2
Installation with long side frame
Befestigung an der langen Rahmenseite
Fijación al lado largo del bastidor
Fixation sur la partie longue du cadre
Fissaggio sul lato lungo del telaio
Upevnění na dlouhé straněrámu
KD135GH-2PU
100mm
278.5mm 943mm
100mm 100mm
278.5mm 943mm
100mm
100mm
278.5mm 943mm
100mm 100mm
278.5mm 943mm
100mm
200mm
278.5mm 943mm
200mm
278.5mm 943mm
200mm
278.5mm 943mm
200mm
278.5mm 943mm
200mm
278.5mm 943mm
200mm
278.5mm 943mm
200mm
278.5mm 943mm
200mm
278.5mm 943mm
943mm
278.5mm 943mm
278.5mm
943mm
278.5mm 943mm
278.5mm
943mm
278.5mm 943mm
278.5mm
943mm
278.5mm 943mm
278.5mm
943mm278.5mm 943mm278.5mm
Inlay
Einlegen
Inserción
Insertion
Incasso
Vkládání
:
Inlay mounting-bar
Einlegesystem
Sistema de inserción
Système d’insertion
Sistema d’installazione
Vkládací systém
Clamping
Klemmen
Bornes
Connexion
Fissaggio con morsetti
Svorky
:
Permissible clamping range
Zulässiger Klemmbereich
Zona de bornes permisible
Plage de connexion admise
Area di bloccaggio consentita
Přípustná oblast upnutí
Bolting
Verschrauben
Atornillado
Vissage
Fissaggio a vite
Přišroubování
<2,400 Pa <5,400 Pa
D-1
Appendix 2 I Anhang 2 I Anexo 2 I Annexe 2 I Appendice 2 I Příloha 2
KD135GH-2PU
Installation with short side frame
Befestigung an der kurzen Rahmenseite
Fijación al lado corto del bastidor
Fixation sur la partie courte du cadre
Fissaggio sul lato corto del telaio
Upevnění na krátké straněrámu
Mounting table D-2
Montagetabelle D-2
Tabla de montaje D-2
Tableau de montage D-2
Tabella di montaggio D-2
Montážní tabulka D-2
750mm
100mm 100mm
750mm
100mm 100mm
750mm
100mm 100mm
750mm
100mm 100mm
750mm
100mm 100mm
750mm
100mm 100mm
750mm
100mm 100mm
750mm
100mm 100mm
150mm 150mm
150mm 150mm
150mm 150mm
150mm 150mm
750mm
150mm
150mm
100mm 100mm
750mm
150mm
150mm
100mm 100mm
750mm
100mm 100mm
750mm
100mm 100mm
750mm
100mm 100mm
750mm
100mm 100mm
750mm
150mm150mm
100mm 100mm
750mm
150mm150mm
100mm 100mm
Support rack
Unterstützung
Soporte
Renfort
Supporto
Podpěra
Clamping
Klemmen
Bornes
Connexion
Fissaggio con morsetti
Svorky
:
Permissible clamping range
Zulässiger Klemmbereich
Zona de bornes permisible
Plage de connexion admise
Area di bloccaggio consentita
Přípustná oblast upnutí
:
Inlay
Einlegen
Inserción
Insertion
Incasso
Vkládání
:
Inlay mounting-bar
Einlegesystem
Sistema de inserción
Système d’insertion
Sistema d’installazione
Vkládací systém
Support rack
Unterstützung
Soporte
Renfort
Supporto
Podpěra
:
<2,400 Pa <5,400 Pa
D-2

Other manuals for KD Series

2

This manual suits for next models

8

Other Kyocera Solar Panel manuals

Kyocera KC130TM User manual

Kyocera

Kyocera KC130TM User manual

Kyocera KS7 User manual

Kyocera

Kyocera KS7 User manual

Kyocera KC-TYPE User manual

Kyocera

Kyocera KC-TYPE User manual

Kyocera KD130GX-LPU User manual

Kyocera

Kyocera KD130GX-LPU User manual

Kyocera KD135SX-UPU User manual

Kyocera

Kyocera KD135SX-UPU User manual

Kyocera KD235GX-LPB User manual

Kyocera

Kyocera KD235GX-LPB User manual

Kyocera KS5 User manual

Kyocera

Kyocera KS5 User manual

Kyocera KK Series Quick guide

Kyocera

Kyocera KK Series Quick guide

Kyocera KD215GX-LPU User manual

Kyocera

Kyocera KD215GX-LPU User manual

Kyocera KD135SX-UPU User manual

Kyocera

Kyocera KD135SX-UPU User manual

Kyocera KD200-60 P Series User manual

Kyocera

Kyocera KD200-60 P Series User manual

Kyocera KS12 User manual

Kyocera

Kyocera KS12 User manual

Kyocera KD MODULES User manual

Kyocera

Kyocera KD MODULES User manual

Kyocera KC65T User manual

Kyocera

Kyocera KC65T User manual

Kyocera KS20 User manual

Kyocera

Kyocera KS20 User manual

Kyocera KD Series Quick guide

Kyocera

Kyocera KD Series Quick guide

Kyocera KC50T User manual

Kyocera

Kyocera KC50T User manual

Kyocera KD200-60 P Series User manual

Kyocera

Kyocera KD200-60 P Series User manual

Kyocera KD205GX-LPU User manual

Kyocera

Kyocera KD205GX-LPU User manual

Kyocera KD225GX-LPB User manual

Kyocera

Kyocera KD225GX-LPB User manual

Kyocera KD130GX-LP User manual

Kyocera

Kyocera KD130GX-LP User manual

Kyocera KD135GX-LPU - MOUNTING GUIDE User manual

Kyocera

Kyocera KD135GX-LPU - MOUNTING GUIDE User manual

Kyocera KD135GX-LPU User manual

Kyocera

Kyocera KD135GX-LPU User manual

Kyocera KD50SE-1P User manual

Kyocera

Kyocera KD50SE-1P User manual

Popular Solar Panel manuals by other brands

TALESUN TP672M-315 installation manual

TALESUN

TALESUN TP672M-315 installation manual

GRIDFREE LIFESTYLE KIT installation manual

GRIDFREE

GRIDFREE LIFESTYLE KIT installation manual

ECTIVE MSP Series installation instructions

ECTIVE

ECTIVE MSP Series installation instructions

Viessmann VITOSOL 100-F SV1B Technical data manual

Viessmann

Viessmann VITOSOL 100-F SV1B Technical data manual

Steinbach speedsolar Sun 00-49120 manual

Steinbach

Steinbach speedsolar Sun 00-49120 manual

V2 ECO-LOGIC manual

V2

V2 ECO-LOGIC manual

Conrad 11 07 00 operating instructions

Conrad

Conrad 11 07 00 operating instructions

EcoFlow 400W user manual

EcoFlow

EcoFlow 400W user manual

Panasonic HIT Power 240S Series General installation manual

Panasonic

Panasonic HIT Power 240S Series General installation manual

Sonnenkraft DBP20 manual

Sonnenkraft

Sonnenkraft DBP20 manual

DeDietrich PRO C250V Installation

DeDietrich

DeDietrich PRO C250V Installation

Giacomini R557 Instruction

Giacomini

Giacomini R557 Instruction

ACOPOWER POWERECO PE-PTK-100WPX20A manual

ACOPOWER

ACOPOWER POWERECO PE-PTK-100WPX20A manual

NexSens SP Series quick start guide

NexSens

NexSens SP Series quick start guide

Roofit.Solar ClicSeam Safety and installation manual

Roofit.Solar

Roofit.Solar ClicSeam Safety and installation manual

UNIRAC PoleTops 5001 Series installation manual

UNIRAC

UNIRAC PoleTops 5001 Series installation manual

WOLSELEY SX300 Mk II manual

WOLSELEY

WOLSELEY SX300 Mk II manual

Baintech 120W quick start guide

Baintech

Baintech 120W quick start guide

manuals.online logo
manuals.online logoBrands
  • About & Mission
  • Contact us
  • Privacy Policy
  • Terms and Conditions

Copyright 2025 Manuals.Online. All Rights Reserved.