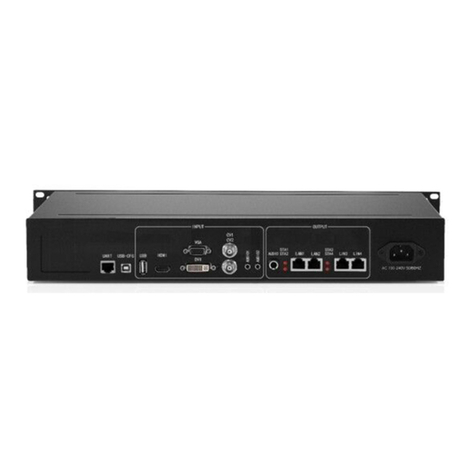
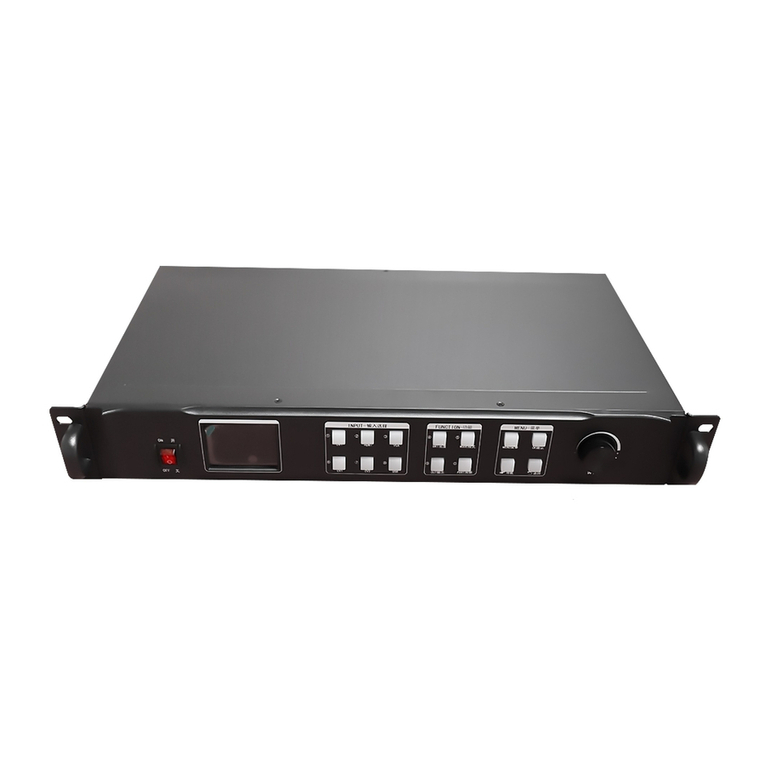
Kystar KLS8Pro User manual

KLS8Pro
Ten ports 2 in 1 video controller
Version: v1.1
Release Date: October 2021
Manual

Version record
version number
Change details
release time
V1.0
First edition released
2021.07.15
V1.1
Modify the cover
2021.10.25

Safety precautions
Danger
● There is high voltage in the equipment. Non-professional maintenance
personnel should not open the back cover to avoid danger.
Warning
● This equipment is not waterproof equipment, please do waterproof treatment in wet
environment;
● This device is not allowed to get close to fire or high temperature environment;
● If the device emits strange noise, smoke or strange smells, unplug the power plug
immediately and contact the dealer.
●It is strictly forbidden to plug and unplug the VGA, DVI, and HDMI signal
cables under power.
Attention
1 Please read this manual carefully before use ,and keep it for future;
2 this equipment is not suitable for non-professionals to operate and debug,please use under
the guidance of professionals;
3 this equipment is not suitable for non-professionals to operate and debug, please use under
the guidance of professionals;
4 Do not insert anything into the vent hole of the device to avoid damage or accidents to the
device;
5 It is not appropriate to place the device on a heat sink or other high-temperature place;
6 It is not suitable to place this equipment in near water or other damp places;
7 Please properly organize and place the power cord to prevent damage;
8 If the following conditions exist,the power plug of the device should be unplugged and
commissioned for maintenance;
●When liquid splashes into the device
●When the device is dropped or the chassis is damaged
●When the device has obvious abnormality or performance is significantly
deteriorated

Catalog
I、 PRODUCT DISCUSSION..................................................................................................................1
Ⅱ、PRODUCT CHARACTERISTICS...................................................................................................... 2
III、TECHNICAL INDICATORS.............................................................................................................. 3
IV、WORKING SKETCH..................................................................................................................... 4
V、PANEL STRUCTURE...................................................................................................................... 5
FRONT PANEL...........................................................................................................................................5
BACK PANEL............................................................................................................................................. 6
VI、WIRING AND INSTALLATION................................................................................................. 7
WIRING DIAGRAM.....................................................................................................................................7
INSTALLATION STEP...................................................................................................................................7
VII、EQUIPMENT COMMISSIONING............................................................................................8
NAVIGATION MODE.......................................................................................................................................8
EXPERT MODE........................................................................................................................................ 10
VIII、FUNCTION INTRODUCTION............................................................................................... 14
KEY FUNCTION....................................................................................................................................... 14
COMMON FUNCTIONS............................................................................................................................15
ADVANCED MENU.................................................................................................................................17
IX、SOFTWARE DEBUG................................................................................................................... 18
1、SOFTWARE CONNECT........................................................................................................................ 18
2、EXPERT DEBUG..................................................................................................................................18
3、RECEIVING CARD PARAMETER SETTINGS..............................................................................................19
4、SCREEN CONNECTION.....................................................................................................................19
5、SAVE PARAMETER..............................................................................................................................20
X、FAQ.................................................................................................................................................. 21

KLS8Pro manual www.kystar.com.cn
1
I、Product discussion
With the rapid development and application demand of LED display industry, various control
requirements for large screen control system emerge as the times require. However, due to the
limitations of the large screen control system in image processing, picture control and signal
format conversion, there are some weak links in the large screen control system of LED, which
can not meet the needs of users. The main problems are as follows:
1.The signal source access format of large LED screen control system is limited. At present,
only digital DVI signal is commonly used. Many signal sources (such as VGA) can not be
displayed directly on the large LED screen through the control system.
2.The image processing effect of traditional signal acquisition card is poor, which causes
great loss to the clarity of the picture while converting the signal format.
3.The large LED screen control system can only capture the corresponding points of the
large LED screen for display, while in some customer sites, it is necessary to display any size or
complete computer desktop screen at will.
4.The large LED screen control system can only capture the corresponding points of the
large LED screen for display, while in some customer sites, it is necessary to display any size or
complete computer desktop screen at will.
In view of the above problems, our company independently developed a number of video
processing products. The product adopts advanced control and image processing technology,
which can not only realize switching between signals quickly and steadily, but also process
multi-level pictures. In addition, the product can be controlled by keyboard and PC computer on
the device, which makes the operation simple and convenient.

KLS8Pro manual www.kystar.com.cn
2
Ⅱ、Product characteristics
Whole machine has 10 network ports, and the single network port can load 650,000 pixels.
The maximum load of the whole machine is 5 million pixels. The width can reach 8,000
pixels and the height can reach 4,000 pixels.
It supports a variety of digital signal interfaces, including 1-channel DP1.1,1-channel
hdmi1.4 and 4-channel DVI-D input source.
Support 4 windows display, screen position arbitrary layout.
All layers support matting and transparency adjustment to achieve the best results.
When switching different signals, it supports a variety of special effects, including fade in
and fade out, up and down left and right screen, oblique up and down screen drawing,
circular cut-out cut-in, diamond cut-out cut-in, comb switch.
Support signal source hot backup.
The input and output signals can be pre monitored.
Support Gigabit echo function.
EDID configuration management: support the reading, modification and customization of
EDID (extended display identification data).
Support one button black screen / static function.
Black edge removal / clipping function: solve the problem of black edge generated by
front-end signal, and cut arbitrarily for any signal source (still keep full screen state)
Support key locking to prevent misoperation.
It can adjust the brightness and contrast of the whole output screen in real time and quickly.
It can preset the timing of the device, and automatically perform the specified signal
switching or scene calling at the specified time.
Superimposed display of subtitles and pictures: subtitles and pictures that can be
superimposed in the output screen can be stored in the device, and the user can call or close
the display in real time.
K-HDR function, support SDR to HDR image optimization technology, can improve the
contrast of ordinary SDR video, enhance image detail performance, and make ordinary video
have HDR effect.

KLS8Pro manual www.kystar.com.cn
3
III、Technical indicators
The video processor adopts the latest patented video processing technology, and has the video
conversion capability of any format input and corresponding format output. Video signals
including DVI, HDMI, DP, etc. can be processed and enhanced to meet customer application
requirements. The detailed specifications are as follows:
Input port
Type
quantity
Specifications
DVI
4
Up to 1920 × 1080@60Hz
HDMI
1
HDMI 1.4 standard, up to 3840 × 2160@30Hz
DP
1
DisplayPort 1.1 standard, up to 3840 × 2160@30Hz
Output port
Type
quantity
Specifications
LAN(1~10)
10
The output port LAN port is used to transmit data to the receiving card
with maximum load of 5 million
HDMI(MONITOR)
1
Support resolution 1920 × 1080@60Hz
LAN10(IP)
1
1000m, support upper computer software echo
Control port
type
quantity
Specification
USB(Type-B )
1
USB-CFG interface is used to connect PC upper computer control
RS-232(DB-9)
1
The data transmission rates are 1200, 2400, 4800, 9600, 19200, 38400,
57600, 115200 (BT)
RJ-45
1
100m, used to connect PC upper computer control
Whole machine specification
Input power
100-240V AC~50/60Hz
working temperature
0-45℃
Dimensions
483×322×72mm(L×W×H)
Net weight
4KG
Overall Power Consumption
60W

KLS8Pro manual www.kystar.com.cn
4
IV、Working sketch
LED screen
Desktop computer laptop camera DVD

KLS8Pro manual www.kystar.com.cn
5
V、Panel Structure
Front panel
① ② ③ ④⑤ ⑥⑦ ⑧
⑨⑩ ⑪ ⑫ ⑬
1、POWER:AC 220V power switch; ON state means the power is on, OFF state means the
power is off.
2、LCD screen :Information display; displays information about the device and
commissioning.
3、ADJUST :Adjust knob;Use the knob to select the information in the color screen and
quickly adjust various parameters. Turn clockwise to decrease, clockwise to increase, press OK.
4、OK:The OK button is used to confirm debugging information.
5、MENU:Press the menu button to enter the main menu interface for device debugging.
6、INFO:Information query button; query the real-time status of the input signal.
7、WIN:Window information button; display the picture signal source of the picture and the
signal source of switching the picture.
8、S1-S6:Signal source button; the main menu interface represents the input source behind
the device, and the parameter input interface represents digital 1-5 and the back button.
9、 :Return or cancel key.
10、 :Navigation button; tap to enter navigation mode.
11、FUNC:Common function keys; click to enter the common function interface.
12 、OUT :Output selection key; the output can be selected as black screen, blue screen,
normal.

KLS8Pro manual www.kystar.com.cn
6
13、M1-M6 :M1-M6: shortcut mode call button; the main menu interface is the shortcut
mode button, and the parameter input interface indicates,Numbers 6-0 and clear key.
Back panel
○
1○
2○
3○
4○
5○
6○
7○
8○
9○
10 ○
11 ○
12
1、USB-CFG --------------Connect the host computer software through the USB port
2、DVI-1----------------------------DVI signal input interface such as desktop computer
3、DVI-3----------------------------DVI signal input interface such as desktop computer
4、DVI-2----------------------------DVI signal input interface such as desktop computer
5、DVI-4---------------------------DVI signal input interface such as desktop computer
6、DP-----------------------------------------------------------------DP signal input interface
7、HDMI-----------------------------------------------HDMI input interface such as laptop
8、HDMI-Monitor--------------------------------------------------------------HDMI monitor
9、LAN10-------------------------------Gigabit echo/network port output with screen
10、LAN1-4----------------------------------------------------------------Network port output
11、LAN5-8----------------------------------------------------------------Network port output
12、
Power supply--------------------------------------------------------------220V power port

KLS8Pro manual www.kystar.com.cn
7
VI、Wiring and installation
Wiring diagram
Installation step
1、Wiring as shown in the picture, connect the DVI port of the graphics card to the DVI-IN
input port of the 2-in-1 controller;
2、Then connect the wires as shown in the figure, connect the computer to the USB-CFG
control port of the device through the USB control cable, and connect the output network port of
the two-in-one controller to the receiving card;
3、After making sure that the wiring is correct, power on and open the gold card debugging
software. The software can correctly identify the model of the sending card and the number of
receiving cards, and the debugging can be done normally.
Signal source
LED screen
Power cable
Lan cable
USB control cable
Monitor

KLS8Pro manual www.kystar.com.cn
8
VII、Equipment commissioning
Navigation mode
This Wizard is suitable for most cases. It is simple to set up. With the prompt, you can
gradually debug it to achieve the desired display effect. The processor automatically enters the
navigation mode when it is powered up.(or Click Enter Navigation Mode):
Click "Basic Settings" to enter the screen parameter setting interface:
Set the screen parameters, set the horizontal size and vertical size as the actual number of LED
screen resolution, click "OK" to complete the parameter settings
Note: You can directly enter by click the number keys, or set parameters through the knob, and
select the step size through the finger keys
Navigation mode, select "Multi-screen settings", click OK to enter

KLS8Pro manual www.kystar.com.cn
9
Select window layout (Layout1/Layout2/Layout3/Layout4)
Select the win signal source, and use the knob to select the signal source input
Set window parameters

KLS8Pro manual www.kystar.com.cn
10
Save mode, mode 1 - mode 32
Expert mode
Step 1: Click "MENU" to enter the main menu interface, select "Device Mode", there are two
modes: 4*DVI+DP(2K)+HDMI(2K) and 2*DVI+DP(4K)+HDMI(4K)
Note; only DVI1 and DVI2 are available in 4K mode
Step 2: Set the screen parameters, the horizontal size and vertical size in the screen parameters are
set to the number of points of the LED screen

KLS8Pro manual www.kystar.com.cn
11
Note: There are two ways to enter numbers:
(1)Adjust by rotating the knob, and adjust the step size by "×1", "×10" and "×100", for
example, "×100" means that the number increases by 100 each time the knob is rotated.
(2)through the front panel number keys, for example, the number on
the key represents the number 1 .
Step 3: set the screen layout, optional layout 1/layout 2/layout 3/layout 4, select the corresponding
screen layout according to the customer's project requirements
Note: This step can be skipped for single screen, as long as the number of screens is consistent with the
project requirements for multi-screen, the inconsistent layout can be set by the following operations.
Step 4: Click "OK" to return to the main menu interface, select "Screen Parameters", enter
the image parameter setting interface, and set the size and position of each screen.
S1

KLS8Pro manual www.kystar.com.cn
12
Step 5: Click "MENU" to return to the main menu interface, enter Menu - More - Common
Functions - Partial Display, enter the part display setting interface, and set the size and position of
the partial interception of each signal source.
Note: Skip this step if the signal source picture needs to be completely displayed on the large screen; if you
only need to capture a certain signal source in the multi-picture, you only need to set the picture of the signal
source; horizontal size or vertical size A value of 0 indicates that no local interception is performed in this
direction.
Step 6: Click "MENU" to return to the main menu interface, select "Save Settings", enter the
data saving interface, select any mode and click "OK" to save the above operation data.

KLS8Pro manual www.kystar.com.cn
13
M1
⑥
M5
○
0
M6
○
c
M4
⑨
M3
⑧
M2
⑦
Note: Mode 1 is the data that is started by default when the device is powered on. It is recommended that the
most commonly used or the mode that needs to be displayed when booting is saved to Mode 1.
At this point, the basic debugging of the equipment is completed. If there are other
requirements, repeat the operation and save it to other modes.
After the equipment is debugged, the saved data can be called according to different
scenarios in later use.
There are two types of mode calls:
(1)To call through the shortcut keys, just click the front panel keys "M1-M6", this method
is convenient to use when there are few mode scenes.
(2)Called via user mode within the main menu. Click "MENU" and select "User Mode" to
enter the user mode calling interface. Select the desired mode and click "OK".
Thank you again for using our company's video processor. Please refer to the following sections
for other detailed settings.

KLS8Pro manual www.kystar.com.cn
14
INFO-Signal status
WIN
WIN 1
S1
WIN 2
S1
WIN 3
S1
VIII、function introduction
Key Function
INFO: Information query button, click this button to enter the input information query
interface, showing whether the input of each signal source is normal, the interface is as follows,
red means the signal is lost, green means the signal is normal.
WIN: window button, click this button to enter the window information interface, and you
can select the signal source for each window under this interface. The following takes 3 windows
as an example, click the "WIN" button to enter the screen switching interface, and display the
current signal sources of the three windows respectively. S1-S6" to switch.
OUT: Output status button, click this button to enter the output status interface, there are
three output options: black screen, blue screen, normal. Selecting black screen means that all
output ports will output black image, and the large screen will turn black; if selecting blue screen,
all output ports will output blue image, and the large screen will turn blue; selecting normal, the

KLS8Pro manual www.kystar.com.cn
15
Output status
Black
Blue
Norma
Display black screen
image will be output normally.
FUNC: function button, click this button to enter the common function interface. Common functions include:
screen brightness, processor brightness, local global, local settings, switching effects, switching time, cutout
settings, transparency settings, intelligent hot backup, OSD settings, EDID, multi-level cascade, still picture,
preview settings , K-HDR.
Common Functions
1、Sending card Brightness
Adjust the brightness of the device sending card, 0-255 levels brightness adjustment.
2、Processor brightness
The device supports 0-255-level brightness adjustment, and the brightness of all screens is adjusted synchronously to meet the
brightness of users in different scenarios.
3、Part-full
Switch the display state of the screen to global display or partial display. Before operation, you need to set the data of partial
display to view the partial display effect.
4、zoom settings
Set the local display for the selected screen, take the upper left corner of each input source image as the (0,0) starting point,
and set the four parameters of the horizontal position, vertical position, horizontal size, and vertical size of the local interception
for the specified position interception. The default data is 0, which means no local interception is performed.
5、switch effect
The device supports 16 kinds of special effects switching, including: fade in and fade out, seamless straight cut, vertical and
horizontal combing, circular cut in, cut out, diamond cut in, cut out, swipe in all directions, to meet the user's scene switching for
different applications need.

KLS8Pro manual www.kystar.com.cn
16
6、effect time
Set the screen switching time or the switching time between modes, adjustable from 0.2s to 3s.
7、Cutout Settings
The cutout setting is to cut out some text or pictures and remove the rest, which is often used for subtitle production.
For example, input red characters with black as background, after setting the cutout, the black background will disappear, leaving
only the red subtitles above.
8、Transparency settings
This product can adjust the transparency of the picture, and can even achieve point-by-point adjustment, making the
application scene more colorful.
9、Intelligent hot backup
The user can specify a backup signal for the source. If the current signal fails, the system will automatically detect it and call it
immediately,Its backup signal, if the signal returns to normal, the system can intelligently call back the original signal. Applying this
function to build a parallel system can
Effectively guarantee the reliability of the site.
10、OSD set
The device can superimpose graphics and subtitles, use software to set up, and hardware can be turned on and off.
11、EDID
Set the EDID information for the input interface to perfectly connect to the specific resolution source. This function is often
used in scenarios where the computer outputs a custom resolution.
12、Multi-level cascade
It is used for cascading splicing of equipment, which solves the problem of asynchronous, and needs to use a synchronous
signal source
13、Freeze
Set the stillness or activity of any screen, often used in field changes or background switching, etc.
14、Preview settings
There are three device monitoring methods: input monitoring, output monitoring, and input and output monitoring.
Preview input channel: monitor all input signal sources;
Preview output channel: monitor all output contents;
Preview input and output: monitor the input signal and output content, that is, the large-screen display.
15、K-HDR
Table of contents
Other Kystar Controllers manuals