manuals.online logo
Brands
  1. Home
  2. •
  3. Brands
  4. •
  5. L.L.Bean
  6. •
  7. Outdoor Furnishing
  8. •
  9. L.L.Bean ADIRONDACK BENCH User manual

L.L.Bean ADIRONDACK BENCH User manual

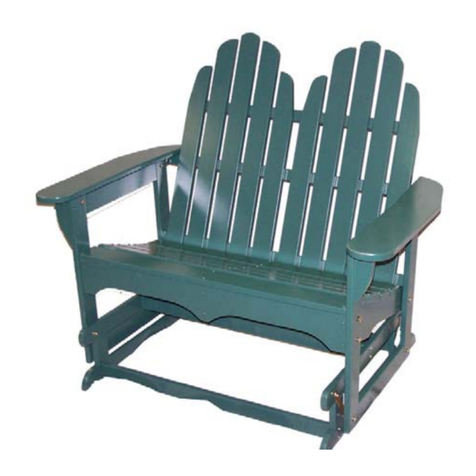
ADIRONDACK BENCH
Thank you for purchasing our Adirondack Bench. Assembly of this
product requires a 7/16" wrench or adjustable wrench. Having
someone assist you by holding parts in place during installation
will make the process easier.
8250 0MLS6120713
STEP 1
Read through these instructions
thoroughly. We have found this to be of
great value when first assembling this
product.
STEP 2
Remove all parts and hardware from
packing material. Place wooden parts on
non-abrasive surface (like carpet or
carton) to prevent damage to finish.
Identify all parts using diagram at right.
STEP 3
Identify and count hardware using
diagram at right.
Assembly of this product requires a
Phillips screwdriver and a hammer. We
have found it helpful to have a second
person assist with assembly.
Note: we have included an Allen
Wrench to aid in tightening the Joint
Connectors.
STEP 4
Attach the Front Leg Assembly (B) to
the Seat Assembly(A) using two 1/4" x
20 x2" Joint Connectors, two 1/4"
washers and two lock nuts for each side.
Ensure that the cross bar of the front leg
assembly (A) faces the front of the chair
as shown. Insert the Joint Connector
through the Front Leg Assembly (B) and
into the Seat Assembly (A). Place
washer on end of Joint Connector and
finish with lock nut. Repeat for other
side. Note: Do NOT tighten joint
connectors completely.
STEP 5
Attach the Back Leg (C) using one 1/4" x
20 x2" Joint Connector, one 1/4"
washer and one lock nut for each side.
Insert the Joint Connector through the
Back Leg (C) and into the Seat
Assembly (A). Place washer on end of
Joint Connector and finish with lock nut.
Repeat for other side.
Note: Do NOT tighten joint
connectors completely.
STEP 6
Attach the Right Arm Assembly (D) to
the top of the Front Leg Assembly (B)
using one 1/4" x20 x2" Joint
Connector, one washer and one lock nut.
Insert the Joint Connector through the
pre-drilled hole in the Front Leg
Assembly (B), through the pre-drilled
hole in the Right Arm Assembly (D)
before putting on the washer and the
lock nut. Repeat the same procedure for
attaching the Back Leg (C) to the Right
Arm Assembly (D). Note: Do NOT
tighten joint connectors completely.
Repeat the above steps to attach the Left
Arm Assembly (E).
STEP 7
Attach Back Assembly (F) to Seat
Assembly (A) by inserting two 2-1/2”
Lag Bolts with washers through the
holes in Back Legs (C), then tighten into
the Bottom Cleat of the Back Assembly.
Insert two 1-3/4” Lag Bolts with
washers through the predrilled holes in
the arm cleats, then into the predrilled
holes of the middle back cleat of Back
Assembly (F). Insert one 1” Lag Bolt
with washer through the hole in the
center hole of the lower back cleat in
Back Assembly (F) and into the center
seat support.
STEP 8
Tighten all Joint Connectors and Lag
bolts completely.
CARE
Thank you for choosing our classic L.L.Bean
Adirondack furniture. The natural,finished
furniture is made of solid oak and finished
with a wood preservative. This oak
hardwood will gray slightly as it ages.
Painted furniture is made of maple hardwood
and finished with a rugged weather-resistant
acrylic paint. All of our Adirondack
Furniture is made in the United States.
Recommendations for extending the life of
your furniture:
•During inclement weather and off-
season, bring furniture indoors or
use a furniture cover.
•Over time, wood exposed to the
ground will absorb moisture, which
may cause rot. If you use this chair
on a lawn, occasionally move it to
a dry surface (patio or deck) to
allow the legs to dry out.
•A deck, porch, or patio is the best
location for your furniture.
•To clean, wipe accumulated dirt
with a solution of warmsoapy
water and a soft cloth; rinse
thoroughly with clean water.
Over time your Adirondack furniture will need
refinishing. We recommend the following:
•Lightly sand each piece with a fine grade of
sandpaper before applying paint or finish.
You do not have to sand down to bare
wood.
•On painted furniture apply a primer first.
Finish with an outdoor weather-resistant
acrylic paint. The original paint color can
be matched at your local hardware or paint
store.
•If you have solid oak furniture, sand and
finish with any high-grade wood
preservative.
www.llbean.com
Product Support 1 800 341 4341

Other L.L.Bean Outdoor Furnishing manuals

L.L.Bean 269699 User manual

L.L.Bean

L.L.Bean 269699 User manual

L.L.Bean 514494 User manual

L.L.Bean

L.L.Bean 514494 User manual

L.L.Bean All-Weather Lounger Adirondack Chair User manual

L.L.Bean

L.L.Bean All-Weather Lounger Adirondack Chair User manual

L.L.Bean 281386 User manual

L.L.Bean

L.L.Bean 281386 User manual

L.L.Bean ADIRONDACK GLIDER User manual

L.L.Bean

L.L.Bean ADIRONDACK GLIDER User manual

Popular Outdoor Furnishing manuals by other brands

Weltevree Bended table 180 product manual

Weltevree

Weltevree Bended table 180 product manual

LIVARNO Z30559 Assembly and Safety Advice

LIVARNO

LIVARNO Z30559 Assembly and Safety Advice

Palram Applications Palermo 3600 manual

Palram Applications

Palram Applications Palermo 3600 manual

Hanover Traditions TRADDN9PCOV-SU-T manual

Hanover

Hanover Traditions TRADDN9PCOV-SU-T manual

CASARIA Maxima 101637 instructions

CASARIA

CASARIA Maxima 101637 instructions

AuthenTeak Kingsley-Bate Essex TR114 Assembly instructions

AuthenTeak

AuthenTeak Kingsley-Bate Essex TR114 Assembly instructions

BCP SKY6611 instruction manual

BCP

BCP SKY6611 instruction manual

Outsunny A20-075 manual

Outsunny

Outsunny A20-075 manual

BE 014-HG-17010 manual

BE

BE 014-HG-17010 manual

Shade N' Shelters Chesterfield owner's manual

Shade N' Shelters

Shade N' Shelters Chesterfield owner's manual

Forever Redwood THE SILVERADO MODERN PERGOLA Assembly instructions

Forever Redwood

Forever Redwood THE SILVERADO MODERN PERGOLA Assembly instructions

Forever Redwood ST. ANTHONY'S FACE TO FACE GLIDERS Assembly instructions

Forever Redwood

Forever Redwood ST. ANTHONY'S FACE TO FACE GLIDERS Assembly instructions

Hartman Amalfi 60903062 Assembly instructions

Hartman

Hartman Amalfi 60903062 Assembly instructions

Taipeng TPPER94033 installation guide

Taipeng

Taipeng TPPER94033 installation guide

Weka B607.003 ASSEMBLY, USER AND MAINTENANCE INSTRUCTIONS

Weka

Weka B607.003 ASSEMBLY, USER AND MAINTENANCE INSTRUCTIONS

Forever Redwood DIY Wood Gazebo Assembly instructions

Forever Redwood

Forever Redwood DIY Wood Gazebo Assembly instructions

MyOUTDOORKITCHEN HUI-SSA20-V Assembly and operating manual

MyOUTDOORKITCHEN

MyOUTDOORKITCHEN HUI-SSA20-V Assembly and operating manual

palmiye Skyroof Plus installation manual

palmiye

palmiye Skyroof Plus installation manual

manuals.online logo
manuals.online logoBrands
  • About & Mission
  • Contact us
  • Privacy Policy
  • Terms and Conditions

Copyright 2025 Manuals.Online. All Rights Reserved.