Labrie MINIMAX User manual

MINIMAXTM
MAINTENANCE MANUAL


MINIMAX™
MAINTENANCE MANUAL

Liability
Labrie Enviroquip Group assumes no liability for any incidental, consequential, or other liability that
might result from the use of the information contained in this document.
All risks and damages, incidental or otherwise, arising from the use or misuse of the information
contained herein are entirely the responsibility of the user.
Although careful precaution has been taken in the preparation of this document, Labrie Enviroquip
Group assumes no responsibility for errors or omissions.
January 2021

Liability ........................................................................................ ii
Table of Contents ........................................................................ iii
Introduction ................................................................................ 1
About This Manual ........................................................................................................................................................................... 1
Topics Not Included in This Manual .................................................................................................................................... 1
About the Illustrations in this Manual ................................................................................................................................ 1
Schematics ................................................................................................................................................................................... 1
Warranty Registration Form .......................................................................................................................................................... 2
Introducing the MINIMAX™ ............................................................................................................................................................. 2
Product Overview ...................................................................................................................................................................... 2
Multiplexed System .................................................................................................................................................................. 3
Service and Maintenance on the MINIMAX™ ............................................................................................................................ 3
Parts ................................................................................................................................................................................................ 3
Warning ......................................................................................................................................................................................... 3
MINIMAX™ Basic Maintenance ................................................................................................................................................ 4
Visual Inspection ........................................................................................................................................................................ 5
Office Addresses and Phone Numbers ..................................................................................................................................... 6
In the U.S. ...................................................................................................................................................................................... 6
In Canada ...................................................................................................................................................................................... 6
Safety ........................................................................................... 7
Conventions ....................................................................................................................................................................................... 7
Basic Safety Notions ........................................................................................................................................................................ 7
Responsibilities .................................................................................................................................................................................. 8
Employer’s Responsibilities ................................................................................................................................................... 8
Employee’s Responsibilities ................................................................................................................................................... 9
Things to Do ....................................................................................................................................................................................... 9
Things to Avoid ................................................................................................................................................................................. 9
General Precautions ...................................................................................................................................................................... 10
Welding ............................................................................................................................................................................................. 12
Fire ...................................................................................................................................................................................................... 12
Safety Kits ......................................................................................................................................................................................... 13
Safety Features ............................................................................................................................................................................... 13
Global Motion Sensors (Optional) .................................................................................................................................... 13
Back Up Alarm ......................................................................................................................................................................... 13
Tailgate Safety Prop ............................................................................................................................................................... 13
Camera System (optional) ................................................................................................................................................... 16
Tailgate Holding Valve .......................................................................................................................................................... 18
Prior to Start Up .............................................................................................................................................................................. 18
Locking Out and Tagging Out the Vehicle ............................................................................................................................ 20
Shutting Down the Vehicle ........................................................................................................................................................ 21
General Maintenance ................................................................ 23
Cleanliness ....................................................................................................................................................................................... 23
Preventive Maintenance Chart ................................................................................................................................................. 24
Packer ................................................................................................................................................................................................. 26
Preparing for Packer Inspection ........................................................................................................................................ 27
Inspecting the Packer ............................................................................................................................................................ 28
Replacing the Packer Cylinder ........................................................................................................................................... 29
Table of Contents

iv Table of Contents
Removing the Packer ............................................................................................................................................................. 34
Replacing Packer Wear Plates ............................................................................................................................................. 37
Reinstalling the Packer .......................................................................................................................................................... 39
Packer Roller Assemblies ............................................................................................................................................................. 41
Replacing Packer Roller Assemblies ................................................................................................................................. 41
Replacing Rollers ..................................................................................................................................................................... 43
Tailgate ............................................................................................................................................................................................... 45
Proximity and Limit Switches .................................................................................................................................................... 46
Limit Switch Adjustment ...................................................................................................................................................... 47
Proximity Switch Adjustment ............................................................................................................................................. 47
Adjusting Packer Extend Proximity Switch .................................................................................................................... 48
Adjusting Packer Retract Limit Switch ............................................................................................................................ 52
Adjusting Tailgate Unlocked Proximity Switch ............................................................................................................ 53
Adjusting Tailgate Fully Open Proximity Switch ......................................................................................................... 55
Adjusting Left-Hand Side Hopper Door Limit Switch (optional) ........................................................................... 56
Adjusting Crusher Panel Up Limit/Proximity Switch ................................................................................................. 58
Adjusting Fully Open Upper Door Limit Switch .......................................................................................................... 60
Adjusting Fully Closed Upper Door Limit Switch (optional) ................................................................................... 61
Adjusting Arm Stowed Limit Switch ................................................................................................................................ 62
Adjusting Arm Parked Limit Switch ................................................................................................................................. 64
Adjusting Mid-Height Limit Switch .................................................................................................................................. 66
Painting and Finishing ................................................................................................................................................................. 68
Lubrication ................................................................................ 69
Recommended Lubricants ......................................................................................................................................................... 69
Grease ......................................................................................................................................................................................... 69
Hydraulic Oil ............................................................................................................................................................................. 69
Engine Oil ................................................................................................................................................................................... 70
Transmission Oil ...................................................................................................................................................................... 70
Testing Hydraulic Oil ..................................................................................................................................................................... 71
Hydraulic Oil Sample Preparation ..................................................................................................................................... 71
Taking an Oil Sample ............................................................................................................................................................. 72
Lubrication Charts ......................................................................................................................................................................... 74
Greasing the Optional Crusher Panel ..................................................................................................................................... 77
Tailgate ............................................................................................................................................................................................... 78
Greasing Tailgate Hinges, Locking Mechanism and Cylinder Pins ....................................................................... 78
Packer ................................................................................................................................................................................................. 80
Cylinder Pins ............................................................................................................................................................................. 80
Follower Panel Rollers ........................................................................................................................................................... 81
Hopper Door Hinges ..................................................................................................................................................................... 82
Sump Box .......................................................................................................................................................................................... 83
Hydraulic System ....................................................................... 85
General Maintenance ................................................................................................................................................................... 85
Inspecting Hydraulic Oil ....................................................................................................................................................... 86
Introducing the Dual Vane Pump ............................................................................................................................................. 87
Body Control Valve ................................................................................................................................................................. 88
Arm Control Valve ................................................................................................................................................................... 89
Inspecting the Pump .................................................................................................................................................................... 90
Pump Replacement ....................................................................................................................................................................... 91
Installing a Yoke-Locking Bolt ................................................................................................................................................ 103
Priming a New Pump ................................................................................................................................................................. 104
Inspecting the Hydraulic Tank ................................................................................................................................................ 105
Hydraulic Pressures .................................................................................................................................................................... 107
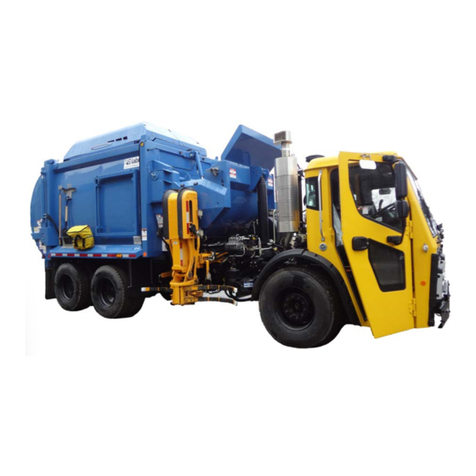
Table of Contents v
Adjusting the Utility Section (Electric-Hydraulic Valve) .......................................................................................... 107
Adjusting Pressure on the Proportional Valve ........................................................................................................... 109
Adjusting Gripper Pressures ............................................................................................................................................. 111
Adjusting Pressures on Cart Tipper Valve (if installed) ........................................................................................... 114
Emptying the Hydraulic Tank .................................................................................................................................................. 115
Replacing Hydraulic Oil ............................................................................................................................................................. 116
Cleaning the Strainer ................................................................................................................................................................. 117
Replacing Filter Elements ......................................................................................................................................................... 120
Hydraulic Cylinders ..................................................................................................................................................................... 121
Inspecting Hydraulic Cylinders ........................................................................................................................................ 121
Detecting Cylinder Internal Leaks .................................................................................................................................. 122
Main Hydraulic Schematic ........................................................................................................................................................ 124
Electrical System ..................................................................... 127
Electrical Schematics .................................................................................................................................................................. 127
How the Electrical System Works ........................................................................................................................................... 127
Adjusting and Repairing Electrical Components ............................................................................................................. 129
Fuses and Circuit Breakers ................................................................................................................................................. 129
Limit and Proximity Switches ........................................................................................................................................... 131
Multiplex System-Related Interventions ............................................................................................................................. 132
IFM Program Update Process ........................................................................................................................................... 132
Checking Control Module (Node) Supply Voltage ................................................................................................... 133
Electrical Schematics .................................................................................................................................................................. 135
Cab Adaptation ..................................................................................................................................................................... 135
Cab Console & Controls ...................................................................................................................................................... 136
Cab Controller ........................................................................................................................................................................ 137
Chassis ...................................................................................................................................................................................... 138
Body Module (rear side) ..................................................................................................................................................... 139
Body Module (front side) ................................................................................................................................................... 140
Tailgate Lighting ................................................................................................................................................................... 141
Panic Bars, Crusher Panel, Tipper Interlocks ............................................................................................................... 142
Cameras, Switchpack Details & Interlocks ................................................................................................................... 143
Pneumatic System ................................................................... 145
Air Dryer .......................................................................................................................................................................................... 146
Troubleshooting ...................................................................... 147
Tools ................................................................................................................................................................................................. 147
Troubleshooting Guide ............................................................................................................................................................. 149
Pump ................................................................................................................................................................................................ 153
Pump Cavitation ................................................................................................................................................................... 153
Tailgate-Locking Mechanism .................................................................................................................................................. 154
Tailgate Unlocking Spontaneously ................................................................................................................................ 156
Tailgate Lowering Spontaneously .................................................................................................................................. 157
“PUMP: Trans Not OK” ................................................................................................................................................................. 158
Troubleshooting Harnesses ..................................................................................................................................................... 163
Multiplexing ............................................................................ 167
Labrie’s Multiplexed System .................................................................................................................................................... 167
Main Page ................................................................................................................................................................................ 168
Main Menu .............................................................................................................................................................................. 175
Warning Buzzer ..................................................................................................................................................................... 185
Plugging a Computer .......................................................................................................................................................... 186
Replacing the CAN Bus-Based Multiplex Joystick ..................................................................................................... 186

vi Table of Contents
Allison Transmission Parameters ........................................................................................................................................... 187
Programmed Parameters .................................................................................................................................................. 188
Cummins Engine Parameters ................................................................................................................................................. 189
Lifting Arm ............................................................................... 191
Daily Inspection ........................................................................................................................................................................... 191
Gripper Auto-Closing System ................................................................................................................................................. 194
Inspecting the Auto-Closing System ............................................................................................................................ 195
Auto-Packing ................................................................................................................................................................................ 195
Adjusting Gripper Adjustment Rod ............................................................................................................................... 196
Bleeding Air Out of the Lifting Arm Hydraulic Circuit ................................................................................................... 197
Cylinder Cushion Adjustment ................................................................................................................................................ 199
Adjusting Arm Speed ................................................................................................................................................................ 200

1Introduction
About This Manual
This manual contains information regarding the
correct maintenance of your MINIMAX™ side loader.
Maintenance personnel should read and understand
this information before doing repairs and maintenance
on the vehicle. For information on how to safely and
efficiently operate the MINIMAX™, please refer to the
related Operator’s Manual that is provided with your
unit.
Topics Not Included in This Manual
Maintenance of the chassis
This is dealt with in the chassis manufacturer’s service
manual.
Cameras and backing-accident prevention systems
For these options, refer to the appropriate
manufacturer’s service manual.
Operating the MINIMAX™
For procedures related to the operation of the
MINIMAX™, please refer to the MINIMAX™ Operator’s
Manual. (A copy of this manual is provided with the
truck.)
Parts and assemblies
For parts and assemblies that make up the MINIMAX™,
and for their respective part number for ordering
purposes, please refer to the MINIMAX™ Parts Manual.
About the Illustrations in this Manual
Because Labrie Enviroquip Group is constantly
updating its products, illustrations used in this manual
may differ from those of the actual product and
accessories, depending on the model or options that
come with your vehicle.
Schematics
For schematics related to body parts, refer to the
MINIMAX™ Parts Manual;

2Introduction
For electrical schematics, refer to the schematics provided with your MINIMAX™ unit;
As for pneumatic and hydraulic schematics for your MINIMAX™ unit, copies are available from
LabriePlus Service Department.
NOTE:A number of system schematics are included in this manual.
Warranty Registration Form
Do not forget to complete the owner registration form and to send it to Labrie Enviroquip Group.
Make sure to fill out the in-service date. This date will be used as the start date of the warranty period.
If the in-service date is not indicated, the warranty period will start 30 days after the delivery date.
Introducing the MINIMAX™
The MINIMAX™ is a side-loading refuse truck to be operated by only one person. It is designed
primarily for the automatic collection of garbage carts with the use of a joystick-controlled Helping
HandTM arm. The lifting capacity of this arm is 450 lbs at a maximum reach of 60 inches. On some
units, a tipper may also be installed. Manual pickup of garbage bags or cans is also possible with the
MINIMAX™.
Product Overview
On most MINIMAX™ units, a Helping HandTM arm is installed on the right-hand side of the body. This
arm has “close grab” capability, allowing the operator to pick up a cart within 12 inches from the side
of the vehicle with no “swing out” movement.
The MINIMAX™ is equipped with an 18-inch packer which pushes refuse that has been dumped in the
hopper into the waste body. The packer is also used to unload the body through the tailgate opening.
This feature is called the “Auto-Eject Mode”.
The standard packer cycle time is 12 seconds at 1200 RPM.
The MINIMAX™ may also be equipped with a full-size crusher panel (optional). It also features a
hinged door on the left-hand side and 1 or 2 hinged doors on the right-hand side (2 doors if an
automated arm is installed).
The MINIMAX™ is primarily designed to be operated by only one worker. If, however, the end-user
chooses to operate the arm-equipped MINIMAX™ with more than one worker, they shall advise Labrie
Enviroquip Group of this situation. Labrie will then determine and supply, at the customer’s expense,
the safety items that are required in such a case.
For more information on this, please contact LabriePlus (see page 6).
Danger! Failure to contact Labrie Enviroquip Group to report a situation where a unit is operated by
more than one worker at a time may result in unit and/or property damage, personal injury
or even death.

Introduction 3
Multiplexed System
All MINIMAX™ vehicles are equipped with an electronic monitoring system called the multiplexed
system.
The multiplexed system used by Labrie is a CAN-based system that integrates a monitor, a control
panel and three electronic controllers. This whole system has been designed to help you operate your
unit in an efficient and easy way.
NOTE:Maintenance personnel as well as in-the-field technicians who encounter any problems with
the multiplexed system should refer to the Multiplex Diagnostic Manual (part# 153145-01) for
troubleshooting information and guidelines.
Service and Maintenance on the MINIMAX™
Maintenance on the MINIMAX™ is of paramount importance to ensure long-lasting durability of all its
moving parts as well as optimum performance in heavy work. Maintenance has to be done on almost
every system involved in the operation of the MINIMAX™, such as the hydraulic, electrical and
mechanical systems. Some parts are subjected to more wear and tear than others. Therefore, these
parts need regular maintenance and routine check-up to prevent signs of deterioration as soon as
possible.
NOTE:Any time you have a problem with a Labrie unit, you should contact your Labrie authorized
dealer first. They should be able to provide you with the proper help that you need, whether it
is for parts or technical service.
In this manual you will find the most common maintenance and inspection procedures required for
the MINIMAX™.
Parts
Labrie refuse vehicle parts are offered exclusively through LabriePlus and LabriePlus authorized
dealers. The quality and reliability of Labrie parts are second to none in the industry.
Warning
Your MINIMAX™ unit MUST BE COMPLETELY LUBRICATED before its first use. Refer to the
lube chart near the hopper on the curbside to know where the lubrication points are located on the
vehicle and how often the parts should be lubricated.
Initial lubrication carried out by Labrie Enviroquip Group is sufficient for production and transport
purposes ONLY.
With your safety in mind, we would like to remind you that ONLY QUALIFIED MECHANICS
should service the hydraulic, electrical, and pneumatic systems on your side loader. In addition, they
should also be fully knowledgeable in the operation of this unit. Please read the Operator Manual
prior to attempting any maintenance work on your MINIMAX™ unit.

4Introduction
MINIMAX™ Basic Maintenance
MINIMAX™ refuse bodies require routine maintenance to ensure product longevity as well as
dependability. Various components have specific needs. A detailed portion of these items is listed
below:
1) Packing System
One of the most commonly overlooked wear items involves the packing system.
Many parts of the packing system have a life which requires proper maintenance. Improperly
maintained packers can result in, but are not limited to: holes worn in the floor liner and/or floor
itself, binding of the packing assembly due to uneven wear against the hopper side walls, etc.
2) Lubrication
Your MINIMAX™ unit MUST BE COMPLETELY LUBRICATED before its first use.
All moving parts require lubrication for continued operation, longevity and dependability.
Maintenance intervals should be adjusted according to the truck’s route or duty cycle. Proper
greasing ensures the maximum life from the moving parts as it flushes out water and contaminants
from the joint.
When greasing it is important to understand that providing the proper amount of grease is a delicate
balance between over greasing, which can result in seal damage as well as wasted lubricant. Only
pump enough grease until the air purges from the joint. Commonly, a “popping” sound can be heard
as the old grease begins to evacuate the seal. Equally important is to remove the excess grease from
the component you are maintaining. Leaving the excess grease will attract dirt and contaminants
which could work themselves into the joint causing potential future issues.
3) Lifting Arm
Next to the packer, the lifting arm on an Automated Side Loader is the piece of equipment with the
most amount of movements throughout the course of a route. Due to this, the arm has the shortest
service interval and requires the most attention.
For the HELPING-HAND™ arm lubrication chart, see Figure 4-10. For maintenance of the arm, see
Lifting Arm on page 191.
4) Body
The body contains grease fittings for every operating cylinder as well as all linkages.
Without proper lubrication and maintenance, these parts can become seized, galled, and/or break
resulting in equipment damage or injury.
For the MINIMAX™ lubrication chart, see Figure 4-9. For maintenance of the body and its equipment
(such as cylinders, packer and tailgate), see General Maintenance on page 23.
5) Hydraulic Fluid and Filter
Hydraulic fluid is the lifeblood of the MINIMAX™ refuse body. Regular maintenance of the hydraulics
will ensure long, trouble-free life.
As directed in all service training, the hydraulic filter needs to be replaced after the initial 50 hours of
new truck operation and then again every 6 months, or when the filter restriction gauge is in the
yellow. The hydraulic fluid needs to be replaced once a year along with the suction screen being
removed, inspected, cleaned and/or replaced.

Introduction 5
Visual Inspection
1) Hardware
Hardware needs to be verified that it is present and tight. Loose or missing hardware can cause severe
equipment damage and/or unsafe operational conditions.
2) Proximity and Limit Switches
Proximity and limit switches are used to limit travel of moving parts and/or to ensure conditions are
safe for operation.
If these switches are not adjusted properly, damage to the equipment may occur as well as poor or
dangerous functionality.
3) Leaks
Verify that there are not any leaking hydraulic cylinders, hoses, tubes, valves, or pumps. Leaks in the
hydraulic system are an indicator of possibly overheating hydraulics, damage to a seal, over-
pressurization, or general wear. To avoid costly and premature replacement of parts, ensure all leaks
are addressed properly and timely.
4) Cracks
Ensure that there are not any cracks forming along the hopper floor edge, body, tailgate, crusher panel
(optional) and arm. This is an indicator that something is worn, not adjusted properly or damaged.
5) Bushings/Bearings
Check for play in any bushing or bearing. This may require the use of a pry bar or lifting equipment.

6Introduction
Office Addresses and Phone Numbers
In the U.S.
Address: 1198 Shattuck Industrial Blvd.
LaFayette, GA 30728
Toll Free: 1-800-231-2771
Telephone: 1-706-591-8764
General Fax: 1-706-639-9275
Oshkosh General Fax: 1-706-591-8766
Parts and warranty: During business hours, 8:00 AM to 6:00 PM Eastern Standard Time
Technical Support Service: Available 24 hours
In Canada
Address: 175A Route Marie-Victorin
Levis, QC G7A 2T3
Toll Free: 1-877-831-8250
Telephone: 1-418-831-8250
Service Fax: 1-418-831-1673
Parts Fax: 1-418-831-7561
Parts and warranty: During business hours, 8:00 AM to 5:00 PM Eastern Standard Time
Technical Support Service: Available 24 hours
Website: www.labriegroup.com
E-mail: sales@labriegroup.com
IMPORTANT:For technical support and parts ordering, the serial number of your vehicle is required. Therefore,
Labrie Enviroquip Group recommends to keep record of the information found on the VIN plate,
which is located in the cab.

2Safety
Safety is always of prime importance when servicing
any type of equipment. All maintenance personnel
working on the MINIMAX™ side-loader garbage truck
must be aware of the safety practices and features
detailed in this chapter.
Conventions
Basic Safety Notions
The following safety notions are related to the use of
the MINIMAX™. It is important to point out that the
safe use of the vehicle remains the user’s responsibility.
He must heed all safety messages in this manual and on
the decals affixed to the vehicle.
Danger! Indicates a hazardous situation which, if
not avoided, will result in serious injury or
death.
Warning! Indicates a hazardous situation which, if
not avoided, could result in serious injury
or death.
Caution! Indicates a hazardous situation which, if
not avoided, could result in minor or
moderate injury.
Danger! Always be aware of the vehicle’s
surroundings to make sure that no
pedestrians, passersby, bystanders, or
other people or vehicles are in any way
exposed to any danger caused by the
use of the MINIMAX™.

8Safety
Responsibilities
Safety is everybody’s responsibility. Both employer and employee must play their part to ensure the
safety of the operator, the vehicle and its immediate surroundings.
Employer’s Responsibilities
It is the responsibility of the employer:
To ensure that the MINIMAX™ is operated in accordance with all applicable regulations, including
all safety requirements and codes set by the Occupational Safety and Health Administration
(OSHA) and by the American National Standards Institute (ANSI).
To ensure that employees are qualified for operating the vehicle and its equipment, and that they
all take safety measures before working on or around them.
To properly maintain all mobile equipment to meet all state/provincial and federal safety
standards.
To supply operators with adequate knowledge and skills so that they can operate the vehicle and
its equipment safely
To keep the vehicle maintained and properly adjusted to meet the manufacturer’s standards and
recommendations. For help or for more information, please contact the manufacturer or any of its
authorized representatives.
To keep records of all vehicle breakdowns and malfunctions as well as any inspection and
maintenance conducted.
To ensure that all failures or malfunctions that may be affecting the safe use of the vehicle are
repaired before the vehicle is put back into operation.
To meet the appropriate lighting requirements for night shift work (if permitted).
To regularly accompany the vehicle operator and take measures to ensure the smooth and safe
operation of the vehicle.
To make sure that the backup alarm works properly when the vehicle is in reverse.
To take necessary measures to repair any damage or malfunction reported by an employee.
To establish and ensure the application of a “lockout/tagout” procedure (see page 20) any time
inspection, repair or maintenance is performed on the vehicle, regardless of whether it takes place
on the road or in the garage.
Danger! Never get in the hopper area when the engine is running.
Only authorized personnel may do so following a lockout/tagout procedure (See Locking
Out and Tagging Out the Vehicle on page 20).

Safety 9
Employee’s Responsibilities
It is the responsibility of the employee:
To enforce all safety measures to meet the requirements established by the employer.
To operate the MINIMAX™ only after having received instruction and training.
To perform routine daily unit inspections.
To immediately report any damage or malfunction of the vehicle to the employer or supervisor.
To make sure that nobody is near the vehicle before activating any of the controls, and to be
prepared to stop at any indication of possible danger.
IMPORTANT:Do not use damaged equipment.
Things to Do
Inspect the body and all systems at the start of each day.
Make sure that the area is clear of any people or possible obstructions.
IMPORTANT:Be extremely cautious in areas where small children may be present.
Wear safety glasses and footwear, gloves, and any other safety equipment when loading and
packing refuse.
Make sure that mirrors, windows, lights, and monitor equipment are clean and properly adjusted.
Check for explosive trash (e.g. televisions, paint cans, fluorescent light tubes, etc.).
Drive carefully when carrying an unevenly distributed load.
Inspect for overhead hazards (e.g. power lines) prior to using the arm.
Always use the tailgate safety prop before entering the area between the main body and the
tailgate.
Obey all warning and operation decals.
Things to Avoid
Do not operate any vehicle while under the influence of alcohol, narcotics or other intoxicants.
Do not talk on a cell phone or listen to loud music while driving.
Do not wear jewelry or loose clothing.
Do not leave the vehicle before it is brought to a complete stop and the work or parking brake is
engaged.
Do not enter the hopper or main body unless the engine is shut off, the key is removed and there is
an out-of-service tag on the steering wheel. Refer to “Locking Out and Tagging Out the Vehicle”
on page 20.
Do not drive with the tailgate fully open unless it is to unload refuse at the landfill.
Do not back up the vehicle with the tailgate fully open. Backing up the vehicle when the tailgate is
fully open can cause damage to the tailgate cylinders.

10 Safety
Only qualified personnel should service the hydraulic, electrical, and pneumatic systems of this vehicle.
They should also be fully versed in operating the vehicle.
General Precautions
It is the employer’s responsibility to ensure that only qualified employees operate and maintain this
vehicle.
Read and make sure that you fully understand this manual and all safety decals before performing
maintenance on the vehicle. Maintenance personnel must also read and understand the Operator
Manual for this vehicle. In case of doubt, ask a supervisor for clarifications.
Verify that the accelerator pedal, the steering wheel, mirrors, brakes, and turn signals are in good
working order.
When driving the vehicle, keep both hands on the steering wheel at all times.
Stop the vehicle completely and put on the parking brake before leaving the driving position.
When the vehicle is parked, the parking brake must be applied.
Vehicle operators must have a clear view of lifting arm operations at all times. To prevent injury to
surrounding people, and damage to property and/or to the lifting arm itself, operators must be
able to stop arm movement at any time.
Before activating the lifting arm, operators shall make sure that people and obstructions are far
away from the vehicle.
MINIMAX™ vehicles are primarily designed to be operated by only one worker. However, if Labrie
Enviroquip Group customers elect to operate the vehicle with more than one worker, additional
safety items shall be installed to protect the co-worker from hazardous situations.
IMPORTANT:In such cases, Labrie Enviroquip Group must be informed of every and all units that will be operated
by more than one worker. Labrie Enviroquip Group will then determine and supply, at the
customer’s expense, the required safety items. For additional information, please contact LabriePlus
at 1-800-231-2771 in the U.S. or 1-877-831-8250 in Canada.
Do not operate this vehicle if there are any signs of damage or incomplete repairs.
Warning! Prior to its first use, your MINIMAX™ must be completely lubricated, as shown on the lube
chart located on the curbside of the truck, near the hopper.
Initial lubrication carried out by Labrie Enviroquip Group is sufficient for production and
transport purposes only!
Danger! Operator and maintenance personnel must adhere to the following precautions at all
times. Failure to do so may result in vehicle and/or property damage, personal injury, or
even death.

Safety 11
Report any doubts that you might have and any safety service requirements regarding this vehicle
to a supervisor.
When removing nylon locknuts, always replace them with new ones.
Before opening and closing the tailgate(s), make sure no one is behind the vehicle.
Do not get into the hopper compartment or try to repair anything behind the packer when it is
moving or when the hydraulic pump is still running. Personnel authorized to get into the hopper
must first lock out and tag out the vehicle, as required by the employer. For more information, see
Locking Out and Tagging Out the Vehicle on page 20.
Never stand underneath a raised arm/gripper.
Never, under any circumstances (maintenance or otherwise), stand underneath a loaded body.
Warning! Do not operate the automated arm until you have been fully trained, and have read and
understood the Operator and Maintenance Manuals supplied with this unit.
Warning! Make sure that all people and obstructions are sufficiently cleared from the automated
arm before moving it. Failure to do so may result in unit and/or property damage,
personal injury or death.
Warning! Make sure there is enough clearance between a raised container and overhead power
lines. The automated arm or the container must not come in direct contact with the
electrical cables. If the unit comes in contact with a power line, stay in the cab and keep
away from any metal parts.
Danger! Never drive this vehicle if the automated arm is not fully retracted to its home position.
The unit would be simply too wide to be driven safely. Failure to fully retract the arm will
result in unit and /or property damage, severe injury or even death. Warning red lights on
dashboard flash when the arm is not at its home position.
Warning! Remove all control levers from the proportional valve. These levers should be used for
maintenance purposes only.
Warning! Units with two driving positions: Prior to changing driving position, stop the vehicle, apply
the parking brake, push the emergency button and stop the engine. Properly adjust
mirrors and set driving control switches including the arm-controlling joystick (if
applicable) to the new driving position before restarting the engine.

12 Safety
Welding
Fire
The employer must inform and train all personnel on the measures that must be taken in case of a
vehicle and/or loaded body catching fire.
Anytime a loaded vehicle is brought inside a garage, fire extinguishers shall be close at hand.
The employer must also inform their employees of an appropriate place near the maintenance facility
to unload the body (preferably away from traffic, surface drains, and ditches).
MINIMAX™ vehicles are equipped with a 5-lb fire extinguisher, which is found inside the cab. A 20-lb
fire extinguisher may be installed on the truck as an option (see Figure 2-1). Each fire extinguisher
must be checked regularly by qualified personnel.
Figure 2-1
Fire extinguishers and first aid kit
Danger! Remove paint before welding or heating. Do not weld near lines that are pressurized or
contain flammable fluids.
Caution! Disconnect all batteries and electronic modules prior to welding on packer body.
Danger! Do not perform any repair or maintenance on a vehicle that has not been unloaded.
5-lb fire extinguisher
First aid kit
Optional 20-lb fire extinguisher
Other manuals for MINIMAX
2
Table of contents
Other Labrie Truck manuals

Labrie
Labrie EXPERT User manual

Labrie
Labrie ALLEY-GATOR RIGHT-HAND User manual

Labrie
Labrie ALLEY -GATOR RIGHT-HAND User manual

Labrie
Labrie Automizer Versa Hand User manual

Labrie
Labrie EXPERT 2000 2002 User manual

Labrie
Labrie Optimizer User manual

Labrie
Labrie Top Select User manual

Labrie
Labrie Automizer Versa Hand User manual

Labrie
Labrie expert 2000 User manual

Labrie
Labrie MINIMAX User manual