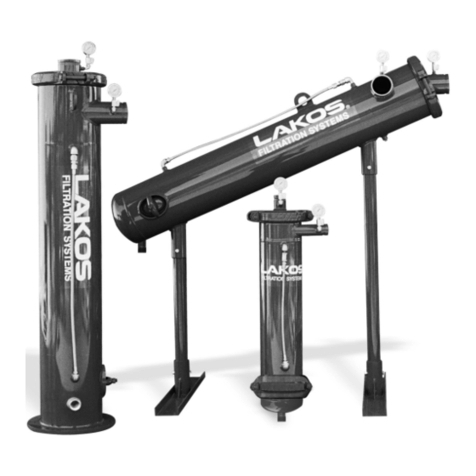
Lakos HTX Series User manual

LS-714B (Rev. 11/17)
1365 N. Clovis Avenue
Fresno, California 93727
(559) 255-1601
www.lakos.com
HTX-HTH SEPARATORS I&O MANUAL
INSTALLATION OPERATIONS AND MAINTENANCE

2
Installation Operations and Maintanence
TABLE OF CONTENTS
Table of Contents ............................................................................... Page 2
Principle of Operation ......................................................................... Page 3
Operation/Installation ..................................................................... Page 3-4
Recommended Piping ........................................................................ Page 4
Maintenance Purging ......................................................................... Page 5
Maintenance Recommendations ......................................................... Page 6
Trouble-Shooting ............................................................................ Page 7-9
HTH Flow vs Pressure Loss Chart ........................................................ Page 10
HTX Flow vs Pressure Loss Chart ........................................................ Page 10
Spare Parts .................................................................................. Page 11-16
Notes ............................................................................................... Page 17

3
Installation Operations and Maintanence
Principle of Operation
Installation Instructions
LAKOS Separators are designed specically to remove solids from liquids.
Each model is calculated for use within a prescribed ow range for
maximum performance and solids removal. Flow rates above and below the
recommended range may aect such performance. Upon tangential entry,
the liquid/solids are drawn through internal tangential slots and accelerated
into the separation chamber where solids heavier than the carrying liquid
are centrifugally separated and allowed to accumulate in the unit’s collection
chamber for eventual purging (see Page 5). The liquid (free of separable solids)
is then drawn to the vortex and up through the separator’s outlet.
1. LAKOS Separators are shipped on skids or in wooden crates. Support legs (22
½° low proles only) are detached. Lifting Lugs, located on the unit’s side
and/or anges, are provided for hoisting as necessary.
2. A suitable foundation is necessary to accommodate the LAKOS Separator’s
weight including liquid. Anchor bolts are recommended in the base of the legs
(low prole) or skirt (vertical prole).
3. Prior to installation, inspect the inlet/outlet/purge connections for foreign
objects incurred during shipping/storage.
4. Inlet/outlet pipe connections to the LAKOS Separator should be a straight
run of at least ve pipe diameters to minimize turbulence and enhance
performance.
5. Proper purge hardware and/or solids-handling equipment is required to ush
separated solids from the separator.
6. All LAKOS Separators operate within a prescribed ow range (Pipe size is not
a factor in model selection). Use appropriate hardware to match the inlet/outlet
size.

4
Installation Operations and Maintanence
Installation Instructions (continued)
Recommended Inlet and Outlet Piping
Grooved couplings are not included with the separator. Optional anged
connections are available upon request.
7. Inlet pressure to the LAKOS Separator must be at least equal to or greater
than the anticipated pressure loss through the separator plus 15 psi (1 bar) plus
whatever downstream pressure is required.
8. Pressure gauges are required at both the inlet and outlet of the separator in
order to monitor pressure loss and proper ow. If separator operates with an
open discharge, a valve should be installed to create a back pressure of at least
5 psi (0.3 bar).
9. Winterizing is important if the LAKOS Separator is to remain idle in freezing
temperatures. Drain liquid as necessary to avoid expansion of water to ice and
related damage.

5
Installation Operations and Maintanence
Maintenance/Purging
1. LAKOS Separators must be purged regularly. Otherwise, the accumulation of
separated solids will overll the separator’s collection chamber, substantially
aecting performance and causing undo wear.
2. Several purging options are available and all may be performed while the LAKOS
Separator is in full operation.
a. Manual: A full-port, straight-through valve may be installed on the standard
purge opening and actuated manually as necessary to purge separated solids.
b. Automatic: The use of LAKOS Separators in a given application typically
implies the need for heavy or unusual solids removal. A LAKOS Auto-Purge
System is therefore recommended. Consult your LAKOS representative for
details on motorized ball valves and other systems.
c. Semi-Automatic: The use of LAKOS Separators in a given application typically
implies the need for heavy or unusual solids removal. A LAKOS Solids Recovery Vessel
System is therefore recommended. The SRV-816 allows for continuous purging of the
solids collected into a separate collection bag. Once the bag is full with solids, the bag
is emptied. The bag can be cleaned and reused, or simply replaced. Consult your LAKOS
representative for details on the solids recovery vessel and accessories.
3. HTX/HTH Separators feature standard purge outlets. Prior to start-up, the installation
of a manual valve on the purge is recommended so that this outlet may be serviceable
at any time for either supplemental purging or as a stand-by, should the primary purge
line ever require servicing.
4. Important: All purge hardware should be installed prior to any elbows or turns in the
purge piping. Avoid “uphill” purging, which can clog piping and hinder eective
solids evacuation.
5. To determine the necessary frequency, purge often at rst and calculate the proper
rate with regard to the actual volume of separated solids. Purge duration should be
long enough to evacuate the purge chamber of solids. Frequency of purge should not
exceed the time it takes to over ll the collection chamber. Consult your LAKOS
representative for specic recommendations regarding your application.
6. When operating in sub-freezing temperatures, be sure to protect the separator’s
collection chamber and all purge line piping from freezing.

6
Installation Operations and Maintanence
Maintenance Recommendations
LAKOS recommends periodic inspections of the separator to keep performance
at an optimum level.
Full Faced Flange Gasket or Victaulic Gaskets should be checked for leaks and
replaced as necessary. Gasket should be replaced at disassembly of separator.
Main Barrel Seal should be replaced when disassembly of separator is required.
Hand Hole Clean-out. Hand Hole should be removed to inspect the collection
chamber for unwanted build up. Inspection should be conducted monthly or
when shutdown is convenient for access.
Hand Hole Gasket, inspected for leaks and change as necessary.
Separator Slots should be inspected during facility pipe inspection is required.
Inspection of slots is recommended when separator performance is suspect.
Slots should be checked for obstruction and wear.
Note: Visual inspection of the separator should be conducted once a month.
Visual inspection should also include observing the inlet and outlet gauges
on the separator. This inspection will indicate the pressure drop across the
separator. The pressure drop and actual ow rate can be compared to the
product brochure to determine if the separator is operating within its expected
performance range. Automatic purge or manual purge should be checked for
leaks and operation. Purge valve seats or diaphragms should be changed as
necessary.

7
Installation Operations and Maintanence
Trouble-Shooting Guidelines For Separator Installation
1. Verify Actual Flow Rate:
Use pressure gauges to indicate dierential pressure and ow meter to verify ow rate.
(Multiple pumps used to increase ow are installed in parallel (into common manifold);
multiple pumps to increase pressure are installed in series (one after another).
Flow meters should be installed prior to the separator. Flow meters installed after the
separator will indicate erroneous data.
2. Plumbing Two Separators:
Do not plumb two separators from two independent pumps into the same outlet header
without installing balancing valves on the discharge of each separator. The balancing
valves must be set to achieve a pressure loss across each separator that indicates a ow
rate (according to that model’s published ow chart) equal to the ow rate anticipated
through the pump that feeds each separator.
3. Verify Actual Inlet Pressure:
Actual inlet pressure must be at least 15 psi (1.03 Bar). A minimum back pressure of 5
psi (.34 Bar) must be created at the separator discharge. This may be accomplished via
process equipment, piping, or a valve. Unrestricted open discharge to a pit, sump,
etc., will result in unacceptable performance. Be sure that no source of vacuum/suction
exists in the piping arrangement. If vacuum/suction exist (i.e. downward piping after
the separator, pump suction installation, booster pump etc.), put a valve between the
separator and the suction source and pressure gauges on either side of the valve. Throttle
the ow until the pressure loss across the separator indicates the published ow rate
which most closely resembles the anticipated ow rate through the separator.
4. Vibration:
Check installation piping inlet & outlet congurations (see appropriate product sheets for
model of separator installed). Mild vibration is possible in some installations and should
be considered normal. Excessive vibration is typically due to entrained air (use air
vents), improper piping (follow the installation instructions) or system vibration
(amplied at the separator).

8
Installation Operations and Maintanence
Trouble-Shooting Guidelines For Separator Installation
(continued)
Units should be secured properly to the oor or wall. If separator is hung, stabilizers may
need to be added. The foundation must be sturdy enough to support the weight of the
product (expected wet weight can be obtained from the product literature).
The use of expansion joints is advisable with all separator installations. It is particularly
recommended that these devices be employed when piping arrangements cannot
comply with the congurations suggested by LAKOS product literature.
5. Vertical Units:
Be aware that solids may accumulate within the separator for a period of time until the
solids reach the level of the purge outlet. The purge outlet is not ush with the bottom of
the solids collection chamber.
6. Purging:
Avoid uphill piping. Purge-piping size is recommended by factory. Be sure that purging
is maintained for the proper duration (proper duration is the time it takes uid to come
out “clean”) in order to pass all accumulated solids through the full length of the purge
piping. Continuous purge (bleed) piping must be sized properly. Oversized piping will
allow purged solids to settle in the line and result in plugging. Under sized piping will
unduly restrict the ow and will result in plugging. Purge ow must not exceed 10% of
the inlet ow. If this occurs, separator eciencies will be severely reduced.
If the accumulation of solids in the separator’s collection chamber becomes clogged or
compacted, it may be necessary to shutdown or bypass the separator and gain internal
access to clear the debris. Never purge the separator into the uid source from which
the separator is being fed unless the actual solids are being contained by an appropriate
solids collection technique. Do not connect two or more separators to one Closed
Recovery System unless the separators are supplied by the same pump and the
separators are of the same model and size.
7. Super-Separators:
Two-stage separators (i.e. Super Separator) must be purged separately…do not join
purges together.

9
Installation Operations and Maintanence
Trouble-Shooting Guidelines For Separator Installation
(continued)
8. Installation:
Proper installation should always include an isolation valve between the separator purge
outlet and any purge system. This will allow for the easy removal of the purge system for
servicing without having to shut down the entire system.
Separators which feature a removable upper chamber should be installed with a spool in
order to facilitate the removal of the upper chamber (see diagram on the appropriate
product sheet).
9. Flanges/Couplings:
All anges and/or grooved couplings should have the appropriate gasket/seal in order to
ensure a leak-free installation. All hand-hole clean-out ports and other internal access
devices should also be properly re-sealed after use.
10. Air Relief Ports:
The appropriate air relief ports should be used at start-up to expel air from the separator.
If the separator will be drained periodically or exposed to entrained air or gases from the
piping system, air vents should be permanently installed.
11. Down Stream Filtration:
The use of ner ltration (polishing) downstream from the separator is a common
application. Be aware, however, that the barrier lter (as it accumulates more solids)
causes an increasing pressure loss, which may cause the ow rate of the system to be
reduced…sometimes below the recommended ow rate of the separator. This situation
will often reveal itself when typical separable solids begin to show up regularly on the
downstream barrier lter (leading the customer to possibly believe that the separator
does not work). Always check for variations in the ow rate when down stream conditions
change.

10
Installation Operations and Maintanence
HTH Flow vs Pressure Loss Chart
HTX Flow vs Pressure Loss Chart
HTX-0016
HTX-0028
HTX-0038
HTX-0060
HTX-0085
HTX-0130
HTX-0200
HTX-0285
HTX-0450
HTX-0500
HTX-0810
HTX-1275
HTX-1950
HTX-3500
HTX-6700
A
B
C
D
E
F
G
H
I
J
K
L
M
N
O
G ONMLKJIHFEDCBA
.2
.4
.6
.8
1.0
Pressure Loss (bar)
3
5
7
9
10
15
20
25
50
75
100
150
200
250
500
750
1,000
1,500
2,000
2,500
3,000
Flow Rate (m
3
/hr)
Pressure Loss (psi)
3
5
10
12
Flow Rate (U.S. gpm)
20
30
40
50
100
10,000
5,000
3,000
2,000
1,000
500
300
200
HTH-0285
HTH-0450
HTH-0500
HTH-0810
HTH-1275
HTH-1950
HTH-3500
HTH-6700
G
A
B
C
D
E
F
G
H
ABCD E F H
50
.2
.4
.8
1.0
.6
Flow Rate (m3/hr)
75 100 150 350 500 1,0002 ,000
12
2
3
4
5
Pressure Loss (psi)
10
15
2003 00 400 1,000 2,000 10,0005,000
Flow Rate (U.S. gpm)
Pressure Loss (bar)

11
Installation Operations and Maintanence
HTX-0004
HTX-0028
HTX-0010
HTX-HTH Spare Parts List
(*) indicates HTH parts list
PART # DESC Description 2 Description 3 Description 4
118504 GROMMET STRIP 15/16” x 1/4” EPDM / 6” LG
106140 GASKET COUPLING 3 TYPE E GROOVE EPDM
*118512 GKT KIT GAUGE, 160PSI CARBON STEEL
*106263 GAUGE 160 PSI, 1/4 MNPT
BOTTOM 2 1/2”DIAMETER FACE GLYCERINE FILLED
PART # DESC Description 2 Description 3 Description 4
118504 GROMMET STRIP 15/16” x 1/4” EPDM / 11” LG
116443 GASKET COUPLING 5 TYPE E GROOVE EPDM
*118512 GKT KIT GAUGE, 160PSI CARBON STEEL
*106263 GAUGE 160 PSI, 1/4 MNPT
BOTTOM 2 1/2”DIAMETER FACE GLYCERINE FILLED
PART # DESC Description 2 Description 3 Description 4
118504 GROMMET STRIP 15/16” x 1/4” EPDM / 7 3/8” LG
106141 GASKET COUPLING 4 TYPE E GROOVE EPDM
*118512 GKT KIT GAUGE, 160PSI CARBON STEEL
*106263 GAUGE 160 PSI, 1/4 MNPT
BOTTOM 2 1/2”DIAMETER FACE GLYCERINE FILLED

12
Installation Operations and Maintanence
HTX-0038
HTX-0085
HTX-0060
HTX-HTH Spare Parts List
(*) indicates HTH parts list
PART # DESC Description 2 Description 3 Description 4
118504 GROMMET STRIP 15/16” x 1/4” EPDM / 11 7/8” LG
106142 GASKET COUPLING 6 TYPE E GROOVE EPDM
*118512 GKT KIT GAUGE, 160PSI CARBON STEEL
*106263 GAUGE 160 PSI, 1/4 MNPT
BOTTOM 2 1/2”DIAMETER FACE GLYCERINE FILLED
PART # DESC Description 2 Description 3 Description 4
118504 GROMMET STRIP 15/16” x 1/4” EPDM / 19 15/16” LG
106147 GASKET COUPLING 8 TYPE E GROOVE EPDM
*118512 GKT KIT GAUGE, 160PSI CARBON STEEL
*106263 GAUGE 160 PSI, 1/4 MNPT
BOTTOM 2 1/2”DIAMETER FACE GLYCERINE FILLED
PART # DESC Description 2 Description 3 Description 4
118504 GROMMET STRIP 15/16” x 1/4” EPDM / 16 11/16” LG
106147 GASKET COUPLING 8 TYPE E GROOVE EPDM
*118512 GKT KIT GAUGE, 160PSI CARBON STEEL
*106263 GAUGE 160 PSI, 1/4 MNPT
BOTTOM 2 1/2”DIAMETER FACE GLYCERINE FILLED

13
Installation Operations and Maintanence
HTX-0130
HTX-0285
HTX-0200
HTX-HTH Spare Parts List
(*) indicates HTH parts list
PART # DESC Description 2 Description 3 Description 4
118504 GROMMET STRIP 15/16” x 1/4” EPDM / 20” LG
106140 GASKET COUPLING 8 TYPE E GROOVE EPDM
*118512 GKT KIT GAUGE, 160PSI CARBON STEEL
*106263 GAUGE 160 PSI, 1/4 MNPT
BOTTOM 2 1/2”DIAMETER FACE GLYCERINE FILLED
PART # DESC Description 2 Description 3 Description 4
118504 GROMMET STRIP 15/16” x 1/4” EPDM / 27 1/16” LG
106150 GASKET COUPLING 12 TYPE E GROOVE EPDM
*106205 GASKET HANDHOLE 4” x 6” NEOPRENE
*118512 GKT 160 PSI, 1/4 MNPT
BOTTOM 2 1/2”DIAMETER FACE GLYCERINE FILLED
PART # DESC Description 2 Description 3 Description 4
118504 GROMMET STRIP 15/16” x 1/4” EPDM / 26 5/16” LG
106149 GASKET COUPLING 10 TYPE E GROOVE EPDM
*118512 GKT KIT GAUGE, 160PSI CARBON STEEL
*106263 GAUGE 160 PSI, 1/4 MNPT
BOTTOM 2 1/2”DIAMETER FACE GLYCERINE FILLED

14
Installation Operations and Maintanence
HTX-0450
HTX-0810
HTX-0500
HTX-HTH Spare Parts List
(*) indicates HTH parts list
PART # DESC Description 2 Description 3 Description 4
118504 GROMMET STRIP 15/16” x 1/4” EPDM / 33 3/8” LG
116634 GASKET COUPLING 14 TYPE E GROOVE EPDM
*106205 GASKET HANDHOLE 4” x 6” NEOPRENE
*118512 GKT KIT GAUGE, 160PSI CARBON STEEL
*106263 GAUGE 160 PSI, 1/4 MNPT
BOTTOM 2 1/2”DIAMETER FACE GLYCERINE FILLED
PART # DESC Description 2 Description 3 Description 4
118504 GROMMET STRIP 15/16” x 1/4” EPDM / 50 1/4” LG
119488 GASKET COUPLING 20 TYPE E GROOVE EPDM
*106205 GASKET HANDHOLE 4” x 6” NEOPRENE
*118512 GKT KIT GAUGE, 160PSI CARBON STEEL
*106263 GAUGE 160 PSI, 1/4 MNPT
BOTTOM 2 1/2”DIAMETER FACE GLYCERINE FILLED
PART # DESC Description 2 Description 3 Description 4
118504 GROMMET STRIP 15/16” x 1/4” EPDM / 33 3/8” LG
116634 GASKET COUPLING 14 TYPE E GROOVE EPDM
*106205 GASKET HANDHOLE 4” x 6” NEOPRENE
*118512 GKT KIT GAUGE, 160PSI CARBON STEEL
*106263 GAUGE 160 PSI, 1/4 MNPT
BOTTOM 2 1/2”DIAMETER FACE GLYCERINE FILLED

15
Installation Operations and Maintanence
HTX-1275
HTX-0810
HTX-1950
HTX-HTH Spare Parts List
(*) indicates HTH parts list
PART # DESC Description 2 Description 3 Description 4
118504 GROMMET STRIP 15/16” x 1/4” EPDM / 55 3/4” LG
121285 GASKET COUPLING 24 TYPE E GROOVE EPDM
*106205 GASKET HANDHOLE 4” x 6” NEOPRENE
*118512 GKT KIT GAUGE, 160PSI CARBON STEEL
*106263 GAUGE 160 PSI, 1/4 MNPT
BOTTOM 2 1/2”DIAMETER FACE GLYCERINE FILLED
PART # DESC Description 2 Description 3 Description 4
119685 GASKET ANSI 12” HTX 28 150# 1/8 THK NEOPRENE
*106205 GASKET HANDHOLE 4” x 6” NEOPRENE
*118512 GKT KIT GAUGE, 160PSI CARBON STEEL
*106263 GAUGE 160 PSI, 1/4 MNPT
BOTTOM 2 1/2”DIAMETER FACE GLYCERINE FILLED
PART # DESC Description 2 Description 3 Description 4
118504 GROMMET STRIP 15/16” x 1/4” EPDM / 33 3/8” LG
116634 GASKET COUPLING 14 TYPE E GROOVE EPDM
*106205 GASKET HANDHOLE 4” x 6” NEOPRENE
*118512 GKT KIT GAUGE, 160PSI CARBON STEEL
*106263 GAUGE 160 PSI, 1/4 MNPT
BOTTOM 2 1/2”DIAMETER FACE GLYCERINE FILLED

16
Installation Operations and Maintanence
HTX-3500
HTX-0500
HTX-HTH Spare Parts List
(*) indicates HTH parts list
PART # DESC Description 2 Description 3 Description 4
119702 GASKET ANSI 16” HTX 36 150# 1/8 THK NEOPRENE
*106205 GASKET HANDHOLE 4” x 6” NEOPRENE
*118512 GKT KIT GAUGE, 160PSI CARBON STEEL
*106263 GAUGE 160 PSI, 1/4 MNPT
BOTTOM 2 1/2”DIAMETER FACE GLYCERINE FILLED
PART # DESC Description 2 Description 3 Description 4
120437 GASKET ANSI 20” HTX 42 150# 1/8 THK NEOPRENE
*106205 GASKET HANDHOLE 4” x 6” NEOPRENE
*118512 GKT KIT GAUGE, 160PSI CARBON STEEL
*106263 GAUGE 160 PSI, 1/4 MNPT
BOTTOM 2 1/2”DIAMETER FACE GLYCERINE FILLED

17
Installation Operations and Maintanence
Separator Model:____________________________________
Sales Order #:_______________________________________
Purchase Date:______________________________________
Distributor:_________________________________________
System Flow:_____________________
Separator Delta P:_________________
NOTES:
1365 N. Clovis Avenue
Fresno, California 93727
(559) 255-1601
www.lakos.com
This manual suits for next models
24
Table of contents
Other Lakos Water Filtration System manuals
Popular Water Filtration System manuals by other brands

Pentair
Pentair STA-RITE SAND DOLLAR Installation and user guide

Grunbeck
Grunbeck fermaliQ:MA2000 Operation manual

Delta Electronics
Delta Electronics 20GENG3E Specifications

Grunbeck
Grunbeck BOXER RX Operation manual

Evoqua
Evoqua DEFENDER SP-27-48-487 Operation & maintenance manual

amiad
amiad SAF-1500 Installation, operation and maintenance instructions

Insignia
Insignia NS-WFPTCC1 Quick setup guide

Miele
Miele DKF 11-R operating instructions

TCi
TCi HGP HarmonicGuard Series Installation, operation and maintenance manual

Spirax Sarco
Spirax Sarco S1 Installation and maintenance instructions

Coway
Coway P-07FR user manual

Tetra
Tetra EX 600 operating instructions