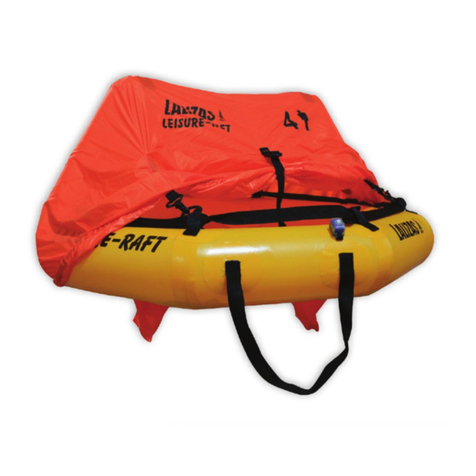
Lalizas INFLATABLE LIFERAFT User manual

LALIZAS Hellas
3 Gounari, Piraeus P.C.18531, Greece
Tel.: +30 210 4226274, Fax: +30 210 4226273
INFLATABLE LIFERAFT
OPERATION MANUAL
FOR LIFERAFTS
OPEN REVERSIBLE TYPE
CEANO

1
Contents
1. Structure Introduction
2. Features
3. Installation
4. Launch the liferaft
5. Free-Floating
6. Boarding
7. Self-protection and SOS
8. Maintenance and repair
OCEANO OR – Open Reversible inatable liferafts are special liferafts designed and
manufactured by LALIZAS. These liferafts are applicable for high-speed crafts engaged in
warm sea area in China and in the international voyages only.
The oor of the liferaft is between the buoyancy tubes. After the ination, the occu-
pants can board immediately, whichever side of the liferaft is above the sea level.
1. Structure Introduction
1.1 This inatable liferaft is composed of upper and lower buoyancy tubes, oor and so on
(Picture 1).
1.2 The section of the upper and lower buoyancy tubes is round-shaped; the appearance
of the body is round or polygon when it is looked from above.
1.3 The upper and lower buoyancy tubes and its connected ination tubes are two separate
gas chambers. These chambers have their own ination system and can be inated auto-
matically by steel cylinders with mixed gas of CO2 & N2 at the same time.
1.4 The oor is made of single-layer antiskid fabric, which is between the two buoyancy
tubes. Both the upper and lower sides have one or two discharge systems.
1.5 The buoyancy tubes are equipped with lighting or indication lights and reective materi-
als.

2
1.6 The upper and lower buoyancy tubes are each equipped with a safety valve and an
ination/deation valve.
1.7 The upper and lower buoyancy tubes are each equipped with 1-2 semi-rigid boarding
ramps.
1.8 The upper and lower buoyancy tubes are each equipped with certain quantities of
water-pockets on their tops.
2. Features
2.1 OCEANO OR – Open Reversible inatable liferaft is a life-saving appliance for rescuing
victims when marine perils happen. The liferaft is mainly made of rubberized fabric. When
operating, throw it outside the shipboard, it will inate fully by its carried CO2 gas and oat
on the water, so the crew and victims can board the liferaft to be rescued.
2.2 There are the following sizes of Open Reversible inatable liferafts: OR-6, OR-10, OR-
25, OR-30, OR-50, OR-65 & OR-100.
3. Installation
The liferaft packed in canister is usually located on the cradle alongside the shipboard.
When installing, the liferaft shall be xed by special lashing. One end of the lashing is con-
nected to a slide hook, which is connected to hydrostatic release unit xed to the cradle.
Besides, the painter line of the canister shall be xed rmly to a connecting ring of the
hydrostatic release unit.
There is an easy-broken rope, which is xed to the clamping plate of the hydrostatic
release unit, on this connecting ring (Picture 2). In the normal time, it is prohibited to pull
out the painter line from the canister.
4. Launch the liferaft
When it is necessary to use the liferaft, throw it into the water, inate it fully by following
the operating processes below:
4.1 Release the slide hook of lashing. Firstly pull out the pin, then push upward the slide
ring, the slide hook will then be released from the lashing (Picture 3).
4.2 After releasing the lashing, if there is an inclined slideway, the canister will fall into the
water due to its own gravity (Picture 4). Otherwise, take the canister out of the cradle and
throw it into the water.
4.3 Pull out the painter line immediately, until the operating head of the gas cylinder is
activated in order to inate the cylinder fully (Picture 5).
4.4 After the liferaft is fully inated, pull the painter line to draw the liferaft close to the ship.
5. Free-oating
When the ship is sinking so rapidly that it is impossible to release the liferaft manually,

3
the canister will sink together with the ship. When it sinks to 2-4 meters below the water
surface, the lashing of the canister will be released automatically by the hydrostatic release
unit due to water pressure, and then the canister will oat freely on the water. During the
continuous sinking of the ship, the painter line will be pulled out continuously with the help
of its own buoyancy, until activate the operation head of the cylinder to fully inate the
liferaft. When the ship sinks further, the easy-broken line will break, thus the liferaft will
separate from the sinking ship. (Picture 6)
6. Boarding
6.1 After the liferaft is close to the shipboard, the passengers can board the liferaft through
boarding ramp or boarding ladder or other ways. If the passenger’s position is not far away
from the water surface, he or she can jump into the liferaft directly. The passengers fallen
into the water shall swim close to the liferaft, and then board the liferaft through boarding
ramp or boarding ladder.
6.2 After boarding, except seating orderly, the occupants shall search the others in the
water and help them to board the liferaft. The occupants can throw the rescue quoit with
enough length of rope to the persons in the water and pull them to the liferaft side after
they grab the rescue quoit, then help them to board into the liferaft. During the night, the
occupants can search the sea surface by electric torch and whistle to raise the attention of
the persons in the sea.
6.3 After all the passengers evacuate to the liferaft, cut off the painter line to separate
the liferaft from the sinking ship, and then paddle away the liferaft from the sinking ship.
(Picture 7)
6.4 When the liferaft is away from the sinking ship and in a safe position, launch the sea
anchor to avoid liferaft oating too far away from the sinking ship for the sake of rescuing
in time.
7. Self-protection and SOS
7.1 If there is accumulated water in the liferaft, open the cover of discharge system or use
the bailer and sponge in the emergency bag to dry it.
7.2 Use SOS signal correctly in right time to get rescued as early as possible. You can
reveal your position by using the following ways:
7.2.1 Observe the sea and air condition, when nding airplanes and ships passing by,
release the red are signals immediately or send Morse signals by using electric torch.
(Picture 8)
7.2.2 Turn off the indication light to save electricity.
7.3 There is emergency pack(s) inside liferaft, which includes various equipments and ac-

4
cessories. Read the “Survival at Sea” Manual carefully to master the correct way of using
all kinds of equipments and accessories and the correct processing methods in different
emergencies. (Picture 17)
7.4 When the pressure of the buoyancy tube is insufcient, inate it by the bellow manu-
ally.
8. Maintenance and repair
8.1 Pay attention to the maintenance and repairing of the liferaft during the period of oat-
ing on the sea to keep it in good condition. Be very careful with the ammable fabric of the
liferaft, which is also damageable to the sharp goods.
8.2 If the liferaft body is damaged, repair it immediately. There is repair kit inside the emer-
gency pack of the liferaft, which includes repair tools and materials. Use rubber plug, re-
pair clamp or fabric together with glue to repair according to different situation of damage.
(Picture 18)
8.3 The liferaft shall be inspected and serviced by the service stations approved by LALI-
ZAS every year.
1. Upper buoyancy chamber
2. Outer grab line
3. Lower buoyancy chamber
4. Ination system
5. Boarding handle
6. Rescue quoit
7. Sea anchor
8. Reective tape
9. Boarding ramp
10. Interior light
11. Indication light
12. Emergency bag
13. Inner grab line
14. Water pocket
15. Draining hole
16. Painter line
17. Safety Knife
Picture 1 Basic Construction of Open Reversible Liferaft

5
1. Canister
2. Cradle
3. Lashing
4. Slide Hook.
5. Hydrostatic release unit
6. Deck
7. Weak Link
8. Connected ring
9. Painter line
Picture 2 Installation or Board
Picture 3 Loose Slip-hock
1. Container
2. Lashing
3. Pin
4. Slip-ring
5. Slip-hook
6. Hydrostatic release unit
7. Weak link cord
8. Painter
Picture 4
Canister slipping into
water along the slideaway

6
Picture 4
Pulling Out Painter to Let Raft Inated to Shape
Picture 6
Free oating

7
Picture 7
Cut the Painter
Picture 8
Send SOS Signals to airplane
or ships
Picture 9
Miscellaneous Appliances Equipped in Liferaft
1. Red ares
2. First-aid kit
3. Sponge
4. Torch
5. Pump
6. Operational Manual
7. Bailer
8. Whistle
9. Log Book
10. Repair kit
11. Paddle
12. Emergency Actions Card
13. Sea Anchor and rope

8
Picture 10
Inate Chamber/Floor with Bellows (pump)
Picture 11
Liferaft’s Repairing and maintenance
1. Conical plug for patching and its use
2. Clamp and use

LALIZAS Hellas
3 Gounari, Piraeus P.C.18531, Greece
Tel.: +30 210 4226274, Fax: +30 210 4226273
LOG BOOK
CEANO
Table of contents
Other Lalizas Marine Safety Device manuals
Popular Marine Safety Device manuals by other brands

ACR Electronics
ACR Electronics NAUTICAST Y1-03-0212-1 Installationshandbuch

R.R. Forrest
R.R. Forrest AQUA LANTERN manual

Exposure Lights
Exposure Lights OLAS CORE Setup and Range Test

ACR Electronics
ACR Electronics NAUTICAST 2662 user manual

Revere
Revere Rescue Racer X 2.0 Service manual

ACR Electronics
ACR Electronics ResQLink AIS user manual