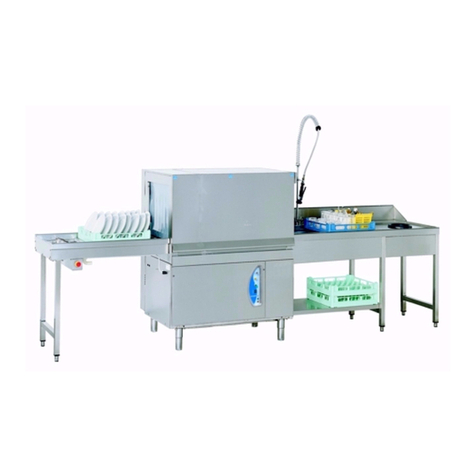
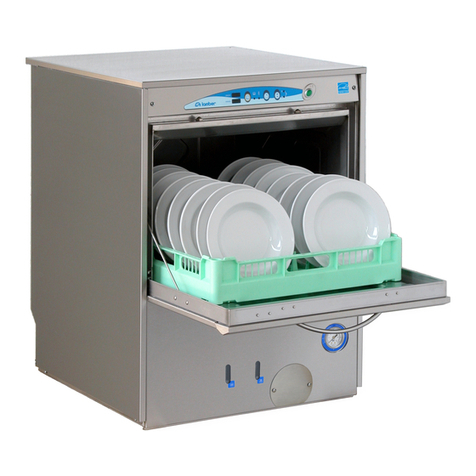
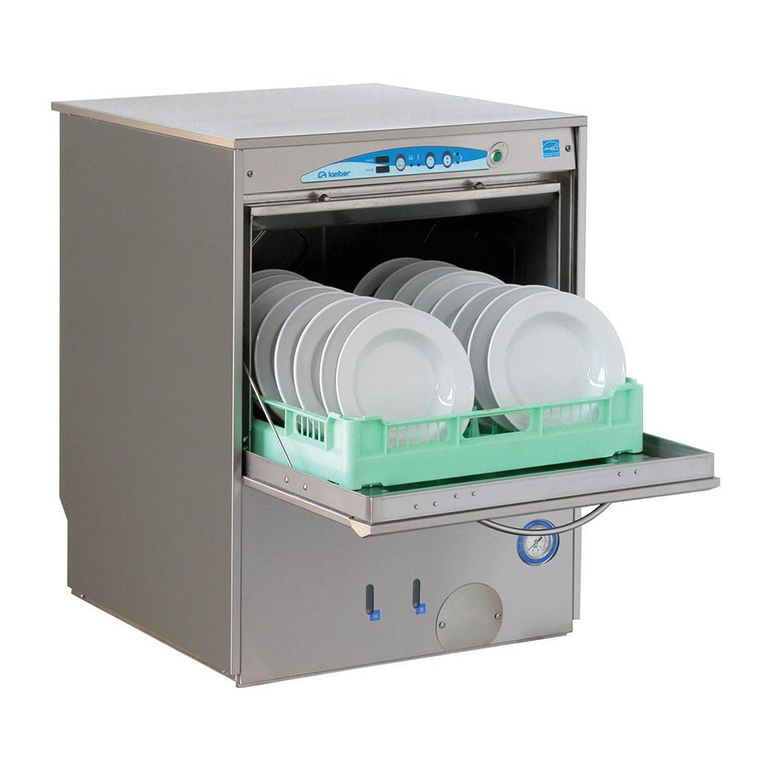
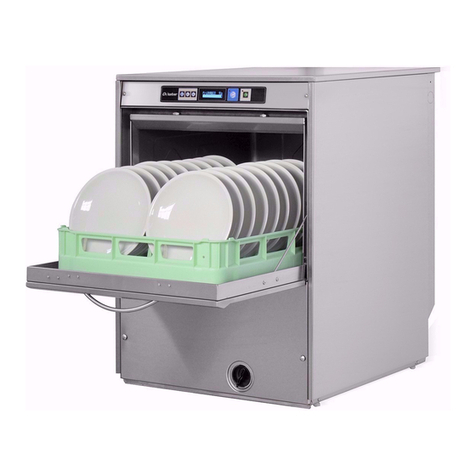
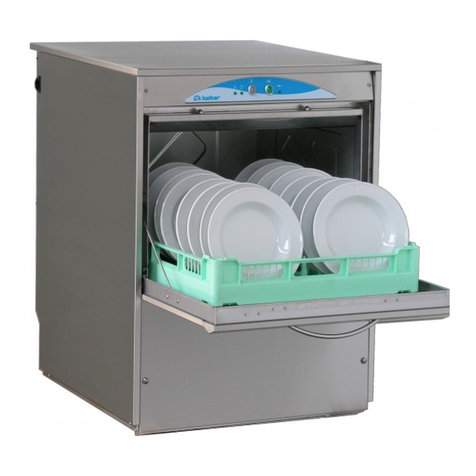
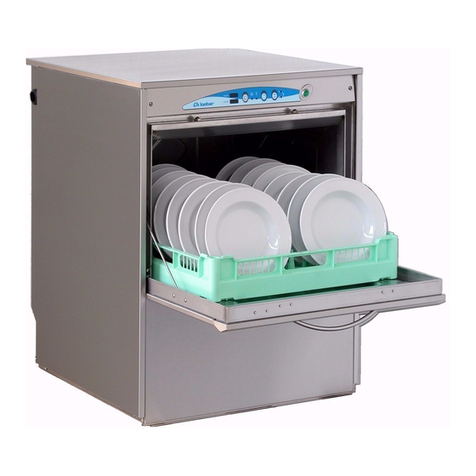
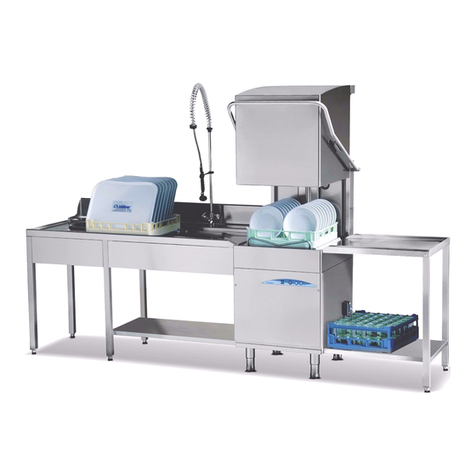
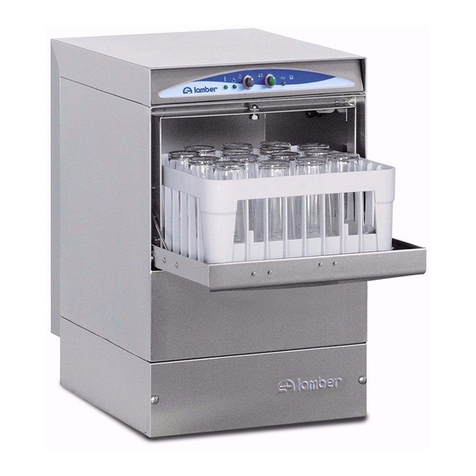
lamber 01F User manual

8
INTRODUCTION ENGLISH
AND SAFETY NORMS
INTRODUCTION
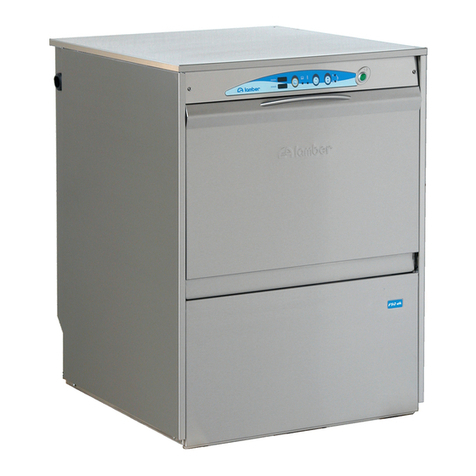
-The machine 01F is an Industrial dish-washing machine .
-The machine is in conformity to the European Norms 89/336/CEE for the radio noises.
-According to EEC directive no. 23 of 19/02/1973 and the law of actuation no.791 of 18/10/1987, our
appliances are built-up according to the good technique notes in force in Italy and abroad.
-Noise level of the machine, less than 70 dB(A).
PRELIMINARY OBSERVATION
Carefully read the instructions reported in the present user manual, as it gives important indications about
safety of installation, operation and maintenance:
-carefully keep the present manual for further consultations;
-the illustrations and drawings showing the machine are intended for general reference only and are not
necessarily accurate in every instance;
-the dimensions and characteristics of the machine, given in this Manual, are not to be considered
binding and may be changed without prior notice;
-once removed the packing material, check that all the equipment is present. If there is any doubt, do
not use it and contact qualified personnel. The packing elements (plastic bags, nails, etc.) should be
kept away from children, because they are dangerous.
GENERAL SAFETY REGULATIONS
THIS SAFETY CODE HAS BEEN COMPILED IN YOUR INTEREST. Strict adherence to these rules will
reduce the risks of injury both to yourself and to others;
Personnel working with this machine must adhere strictly to all statutory safety regulations as well as the
specific rules listed below. Failure to do so may result in personal injury and damage to the machine;
-DO NOT attempt to move, install, set up or operate this machine until you have read and fully
understood this Manual. If doubt persists, ask your supervisor;
-never leave tools, parts or other loose material on or in the machine;
-Before switching the equipment on, make sure that the model plate data conform to those of the
electrical and water distribution network;
-remember that even with the mains indicator in the “OFF” position, the incoming cables are still live;
-BEFORE starting the machine or the cycle, after any maintenance or repair work, make sure all
protective are correctly installed;
-be vigilant at all times, remember that your safety and that of your fellow workers depends on you;
-when moving or lifting the machine, care must be taken to comply with all the relevant regulations
governing such operations;
-installation should be carried out by qualified personnel according to the manufacturer's instructions.
-this equipment should be destined to the use which it has been conceived for. Any other application
should be considered improper and consequently dangerous;
-the equipment should only be used by personnel trained for its use;
SPECIAL SAFETY REGULATIONS
-adjustement and repairs must be carried out only by qualified personnel. Repair carried out by
unskilled personnel may be dangerous;
-perfect washing-up results as regards hygiene and a correct operation of the washing machine can be
assured only in case the instructions reported in the present handbook are carefully followed;
-the machine must be used only by authorized personnel who must comply with sanitary measures;
-do not leave the machine in an environment with temperatures lower than 0°C;
-the machine protection degree is IP21, therefore it should not be washed with direct high pressure jets
of water.

Lavaggio superiore rotante inacciaio inox
Lavage supérieur rotatif en acier inoxydable
Stainless steel Upper rotating washing
Pannellaturadoppia parete
Double paroi
Double skin
Doppelwandig
Lavaggio inferiore rotante in acciaio inox
Lavage inférieur rotatif en acier inoxydable
Stainless steel Lower rotating washing
Filtri vasca in acciaio inox
Filtrescuveen acier inoxydable
Stainless steel Tank filters
Filtro aspirazione pompa in acciaio inox
Filtre aspiration pompeen acier inoxydable
Stainless steel Suction pumpfilter
Troppopieno
Trop-plein
Overflow
Uberlaufstutzen
Pannellodicomando
Panneau de contrôle
Control panel
Steuertafel
Pompa Lavaggio
Pompe Lavage
Washing pump
Pumpenmotor
Dosatore additivo di risciacquo
Doseur de produit pour rinçage
Rinse-aid dispenser
Telaio,vasca e capot inacciaio inossidabile
Châssis, cuve et capoten acier inoxydable
Body,tank and Top inStainless steel construction
Boiler coibentato in acciaio inox
Surchauffeur isolé en acier inox
Stainless steel Boiler with insulation
Resistenza vasca
Résistance cuve
Tank Heating element
Tankheizung
Risciacquo inferiore rotante in acciaio inox (cono 90°)
Rinçageinférieurrotatif en acier inoxydable(cône 90°)
Stainless steel Lower rotating rinsing (90°)
Scarico vasca
Vidange cuve
Tank drain
Wannenablauf
Elettrovalvola Entrata acquae risciacquo
Electrovanne Entréed 'eau et rinçage
Waterinlet and rinsing solenoid valve
Elektrisches Wassereinlaufventilund Spülventil
Oberer Wascharm rotierenderaus CNS
Unterer Wascharm rotierender aus CNS
Herausnehmbare Schmutzauffangfilter
überdem Waschtank
Pumpenansaugfilter aus CNS
Nachspülmitteldosiergerät
Isolierter Boiler aus CNS
Unteres Spülsystemrotierend aus CNS (Konus 90°)
GehäuserahmenundVerblendungen aus CNS
Fate conoscenza con l'apparecchio
Learn to use the appliance
Faites connaissance avec l'appareil
Wollen Sie den Apparat kennenlernen
01F
descr01f-3T
Risciacquo superiore rotante in acciaio inox (cono 90°)
Rinçagesupérieur rotatif en acier inoxydable (cône 90°)
Stainless steel Upper rotating rinsing (90°)
Oberes Spülsystem rotierendes aus CNS (Konus 90°)

NORME PER L'UTENTE
INSTRUCTIONS POUR L'UTILISATEUR
INSTRUCTIONS FOR THE USER
AUFSTELLUNGSANLEITUNG
FÜR DEN BENUTZER

12
PANNELLO COMANDI EMPLOI CONTROLES
CONTROL PANEL STEUERTAFEL
.
.
Pulsante ciclo
Bouton cycle
Cycle pushbutton
Programmdrucktaste
Pulsante ciclo/Bouton cycle
Cycle pushbutton/Programmdrucktaste
Interruttore generale
Interrupteur général
Main switch
Hauptschalter
Interruttore generale/Interrupteur général
Main switch/Hauptschalter
Selettore tempo lavaggio
Selecteur temps de lavage
Wash time selection
Programmwahlschalter
Selettore tempo lavaggio/Selecteur temps de lavage
Wash time selection/Programmwahlschalter
Lampada linea/Lampe indicatrice de ligne
Main switch lamp/Netzkontrollampe
Lampada linea/Lampe indicatrice de ligne
Main switch lamp/Netzkontrollampe
Lampada ciclo/Lampe indicatrice de cycle
Cycle lamp/Programmkontrollampe
Lampada ciclo/Lampe indicatrice de cycle
Cycle lamp/Programmkontrollampe
Lampada temperatura/Lampe témperature
Temperature lamp/Temperaturekontrollampe
Lampada temperatura/Lampe témperature
Temperature lamp/Temperaturekontrollampe
Pompa di scarico/Pompe de vidange
Drain pumpe/Ablaufpumpe
Lampada pompa scarico o addolcitore
Lampe pompe de vidange ou adoucisseur
Drain pump or water softener lamp
Ablaufpumpe Kontrollampe für Ablaufpumpe
und Reinigung
Depuratore/Adoucisseur
Water Softener/Reinigungsapparat
13
2
OFF
A
B
Dis.1
01F
13
2
OFF
A
B
H
R
01F ps-dep

21
ENGLISH
First Section -FOR THE USER
WORKING AND USE
The dishwashing machine 01F can wash up to 30 baskets per hour.
The machine protection degree is IP21, therefore it should not be washed with direct high pressure jet water.
The objects to be washed should be correctly arranged for a good washing-up result.
We suggest to descale dishes, from time to time, in order to remove calcareous and/or starchy sediments
by soaking it in suitable solutions suggested by your cleansing agent supplier.
If you need to buy new dishes remember the following: Dishes and cups: preference must be given to china
or non-porous pottery articles, with smooth surface. Glasses: choose a glass suitable to be washed in dish-
washing machines. Surfaces must be smooth and bottoms the least concave possible.
OPERATION BEFORE WASHING
BEFORE STARTING THE WORKING OPERATION BE
SURE THAT:
-the cock is open;
-the filters and the overflow are in
their housings;
-the wash arm and the rinse arm are free to
pivot;
-brightener and washing powder dispenser
containers are loaded.
THEN PROCEED:
A-Open the door and put into the tank,
possibly over the pump filter, about 120
gr. of non-lathering detergent in powder.
Every 10 cycles add about 85 gr. of detergent.
If the machine is provided with an automatic
dosing device, control that the detergent is in its
container.
B-Place the dishes in the basket minding to
previously remove all solid waste and fat.
Do not overload baskets, dishes must not be
placed one upon the other, water must have the
way to run on each part of the same.
C-Turn the machine on by wall switch and
turn the main switch “A” on the control
panel (fig.1 ) into position 1.
At this point the green light “C” will go on and the
tank will fill up with water.
N.B. On position “1” the first washing cycle of
120 seconds is automatically selected.
D-Put the basket into the machine and close
the door.
E-Choose the washing period cycle between
1 and 2 minutes turning the selector "A"
(1:120 seconds -2:180 seconds -3:240
seconds).
Usually 180 seconds .
F-Push the button "B".
The green lamp "D"will light up and the
cycle, including, besides the washing, a five-
seconds stop and the rinsing of fifteen seconds
with clean water at 85°÷90°C, will start. At the
end of the cycle the lamp "D"will go out.
Note: The rinse starts only when the
temperature of the water is 85°÷90°C
(thermocontrol system).
Bear in mind that the opening of the door
interrupts the cycle and therefore the machine at
any moment. Practically, the opening of the tank
works as an emergency device.
G-Take the basket away and repeat the
operation "F".
ACHIEVEMENTS
Any deficiency in the washing process is
apparent when dirty residuals are visible. Any
halos might be caused by an insufficient rinsing:
in this case, check that the rinsing jets are clean
and there is a sufficient pressure in the water
distribution network.
In the case that residuals are present, check
that:
• the washing jets are clean
• there is detergent
• the pump suction filter is clean
• the positions of the objects in the rack are
correct.

22
DISHES POSITIONING
It is suitable to place dishes, inside the plastic
basket with the concave side facing upwards.
Place mixed cutlery in a vertical position into the
suitable container minding not to cram them and
with handgrips towards the bottom (see
drawing).
CLEANSING AGENTS
Choice of the suitable cleansing agent is an
essential condition if you want to obtain
extremely good washing results as regards
hygienic results. It is then important to consider
some points. First of all only highly alkaline and
chlorine-active antifoam products, especially
made for industrial dish-washing machines, must
be used and they must be produced by well-
known reliable Firms. Mean concentration of the
cleansing agents in powder must be 1,5÷2,5 g/lt.
Mean concentration of liquid cleansing agents
must be 2÷4 g/lt.
In order to avoid scales and corrosions, put the
cleansing agent above water level on the nearest
area of the sucking pump filter, in this way it will
immediately dilute and will not deposit on the
tank bottom.
RINSING ADDITIVES
To grant a perfect rinsing, a quick drying and to
avoid calcareous sediments on glasses and
cups you must add a surfactant on water
(Brightener).
Your cleansing agent supplier will be able to
suggest the most suitable product. Your
machine is equipped with a rinse aid dispenser.
Mean concentration used is 0,15 g/lt.
DESCALING
When hard water is used you can find, inside the
machine and also on dishes, calcareous
sediments which must be removed both for
hygienic and operating reasons by a descaling
operation.
Operating process and frequency of this
intervention are suggested by your cleansing
agent supplier who has suitable products,
generally containing phosphoric acid.
In order to avoid damage to the machine do not
increase the quantities and once operations end
rinse abundantly.
SANIFICATION
At last each 30 days it would be useful to do this
operation which guarantees the complete
hygienic conditions of the machine. We suggest
to contact your cleansing agent supplier who will
give you quantity and name of the most suitable
product you can use and that, generally, is an
active chloride powder (100÷200 ppm).
In order to avoid damage to the machine do not
increase the quantities and once operations end,
rinse abundantly.
REGENERATING
(for machines with Water-softener)
If the glasswasher is equipped with a Water-
softener it is possible to regenerate the water
(water cleaning).
Every evening, after MAINTENANCE operations,
lift the overflow out of the tank, close the door
and turnthe switch "A" on the OFF position.
Push the button "R" until the lamp "H" is lighted.
After twenty (20) minutes the lamp "H" is OFF.
The regeneration of resins has been completed
automatically and the machine is ready to go into
operation again.
Every 6 days add 1 kg of salt in tablet-form in the
bottle placed on the bottom of the tank.
Attention!: the regeneration starts only when
the machine is on the OFF position.
SALT CONTROL
Unscrew the plug of the salt container at the
bottom of the tank and put 1 kg coarse salt tablets
in it.
Clean the gasket and screw the plug.
The lack of sault in the container causes damages
for the machine because of limestone, besides a
defective washing of glasses and dishes.
23
CLEANING AND PREVENTIVE
MAINTENANCE
PRECAUTION AND CLEANING
INSTRUCTIONS
-IMPORTANT: Before carrying out the
cleaning and maintenance operations,
disconnect the equipment from the mains
power supply.
-High temperatures can be reached inside
the machine (90°C). After power supply has
been removed, wait until the machine has
reached room temperature, before working
on it.
-The machine protection degree is IP21,
therefore it should not be washed with direct
high pressure jets of water.
-never leave tools, parts or other loose
material on the machine or inside of it.
-BEFORE starting machine or cycle, after
any maintenance or repair work, make sure
all protectives are correctly installed.
DAILY MAINTENANCE
-Disconnect the machine with pushbutton
"A";
-Lift the overflow pipe and let the water
drain out of the tank;
-Wash thoroughly the tank and the filter
housings to remove all impurities;
-Take the filters out and clean them under
running water;
-Re-assemble the overflow pipe and the
filters in their housings;
-Check and clean the washing and the
rinsing jets;
-Clean the outer surface of the machine by
using a wet sponge; do not use water jets
because, besides being dangerous, they
could damage the electrical parts; do not
use abrasive detergents;
-When the machine is to remain idle for a
long time, drain all the water from the
boiler and from the electropump.
Also leave the door open.
NEVER WASH THE EXTERNAL PART OF
THE MACHINE WITH A WATER JET
POSSIBLE TROUBLES -CAUSES -SOLUTIONS
PROBLEMS CAUSES SOLUTIONS
The machine doesn't catch Main switch is switched off Turn ON the main switch
The water doesn't go in Water cock closed Open water cock
The Overflow is not in place Reassemble the Overflow in
place
Insufficient Washing Wrong detergent or insufficient
dosage Use anti-foam detergent in the
right dosage and never with
cold water
Low temperature in the tank Wait until the water gets hot
Dirty wash filter Clean filter
Insufficient Rinsing Rinsing nozzles blocked Unscrew and clean nozzles
under running water
Hydraulic pressure lower than Wait until the pressure is on or
1 bar -100 kPa buy a booster pump
CAUTION! FOR ANY OTHER TROUBLE, CALL SERVICE

24
DRAIN PUMP INSTRUCTION (only for machines with drain pump)
The drain pump starts up automatically just during the washing cycle to discharge the exceeding water
coming from the rinsing cycle.
At the end of the working day, in order to completely discharge the tank, it is necessary to perform the
following operations:
1. Switch the machine main switch "A" off;
2. Remove the overflow from the tank;
3. Soon afterwards press the drain pump pushbutton "R" (the lamp "H" is lighted).
(see also the paragraph “Daily maintenance” on page 23)
After the water has completely flowed down, press the drain pump pushbutton "R" to switch the pump off.
WARNING!
DO NOT FORGET THE PUSHBUTTON "R" ON "ON" POSITION; THIS CAN CAUSE
DAMAGES TO THE PUMP.
USEFUL HINTS OF STAINLESS STEEL MAINTENANCE
Stainless steel is so called because it is not affected by oxidation, this is due to a thin molecular layer of oxide
on the surface which protects againts further oxidation. There are, however, substances which can modify or
destroy this layer, giving rise to corrosion: besides preventing the protective film of oxide from reforming,
these substances corrode the stainless steel itself and can cause irreparable damage. It is therefore
necessary to prevent this by choosing correct cleaning products and by complying with the following simple
recommendations: never forget that when using these appliances, the first and fundamental rule is to
guarantee that the cleaning products are both non-toxic and hygienic.
Before using any detergent to clean either the stainless steel or the immediate and sorrounding floor area,
always ask your supplier for the most suitable product which does not cause corrosion on the steel itself, the
onset of rust is most commonly caused by the use of unsuitable cleaning materials (strongly acid chlorate
based detergents) or on inadequate maintenance.
Our appliances are made of stainless steel AISI 304 (18/10 type) for exterior panelling, upper tops, tanks etc.
Comply with the following instructions when cleaning and servicing parts in stainless steel.
Ordinary daily maintenance
Carefully and frequently clean the surfaces using a damp cloth; use soap and water or normal detergents, so
long as these do not contain abrasives or chlorine based substances such as sodium hypochlorite
(bleach), hydrochloric acid or other such solutions: These products quickly and irreparably corrode stainless
steel. When cleaning floors underneath or near the appliances, never use the above mentioned products as
vapours or splashes could subject the steel to similar destructive effects.
Only ever rub in the direction of the satining, then thoroughly rinse with clean water and carefully dry.
Rust: water supply pipes, inevitably convey particles of rust dissolved in the water especially in new
installation plants or when taps are opened after a period of inactivity. These iron deposits must not be
allowed to remain on the stainless steel since they produce rust by contamination.
Use suitable products to remove any rust marks, from companies which produce detergents for industrial
use. After application, thoroughly rinse with clean water, neutralizing the action of the product with an alkaline
detergent normally used to clean such appliances or with another specific product.
DO NOT USE METAL MATS TO CLEAN THE STAINLESS STEEL

29
NORME PER L’INSTALLATORE
Le istruzioni che seguono sono rivolte a personale qualificato, il solo
autorizzato ad attuare le verifiche e le eventuali riparazioni.
La Ditta declina ogni responsabilità nel caso di interventi effettuati da
personale non qualificato e/o utilizzo di ricambi non originali.
INSTRUCTIONS POUR L'INSTALLATEUR
Les instructions suivantes sont adressées à un personnel qualifié, qui est le
seul autorisé à effectuer les vérifications et les réparations éventuelles.
Le constructeur décline toute responsabilité en cas d'interventions effectuées
par du personnel non qualifié.
INSTRUCTIONS FOR THE INSTALLER
The following instructions are addressed to a qualified personnel, the only one
authorised to carry out checks and repair, if any.
The Manufacturer declines any responsibility in the case of interventions
made by a non qualified personnel.
AUFSTELLUNGSANLEITUNG
FÜR DEN INSTALLATEUR
Die folgenden Hinweise sind an das Fachpersonal gerichtet; nur das
Fachpersonal darf Prüfungen und eventuelle Reparaturen durchführen.
Unsere Firma ist von jeglicher Verantwortung befreit, wenn unqualifiziertes Personal
Eingriffe vornehmen und/oder keine Originalsatzteile verwenden sollte.

SCHEMA ALLACCIAMENTI INSTALLATION
INSTALLATION INSTALLATIONSBLATT
E
L
S
Elettrovalvola carico - Electrovanne chargement
Water inlet - Wasseranschluß
Linea elettrica - Branchement eléctrique
Electric input - Netzanschluß
Tank drain - Wasserablauf
3/4" G
32 mm - 1"1/4 G
Dis.2
Scarico acqua - Evacuation Eau
L
SE
S
S
E
600 650 430
1370
400
850
200
170
380
650
190
A
AAltezza massima per scarico a muro - Hauteur maximale pour vidange à mur
Maximum height for drain to wall - Maximale Bodenhöhe für Wandwasserablauf
L
SE
380
340
200
260
400 V3N 50Hz
01F
35

ENGLISH
Second Section -FOR THE INSTALLER
During installation carry out a good machine levelling, which is a prerequisite for a correct
operation thereof.
The Manufacturer cannot assume any responsability for any damage to persons or
property deriving from the non-observance of the above specified norms.
For a correct installation see the drawing on page 30.
ELECTRICAL CONNECTION
Before connecting the machine,
make sure the voltage outlet of the
mains is the same as the voltage
specified on the data plate of the
machine.
A main switch must be installed between
the mains and the machine. This safety
measure also requires that the minimum
distance between the switch contacts is at
least 3 mm and the disconnection on all
poles according to EN 60204 (VDE 113).
Fuses on the main switch must be 16 A.
The mains must be wired to be able to
handle the current drawn by the
machine.The system must also be provided
with a proper ground lead in accordance
with the existings norms. The electric cable
must be of the following type: H07RN-F.
For the right choice of the cross section
area refer to the following table:
Cross Section area Total loading
mm² A
0,75 < 6
16 ÷10
1,5 10 ÷16
2,5 16 ÷25
The electrical safety of this equipment is
only assured if it is connected as follows.
It is necessary to connect the equipment to
an effective ground installation, as specified
by the electrical safety regulations in force.
Check that this basic requirement is
complied with and, in case of doubt, ask for
a careful check of the installation by a
qualified personal.
In addition, the equipment shall be part of
an equipotential system, the effectiveness
of which should be checked according to
the regulations in force.
The connection should be made at the
screw marked by the respective label
located on the equipment back side ( ).
THE MACHINE SHALL BE
CONNECTED WITH AN EFFECTIVE
GROUND CLAMP.
The manufacturer declines any
responsibility for any damages
caused by lack of an effective
ground installation.

36
WATER CONNECTIONS
Carefully comply with any national or
regional regulations in force.
Water installation must have the following
characteristics:
Temperature: 55°C
Dynamic Pressure :
-2 ÷ 4 bar (200÷400 kPa)
-for machines with incorporated Water-
softener:
Temperature: 10÷12°C
Dynamic Pressure: 3 ÷ 4 bar (300 ÷ 400
kPa).
If the dynamic pressure is lower than
specified on the data plate of the machine,
it is advisable to install a Pump for pressure
increase.
If the dynamic pressure is higher than 4 bar,
it is advisable to install a pressure
reduction.
Hardness: between 7,2 and 12,5 °French.
If the hardness values are higher than
those mentioned above, it is advisable to
install a water-softener.
WORK TEMPERATURES
Washing temperature 55°÷ 60°C
Rinse temperature 80°÷ 85°C
DO NOT TAMPER WITH THE
THERMOSTAT CALIBRATION
WATER DRAIN
According to the dimensions of the drawing,
water drain and feeding pipe should have
the same diameter of the water inlet of the
machine.
It must be furnished with a siphon and have
a right slope.
The machine is provided with a flexible pipe
for the connection with the water-work.
Make sure there are no throttlings along the
pipe.
Carefully comply with any national or
regional regulations in force.

TIMERDOS
- Um die Dosiermenge zu
erhöhen die Einstellschraube
(mit dem mitgelieferten
Imbusstift) im Uhrzeigersinn drehen.
gelben
Den roten Ring nicht drehen!
- Per aumentare la dose
di detergente ruotare in senso
orario la vite di regolazione con
la chiave in dotazionegialla
N.B.: non ruotare il disco rosso !
- To increase the detergent
dose turn CW the regulation
screw with the included keyjellow
N.B. Do not turn the Red disc !
Portata pompa dosatrice
Portée pompe doseur de lavage
Detergent pump delivery
Wassermenge
-
+
0"-30"
4
1
5
2
6
3
+
TIMER DOSATORE DI LAVAGGIO
TIMER DOSEUR THE LAVAGE
DETERGENT PUMP TIMER
TIMER ZU
WASCHMITTELDOSIERPUMPE
1 cc/sec=3,6 Lit/h
disco giallo
disque jaune
yellow disc
gelber Ring
disco rosso
disque rouge
red disc
roter Ring
vite di regolazione
vis de régulation
regulation screw
Einstellschraube
- Tourner dans le sens des
aiguilles d'une montre la vis de
régulation par la clé
en dotation. jaune
Att.! Ne tourner pas le
disque rouge !
SCHEMA COLLEGAMENTI
SCHEMA BRANCHEMENTS
CONNECTIONS SCHEME ANSCHLUßSCHEMA
Resistenza BOILER - Résistance SURCHAUFFEUR
BOILER Elements - BOILERHEIZUNG
4
1
2
1
3
4
2
3
Marrone - Marron
Braun - Braun
Nero - Noir
Black - Schwarz
Nero - Noir
Black - Schwarz
Ponticelli - Ponts
Staples - Brücke
Resistenza VASCA - Résistance CUVE
TANK Elements - TANKHEIZUNG
Marrone - Marron
Brown - Braun
Blu - Bleu
Blue - Blau
Colle01f3t-2004

Dosatore additivo di risciacquo
Doseur de produit pour rinçage
Rinse-aid dispenser
Nachspülmitteldosiergerät
SCDOS01F
Termostati Lavaggio e Risciacquo
Thermostats Lavage et rinçage
Wash and rinse thermostats
Tankthermostat und Boilerthermostat
Termostati Risciacquo
Thermostat rinçage
Rinse thermostat
Boilerthermostat
Entrata additivo per risciacquo
Entrée du produit de rinçage
Rinse aid inlet
Klarspülmittel
SCHEMA REGOLAZIONI - SCHEMA REGULATION
REGULATION SCHEME - EICHUNG
AB
A-
B-
+
Termostati Lavaggio
Thermostat Lavage
Wash thermostat
Tankthermostat
80÷85 °C
+
55÷60 °C
Termostati Lavaggio e Risciacquo
Thermostat Lavage et rinçage
Wash and rinse thermostat
Tankthermostat und Boilerthermostat
Dosatore risciacquo
Doseur de produit pour rinçage
Rinse-aid dispenser
Nachspülmitteldosiergerät
LAVAGGIO
LAVAGE
WASH
WASCHTEMPERATUR
RISCIACQUO
RINÇAGE
RINSE
SPÜLEN
- Per aumentare la dose di ADDITIVO ruotare in
senso ANTIORARIO la vite di regolazione
- Tourner la vis de regulation en sens
anti-horaire pour augmenter la dose du produit
- To increase the detergent
turn Anti-CW the regulation screw
- Um die Dosierung zu vergrössern im
Gegenuhrzeigersinn drehen

Interruttore generale
Finecorsa
Pulsante ciclo
Resistenza boiler
Resistenza vasca
Lampada spia linea
Lampada temperatura
Lampada spia livello e ciclo
Contattore resistanza boiler
Contattore finecorsa
Contattore di sicurezza
Pressostato
Termostato boiler
Termostato vasca
Termostato di sicurezza
Selettore tempi
Timer
Pompa lavaggio
Elettrovalvola carico
e risciacquo
Condensatore
Filtri antidisturbo
Pressostato SRS
Contattore SRS
Elettrovalvola SRS
Lampada SRS
Elettropompa SRS
Motorino dosat.lavaggio
Timer dosat.lavaggio
Interrupteur général
Microinterrupteur
Bouton cicle
Résistance Surchauffeur
Résistance Cuve
Lampe de ligne
Lampe Témpérature
Lampe de cycle
Contacteur Rés.Surchauffeur
Contacteur Microinterrupteur
Contacteur de sureté
Pressostat
Thermostat Surchauffeur
Thermostat Cuve
Thermostat de sureté
Sélecteur temps
Timer
Pompe de lavage
Electrovanne chargement
et rinçage
Condenseur
Filtres ante-ennui
Pressostat SRS
Contacteur SRS
Electrovanne SRS
Lampe SRS
Electropompe SRS
Moteur doseur produit lessiviel
Timer doseur produit lessiviel
I1
Fc
PC
R1
R2
LS
LS2
LS4
MT1
MT4
MT3
CP
CT1
CT2
CT3
S1
T1-T3
PM
EV1
Cd
Ad 1-3
CP5
MT5
EV5
LS5
PM1
M1
T1a-T1b
I1
Fc
PC
R1
R2
LS
LS2
LS4
MT1
MT4
MT3
CP
CT1
CT2
CT3
M
T1-T3
PM
EV1
Cd
Ad 1-3
CP5
MT5
EV5
LS5
PM1
M1/M2
T1a-T1b
Main switch
Limit switch
Cycle pushbutton
Boiler elements
Tank elements
Main switch lamp
Temperature lamp
Cycle lamp
Boiler elements contactor
Limit switch contactor
Security contactor
Pressure switch
Boiler thermostat
Tank thermostat
Security thermostat
Time selector
Timer
Electric pump
Loading and rinsing solenoid
valve
Capacitor
Suppressors
SRS Pressostat
SRS Contactor
SRS solenoid valve
SRS lampe
SRS electric pump
Deterg. pump timer motor
Detergent pump timer
Hauptschalter
Endschalter
Preogrammdrucktaste
Boilerheizung
Tankheizung
Netzkontrollampe
Temperaturekontrollampe
Zykluskontrollampe
Schütz für Boilerheizung
Schaltrelais Fc
Schütz für Sichereit
Druckwächter
Boilerthermostat
Tankthermostat
Sichereitsthermostat
SeleKtor der reinigungszeitr
Timer
Pumpe
Elektrisches Wassereinlaufventil und
Spülventil
Kondensator
Entstörfilter
Druckwächter SRS
Schütz SRS
Wassereinlaufventil SRS
Kontrollampe SRS
Pumpe SRS
Waschmitteldosiergerät timermotor
Waschmitteldosiergerät Timer
LS
I1
MT4
1
4
2
3
11
12
P
CP 6
5
CT2
v
v
CT3
8
9
40
10
18
20
7
EV1
MT3
v
CT1
MT1
R2
LS2 MT4
Fc MT4
F-TD-3t-timelet-11/11/2004
T1b
T1a
Dos
M1
400 V3N 50Hz
230/1 50Hz
T
R
(marrone)
(nero)
(rosso)
(azzurro)
S
L
N
MT3 MT1
R1
30
31
32
RT
N
s
N
Ad1
R
N
Ad1
Ad2 Ad3
SCHALTSCHEMA
SCHEMA ELECTRIQUE
WIRING DIAGRAM
con dosatore di lavaggio
avec doseur de produit lessiviel
with detergent pump
mit Waschspülmitteldosiergerät
SCHEMA ELETTRICO
Cd 10 uf 17
0
3
1
2
16
Nc MT1
6
2
3
7
8
10
11
S1 T1-T3
9
4
LS4
PC
PM
3
4
20
P
Cp5
5
Ev5
Ls5
MT5
PM1
Safe Rinse System

PS
MT8
LS8
IPS 1A
2A
3A
4A
Interruttore generale
Finecorsa
Pulsante ciclo
Resistenza boiler
Resistenza vasca
Lampada spia linea
Lampada temperatura
Lampada spia livello e ciclo
Contattore resistanza boiler
Contattore finecorsa
Contattore di sicurezza
Pressostato
Termostato boiler
Termostato vasca
Termostato di sicurezza
Selettore tempi
Timer
Pompa lavaggio
Elettrovalvola carico
e risciacquo
Condensatore
Filtri antidisturbo
Pressostato SRS
Contattore SRS
Elettrovalvola SRS
Lampada SRS
Elettropompa SRS
Motorino dosat.lavaggio
Timer dosat.lavaggio
Inter.pompa scarico
Pompa scarico
Rele pompa scarico
Lampada pompa scarico
Interrupteur général
Microinterrupteur
Bouton cicle
Résistance Surchauffeur
Résistance Cuve
Lampe de ligne
Lampe Témpérature
Lampe de cycle
Contacteur Rés.Surchauffeur
Contacteur Microinterrupteur
Contacteur de sureté
Pressostat
Thermostat Surchauffeur
Thermostat Cuve
Thermostat de sureté
Sélecteur temps
Timer
Pompe de lavage
Electrovanne chargement
et rinçage
Condenseur
Filtres ante-ennui
Pressostat SRS
Contacteur SRS
Electrovanne SRS
Lampe SRS
Electropompe SRS
Moteur doseur produit lessiviel
Timer doseur produit lessiviel
Interrup.pompe de vidange
Pompe de vidange
Relais pompe de vidange
Lampe pompe de vidange
I1
Fc
PC
R1
R2
LS
LS2
LS4
MT1
MT4
MT3
CP
CT1
CT2
CT3
S1
T1-T3
PM
EV1
Cd
Ad 1-3
CP5
MT5
EV5
LS5
PM1
M1
T1a-T1b
IPS
PS
MT8
LS8
I1
Fc
PC
R1
R2
LS
LS2
LS4
MT1
MT4
MT3
CP
CT1
CT2
CT3
M
T1-T3
PM
EV1
Cd
Ad 1-3
CP5
MT5
EV5
LS5
PM1
M1/M2
T1a-T1b
IPS
PS
MT8
LS8
Main switch
Limit switch
Cycle pushbutton
Boiler elements
Tank elements
Main switch lamp
Temperature lamp
Cycle lamp
Boiler elements contactor
Limit switch contactor
Security contactor
Pressure switch
Boiler thermostat
Tank thermostat
Security thermostat
Time selector
Timer
Electric pump
Loading and rinsing solenoid
valve
Capacitor
Suppressors
SRS Pressostat
SRS Contactor
SRS solenoid valve
SRS lampe
SRS electric pump
Deterg. pump timer motor
Detergent pump timer
Drain pump switch
Drain pump
Drain pump relay
Drain pump lamp
Hauptschalter
Endschalter
Preogrammdrucktaste
Boilerheizung
Tankheizung
Netzkontrollampe
Temperaturekontrollampe
Zykluskontrollampe
Schütz für Boilerheizung
Schaltrelais Fc
Schütz für Sichereit
Druckwächter
Boilerthermostat
Tankthermostat
Sichereitsthermostat
SeleKtor der reinigungszeitr
Timer
Pumpe
Elektrisches Wassereinlaufventil und
Spülventil
Kondensator
Entstörfilter
Druckwächter SRS
Schütz SRS
Wassereinlaufventil SRS
Kontrollampe SRS
Pumpe SRS
Waschmitteldosiergerät timermotor
Waschmitteldosiergerät Timer
Ablaufpumpe Schalter
Ablaufpumpe
Schutz fur Ablaufpumpe
AblaufpumpeKontrollampe
LS
I1
MT4
1
4
2
3
11
12
P
CP 6
5
CT2
v
v
CT3
8
9
40
10
18
20
7
EV1
MT3
v
CT1
MT1
R2
LS2 MT4
Fc MT4
F-TD3T-400-PS-r00-10/11/2004
T1b
T1a
Dos
M1
400 V3N 50Hz
230/1 50Hz
T
R
(marrone)
(nero)
(rosso)
(azzurro)
S
L
N
MT3 MT1
R1
30
31
32
RT
N
s
N
Ad1
R
N
Ad1
Ad2 Ad3
SCHALTSCHEMA
SCHEMA ELECTRIQUE
WIRING DIAGRAM
con dosatore di lavaggio
avec doseur de produit lessiviel
with detergent pump
mit Waschspülmitteldosiergerät
SCHEMA ELETTRICO
Cd 10 uf 17
0
3
1
2
16
Nc MT1
6
2
3
7
8
10
11
S1 T1-T3
9
4
LS4
PC
PM
3
4
20
P
Cp5
5
Ev5
Ls5
MT5
PM1
Safe Rinse System

SCHEMA COLLEGAMENTI
SCHEMA BRANCHEMENTS
CONNECTIONS SCHEME ANSCHLUßSCHEMA
Colle01f3t-2004
Collegamentoelettrico
Branchementelectrique
Wiring diagram
Schaltschema
Per modificare la programmazione
dei tempi ruotare il selettore.
Pour modifier la programmation
des temps tourner le selecteur.
To change de timing programs,
rotate the selector
Um die Zeitplansaufstellung
Abzuändern, den wählschalter drehen
LS4 PM EV1
non disponibile
pas disponible
not available
nicht verfügbar
(12)
(4)
(16)
(5)
non disponibile
pas disponible
not available
nicht verfügbar
THERMOCONTROL
T2 MT1
PC T1
CICLO LAVAGGIO-CYCLE LAVAGE-WASH CYCLE-PROGRAMMDAUER SEL.
POSIZIONE COMMUTATORE
POSITION COMMUTATEUR
COMMUTATOR’S POSITION
ANORDNUNG DES UMSCHALTERS
PAUSA
PAUSE
PAUSE
RISCIACQUO
RINÇAGE
RINSE
SPÜLUNG
0
1
2
3
4
5
6
7
4”
100”
40”
42”
42”
42”
102”
162”
6”
160”
70”
72”
102”
72”
222”
342”
8”
220”
100”
102”
162”
102”
340”
520”
1”
3”
3”
1”
3”
3”
3”
3”
3”
17”
17”
17”
15”
15”
15”
15”
8-9
NC=ok

MT1
MT4
MT3
CP
Ad2
Ad1
LS LS4
Fc
LS2
R1 PM
T1-T3
IN
T2
T1
1
3
2
KOMPONENTEN
COMPOSANTS
COMPONENTS
COMPONENTI
CASSETTA QUADRO COMANDO - CONTROL BOARD - BOITE DE CONTROLE - SCHALTTAFEL
BASAMENTO - SOCLE - BASE - UNTERBAU
Lavastoviglie
Lave-vaisselle
Dishwashers
Geschirrspüler
T3
EV1
R2
4
1
5
2
6
3
M1
Ad3
CT2
CT3
CT1
Cnp-f9ce
IN
S1-S3
Cd

Table of contents
Other lamber Dishwasher manuals

lamber
lamber 050F User manual

lamber
lamber S400-dy User manual

lamber
lamber DSP4 User manual

lamber
lamber L21-ek Instruction Manual

lamber
lamber S280 Instruction Manual

lamber
lamber L21-ek Instruction Manual

lamber
lamber F85 User manual

lamber
lamber Minibar Instruction Manual

lamber
lamber DSP26-add User manual

lamber
lamber L20 User manual

lamber
lamber 050F User manual

lamber
lamber Super QS S260 User manual

lamber
lamber S510 User manual

lamber
lamber L21-ek User manual

lamber
lamber MATIC-M-MA Series User manual

lamber
lamber L24-ek-plus User manual

lamber
lamber DSP4 User manual

lamber
lamber LINEAR 30 User manual

lamber
lamber F92-ek Instruction Manual

lamber
lamber F92-dy User manual