manuals.online logo
Brands
  1. Home
  2. •
  3. Brands
  4. •
  5. lancer
  6. •
  7. Dispenser
  8. •
  9. lancer FS 30 User manual

lancer FS 30 User manual

1CONTINUED ON NEXT PAGELancer PN: 28-3015
FS30, Mariani Video Merchandiser
Installation Kit
Instruction Sheet
The following illustrates how to remove the existing unit merchandiser and replace it with the
new Mariani Video Merchandiser for a FS30 unit.
Installation - New Merchandiser Assembly
Disconnect power from unit prior to servicing or
cleaning.
F WARNING
 Steps5-6highlighthowtoremovetheuorescent
lighting components and Steps 7 - 8 highlight how to
remove the LED lighting components.
NOTE
1. Unplug unit power cord from wall outlet to power down
unit.
2. Remove the existing merchandiser by lifting straight up
and pulling away from the unit.
3. Using the pins towards the top of the reector
assembly, ip up the reector and lock in place.
4. Remove the cover panel from the unit control board.
5. Disconnect the uorescent reector harness from the
unit control board.
6. Unscrew the reector and remove from unit.
7. Disconnect the brown and blue wires of the LED driver
harness from the “Ballast” connection on the control
board.
8. Unscrew the reector and LED Driver Assembly and
remove from the unit
9. Remove the screw from the left and right side edge of
the unit.
2CONTINUED ON NEXT PAGELancer PN: 28-3015
More than likely, a grounded power strip will be
required for monitor to reach a grounded electrical
outlet.
NOTE
10. Position the new Merchandiser Frame in place,
starting at the top of the unit.
11. Slide the Merchandiser Frame into place with the
bottom of the frame sliding behind the valve plate.
12. Install new self-tapping screws into the existing screw
placements removed in Step 9.
13. Remove the Monitor Bracket from the Merchandiser
Frame by lifting up and pulling away from the frame.
14. Slide the top of the Monitor into the top of the Monitor
Bracket then place the bottom of the monitor into the
lower portion of the bracket.
15. Secure the Monitor Bracket to the back of the Monitor
using the screws and nuts included in kit.
16. With the new Monitor installed to the Monitor Brack-
et, re-install the Monitor Bracket to the Merchandiser
Frame.
17. Plug the Monitor power cord into the back of the
Monitor.
18. If the unit utilizes an ice-maker: Run the power cord
out the top of the Merchandiser Frame and alongside
the ice-maker then plug into a grounded electrical
outlet.
Keep the front ice bin lid installed during installation
and operation of the Monitor.
! ATTENTION
19. Alternatively, run the power cord down behind the
valve plate and splash plate and plug into a grounded
electrical outlet.
3CONTINUED ON NEXT PAGELancer PN: 28-3015
Uploading New Video Content
1. Using the key provided, unlock the Merchandiser
Frame and open to gain access to the monitor.
2. Turn on the screen by pressing the power button on
the remote provided.
Aim the remote at the remote sensor on the lower left
corner of the monitor for best accuracy.
NOTE
Once plugged in, the screen should show the video
leaswellasthenameoftheUSB,“CruzerGlide”.
NOTE
Once the copy function is complete, the screen should
nowshowtwo(2)ofthesamevideole.
NOTE
 Oneofthevideolesonthescreenshoulddisappear
aftertheUSBdriveisremoved.
NOTE
Video will begin to play on a continuous loop, press
the back button to return to the menu.
NOTE
3. Once the screen has turned on, press the “Home” icon
button on the remote.
4. Use the arrows on the remote to navigate the Home
screen, and select the “Player” menu from the bottom
row of menu options.
8. Use the remote to scroll to the “Copy” icon, then press
OK.
9. Select the device “LG Signage Internal Storage” then
select the “Select” icon and press OK on the remote.
11. Remove the USB drive from the side of the monitor.
12. Use the remote to scroll to the “Continuous Play” icon,
then press OK.
15. Close the merchandiser frame and lock in place using
the key provided.
5. Plug the USB drive, containing the video le to be
loaded to the monitor, into the USB port on the top-left
side of the monitor.
6. Use the remote to scroll to the “Export” icon, then
press OK.
10. Select Yes on the “Single Item Selected. Copy Now?”
menu and press OK on the remote to begin the copy.
13. Select the video or videos you wish to play, then scroll
the “Play” icon and press OK.
14. Select No from the “Do you want to save Media to
Playlist?” menu then press OK.
7. Press OK on the remote to select the video to be
uploaded.
4
Lancer PN: 28-3015
Lancer Corp., 6655 Lancer Blvd., San Antonio, Texas 78219 - 800-729-1500 - Technical Support/Warranty: 800-729-1550
[email protected] - lancercorp.com - Manual PN: 28-3015 - August 2018
“Lancer” is the registered trademark of Lancer © 2018 by Lancer, all rights reserved.

Other lancer Dispenser manuals

lancer DROPIN 1522 Bargun Manual

lancer

lancer DROPIN 1522 Bargun Manual

lancer Twin Pour User manual

lancer

lancer Twin Pour User manual
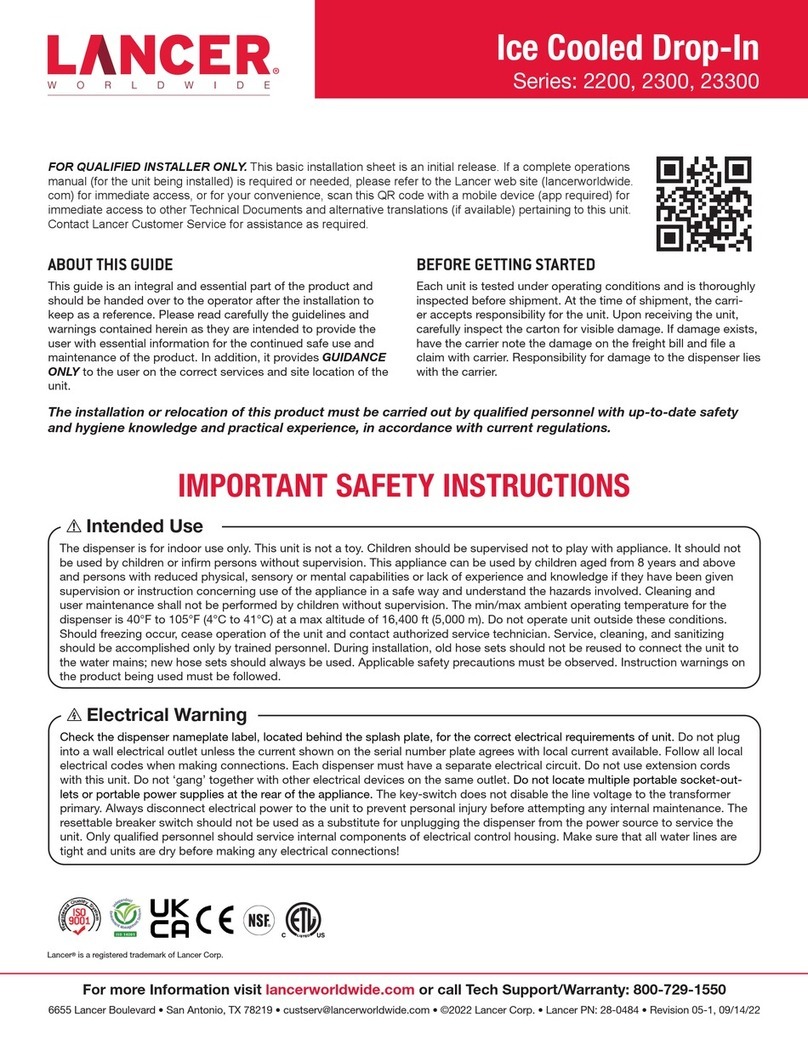
lancer 9000 series User manual

lancer

lancer 9000 series User manual

lancer LEV FILL STATION Manual

lancer

lancer LEV FILL STATION Manual

lancer Spartan Ice User manual

lancer

lancer Spartan Ice User manual

lancer CENTURIONII 85-0055 Manual

lancer

lancer CENTURIONII 85-0055 Manual

lancer Minute Maid User manual

lancer

lancer Minute Maid User manual

lancer Flavor Select 22 User manual

lancer

lancer Flavor Select 22 User manual

lancer SERIES 1500 POSTMIX Manual

lancer

lancer SERIES 1500 POSTMIX Manual

lancer BLENDPOINT User manual

lancer

lancer BLENDPOINT User manual

lancer TD 1700 series Manual

lancer

lancer TD 1700 series Manual

lancer 2200 Series User manual

lancer

lancer 2200 Series User manual

lancer 800 series Manual

lancer

lancer 800 series Manual

lancer bridge tower User manual

lancer

lancer bridge tower User manual

lancer Twin Pour 30 User manual

lancer

lancer Twin Pour 30 User manual

lancer TD 1700 series User manual

lancer

lancer TD 1700 series User manual

lancer 2308 Series Manual

lancer

lancer 2308 Series Manual

lancer DELTA III PRE-MIX Manual

lancer

lancer DELTA III PRE-MIX Manual

lancer 2308 Series Assembly instructions

lancer

lancer 2308 Series Assembly instructions

lancer 2200 Series User manual

lancer

lancer 2200 Series User manual

lancer MVU TOWER User manual

lancer

lancer MVU TOWER User manual

lancer Bar Bridge User manual

lancer

lancer Bar Bridge User manual
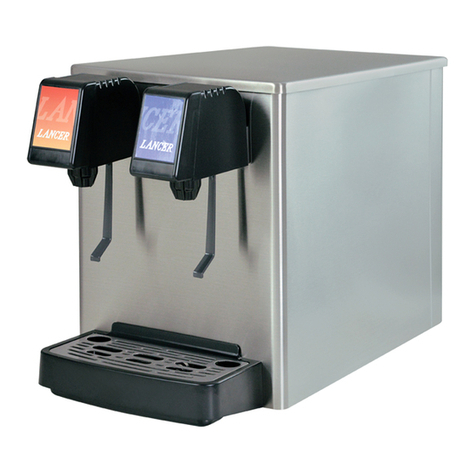
lancer MOO User manual

lancer

lancer MOO User manual

lancer Metal Tower 306 User manual

lancer

lancer Metal Tower 306 User manual

Popular Dispenser manuals by other brands

Sunlight e-CUT SZ 0401 installation guide

Sunlight

Sunlight e-CUT SZ 0401 installation guide

corob FIRST 70 user manual

corob

corob FIRST 70 user manual

DEMA 652GAP installation instructions

DEMA

DEMA 652GAP installation instructions

Bunn IMIX-3S+ Installation & operating guide

Bunn

Bunn IMIX-3S+ Installation & operating guide

Sanela SLZN 83ER4 Instructions for use

Sanela

Sanela SLZN 83ER4 Instructions for use

ASI EZ FIL 0390-(n) owner's manual

ASI

ASI EZ FIL 0390-(n) owner's manual

DAYCO 0902V quick start guide

DAYCO

DAYCO 0902V quick start guide

Curtis Thermopro Airpot instructions

Curtis

Curtis Thermopro Airpot instructions

AGA marvel ML24BT Installation, operation and maintenance instructions

AGA marvel

AGA marvel ML24BT Installation, operation and maintenance instructions

Ecolab SCLS IV Installation and operation manual

Ecolab

Ecolab SCLS IV Installation and operation manual

Sulzer Mixpac DP2X 200 Instruction handbook

Sulzer

Sulzer Mixpac DP2X 200 Instruction handbook

Hilti HDM 330 operating instructions

Hilti

Hilti HDM 330 operating instructions

Bobrick B-132 Instructions for installation

Bobrick

Bobrick B-132 Instructions for installation

U-Line IH-99 quick start guide

U-Line

U-Line IH-99 quick start guide

Dover Hydro AccuPro quick start guide

Dover

Dover Hydro AccuPro quick start guide

Nordson Asymtek Spectrum Series Installation, operation & maintenance manual

Nordson

Nordson Asymtek Spectrum Series Installation, operation & maintenance manual

Brasstech 0314 installation instructions

Brasstech

Brasstech 0314 installation instructions

Signature Design Tork Xpressnap quick start guide

Signature Design

Signature Design Tork Xpressnap quick start guide

manuals.online logo
manuals.online logoBrands
  • About & Mission
  • Contact us
  • Privacy Policy
  • Terms and Conditions

Copyright 2025 Manuals.Online. All Rights Reserved.