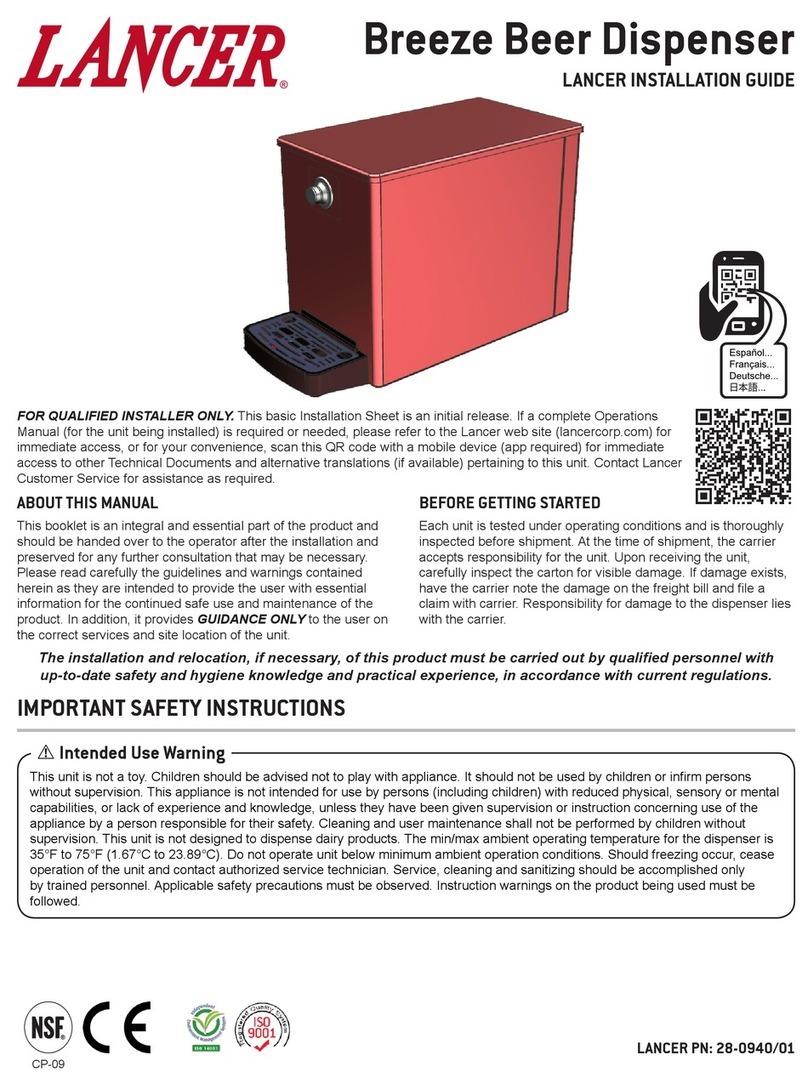
lancer 28-0940 User manual

Lancer Corp.
6655 Lancer Blvd.
San Antonio, Texas 78219
800-729-1500
Technical Support/Warranty: 800-729-1550
lancercorp.com
Manual PN: 28-0940
September, 2014
FOR QUALIFIED INSTALLER ONLY
Breeze Beer Dispenser
Installation and Operation Manual
PN: 28-0940
“Lancer” is the registered trademark of Lancer © 2014 by Lancer, all rights reserved.
CP-09
Please refer to the Lancer Corp website (lancercorp.com) for
information relating to Lancer Installation/Operation Manuals,
Installation Guides, Instruction Sheets, and Technical Bulletins or
for your convenience, scan this QR code with a mobile device (app
required) for immediate access to other Technical Documents and
alternative translations pertaining to this unit.

ABOUT THIS MANUAL
This booklet is an integral and essential part of the product and should be handed over to the operator after the
installation and preserved for any further consultation that may be necessary. Please read carefully the guidelines and
warnings contained herein as they are intended to provide the user with essential information for the continued safe
use and maintenance of the product. In addition, it provides GUIDANCE ONLY to the user on the correct services and
site location of the unit.
The installation and relocation, if necessary, of this product must be carried out by qualied personnel with up-to-date
safety and hygiene knowledge and practical experience, in accordance with current regulations.
TABLE OF CONTENTS
SPECIFICATIONS................................................................................................................................3
PRE-INTALLATION CHECKLIST........................................................................................................4
WARNINGS/CAUTIONS.....................................................................................................................5
1. INSTALLATION.............................................................................................................................5
1.1 UNPACKING THE DISPENSER............................................................................................5
1.2 DRAIN SPIDER.....................................................................................................................5
1.3 SELECTING COUNTER LOCATION....................................................................................6
1.4 LEVELING THE DISPENSER...............................................................................................6
1.5 INSTALLATION OF THE UNIT..............................................................................................6
2. RECOMMENDED SERVICE AND MAINTENANCE.....................................................................6
2.1 REPLACE BEER KEG..........................................................................................................6
3. CLEANING AND SANITIZING INSTRUCTIONS...........................................................................7
3.1 GENERAL INFORMATION...................................................................................................7
3.2 CLEANING SOLUTION........................................................................................................7
3.3 SANITIZING SOLUTION......................................................................................................7
3.4 DAILY CLEANING................................................................................................................8
3.5 ICE BIN CLEANING - START UP AND MONTHLY...............................................................8
3.6 CLEANING AND SANITIZING PRODUCT COMPONENTS.................................................8
4. DISPENSER DISPOSAL...............................................................................................................8
5. ILLUSTRATIONS AND PART LISTINGS......................................................................................9
5.1 EXPLODED VIEW................................................................................................................9
2

3
BREEZE BEER DISPENSER SPECIFICATIONS
This unit emits a sound pressure level below 70 dB
DIMENSIONS
Width: 11.57 inches (293.87 mm)
Depth: 19.77 inches (502.17 mm)
Height: 15.54 inches (394.71 mm)
Depth w/ Dip Tray: 24.87 inches
(631.70 mm)
WEIGHT
Shipping: 55 lbs (24.95 kg)
Empty: 50 lbs (22.68 kg)
ICE
Capacity: 19.4 lbs (8.8 kg)
PRODUCT SUPPLY
Minimum pressure:
42 PSI (0.289 MPA)
Maximum pressure:
46 PSI (0.317 MPA)
FITTINGS
Product inlet: 5/16” barb

4
PRE-INSTALLATION CHECKLIST
BEFORE GETTING STARTED
Each unit is tested under operating conditions and is thoroughly inspected before
shipment. At the time of shipment, the carrier accepts responsibility for the unit. Upon
receiving the unit, carefully inspect the carton for visible damage. If damage exists, have
the carrier note the damage on the freight bill and le a claim with carrier. Responsibility for
damage to the dispenser lies with the carrier.
Your Service Agent:__________________________________
Service Agent Telephone Number:______________________
Serial Number:_______________________________________
Installation Date:_____________________________________
TOOLS REQUIRED
Oetiker Pliers
Tubing Cutters
Faucet Wrench
CONSIDER THE FOLLOWING PRIOR TO INSTALL:
•Drain Location
•Is the countertop level?
•Enough space to install the dispenser
•Can the countertop support the weight of the dispenser? Be sure to include
the weight of the ice.

5
WARNING/ADVERTENCIA/AVERTISSEMENT
! This unit is not a toy. Children should be advised not to play with appliance. It should not be used by children or
inrm persons without supervision. This appliance is not intended for use by persons (including children) with reduced
physical, sensory or mental capabilities, or lack of experience and knowledge, unless they have been given
supervision or instruction concerning use of the appliance by a person responsible for their safety. Cleaning and user
maintenance shall not be performed by children without supervision. This unit is not designed to dispense dairy
products. The min/max ambient operating temperature for the dispenser is 35°F to 75°F (1.67°C to 23.89°C). Do
not operate unit below minimum ambient operation conditions. Should freezing occur, cease operation of the unit
and contact authorized service technician. Service, cleaning and sanitizing should be accomplished only by trained
personnel. Applicable safety precautions must be observed. Instruction warnings on the product being used must be
followed.
! Esta unidad no es un juguete. Los niños deben ser supervisados para no jugar con aparato. No la deben usar
niños ni personas discapacitadas sin supervisión. Esta unidad no está destinada al uso por parte de personas
(incluso niños) con capacidad física, sensorial o mental reducida, o sin experiencia y conocimientos sucientes, a
menos que una persona responsable de su seguridad les haya dado supervisión o capacitación en el uso de la
unidad. Limpieza y mantenimiento de usuario no deberá ser realizada por los niños sin supervisión. Esta unidad no
ha sido diseñada para suministrar productos lácteos. La temperatura ambiente operativa mínima / máxima para el
dispensador es de 35°F a 75°F (1.67°C a 23.89°C). No opere la unidad debajo de las condiciones de funcionamiento
ambientales mínimos. En caso de congelación se produce, cesar la operación de la unidad y el contacto técnico de
servicio autorizado. Servicio de limpieza y desinfección deben llevarse a cabo solamente por personal capacitado.
Es necesario tomar medidas de seguridad aplicables. Advertencias de las instrucciones sobre el producto utilizado
se deben seguir.
! Cet appareil n’est pas un jouet. Les enfants doivent être surveillés an de ne pas jouer avec l’appareil. Il ne
devrait pas être utilisé par des enfants ou des personnes inrmes sans surveillance. Cet appareil n’est pas destiné
à un usage par des personnes (y compris les enfants) ayant des capacités physiques, sensorielles ou mentales
réduites, ou manquant d’expérience et de connaissances, à moins qu’elles obtiennent de la surveillance ou des
instructions au sujet de l’utilisation de l’appareil de la part d’une personne chargée de leur sécurité. Nettoyage et
entretien de l’utilisateur ne doivent pas être effectués par des enfants sans surveillance. Cet appareil n’est pas conçu
pour distribuer des produits laitiers. La température de service ambiante minimum/maximum pour le distributeur est
de 35°F à 75°F (1.67°C à 23.89°C). Ne pas utiliser l’appareil dans des conditions de performance environnementale
minimale. En cas de gel, cesser l’exploitation de l’unité et contactez un technicien agréé. Nettoyage et désinfection
doivent être effectuées uniquement par du personnel qualié. Vous devez prendre des mesures de sécurité.
Avertissements instructions sur le produit utilisé doivent être respectées.
! !
1. INSTALLATION
1.1 UNPACKING THE DISPENSER
A. Cut band and remove.
B. Inspect unit for concealed damage. If evident, notify delivering carrier and le a claim against
same.
C. Remove plywood shipping base from unit.
NOTE: If unit is to be transported, it is advisable to leave the unit secured to the plywood base.
D. If leg kit has been provided, assemble legs to unit by tilting unit. DO NOT LAY UNIT ON ITS
SIDE OR BACK.
1.2 DRAIN SPIDER
The drain spider is located to the left side near the front of the bin. The
coldplate has a cavity designed to hold the drain spider. During shipment or
installation, the drain spider may become dislodged from its original position.
Prior to installing the dispenser, ensure the drain spider is in the correct
position.This will prevent drain clog issues. Inspect the lower bin area to
ensure the drain spider is secure in the coldplate cutout. If the drain spider
is not in place, locate the drain spider and reinstall in the cold plate cavity
where drain line exists.

6
1.4 LEVELING THE DISPENSER
In order to facilitate proper dispenser drainage, ensure
that the dispenser is level, front to back and side to side.
Place a level on the top of the rear edge of the dispenser.
The bubble must settle between the level lines. Repeat
this procedure for the remaining three sides. Level unit if
necessary. For optimum performance place the unit at a
0° tilt.
!
CAUTION THE ICE USED IN THIS UNIT MAY NOT BE POTABLE AND SHOULD NOT BE INGESTED. DO NOT EAT,
CHEW, SUCK, SWALLOW, OR PUT INTO DRINKS. THE ICE USED IN THIS UNIT IS INTENDED SOLELY FOR THE
REFRIGERATION PURPOSES OF THE PRODUCT.
PRECAUCIÓN EL HIELO SE USA EN ESTA UNIDAD NO ES POTABLE Y NO SE DEBEN INGERIR. NO COMER,
MASTICAR, SUCCIONAR, TRAGAR, O PUESTOS EN BEBIDAS. EL HIELO SE USA EN ESTA UNIDAD HA SIDO
DISEÑADA EXCLUSIVAMENTE PARA LA FINES DE REFRIGERACIÓN DEL PRODUCTO.
ATTENTION LA GLACE UTILISÉS DANS CET APPAREIL N’EST PAS POTABLE ET NE DOIT ÊTRE INGÉRÉ. NE PAS
MANGER, DE MÂCHER, SUCEZ, HIRONDELLE, OU MIS EN BOISSONS. LA GLACE UTILISÉE DANS CET APPAREIL
EST DESTINÉ UNIQUEMENT À L’REFRIGERATION FINS DU PRODUIT.
1.3 SELECTING COUNTER LOCATION
Connecting lines can be run through the front of the unit and can extend down through a
counter cutout. Select a level, well ventilated, accessible location away from direct sunlight (avoid)
or overhead lighting. The selected location should be able to support the weight of the unit with the
ice after counter cut out is made (if applicable).
1.5 INSTALLATION OF THE UNIT
A. Remove Top Cover.
B. Connect Product supply line to 3/8 inch barb tting located at the front of the unit.
C. Connect other end of Product supply line to keg coupler using 3/8 inch barb tting
D. Attach keg coupler on to the keg by turing clockwise until it stops. Check for leaks.
E. Install the ice bin drain hose; connect the 90° elbow or straight tting underneath the unit’s
base. The ice bin drain is located towards the front of the bin and slightly to the left. Connect
the hose. Extend the hose to an open type drain.
F. Drain line must be insulated with a closed cell insulation. Insulation must cover the entire length
of the drain hose, including ttings. The drain should be installed in such a manner that water
does not collect in sags or other low points, as condensation will form.
G. Fill unit with ice and Install Top Cover and Drip Tray.
2. RECOMMENDED SERVICE AND MAINTENANCE
2.1 REPLACE BEER KEG
NOTE: Excessive foaming is caused by a nearly empty beer keg. Replace it with a new keg as
soon as possible. When a beer keg becomes completely empty, CO2 gas will blow out of the beer
tap and splash beer.
A. Close the beer circuit by turning the keg coupler handle counter-clockwise until it stops.
B. Turn the keg coupler further counter-clockwise and remove it from the keg.
C. Remove empty keg.
D. Attach the keg coupler on the new keg by turning clockwise.
NOTE: Wash the keg joint with water if necessary.
E. Open the beer circuit by turning the keg coupler clockwise until it stops.
NOTE: Check that the beer tap lever is closed. Opening the keg coupler with the beer tap lever
open will cause beer to splash out.
F. Set a mug (container) to recieve beer and push the beer tap lever hard to the back (Foam
Position). Keep pushing it to dispense foam. When the mug is half lled with foam, move lever
back to original (Stop) position.
G. Wait for more than a minute to settle beer in circuit.
H. Set mug (contianer) and pull the beer tap lever toward you to dispense beer. Keep dispensing
beer until foam turns to liquid.

7
!
WARNING IF A POWDER SANITIZER IS USED, DISSOLVE IT THOROUGHLY WITH HOT WATER PRIOR TO
ADDING TO THE SYRUP SYSTEM. ENSURE SANITIZING SOLUTION IS REMOVED FROM THE DISPENSER AS
INSTRUCTED. AVOID GETTING SANITIZING SOLUTION ON CIRCUIT BOARDS. DO NOT USE STRONG BLEACHES
OR DETERGENTS; THESE CAN DISCOLORAND CORRODE VARIOUS MATERIALS. DO NOT USE METAL
SCRAPERS, SHARP OBJECTS, STEEL WOOL, SCOURING PADS, ABRASIVES, OR SOLVENTS ON THE
DISPENSER. DO NOT USE HOT WATER ABOVE 140° F (60° C). THIS CAN DAMAGE THE DISPENSER.
ADVERTENCIA SI SE USA UN HIGIENIZADOR EN POLVO, DISUÉLVALO BIEN EN AGUA ANTES DE AGREGARLO
AL SISTEMA DE CONCENTRADO. EL USO DE AGUA CALIENTE CONTRIBUYE A DISOLVER LOS HIGIENIZADORES
EN POLVO. ASEGÚRESE DE HABER ELIMINADO LA SOLUCIÓN DE ESTERILIZACIÓN DEL
DISPENSADOR DE ACUERDO CON LAS INSTRUCCIONES. LOS RESIDUOS DE LA SOLUCIÓN DE
ESTERILIZACIÓN REPRESENTAN UN PELIGRO PARA LA SALUD. EVITE QUE LA SOLUCIÓN DE ESTERILIZACIÓN
LLEGUE A LAS PLACAS DE CIRCUITOS. NO USE LAVANDINAS NI DETERGENTES QUE PODRÍAN QUITAR EL
COLOR Y CORROER DISTINTOS MATERIALES. NO USE RASPADORES METÁLICOS, OBJETOS FILOSOS, LANA
DE ACERO, ESTROPAJOS, ABRASIVOS NI SOLVENTES EN EL DISPENSADOR. NO USE AGUA CALIENTE A MÁS
DE 140 ºF (60 ºC). PODRÍA DAÑAR EL DISPENSADOR.
AVERTISSEMENT AVANT L’INJECTION DANS LE SYSTÈME, IL FAUDRA QUE LA POUDRE SEPTIQUE SOIT
DISSOLUE ENTIÈREMENT DANS CHAUDE. L’EAU CHAUDE PERMETTRA UN MEILLEUR PROCÈS DE
DISSOLUTION. SUIVANT LES INSTRUCTIONS JOINTES, IL EST IMPÉRATIF QUE LA SOLUTION SEPTIQUE SOIT
ENTIÈREMENT ENLEVÉE. EVITEZ DE METTRE LA SOLUTION EN CONTACT AVEC LES CIRCUITS. N’UTILISEZ PAS
DE JAVELLISANTS OU DEDÉTERGENTS FORTS; CEUX-CI PEUVENT DÉCOLORER ET CORRODER DIVERS
MATÉRIAUX. N’UTILISEZ PAS DE RACLEURS EN MÉTAL, D’OBJETS POINTUS, DE LAINE D’ACIER, DE TAMPONS À
RÉCURER, D’ABRASIFS OU DE SOLVANTS SUR LE DISTRIBUTEUR. N’UTILISEZ PAS DE L’EAU CHAUDE DE PLUS
DE 140 DEGRÉS F (60 DEGRÉS C). CECI PEUT ENDOMMAGER LE DISTRIBUTEUR.
3. CLEANING AND SANITIZING INSTRUCTIONS
3.1 GENERAL INFORMATION
A. The cleaning and sanitizing procedures provided pertain to the Lancer equipment identied by
this manual. If other equipment is being cleaned, follow the guidelines established by the
manufacturer for that equipment.
B. Lancer equipment (new or reconditioned) is shipped from the factory cleaned and sanitized in
accordance with NSF guidelines. The equipment must be cleaned and sanitized after
installation is complete. The operator of the equipment must provide continuous maintenance
as required by this manual and state and local health department guidelines to ensure proper
operation and sanitation requirements are maintained.
C. Cleaning and sanitizing should be accomplished only by trained personnel. Sanitary gloves are
to be used during cleaning and sanitizing operations. Applicable safety precautions must be
observed. Instruction warnings on the product being used must be followed.
3.2 CLEANING SOLUTION: Mix a mild, non-abrasive detergent (e.g. Sodium Laureth Sulfate, dish
soap) with clean, potable water at a temperature of 90°F to 110°F (32°C to 43°C). The mixture
ratio is one ounce of cleaner to two gallons of water. Prepare a minimum of ve gallons of cleaning
solution. Do not use abrasive cleaners or solvents because they can cause permanent damage to
the unit. Ensure rinsing is thorough, using clean, potable water at a temperature of 90°F to 110°F.
Extended lengths of product lines may require additional cleaning solution.
3.3 SANITIZING SOLUTION: Prepare sanitizing solutions in accordance with the manufacturer’s
written recommendations and safety guidelines. The solution must provide 50 to 100 parts per
million (PPM) chlorine (e.g. Sodium Hypochlorite or bleach). A minimum of ve gallons of sanitizing
solution should be prepared. Any sanitizing solution may be used as long as it is prepared in
accordance with the man- ufacturer’s written recommendations and safety guidelines, and provides
50 to 100 parts per million (PPM) chlorine.

8
3.6 CLEANING AND SANITIZING PRODUCT COMPONENTS
Lancer recommends regular maintenance and sanitization of product lines. Beer lines and taps
should be routinely cleaned as recommended by the local authorities, beer manufacturer or
manufacturer of the chemical cleaner used. Follow manufacturers’ instructions for proper use of
sanitizing (or detergent) products such as recommended use-dilution, material compatibility,
storage, shelf-life, and safe use and disposal.
!
CAUTION FOLLOWING SANITIZATION, RINSE WITH END-USE PRODUCT UNTIL THERE IS NO AFTERTASTE. DO
NOT USE A FRESH WATER RINSE. THIS IS A NSF REQUIREMENT. RESIDUAL SANITIZING SOLUTION LEFT IN THE
SYSTEM CREATES A HEALTH HAZARD.
PRECAUCIÓN DESPUÉS DE LA ESTERILIZACIÓN, ENJUAGUE CON EL PRODUCTO FINAL HASTA QUE
ELIMINAR EL SABOR QUE QUEDA. NO ENJUAGUE CON AGUA FRESCA. ÉSTA ES UNA EXIGENCIA DE NSF. SI
QUEDA SOLUCIÓN DE ESTERILIZACIÓN EN EL SISTEMA, GENERA UN PELIGRO PARA LA SALUD.
ATTENTION DÉFENSE DE RINCER L’OUTIL À L’EAU FRAICHE IMMÉDIATEMENT APRÈS UN TRAITEMENT
SEPTIQUE.EN CAS DE APRÈS-GOÛT, NE PURGER AVEC LE PRODUIT FINAL UNE EXIGENCE NSF.
4. DISPENSER DISPOSAL
To prevent possible harm to the environment from improper disposal, recycle the unit
by locating an authorized recycler or contact the retailer where the product was pur
chased. Comply with local regulations regarding disposal of the insulation.
3.4 DAILY CLEANING
A. Using the cleaning solution, clean Top Cover and all exterior stainless steel surfaces.
B. Clean exterior of dispensing valves.
C. Remove Drip Tray by lifting to release its mounting holes from the mounting screws.
D. Dump water and beer, and wash the Drip Tray and Splash Plate with cleaning solution.
E. Lift the Drip Tray to hook the mounting holes on the mounting screws, and set Splash Plate on
the Drip Tray.
F. Wipe clean all splash areas using a damp cloth soaked in cleaning solution.
G. Remove the beer tap by loosening the union nut by turning it clockwise.
H. Tilt the beer tap toward you, and run cleaning solution through the beer tap.
I. Ret the beer tap by turning the union nut counterclockwise.
3.5 ICE BIN CLEANING - START UP AND MONTHLY
A. Remove Top Cover.
B. Remove Drip Tray by lifting it up and out from the dispenser face.
C. Using cleaning solution, described in Section 3.2, and a clean cloth or soft brush, clean all
sides of Ice Bin and surface of aluminum casting.
D. Repeat Step C for all exterior surfaces of the unit.
E. Using hot water, thoroughly rinse away the cleaning solution.
F. Wearing sanitary gloves, soak a clean cloth towel in sanitizing solution, described in Section
3.2, and wash all sides of Ice Bin and surface of aluminum casting.
G. Repeat Step F for all metal and plastic surfaces (but not labels) of the unit exterior.
H. Wearing sanitary gloves, reassemble all removable parts.
I. Fill Unit with ice and replace Top Cover.

9
5. ILLUSTRATIONS AND PARTS LISTINGS
5.1 EXPLODED VIEW
1
3
2
4
5
Item Part No. Description
1 30-11859 Cup Rest, Breeze Beer
2 01-2976 Elbow, Connector, JG, 3/8”X5/16”
3 05-3266 Drip Tray, Breeze Beer
4 04-1682 (2) Screw, M4-0.7X4.5, 4.5 Shoulder, FHD, PH, SS
5 30-11833 Lid, Metal, Breeze Beer

NOTES
10

INTENTIONALLY LEFT BLANK
11
Table of contents
Other lancer Kitchen Appliance manuals