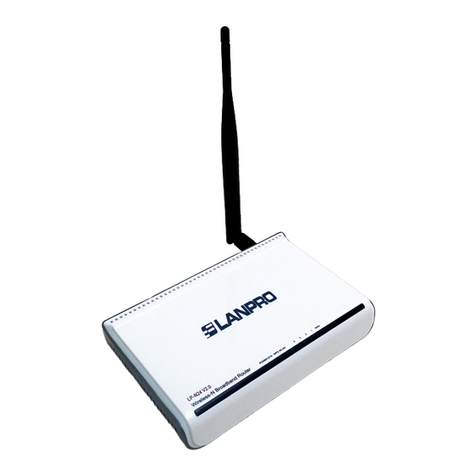
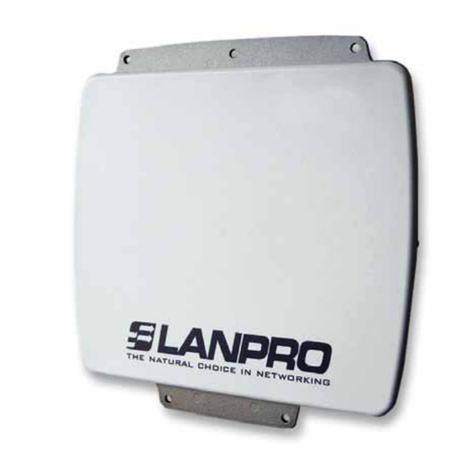
Lanpro LP-N24 User manual

Wireless - Equipment
www.lanpro.com
LP-N24, 123 Manual, PTP and MTP mode Installation.
LPN24_M123_ENC01W
LP-N24
123 Manual, PTP and MTP
mode Installation.

www.lanpro.com
Wireless - Equipment - 2.4 GHz - LP-N24, 123 Manual, PTP and MTP mode Installation
2
This document´s intention is to help the user setup the LP-N24 in Point to Point, and Point to Multi-Point modes. In
order to perform these connections, two(2) or more LP-N24´s are needed.
This manual is divided in two parts, the rst: I, showing possible scenarios and congurations and the second: II, as the
123 Manual itself.
Figure 1
I
Possible congurations and scenarios are shown in the following diagrams, (See gure 1):
Scenarios and Congurations.
Main Client Main is AP
LP-N24 Bridge LP-N24 Lazzy No
LP-N24 Bridge LP-N24 Bridge No
LP-N24 Bridge LP-N24 Repeater No
LP-N24 Repeater LP-N24 Lazzy Yes
LP-N24 Repeater LP-N24 Bridge Yes
LP-N24 Repeater LP-N24 Repeater Yes
Point to Point, Multi-point Congurations, LP-N24 (WDS)
Mode Description
Lazzy The LP-N24 is a client WDS and AP in this mode
Bridge The LP-N24 is a WDS Server and/or Client, Not an AP in this mode
Repeater The LP-N24 is a WDS Server and/or Client and AP in this mode

www.lanpro.com
Wireless - Equipment - 2.4 GHz - LP-N24, 123 Manual, PTP and MTP mode Installation
3
Figure 2
Figure 4
Figure 3
Figure 5
The gures 2 to 5 show examples of PTP and MTP possible connections with the LP-N24.

www.lanpro.com
Wireless - Equipment - 2.4 GHz - LP-N24, 123 Manual, PTP and MTP mode Installation
4
Figure 7
Figure 8
II
II.1.1. Please review package contents (Figure 7).
II.1.2. Please turn the equipment over and take note of the Mac Addresses of both LP-N24´s involved. In gure 8,
you can see where to nd them on the printed label.
LP-N24, 123 Manual for Installation in modes PTP and MTP
II.1. Preparation.
For the conguration shown in gure 6, we use the bridge and lazzy Modalities. In these modalities, we have two (2)
wireless LANS, a connection between them and a connection to Internet, please note that each network has been identied
with a letter A and B.
Figure 6

www.lanpro.com
Wireless - Equipment - 2.4 GHz - LP-N24, 123 Manual, PTP and MTP mode Installation
5
Figure 9
II.2.1. Connect power as shown in gure 9.
II.2. “A” Network LP-N24 conguration.
Figure 10
Figure 11
II.2.2. Connect your PC to a LAN port of the LP-N24 as
shown in gure 10.
II.2.3. Connect the Internet service to the WAN port as
shown in gure 11.

www.lanpro.com
Wireless - Equipment - 2.4 GHz - LP-N24, 123 Manual, PTP and MTP mode Installation
6
II.2.5. Once nished, select: Ok and then again select: Ok.
II.2.6. Open your preferred browser and navigate to the default address of the Router: 192.168.0.1 as shown in gure
14.
II.2.7. A new window will pop-up asking for the user and
the password, please use the defaults for User: admin
and password: admin, select: OK, as shown in gure 15.
Figure 14
Figure 15
Figure 12 Figure 13
II.2.4. Please go to your network card Properties and change the IP address as shown in gures 12 and 13.

www.lanpro.com
Wireless - Equipment - 2.4 GHz - LP-N24, 123 Manual, PTP and MTP mode Installation
7
II.2.8. The conguration window will pop-up, select
option: Next, as shown in gure 16.
II.2.9. Select option that corresponds to your Internet
Service Provider (ISP), (Most of them recommend
Dynamic IP), select: Next as shown in gure 17.
Figure 16
Figure 17
II.2.10. In order to save the changes, select: Apply, as
shown in gure 18.
Figure 18

www.lanpro.com
Wireless - Equipment - 2.4 GHz - LP-N24, 123 Manual, PTP and MTP mode Installation
8
II.2.12. Procceed to select the security mode by
selecting option: WLAN Settings, Security Settings; in:
Security Mode, select the desired mode. We recommend
you use: WPA2–Personal as shown in gure 21.
Figure 21
II.2.11. A Window named: Network Status pops-up
showing the WAN connection status, it obtains the IP
Address like the one shown in gure 19 (This address
is for reference purposes only), if not, please verify
the cable connection from the LP-N24´s WAN port to the
ADSL modem or Internet service connection; you can
also try turning the ADSL Modem off and on again, then
wait for 2 minutes and nally select option: Release then
option: Renew in the window shown in gure 19.
II.2.11. In order to give a name to your wireless LAN,
please select option: WLAN Settings, Basic Settings
and in the eld: SSID, input the name you wish for your
wireless LAN. In this example, it will be: LanPro LP-N24
A; take note of the channels used, (in this example: 1
and 5) and proceed to select: Apply, as shown in gure
20.
Figure 19
Figure 20

www.lanpro.com
Wireless - Equipment - 2.4 GHz - LP-N24, 123 Manual, PTP and MTP mode Installation
9
II.2.13. Proceed to input the wireless LAN client
password in the eld named: Pass Phrase and select:
Apply, as shown in gure 22.
II.2.14. In this step we will stablish this equipment as
a Repeater, to do this, select: WLAN settings, WDS
Settings and in: WDS Mode, select: Repeater Mode,
as shown in gure 23.
Figure 22
Figure 23
II.2.15. Select the type of encryption for WDS, in this
example select: TKIP, as shown in gure 24.
Figure 24

www.lanpro.com
Wireless - Equipment - 2.4 GHz - LP-N24, 123 Manual, PTP and MTP mode Installation
II.2.18. Once booted, the equipment will ask for the
password. If not, open the browser and access the
equipment as shown in paragraphs II.2.6. and II.2.7.
Proceed to review the DHCP conguration, select: DHCP
Server, DHCP Server only on this LP-N24 and change
the range if you need it, as shown in gure 27 for this
example, please remember that this router will deliver IP
addresseses to both networks. Then Select: Apply.
II.2.19. Now proceed to change the management
password by selecting option: System Tools, Change
Password, input the new password in: New Password,
then enter it again in: Re-enter to Conrm and then
select: Apply, as shown in gure 28, remember to save
it in a secure place because it will be needed again by the
equipment for management.
Figure 27
Figure 28
10
II.2.16. Proceed to input the encryption phrase for
WDS and the MAC address of the equipment that will
be connected to it (Network B), then select: Apply, as
shown in gure 25.
II.2.17. The equipment will reboot, as shown in
figure 26.
Figure 25
Figure 26
www.lanpro.com
Wireless - Equipment - 2.4 GHz - LP-N24, 123 Manual, PTP and MTP mode Installation
II.3.2. Connect to your PC to a LAN port of the LP-N24,
as shown in gure 30.
With the steps already followed, you are now through with the rst part of the conguration. This equipment must remain
turned on for the second part of the conguration to take place which is explained in the following paragraphs.
Figure 30
Figure 29
II.3.1. Connect power as shown in gure 29.
II.3. Conguring the “B” Network LP-N24.
11
II.3.3. Open your preferred browser and input in the search eld the default address: 192.168.0.1, as shown in
gure 31.
Figure 31

www.lanpro.com
Wireless - Equipment - 2.4 GHz - LP-N24, 123 Manual, PTP and MTP mode Installation
12
II.3.6. Proceed to input the security mode for clients,
by selecting option: WLAN Settings, Security
Settings, in: Security Mode, select the desired mode.
We recommend you use: WPA2 –Personal as shown in
gure 34.
Figure 34
II.3.5. Proceed to input the name of your WLAN by
selecting option: WLAN Settings, Basic Settings and
inputting in the eld: SSID, the name you have selected
for your WLAN; in this example: LanPro LP-N24 B, take
note of the channels, in this example they are 1 and 5
and proceed by selecting: Apply, as shown in gure 33.
II.3.4. A window will pop-up asking for the user and
password, by default, user is: admin and the password
is: admin; select: OK, as shown in gure 32.
Figure 33
Figure 32

www.lanpro.com
Wireless - Equipment - 2.4 GHz - LP-N24, 123 Manual, PTP and MTP mode Installation
13
II.3.7. Proceed to input the WLAN password in the eld:
Pass Phrase and select: Apply, as shown in gure 35.
II.3.8. In this step, we will change the IP address of
the LP-N24 of the B network. In order to do this, select:
Advanced Settings, LAN Settings, change the IP
address to: 192.168.0.2 (because there should not be
duplicate addresses when A and B get connected), select
now: Apply, as shown in gure 36.
Figure 35
Figure 36
II.3.9. A new window will pop-up warning you to wait for a few minutes before accessing the system with the new IP
address. Select: Ok as shown in gure 37. Please wait for about 1 minute.
Figure 37

www.lanpro.com
Wireless - Equipment - 2.4 GHz - LP-N24, 123 Manual, PTP and MTP mode Installation
14
II.3.13. In this step we will establish the connectionto
thel LP-N24 Repeater (conection to Network A), in order
to do this, select: WLAN settings, WDS Settings and
in: WDS Mode, select: Lazzy Mode, as shown in gure
41.
Figure 41
II.3.12. In this step, we will disable the DHCP Server
for this equipment, this is so because the one that will
assign the IP addresses in both networks is the LP-N24
in network A. In order to do this, select: DHCP Server,
DHCP Server; disable option: Enable and select: Apply,
as shown in gure 40.
II.3.11. Input your User and Password and selct : OK,
as shown in gure 39.
Figure 40
Figure 39
II.3.10. Input the new IP address in your browser as shown in gure 38.
Figure 38

www.lanpro.com
Wireless - Equipment - 2.4 GHz - LP-N24, 123 Manual, PTP and MTP mode Installation
15
II.3.17. Once booted, the equipment will ask for a password, if not, open the browser and access the equipment as
shoen in paragraphs B.3.10 and B.3.11.
II.3.14. Select the Type of Encryption for WDS,
remember to use the same you congured in paragraph
18, because this is the link between both networks (A and
B); in this case use: TKIP, as shown in gure 42.
II.3.18. Proceed now to change the administration
password by selecting option: System Tools, Change
Password , input in the new password in: New Password
and again in: Re-enter to Conrm and select: Apply,
as shown in gure 45; remember to store your password
in a safe place because the equipment will ask for it for
administration from now-on .
II.3.15. Proceed to input the encription and Pass Phrase
for WDS (The same for paragraph B.2.16) and then select:
Apply, as shown in gure 43.
II.3.16. The equipment will boot as shown in gure 44.
Figure 42
Figure 45
Figure 43
Figure 44

www.lanpro.com
Wireless - Equipment - 2.4 GHz - LP-N24, 123 Manual, PTP and MTP mode Installation
If there is no answer, we recommend that you review the
following points:
1. Review that both routers are in the same RF
channel(review paragraphs: II.2.7 y II.3.5 ).
2. Review that the registered MAC address in the repeater
is the one of the Lazzy (review paragraph: II.2.16).
3. Review that the name and passphrase used for ciphering
of the WDS are the correct ones (review paragraphs:
II.2.14,II.2.15,II.3.14 and II.3.15).
In order to verify connections between both networks,
look for them and connect to each of them as shown in
gure 31.
If there is no success in anyone of these connections, please review the following points:
• Verify that the password input in paragraphs: II.2.13 y II.3.7 is the correct one.
Figure 31
II.3.19. Once these steps are nished you will have congured a Point to Point network with Access to both LP-N24 for
wireless connections. In order to test its operation, open a command window and send a PING to the destination router,
in this example we use: 192.168.0.1, as shown in gure 30.
Figure 30
Other manuals for LP-N24
7
Other Lanpro Wireless Router manuals

Lanpro
Lanpro LP-1521 User manual

Lanpro
Lanpro LP-1521 User manual

Lanpro
Lanpro LP-N24 V2.0 User manual

Lanpro
Lanpro LP-1521 User manual

Lanpro
Lanpro LP-1521 User manual

Lanpro
Lanpro LP-N24 User manual

Lanpro
Lanpro LP-1521 User manual

Lanpro
Lanpro LP-5420G User manual

Lanpro
Lanpro LP-N24 User manual

Lanpro
Lanpro LP-1522 User manual
Popular Wireless Router manuals by other brands

ZyXEL Communications
ZyXEL Communications LTE4506-M606 user guide

NETGEAR
NETGEAR WGT624v3 - 108 Mbps Wireless Firewall Router Specifications

ZyXEL Communications
ZyXEL Communications P-334WH Specifications

Asus
Asus RT-N12 Series user guide

Frontier
Frontier Arris NVG589 quick start guide

Sceptre
Sceptre SR600W user guide