IMPORTANT SAFETY INSTRUCTIONS AND PRECAUTIONS .............................................................................................. 1
WHATS IN THE BOX .......................................................................................................................................................... 1
INSTALLING THE BATTERIES ............................................................................................................................................. 1
SET TOP BOX..................................................................................................................................................................... 2
Front Panel.................................................................................................................................................................... 2
Rear Panel ..................................................................................................................................................................... 2
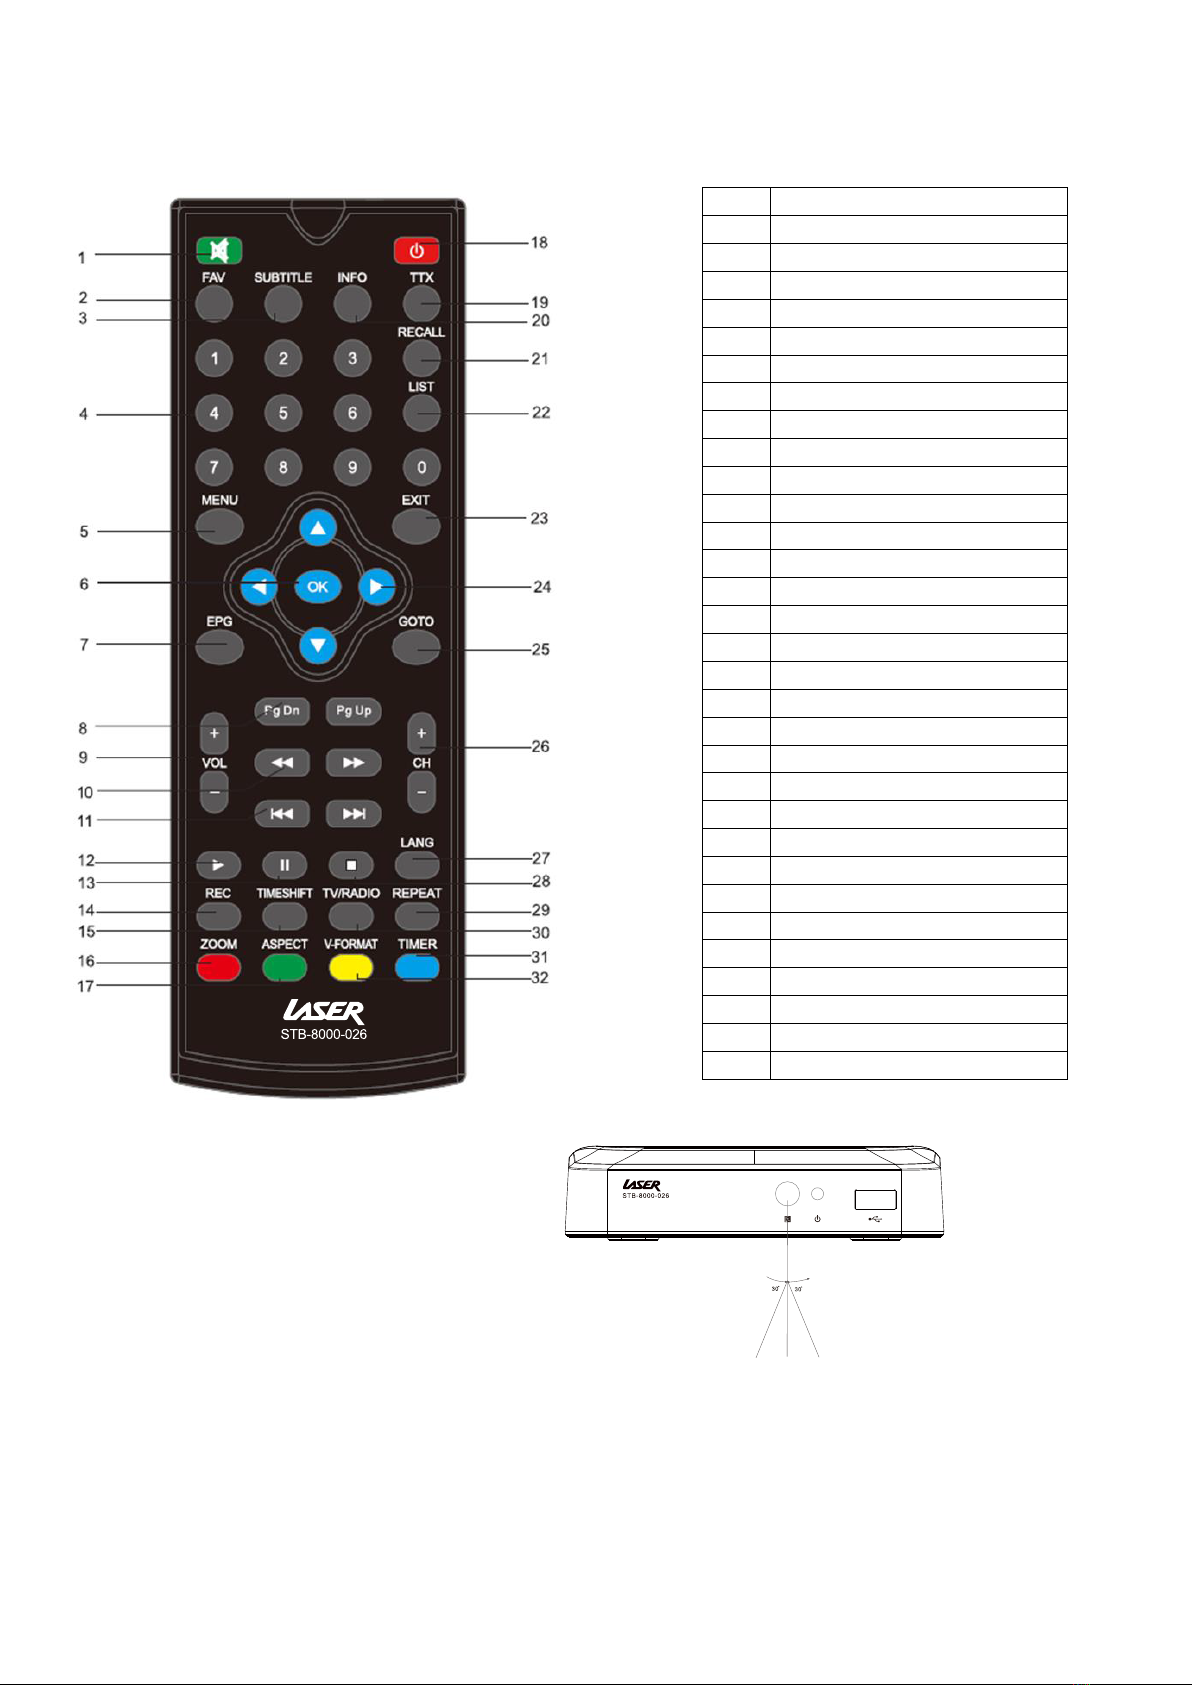
REMOTE CONTROL ........................................................................................................................................................... 3
Key Function.................................................................................................................................................................. 4
CONNECTING TO A TELEVISION ....................................................................................................................................... 5
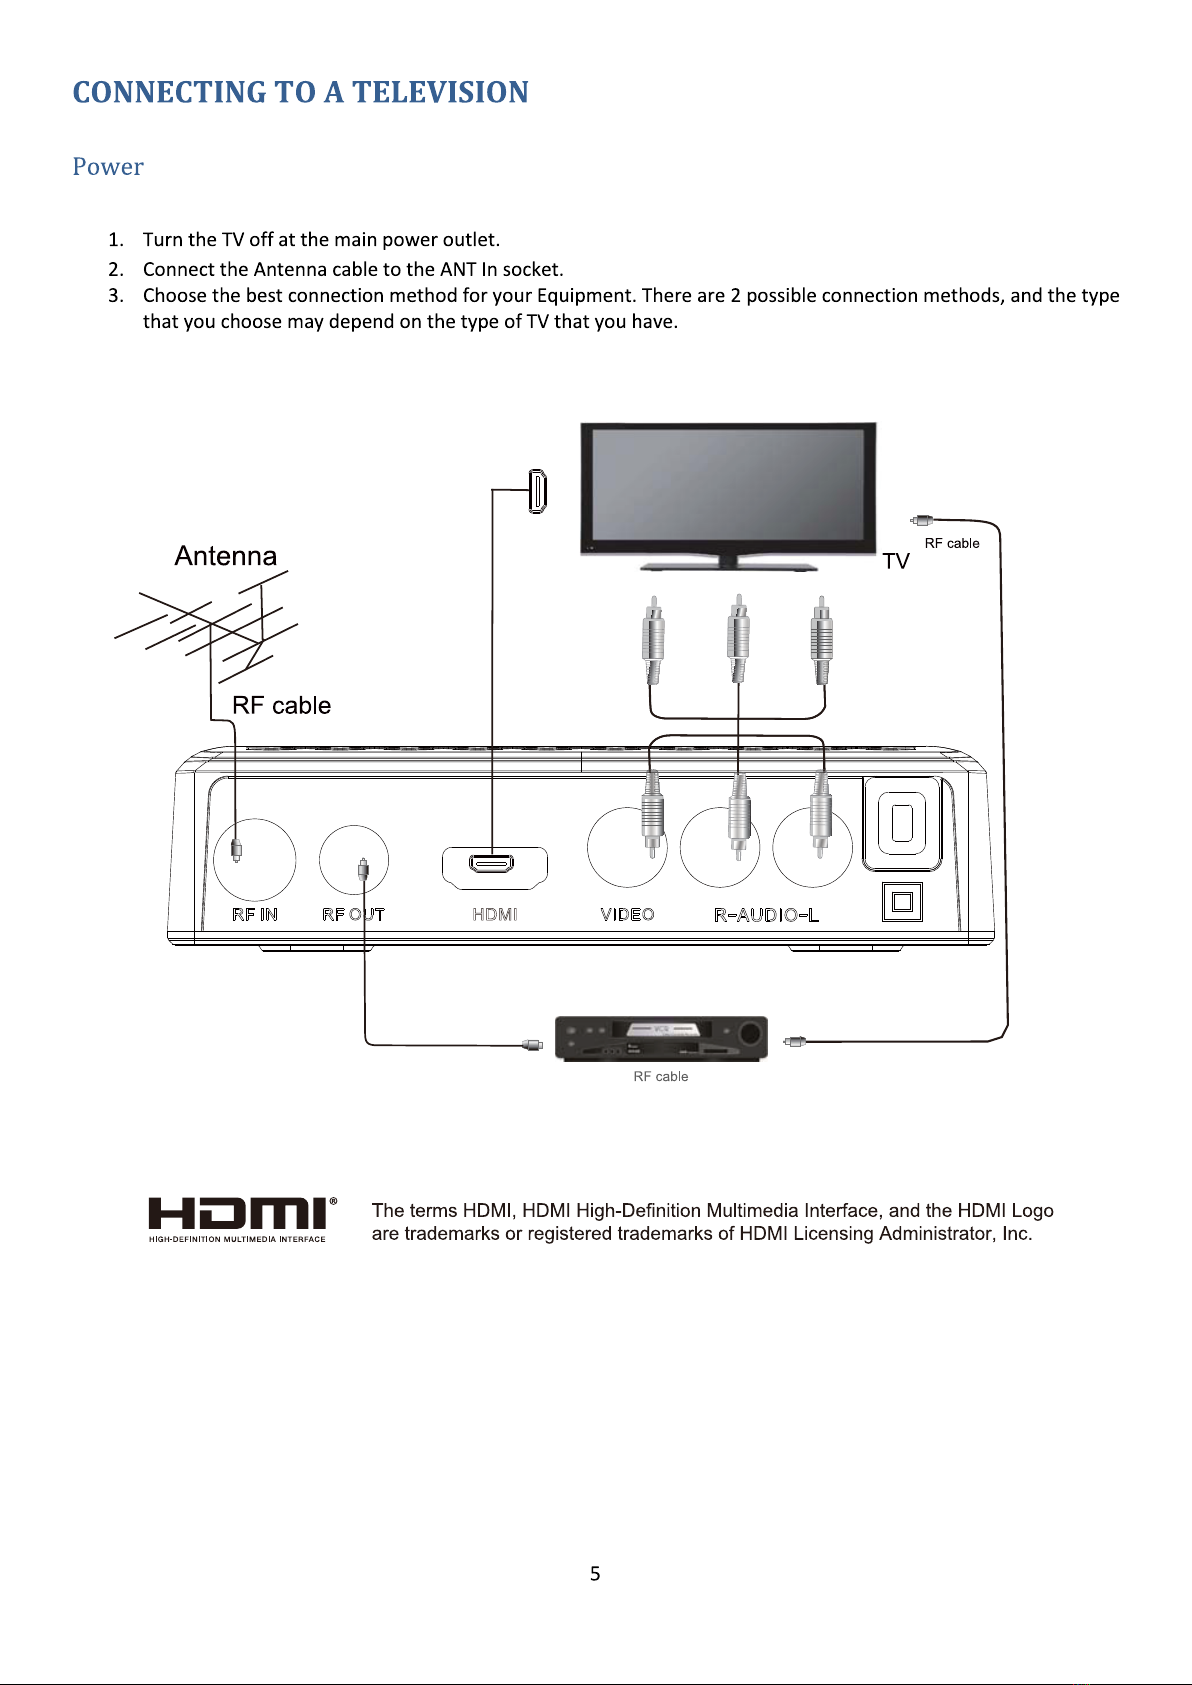
Power ............................................................................................................................................................................ 5
Video and Audio Connection ........................................................................................................................................ 6
Connection Method 1: Composite............................................................................................................................ 6
Connection Method 2: HDMI.................................................................................................................................... 6
Audio Connection.......................................................................................................................................................... 6
FIRST TIME INSTALLATION ............................................................................................................................................... 6
OSD Language ............................................................................................................................................................... 6
Country.......................................................................................................................................................................... 6
Channel Search ............................................................................................................................................................. 6
BASIC OPERATION ............................................................................................................................................................ 7
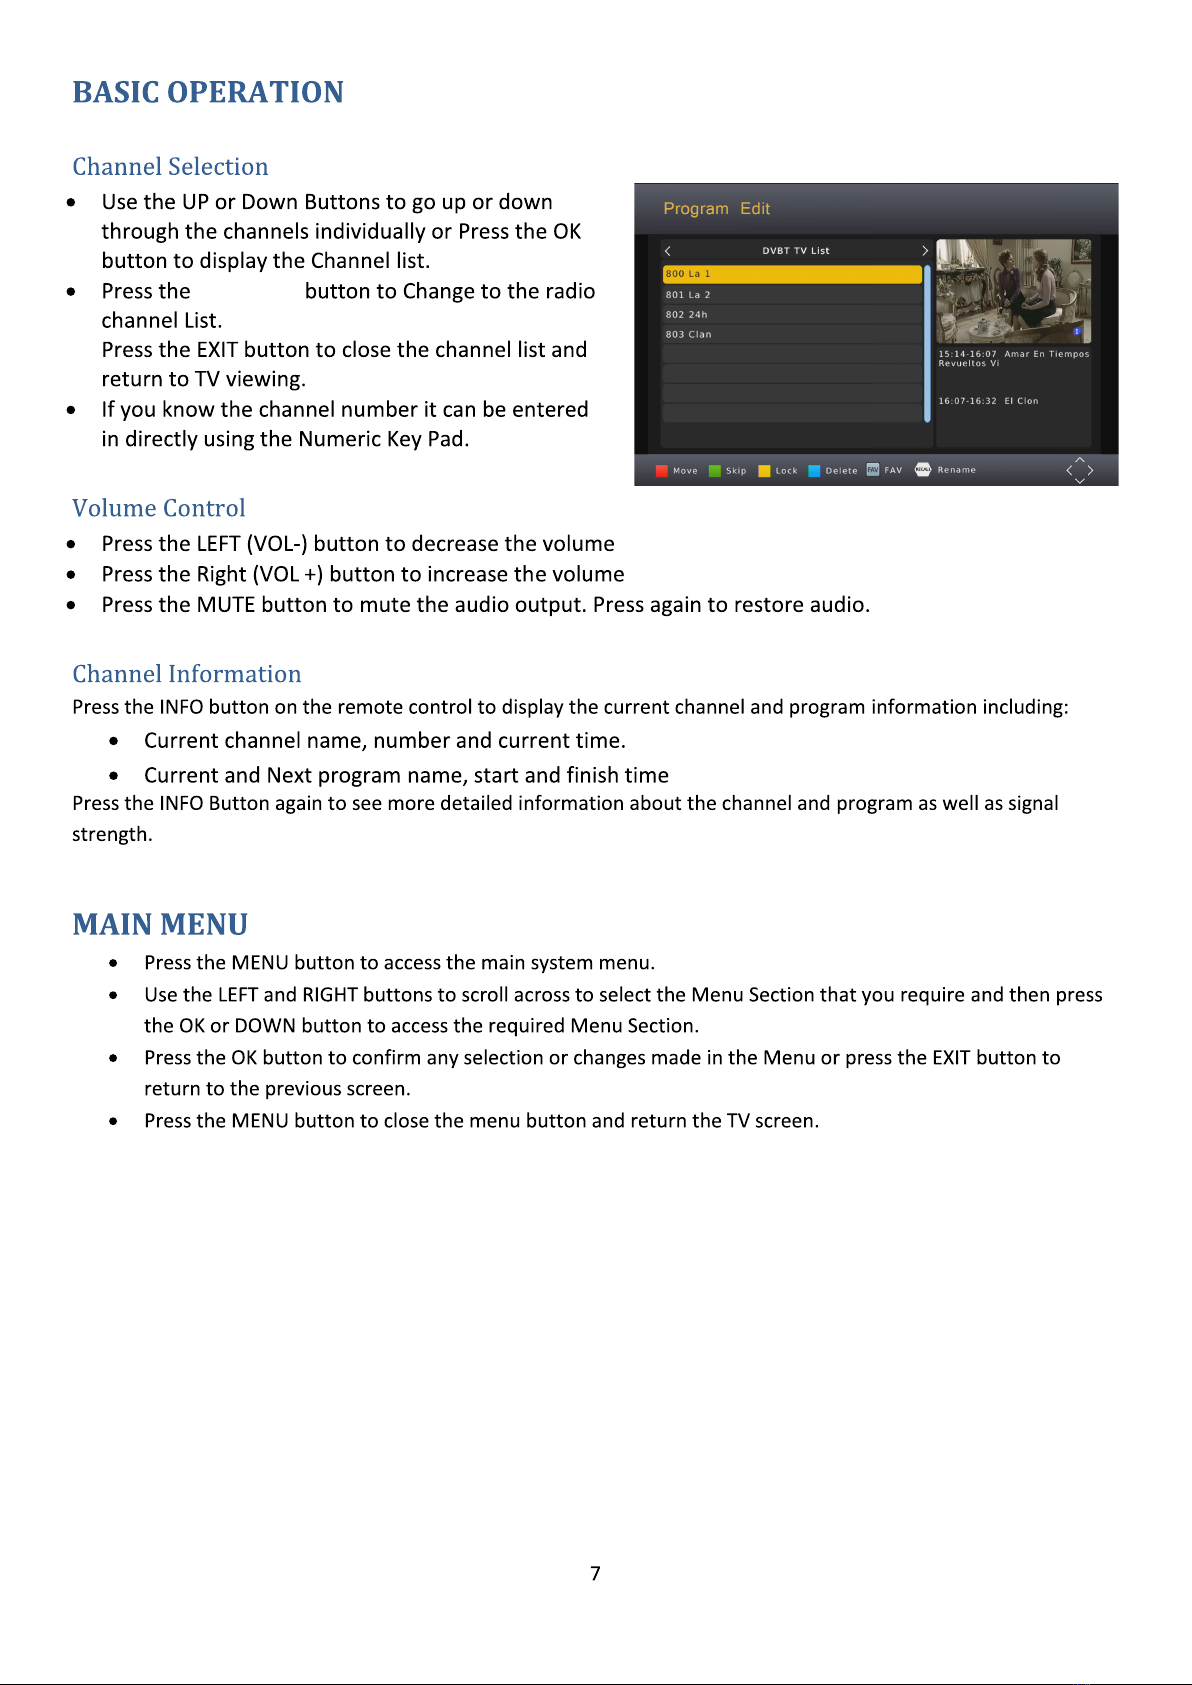
Channel Selection.......................................................................................................................................................... 7
Volume Control............................................................................................................................................................. 7
Channel Information ..................................................................................................................................................... 7
MAIN MENU ..................................................................................................................................................................... 7
Program ............................................................................................................................................................................ 8
Program Edit ................................................................................................................................................................. 8
EPG & Scheduling.......................................................................................................................................................... 9
Sort.............................................................................................................................................................................. 10
LCN .............................................................................................................................................................................. 10
Picture............................................................................................................................................................................. 10
Channel Search ............................................................................................................................................................... 11
Auto Search................................................................................................................................................................. 11
Manual Search ............................................................................................................................................................ 11
Country........................................................................................................................................................................ 11
Antenna Power ........................................................................................................................................................... 11
Search Mode ............................................................................................................................................................... 11
Time ................................................................................................................................................................................12
Time Offset..................................................................................................................................................................12