LCI Solera User manual

Rev: 03.27.2017 Page 1 Solera®PowerAwningwithNoManualOverrideOwner'sManual
SOLERA
®
POWER AWNING
(NO MANUAL OVERRIDE)
Owner's Manual

Rev: 03.27.2017 Page 2 Solera®PowerAwningwithNoManualOverrideOwner'sManual
Operation
NOTE: If the unit is equipped with a locking latch, be sure to unlock prior to extending the awning. After
retraction and before travel, be sure to lock the support arms back into place.
NOTE: Some units may not use the LCI switch (Fig. 1).
Extending the Awning
1. Verify the unit's battery is fully charged and connected to the electrical system.
2. Press and hold "EXTEND" (Fig. 1A) until the awning is extended completely.
NOTE: Extension is considered complete when the fabric is completely unrolled, the valance polycord is
visible and a section of the roll tube is exposed (Fig. 2).
NOTE: The awning fabric should always be above the roll tube. However, if the "EXTEND" switch is engaged
too long or "EXTEND" is hit inadvertently instead of "RETRACT", the awning will roll up backward.
This is not a defect. To correct the fabric orientation, press the "RETRACT" button. The awning will
then extend to its correct orientation and normal operation can resume.
System Information
The Solera® Power Awning features an internal motor to steadily operate the awning. Additionally, the pitch arm
allows for rain dump and adjustable pitch features. The pitch arm also provides added stability.
TABLE OF CONTENTS
System Information 2
Operation 2
Extending the Awning 2
Retracting the Awning 3
Adjusting Pitch 3
Maintenance 4
Fabric Care 4
Variant Code Information 4
Manual Retraction of The Awning 4
Resources Required 4
Procedure #1 (Preferred) 4
Procedure #2 5
Procedure #3 5
Tying down the roll tube once the awning is extended will not allow the free-floating support arms to work
as designed and may cause damage to the awning or unit.
This manual provides operational procedures for Solera Power Awning. Operating the Solera Power
Awning in any other manner than described may result in personal injury, damage to the unit or the awning
assembly as well as voiding the Lippert Components Limited Warranty.

Rev: 03.27.2017 Page 3 Solera®PowerAwningwithNoManualOverrideOwner'sManual
Retracting the Awning
1. Verify the unit's battery is fully charged and connected to the electrical system.
2. Press and hold "RETRACT" (Fig. 1B) until the awning is retracted completely.
NOTE: The awning can be retracted without resetting the pitch.
Adjusting Pitch
NOTE: The awning will pitch itself to purge the pooling of excess water and may dump a significant amount of
water without notice.
1. Pitch can be set by adjusting the pitch arm to tip one side of the awning to allow water runoff.
2. Extend the awning to desired position.
3. Choose the side of the awning for optimum shade or convenient water runoff. Pull downward on the joint of the
pitch arm until desired pitch is set (Fig. 3) to allow for water runoff. Belleville washers and bolt (Fig. 3) allow for the
joint to remain in the position set by the operator.
4. If the pitch arm does not hold position, it can be tightened by adjusting the bolt (Fig. 3) in the center of
the joint.
NOTE: Some awnings are equipped with a 2-position pitch arm (Fig.4). The 2-position arm can be set in the pitch
position or snapped into a straight position by pushing the release button (Fig.4A) and sliding the sleeve
(Fig.4B).
NOTE: Do not push the joint of the pitch arm up past the point where the two sections are in line. This will put
tension on the gas strut, which can cause the strut to break.
NOTE: The awning can be retracted without resetting the pitch.
Fig. 1
B
A
Fig. 3 Fig. 4
Fig. 2
Drive Head
Fabric
Fabric Polycord
Roll Tube
Valance
Pitch Arm
Joint
Bolt
B
A
Slide

Rev: 03.27.2017 Page 4 Solera®PowerAwningwithNoManualOverrideOwner'sManual
Make sure to adequately support the roll tube during this process. Failure to support the roll tube
may result in personal injury or property damage.
4. Roll the fabric up around the roll tube by turning the roll tube by hand.
NOTE: Roll the fabric as tight to the unit as possible while leaving enough slack in the fabric to be able to
slide the drive head back onto the end cap.
5. Slide drive head shaft into the end cap and reinstall the #8 wax screw to secure.
6. Tighten zip ties around the support arms until the support arms are as tight against the unit as
possible.
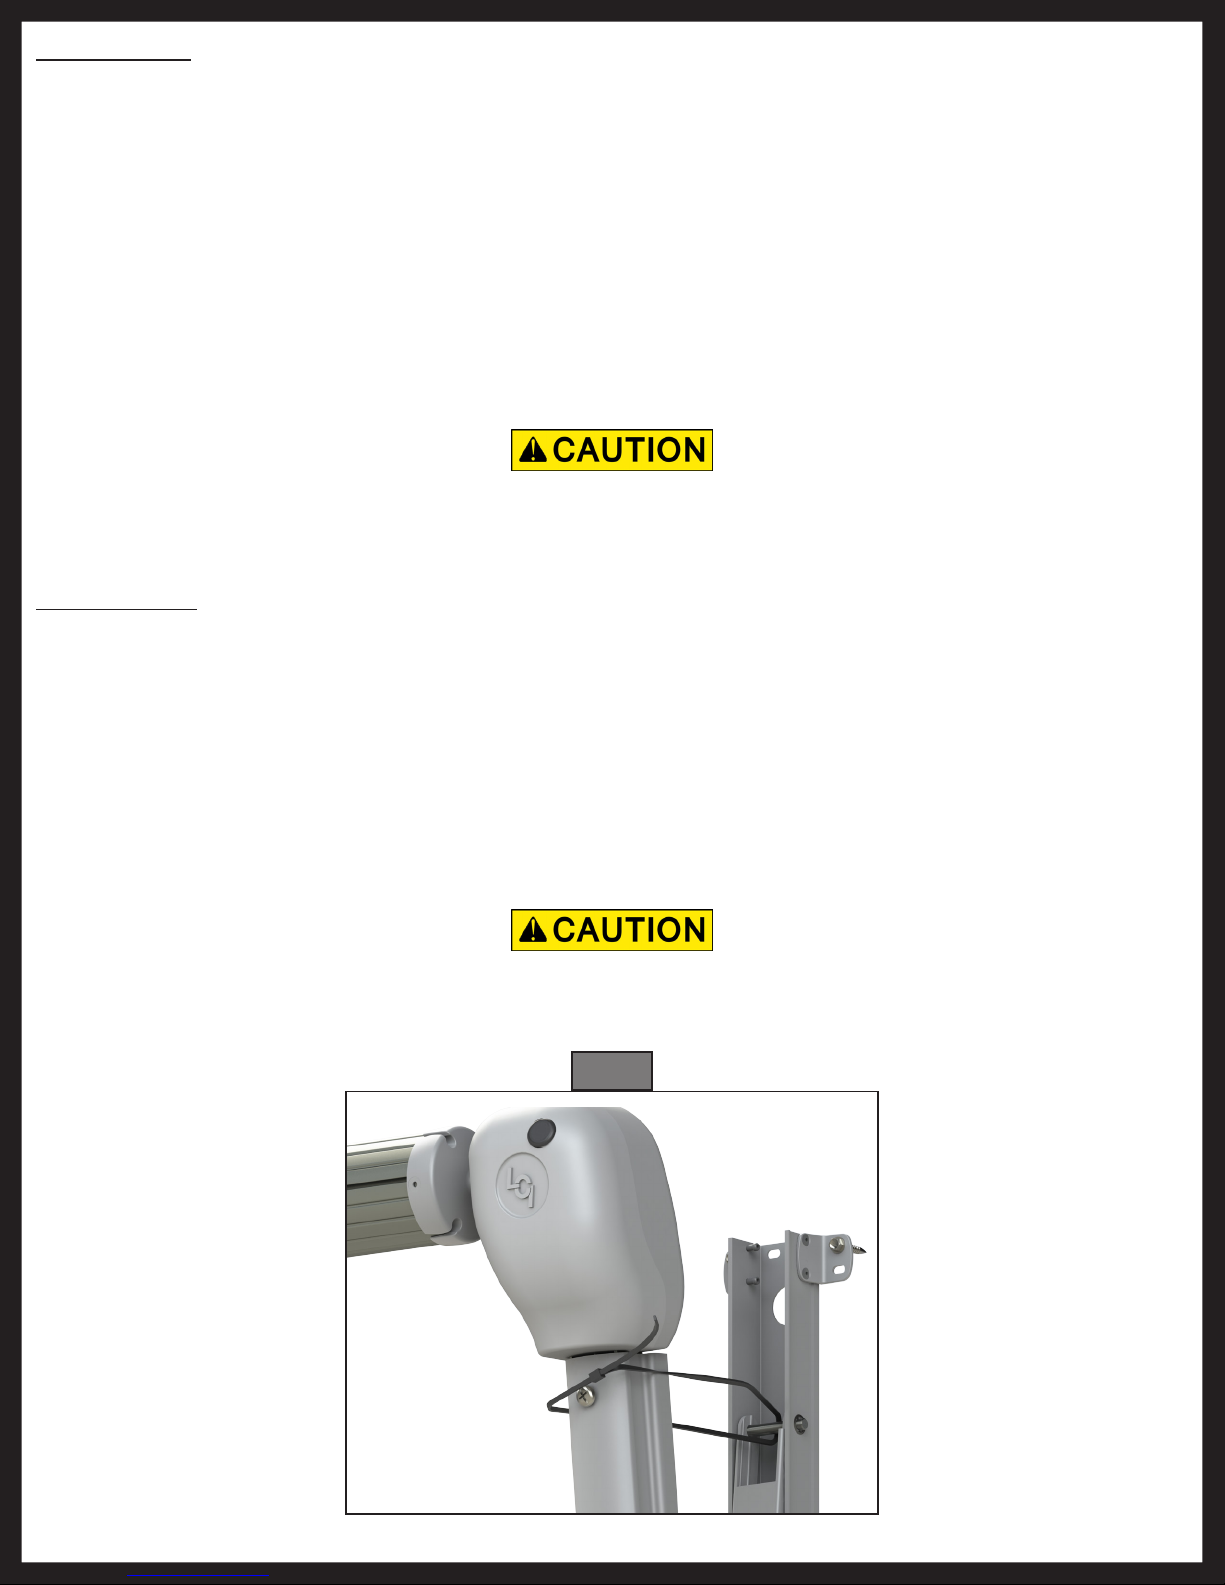
Procedure #1 (Preferred)
1. Push both support arm assemblies closed until they are approximately one foot from fully retracted.
Secure both support arm assemblies by securing a zip tie around the outer arm and around the pin on
the top of the mount arm where the mount arm and inner arm connect (Fig. 6).
2. Remove the #8 wax screw that secures the end cap to the drive head shaft.
3. Pull the roll tube and end cap off of the drive head shaft.
Manual Retraction of The Awning
Resources Required
• 2 or 3 People
• Cordless or Electric Drill or Screw Gun
• Appropriate Drive Bits
• Razor Knife
• Zip Ties
• Ladders
Fig. 5
Variant Code
Maintenance
Fabric Care
If the awning is retracted while wet, extend the awning and let it dry as soon as conditions allow before
retracting. This will help prevent the formation of mildew and add greatly to the life of the awning. Mildew
does not form on the fabric itself, but on the accumulated dust, dirt and grime.
NOTE: Periodically clean vinyl or woven acrylic fabric using a mixture of ¼ cup of dish soap and 5 gallons
of warm water. Liberally apply the mixture on the top of the fabric and retract the awning for 5
minutes. This will apply the mixture to the bottom of the fabric as well. Extend the awning and hose
off with fresh water. Repeat if necessary. Allow to dry before retracting.
Variant Code Information
Solera® Awnings have a sticker located on the roll tube with a variant code that is specific to that awning assembly
(Fig. 5). The sticker on newer units will be located near the motor head on the roll tube. There will also be a sticker
on the awning fabric. The variant code will determine which variation of the product is being used. When ordering
replacement parts, it is imperative to use the variant code to receive the most compatible part.
Roll Tube
Ensure the awning assembly is secure against the side of the unit prior to travel. Failure to do so may
result in personal injury or property damage.
Rev: 03.27.2017 Page 5 Solera®PowerAwningwithNoManualOverrideOwner'sManual
Fig. 6
Procedure #2
1. Push both support arm assemblies closed until they are approximately 1 foot from fully retracted.
Secure both support arm assemblies by securing a zip tie around the outer arm and around the pin on
the top of the mount arm where the mount arm and inner arm connect (Fig. 6).
2. Remove the #6 x ½" hex head screw at each end of the fabric, where it is secured to the awning rail.
3. Remove the drip cap at one end of the awning rail (if equipped).
4. Remove the #8 wax screws that secure the end caps to the drive and idler head shafts.
5. With one person at each end of the awning and one in the middle to support the roll tube, slide the roll
tube and end cap assembly off the shaft from each head assembly.
6. Slide the fabric down the awning rail to the desired end to remove it from the unit.
7. Roll the fabric around the roll tube and store securely inside the unit for travel.
8. Tighten zip ties around the support arms until the support arms are as tight against the unit as
possible.
Ensure the awning assembly is secure against the side of the unit prior to travel. Failure to do so may
result in personal injury or property damage.
Procedure #3
NOTE: Performing this procedure will require the replacement of the fabric in addition to any other
components that may need to be repaired or replaced.
1. Push both support arm assemblies closed until they are approximately 1 foot from fully retracted.
Secure both support arm assemblies by securing a zip tie around the outer arm and around the pin on
the top of the mount arm where the mount arm and inner arm connect (Fig. 6).
2. Cut the awning fabric along the roll tube and along the awning rail to remove from the awning
assembly.
3. Tighten zip ties around the support arms until the support arms are as tight against the unit as
possible.
Ensure the awning assembly is secure against the side of the unit prior to travel. Failure to do so may
result in personal injury or property damage.

The contents of this manual are proprietary and copyright protected by Lippert Components, Inc. (“LCI”).
LCI prohibits the copying or dissemination of portions of this manual unless prior written consent from an
authorized LCI representative has been provided. Any unauthorized use shall void any applicable warranty.
The information contained in this manual is subject to change without notice and at the sole discretion of LCI.
Revised editions are available for free download from www.lci1.com.
Please recycle all obsolete materials.
For all concerns or questions, please contact
Lippert Components, Inc.
Rev: 03.27.2017 Page 6 Solera®PowerAwningwithNoManualOverrideOwner'sManual
Table of contents
Other LCI Accessories manuals


